Author: admin

  • Guilin in 5 Days: Li River, Yangshuo and Longji Rice Terraces Without Spending Every Day in Transit

    Guilin in 5 Days: Li River, Yangshuo and Longji Rice Terraces Without Spending Every Day in Transit

    If this stop is part of a wider journey, use China in 10 Days: Beijing, Xi’an and Shanghai by High-Speed Rail for the broader planning decisions and this guide for the destination-level details.

    Quick trip summary

    • Ideal stay: 5 days for a first visit.
    • Best approach: one major experience per half-day, with at least one flexible block for weather, fatigue or transport changes.
    • Good for: first-time visitors, couples, families, senior travellers and independent travellers who prefer a realistic pace.
    • Main planning risk: treating map distance as if transfers, queues, terrain, heat and meals took no time.

    Is this the right trip for you?

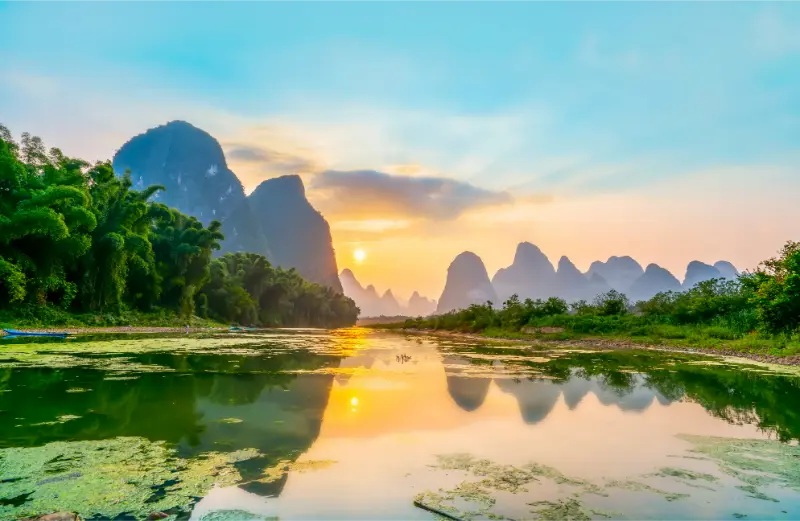
    Guilin is less a single-city sightseeing break than a gateway to one of China’s most distinctive landscapes. Karst peaks rise directly around the urban area, the Li River leads south toward Yangshuo, and the Longji rice terraces add a very different mountain environment north of the city. Five days is a strong first visit because it lets you keep one city day, one river day, time in Yangshuo and a separate terrace excursion instead of treating every attraction as a bus transfer.

    This destination suits travellers who prefer a mix of major sights and time to understand how the place works between them. The itinerary is intentionally paced around one main experience per half-day. That approach leaves room for meals, transport, weather changes and discoveries that are impossible to schedule in advance.

    Where to stay

    AreaWhy choose it
    Central Guilin / Two Rivers and Four LakesConvenient for the city’s evening scenery, restaurants and short taxi rides to central sights.
    Near Guilin railway stationsPractical for travellers using several trains, but choose the exact station carefully because Guilin has more than one major rail stop.
    Yangshuo townBest if you want two nights among the karst scenery and easier access to countryside cycling, river activities and evening streets.
    Yulong River countrysideQuieter and more scenic than central Yangshuo, ideal for travellers who value landscape over nightlife and can manage local transfers.

    Choose accommodation by the journeys you will repeat, not by a small difference in nightly price. Check the first morning route, likely dinner area and departure point for any fixed excursion. Recent reviews about noise, air-conditioning, heating, lift access and luggage handling are often more useful than generic star ratings.

    Before booking, zoom in on the exact entrance and surrounding streets. A property that looks central can still involve steep steps, a busy highway, a long beach access path or a difficult old-town lane. Practical access matters more than a few hundred metres on a map.

    How to get there

    Guilin Liangjiang International Airport serves the region, while high-speed rail connects Guilin with major Chinese cities. Check which Guilin station your train uses before booking the hotel or transfer. For a wider China itinerary, rail is often the most efficient option, but flight schedules may make more sense from distant regions.

    Save the accommodation name and address offline before travelling. Keep arrival day low-risk: avoid a non-refundable attraction immediately after a flight or long transfer, and leave extra time for baggage, immigration, traffic and finding the correct pickup point.

    Getting around

    Taxis, ride-hailing and buses handle Guilin city, while Yangshuo and Longji require separate transport planning. The classic Li River cruise is a sightseeing transfer as much as an attraction, but luggage rules and arrival logistics should be checked before treating it as a hotel-to-hotel move. Countryside cycling or e-bikes can work around Yangshuo for confident riders, while families may prefer a driver.

    Compare journeys door to door rather than only looking at distance. Waiting time, stairs, traffic, the final walk and the number of transfers can matter more than the nominally fastest route, especially for families, senior travellers or anyone carrying luggage.

    A realistic itinerary

    The schedule below is a framework rather than a rigid timetable. Recheck opening days, weather and local transport shortly before each block. If one major experience is closed or conditions are poor, move the entire block instead of forcing the rest of the trip to become inefficient.

    Day 1 – Guilin city and lakes

    Begin with a relaxed city day: Elephant Trunk Hill area, riverside walking and the Two Rivers and Four Lakes zone. Add Reed Flute Cave if caves interest you, but do not stack every famous city attraction into one afternoon. The illuminated lakes and bridges are best appreciated after dark, so leave energy for an evening walk.

    Day 2 – Li River to Yangshuo

    Make the Li River the centrepiece of the day. A cruise from the Guilin area toward Yangshuo reveals the classic karst scenery without constant road stops. Once in Yangshuo, check into your accommodation, walk the town or riverside and keep the evening simple. Weather and visibility can change the experience dramatically, so avoid building the entire trip around one exact photograph.

    Day 3 – Yulong River and countryside

    Use the day for the quieter landscapes around the Yulong River. Choose a combination of walking, cycling, bamboo-raft sections where operating and village stops rather than chasing every viewpoint. Heat and humidity can be significant, so an early start and long lunch break improve the day.

    Day 4 – Longji Rice Terraces

    Treat Longji as a full excursion. The road journey, village access and walking take time, and terrace conditions vary by season. Choose one main village area rather than trying to cover multiple terrace systems. Good footwear matters because steps can be steep, wet and uneven.

    Day 5 – Return to Guilin or keep a flexible Yangshuo day

    Use the final day as a buffer. Stay around Yangshuo for another countryside block if weather was poor earlier, or return to Guilin for a museum, park and an easier departure. This flexibility is more valuable than pre-booking a fifth major excursion.

    Keep enough margin for meals, transport and an unscheduled stop. If this block runs long, remove the lowest-priority extra rather than turning the rest of the day into a race.

    How many days do you really need?

    If you have one day less, remove the most optional excursion and protect the core city or island experience. If you have one extra day, add a slower neighbourhood, nature block or rest day rather than stretching every sightseeing day until evening. The aim is to finish the trip with energy, not with a list of technically completed attractions.

    5 days is a strong first-trip length because it leaves enough time for the essential sights and at least one slower or weather-flexible block. Travellers on a longer regional route can shorten the stay, but the cut should come from an excursion rather than compressing the core experience.

    Best time to visit

    Spring and autumn are popular for milder temperatures, but rain and mist are part of the landscape and can affect visibility. Summer is hot, humid and busy, while winter is quieter but cooler and sometimes grey. The rice terraces look different by planting, green-growth and harvest season, so choose dates according to the landscape you want rather than assuming one month is always best.
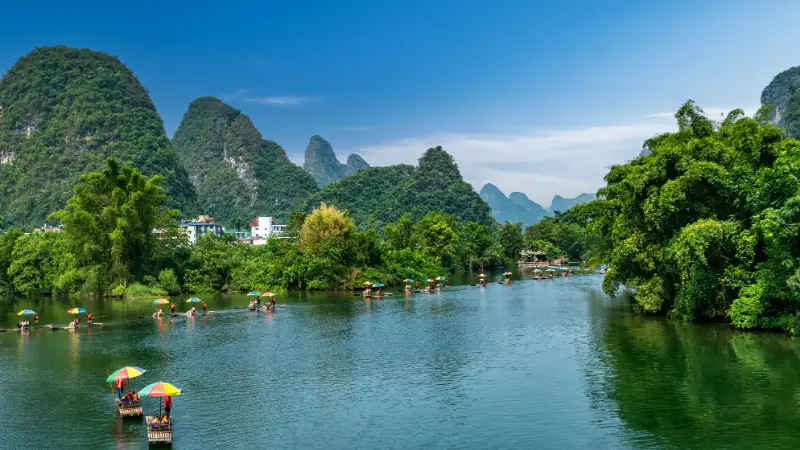
    Guilin Karst Mountains And River China

    Do not choose dates from average temperature alone. Check daylight, rainfall, local holidays, school breaks and the seasonal schedule of the one experience that matters most to you. Shoulder season is excellent only when the things you actually want to do are operating.

    What deserves advance booking?

    Li River cruises, good Yangshuo hotels and Longji transport are the main items to arrange ahead during busy periods. High-speed train tickets also matter on national holidays. Avoid locking every countryside activity weeks in advance because weather can make a flexible day much more valuable.

    Build the trip around the reservations that genuinely control the day, then keep the rest flexible. A fully prepaid itinerary can become a problem when weather, traffic or fatigue changes the order of the trip.

    Food and drink

    Guilin rice noodles are the obvious local staple, while Yangshuo has its own tourist-focused restaurant scene and countryside dishes. Try local specialities in busy places and carry a translation app for menus. If you have allergies or strict dietary needs, prepare written Chinese explanations rather than relying only on spoken English.

    Use meals as part of the itinerary rather than something squeezed between attractions. A long lunch can be the right strategy in hot weather, while an early dinner can protect an evening walk or performance. For allergies or strict diets, prepare a clear written explanation in the local language when useful.

    Families, senior travellers and mixed-age groups

    Families can enjoy the cruise and the visual landscape, but Longji’s steps and long road transfer may be tiring for small children. Senior travellers should be selective about terrace walking and choose accommodation with easy vehicle access in Yangshuo rather than a scenic property reached only by steep lanes.

    For mixed-age groups, plan around the slowest realistic pace. One major experience in the morning and one flexible block later usually works better than several timed entries. Build in seating, toilets and food stops before they become urgent.

    Accessibility

    Accessibility varies widely between modern districts and historic or natural sites. Confirm step-free entrances, lift operation, accessible toilets and vehicle drop-off points directly when they are essential. A route described as accessible may still contain cobbles, steep gradients, sand, uneven paths or long distances between seats.

    Budget: where to spend and where to save

    The city itself can be moderate, while cruises, private transfers and scenic-area tickets increase costs. Decide which landscape experiences matter most and spend there. A private driver may be better value for a family than several separate tickets and complicated transfers.

    Compare the total cost of a day, not only individual ticket prices. A hotel that removes repeated transfers, a driver that replaces three difficult connections or a flexible ticket that protects a weather-dependent plan may be better value than the cheapest option on paper.

    Safety and practical awareness

    The main practical risks are heat, wet stone, traffic and overambitious outdoor schedules. Follow local rules for river activities, wear proper footwear at the terraces and keep offline copies of hotel names in Chinese. Check current entry, payment and connectivity requirements before travelling in mainland China.

    Keep digital and offline copies of important booking details, use official or reputable transport and avoid carrying every card and document in one place. Before travel, check current government entry requirements and local official guidance because visa, health, transport and security conditions can change.

    One day trip or regional extension

    Longji is already the major day trip in this itinerary. If you stay longer, consider a slower countryside day around Xingping rather than another distant transfer. The best extension is usually more time in the karst landscape, not a collection of unrelated scenic parks.

    A day trip should add a different experience, not duplicate something already scheduled later in the journey. Measure it from hotel door to first attraction and back again, including waiting time, so a destination described as nearby does not quietly become a full transport day.

    How to handle bad weather or extreme heat

    Build one movable indoor or low-risk block into the itinerary. In hot climates, move the longest walk to the morning and protect the middle of the day; in wet or cool places, keep a museum, market or long lunch available. Weather flexibility is especially important for boats, mountain roads and viewpoints.

    Solo travel

    Solo travellers can simplify the trip by choosing a central base, sharing selected guided experiences and avoiding isolated late-night transfers. Keep a charged phone and offline address details, and let accommodation staff know about any remote hike, boat trip or long excursion where practical.

    Evenings and nightlife

    Do not treat every evening as another sightseeing shift. One planned dinner, live performance, waterfront walk or neighbourhood café is usually enough. Keeping some evenings light also protects early starts and gives the trip a rhythm that feels like travel rather than a work schedule.

    Photography without turning the trip into a photo shoot

    Early morning and late afternoon usually bring softer light and fewer people, but the best photographs often come from staying long enough to understand how a place is used. Ask before photographing people closely, respect restrictions in religious or museum spaces and avoid blocking narrow streets, trails or working areas for staged images.

    Shopping and souvenirs

    Buy souvenirs that connect to the destination rather than generic travel merchandise. Markets, museum shops and specialist craft stores are usually better places to understand provenance. Check customs rules before carrying food, plants, animal products, antiques or large quantities of liquids across borders.

    What to pack

    Comfortable footwear is the first priority. Add sun protection, a light rain layer and one modest outfit suitable for religious or formal cultural sites. Pack for the transport and terrain you will actually use: a small day bag is more useful than dragging the contents of a suitcase through historic streets, beaches or trails.

    Common planning mistakes

    The biggest mistake is trying to convert a map into a timetable. Opening hours, heat, traffic, queues, meal times and the simple need to stop for a while all change the realistic pace. A second mistake is choosing accommodation for a low headline price while ignoring the transport cost and time it creates every day.

    Leave one low-priority block that can disappear without damaging the trip. That single piece of slack protects the experiences you travelled for when a flight is late, rain arrives, a museum closes unexpectedly or you simply need a slower morning.

    Practical habits that make the trip easier

    • Save offline maps and the exact names of stations, terminals, hotel entrances and meeting points.
    • Carry a small amount of local cash even when cards are widely accepted.
    • Check the last practical return option before starting a day trip.
    • Download tickets and booking confirmations before leaving reliable Wi-Fi.
    • Separate one payment card from your main wallet and keep backup contact details offline.
    • Recheck weather, transport notices and opening hours on the morning of any fixed excursion.

    Official information to check before you go

    Opening days, transport, weather-sensitive access and event schedules can change. Recheck the details that control fixed reservations shortly before travel, especially during public holidays, major festivals or severe weather.

    Final planning checklist

    • Confirm passport, visa, entry and transit requirements for your nationality.
    • Choose accommodation by the journeys you will repeat, not by price alone.
    • Reserve only the attractions or excursions that genuinely control the day.
    • Save offline copies of tickets, hotel details, insurance information and essential addresses.
    • Check the exact airport, station, bus terminal, ferry pier or pickup point before arranging transfers.
    • Keep one flexible half-day for weather, fatigue or something discovered after arrival.
    • Recheck official opening information and local transport shortly before each fixed day.

    Final thoughts

    A good stay is not the itinerary with the highest number of pins. It is the one that protects the experiences you care about, leaves enough energy to notice the destination between them and can absorb a delayed arrival, hot afternoon or change of weather without collapsing. Use this plan as a structure, then let local conditions and your own pace decide the final order.


  • Atlanta in 4 Days: Civil Rights History, BeltLine and Neighbourhoods Without Spending the Trip on Highways

    Atlanta in 4 Days: Civil Rights History, BeltLine and Neighbourhoods Without Spending the Trip on Highways

    If this destination is part of a wider trip, compare the pace with Georgia, USA in 8 Days: Atlanta, Blue Ridge and Savannah Without Driving the State Twice. Use that article for the larger route and this guide for the practical details of staying in Atlanta itself.

    Quick trip summary

    • Ideal stay: 4 days for a first visit.
    • Best approach: one major experience per half-day, with at least one flexible block for weather, fatigue or transport changes.
    • Good for: U.S. city-break travellers, families, history travellers, food-focused visitors, sports and event trips and road trips through Georgia.
    • Main planning risk: treating map distance as if transfers, queues, heat, weather and meals took no time.

    Is this the right trip for you?

    Atlanta is spread out, but a good first trip does not need to become a motorway tour. The city makes more sense when you group Downtown attractions, civil rights history, BeltLine neighbourhoods and food districts into separate geographic days, using MARTA where it genuinely helps and rideshares only for the gaps.

    A realistic itinerary does not try to prove how much you can fit into a day. It protects the experiences that justify the trip and leaves room for meals, transport and the small discoveries that make one destination feel different from another. That matters even more when the city has strong seasonal weather, steep streets, busy transport or attractions with timed entry.

    Where to stay

    AreaWhy choose it
    MidtownStrong balance of MARTA access, restaurants, museums and walkability; one of the easiest first-time bases.
    DowntownConvenient for major attractions and conventions, but the experience varies sharply block by block and by event schedule.
    Old Fourth Ward / BeltLine areaExcellent for neighbourhood atmosphere, food and walking, though rail access is less direct in some sections.
    BuckheadUpscale hotels and shopping with MARTA access in parts, but farther from several historic attractions.

    Choose accommodation by the journeys you will repeat. Map the first morning, the area where you are likely to eat dinner and the departure point for any fixed excursion. A room that removes two awkward transfers every day can be better value than a cheaper property that creates constant taxi or transit costs.

    Before booking, read recent reviews specifically for noise, air-conditioning or heating, lift access, luggage handling and late check-in. These practical details often affect the trip more than decorative room features, especially in historic buildings or hot climates.

    Atlanta Piedmont Park Aerial View

    How to get there

    Hartsfield-Jackson Atlanta International Airport is connected directly to the MARTA rail network, which can be faster and simpler than driving to a central hotel. If renting a car for a wider Georgia trip, consider collecting it only when leaving the city so you avoid several days of parking costs.

    Save the accommodation address offline and screenshot the first transfer before travelling. Arrival day should carry less risk than the rest of the trip: avoid a non-refundable attraction immediately after a flight or long rail journey, and leave extra time when baggage, immigration, weather or traffic can affect the first connection.

    Getting around

    Use MARTA for the airport, Midtown, Downtown and selected north-south/east-west corridors. Walk within neighbourhood clusters and use rideshare for connections that would otherwise require awkward transfers. A car is useful for some outer attractions but is not mandatory for every visitor.

    Compare journeys door to door rather than station to station. Waiting time, stairs, the final walk and the number of transfers can matter more than the nominally fastest route, especially for families, senior travellers or anyone carrying luggage.

    A realistic itinerary

    The schedule below is a framework rather than a rigid timetable. Opening days, seasonal transport, weather and local events should determine the exact order. If a major attraction is closed or conditions are poor, move the whole block instead of forcing the rest of the trip to become inefficient.

    Day 1 – Downtown museums and Centennial Olympic Park area

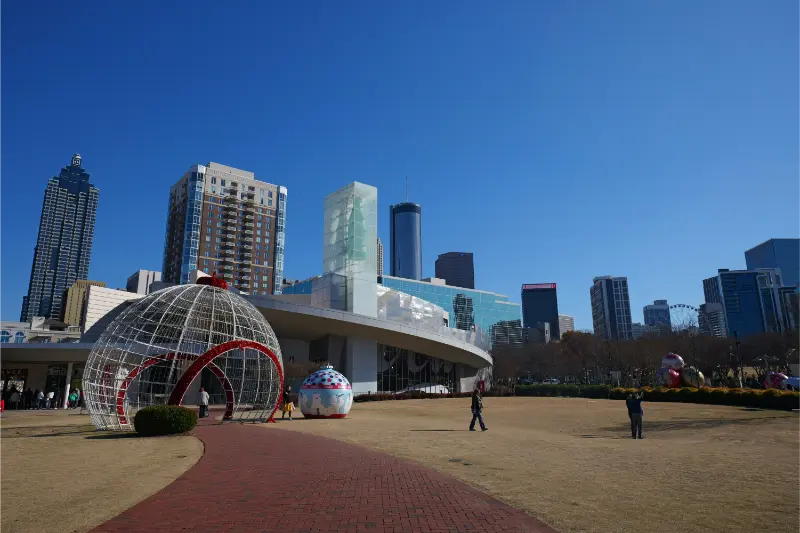
    Group the major Downtown attractions you genuinely care about rather than buying tickets to all of them. The Georgia Aquarium, World of Coca-Cola, National Center for Civil and Human Rights and nearby park can fill more than a day, so choose two anchors and leave room for meals and lines.

    Day 2 – Martin Luther King Jr. history and Old Fourth Ward

    Make the Martin Luther King Jr. National Historical Park area the morning focus, then move into Old Fourth Ward and the BeltLine. Continue toward Ponce City Market if it suits your interests, using the afternoon as a neighbourhood day rather than returning Downtown repeatedly.

    Day 3 – Midtown, Piedmont Park and arts

    Use Midtown for the High Museum or another cultural priority, then spend time in Piedmont Park and nearby streets. This day is deliberately less ticket-heavy and works well after two structured sightseeing days.

    Atlanta Midtown Towers From Park

    Day 4 – Choose one Atlanta beyond the core

    Pick one theme: Buckhead and history, a sports or event experience, food neighbourhoods, or an outer attraction such as the Atlanta History Center area. If beginning a Georgia road trip, use the second half of the day to collect the car and leave the city without backtracking.

    Keep enough margin for meals, transport and an unscheduled stop. If this block runs long, remove the lowest-priority extra rather than turning the rest of the day into a race.

    How many days do you really need?

    4 days is a strong length for a first visit because it gives the destination enough time for its essential sights and at least one slower or weather-flexible block. With one less day, remove the lowest-priority excursion rather than compressing every meal and transfer. With one extra day, add a regional experience or a deliberately slow day instead of stretching each sightseeing day until evening.

    If this stop sits inside a longer itinerary, count hotel changes, airport or station transfers and recovery time as real parts of the trip. A night that prevents two consecutive transfer days can be more valuable than another attraction.

    Best time to visit

    Spring and autumn are especially comfortable, though pollen can be significant in spring. Summers are hot and humid with thunderstorms, while winter is usually mild but can bring occasional disruptions. Major conventions, games and festivals can affect hotel prices more than the season itself.

    Do not choose dates from average temperature alone. Check daylight, rainfall, local holidays, school breaks and the seasonal schedule of the one experience that matters most to you. Shoulder season is excellent only when the things you actually want to do are operating.

    What deserves advance booking?

    Reserve high-demand attractions, major sports events and popular restaurants when your dates are fixed. Aquarium tickets and special exhibitions can be time-sensitive. Keep parks, BeltLine walking and neighbourhood exploration flexible.

    Book the scarce item first, then shape flexible sightseeing around it. Avoid prepaying every hour of the trip: a delayed flight, hot afternoon, heavy rain or long lunch should not create a chain of missed reservations.

    Where and what to eat

    Atlanta’s food scene ranges from Southern cooking and barbecue to global neighbourhood restaurants and modern tasting menus. Do not spend every meal around Downtown attractions; build at least one evening around the neighbourhood where you actually want to eat.

    Use meal planning to reduce unnecessary travel. If the day ends in a particular neighbourhood, eat there instead of crossing the city because one restaurant looked attractive online. Keep at least one meal unreserved so you can follow a market recommendation or change plans when energy is low.

    Families, older travellers and accessibility

    Families have many strong indoor attractions, but trying to combine all of them creates ticket fatigue. Older travellers should choose a hotel near MARTA or use rideshare strategically. Pavement and transit accessibility are generally better than in historic European centres, but distances between attractions can still be substantial.

    Atlanta Centennial Olympic Park Skyline

    For mixed-age groups, plan around the slowest realistic pace rather than the fastest walker. One important sight in the morning and one flexible block in the afternoon usually works better than four timed entries. If step-free access, seating, toilets or lift availability are essential, confirm them directly with the attraction or hotel; historic districts often have partial accessibility rather than a simple yes-or-no answer.

    Budget: where to spend and where to save

    Attraction tickets and parking are the major cost drivers. Save by using MARTA from the airport, choosing a central base and mixing paid museums with parks and BeltLine time. Spend on the one attraction or event that matters most rather than buying every bundled experience automatically.

    Compare the total cost of a day, not only individual ticket prices. A hotel that removes repeated transfers, a driver that replaces three difficult connections or a flexible ticket that protects a weather-dependent plan may be better value than the cheapest option on paper.

    Safety and practical awareness

    Atlanta is a large city with neighbourhood-by-neighbourhood variation. Use normal urban awareness, especially late at night, and check current local guidance around your hotel and transit stop. Heat, traffic and pedestrian-unfriendly road crossings are also practical concerns.

    Keep digital and offline copies of important booking details, use official or reputable transport and avoid carrying every card and document in one place. Before travel, check current government entry requirements and local official guidance because visa, health, transport and security conditions can change.

    One day trip or regional extension

    Stone Mountain, small Georgia towns and North Georgia can be extensions, but they make more sense with a car. Savannah is not a casual Atlanta day trip; if it matters to your itinerary, give it separate nights.

    A day trip should add a different experience, not duplicate something already scheduled later in the journey. Measure it from hotel door to first attraction and back again, including waiting time, so a “one-hour” destination does not quietly become a four-hour transport day.

    How to handle bad weather or extreme heat

    Build every itinerary with one movable indoor block. Museums, markets, historic interiors, cafés or a long lunch can absorb the worst weather, while outdoor viewpoints and waterfront time can shift to a better window. In hot destinations, move the longest walk to the morning and protect the middle of the day; in rainy climates, carry a light layer rather than cancelling the entire schedule at the first shower.

    Photography without turning the trip into a photo shoot

    Early morning and late afternoon usually offer softer light and fewer people, but the best photographs often come from staying long enough to understand how a place is used. Ask before photographing people at close range, respect restrictions in religious or museum spaces and avoid blocking narrow streets for staged images.

    Atlanta Centennial Olympic Park Plaza

    Common planning mistakes

    The biggest mistake is renting a car automatically and then paying to park it for four days. Others include booking a Downtown hotel solely on map distance, underestimating event traffic and trying to fit every major family attraction into a single day.

    A second mistake is leaving no recovery margin. Travel days, temperature changes and unfamiliar food or sleep patterns affect energy. The easiest way to protect the trip is to keep one low-priority block that can disappear without damaging the experiences you travelled for.

    Practical habits that make the trip easier

    • Save offline maps and the exact names of stations, terminals and hotel entrances.
    • Carry a small amount of local cash even when cards are widely accepted.
    • Check the last practical return option before starting a day trip.
    • Keep a refillable bottle where tap-water conditions and local guidance make that appropriate.
    • Download tickets before leaving reliable Wi-Fi.
    • Separate one payment card from your main wallet.

    Shopping and souvenirs

    Buy things that connect to the destination rather than generic travel souvenirs. Markets, museum shops and specialist craft or food stores are usually better places to understand provenance. If you are flying internationally, check customs rules before buying food, plants, animal products or large quantities of liquids.

    What to pack

    Comfortable footwear is the first priority. Add sun protection, a light rain layer and one modest outfit suitable for religious or formal cultural sites. In hot climates carry breathable layers; in places with strong air-conditioning, wind or cool evenings, keep a light extra layer in the day bag.

    Official information to check before you go

    Opening days, transport, weather-sensitive access and event schedules can change. Recheck the details that control fixed reservations shortly before travel, especially during public holidays, major festivals or severe weather.

    Final planning checklist

    • Confirm passport, visa, entry and transit requirements for your nationality.
    • Choose accommodation by the journeys you will repeat, not by price alone.
    • Reserve only the attractions or excursions that genuinely control the day.
    • Save offline copies of tickets, hotel details, insurance information and essential addresses.
    • Check the exact airport, station, bus terminal, ferry pier or pickup point before arranging transfers.
    • Keep one flexible half-day for weather, fatigue or something discovered after arrival.
    • Recheck official opening information and local transport shortly before each fixed day.

    Final thoughts

    A good stay in Atlanta is not the itinerary with the highest number of pins. It is the one that protects the experiences you care about, leaves enough energy to notice the destination between them and can absorb a delayed arrival, hot afternoon or change of weather without collapsing. Use this plan as a structure, then let local conditions and your own pace decide the final order.
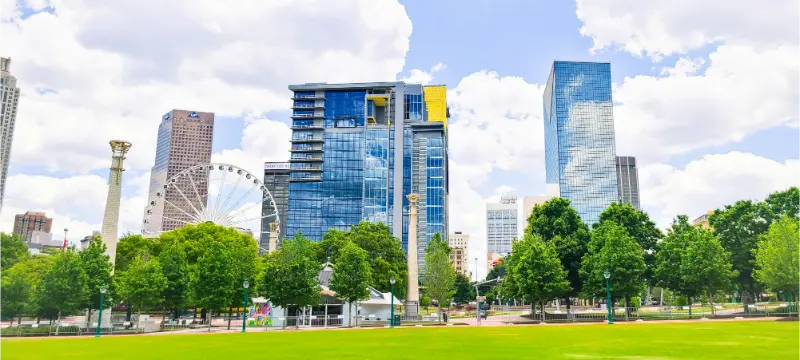
  • Kanchipuram, India: Temples, Silk Weaving and Tamil Heritage

    Kanchipuram, India: Temples, Silk Weaving and Tamil Heritage

    Kanchipuram, also spelled Kancheepuram, is a major temple city in Tamil Nadu with a cultural life far deeper than a quick day trip from Chennai suggests. Sacred architecture, active Hindu worship, Pallava-era stone carving and renowned silk weaving remain part of the city's everyday identity. The city is often marketed as the 'city of a thousand temples,' a traditional description rather than a promise that a visitor can see that number of monuments. A meaningful visit is about choosing a small set of shrines, understanding their differing religious associations and leaving time for a weaving workshop or cooperative. Temples are not interchangeable attractions: rituals, visitor access and dress expectations vary. Summer heat and crowded festival periods require careful planning, especially for children or older travelers. Two days offer a more respectful pace than a rushed sequence of short photo stops. Chennai is a practical gateway, but be realistic about road traffic and the last transfer to your accommodation.

    At a glancePlanning advice
    Suggested time1–2 days
    Where to stayTown hotel or Chennai base
    Accessibility and comfortHeat, temple dress rules and variable access
    Best approachChoose a realistic pace; confirm transport and opening rules

    Understand why the city matters

    Kanchipuram developed as a center of religion, learning, patronage and craft across many centuries. The Pallavas helped shape its architectural heritage, while later dynasties added major temple gateways, halls and institutions. Its Hindu traditions include significant Shaiva, Vaishnava and Shakta places of worship. This is why one monument rarely explains the whole city. In a single day, the temptation to visit every famous tower can make the experience feel repetitive; instead, select temples with distinct stories and architectural forms. Before your first visit, learn a few basic terms such as gopuram for an entrance tower and mandapa for a pillared hall. They will make it easier to interpret what you are seeing. Remember that pilgrims may have very different purposes from tourists; the right etiquette is to give worshippers room, respect queues and avoid treating rituals as entertainment staged for photographs.

    Kailasanathar Temple and Pallava sculpture

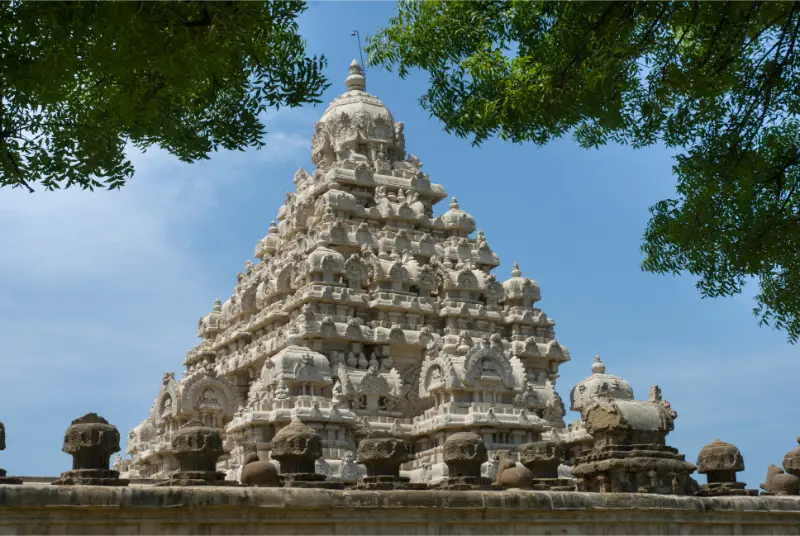
    Kailasanathar Temple is especially valuable for understanding early stone architecture in the city. The Kancheepuram district administration identifies it as a major Pallava-period temple dedicated to Shiva, with sandstone elements and distinctive carved surfaces. Look beyond its overall silhouette to the sculpted panels, smaller shrines and relationships between enclosed spaces. A guide who can explain iconography will provide more value than someone simply leading you from one photo point to another. Parts of the site may have fragile surfaces or restricted access, so follow posted instructions rather than touching carvings. This is a good first stop for visitors interested in art because it provides a reference point for later, larger temple complexes. Children can be encouraged to count motifs or compare relief styles, but should never climb decorative elements. The ground can be hot in the middle of the day, particularly where footwear must be removed.

    Ekambareswarar and the scale of a temple complex

    Ekambareswarar Temple is one of the city's important Shaiva sites. Its impressive gateways and broad sacred complex make it different in atmosphere from the more intimate architectural study at Kailasanathar. Visit respectfully, ideally at a time when the heat is manageable and you can observe without disrupting ceremonies. The scale can be confusing; ask locally about the main visitor route and the areas that are open to non-worshipping visitors. Do not assume all sanctums admit everyone, as entry policies can vary by temple and identity or ritual requirements. Photography may be limited, especially around inner sanctums. If you are accompanying children, prepare them for removing shoes, quiet behavior and potentially waiting while worship services take place. You can appreciate the architecture and trees within the complex without entering every shrine. Keep a small bag for footwear if storage arrangements are unclear and follow local instructions.

    Kamakshi Amman and the role of living worship

    Kamakshi Amman Temple is dedicated to the goddess and remains a deeply important place of worship. The experience is shaped by ritual rhythms rather than a predictable museum schedule. Arrive prepared to wait, dress modestly and accept that some sections may not be accessible for sightseeing. Major festival dates can draw substantial crowds, which may be meaningful for pilgrims but tiring for travelers seeking a quiet architectural visit. If you have sensory or mobility needs, ask about queue arrangements before joining a busy line. It is inappropriate to push ahead for a photograph, and prohibited photography should be respected even if other visitors ignore signs. A traveler can gain insight into religious life from observing the public spaces respectfully without entering the most crowded area. Do not make confident promises about a fixed opening time based on old travel articles: worship schedules and special events can change access with little notice.

    Varadaraja Perumal and other Vaishnava traditions

    Varadaraja Perumal Temple is a major Vaishnava site and offers a useful contrast to the Shiva temples. Its halls, pillars and religious traditions reward a carefully timed visit with appropriate guidance. The official India tourism portal identifies it among Kanchipuram's key shrines and notes its place among the Divya Desam sites. The city's other Vishnu temples, including Vaikunta Perumal, offer further architectural interest, but your day should not become a race between distant complexes. Decide first whether your priority is learning about religious traditions or photographing exteriors; these are different kinds of visits, and access may differ. Ask a recognized guide to explain how architectural additions reflect later dynasties, rather than assuming all stonework comes from the same period. Families will generally enjoy two well-chosen temples more than five rushed stops, especially when footwear changes and heat breaks are involved.

    Kanchipuram silk: buying thoughtfully

    The city is famous for richly woven silk sarees, often called Kanjeevaram or Kanchipuram silk. Their cultural and economic importance goes beyond shopping: weaving supports specialist skills, households, design traditions and trading networks. If you want to visit a workshop, arrange it with a reputable cooperative or producer; do not walk uninvited into someone's home or working room. Look at how the loom works and ask about yarn, borders, motifs, dyes and time needed to finish a saree. The official India tourism portal recommends checking authenticity marks and geographical indication information when buying. A high price alone proves little. Ask for a detailed receipt, fiber description, care instructions and an explanation of zari material. Be cautious about sales pitches built around supposedly compulsory stops arranged by a driver. Even if you buy nothing, paying for an ethical demonstration where available is more respectful than treating a craftsperson's labor as free entertainment.

    How to reach Kanchipuram from Chennai

    Chennai International Airport is the most useful major gateway, and Kanchipuram has regional rail and road links. The journey by road can be heavily affected by city traffic; allow a buffer instead of relying on the shortest time shown by a navigation app. A private driver is practical for families or travelers visiting several temples separated by traffic, but establish the fare, route and waiting arrangements in advance. Bus and train options may be economical but involve more navigation, especially with luggage. If choosing a day trip, begin early enough to avoid arriving at temples just before midday closure or a shift in worship hours. Travelers without a car should cluster sites geographically and use licensed local transport between more distant complexes. Do not assume a temple city is entirely pedestrian-friendly: busy intersections, road surfaces and heat can make even short distances uncomfortable.

    Where to stay and how many days

    A hotel in Kanchipuram suits visitors who want to attend early temple periods or learn about weaving without a rushed return. Check air conditioning, reliable drinking water, elevator access and practical distance to the sites you care about. Properties near major roads can be noisy, so request a quiet room if sleep matters. Chennai offers a broader selection of hotels and international connections, but a daily round-trip from the city reduces time available on the ground. One long day can cover two major temples and a short weaving stop; two days allow deeper visits and rest during the hottest hours. If traveling with a multigenerational group, consider a private vehicle for transfers and one flexible afternoon rather than scheduling every shrine in advance. Ask accommodations whether early breakfast is available when planning morning worship-related visits.

    Food and respectful eating choices

    Kanchipuram's food options include South Indian tiffin dishes, rice meals, filter coffee and regional vegetarian cooking, although offerings vary by neighborhood. Idli, dosa and savory snacks can be convenient for a quick breakfast; remember that chutneys and sambar ingredients vary, which matters for allergies. Many temple-oriented eating areas are primarily vegetarian, but do not assume every restaurant maintains the same kitchen practices. Drink safe water and wash hands before meals, especially when traveling in high heat. During major festivals, restaurants near temples can be crowded. Plan lunch in a place with shade and seating rather than waiting until the entire group is exhausted. If a family member has severe dietary restrictions, identify a dependable establishment beforehand and carry a backup snack. The best meal may be a simple thali served at a convenient time, not an elaborate dinner after a long day of queues.

    Dress, etiquette and photography

    Modest dress that covers shoulders and knees is a sensible starting point, but individual temples can have more specific rules. Footwear commonly must be removed before entering designated spaces, so choose shoes that are easy to take off and carry socks only where permitted. Do not assume photography is allowed inside every complex; signs and attendants take precedence over advice from other tourists. Ask before photographing people performing rituals. Some sanctums restrict entry based on temple practice, and these restrictions need to be respected without argument. Carry small denominations of cash for legitimate offerings or services if you wish, but do not feel obliged to pay informal intermediaries who approach you aggressively. When hiring a guide, clarify the cost and scope before the tour. A respectful visitor can learn a great deal from public architecture and conversation without attempting access to every sacred interior.

    Planning for families, seniors and disabilities

    The biggest challenge is often the combination of heat, bare feet on hot surfaces, temple queues and traffic between sites. Start early, include shaded breaks and limit yourself to two or three primary stops per day. Older visitors may want a comfortable car transfer and a clear explanation of where they can sit, while families with small children should avoid carrying strollers through crowded sanctum areas. Accessibility varies significantly; gateways may be broad but internal platforms or ritual spaces may have steps. Contact temple administration or a knowledgeable local guide about the specific entrance and route. Do not presume that a temple has step-free access because an exterior courtyard looks level. Travelers with sensory sensitivities should also be aware that bells, chanting and crowds can become intense during festivals. It is entirely acceptable to view a temple from permitted public areas and leave if conditions are overwhelming.

    A measured two-day plan

    On the first morning, focus on Kailasanathar and one major nearby temple, using a guide if possible to compare architectural periods. Break for lunch and avoid walking across hot exposed roads at midday. In the late afternoon, visit a silk cooperative or arranged weaving demonstration and discuss materials and provenance. On day two, make Kamakshi Amman and Varadaraja Perumal your principal stops, fitting them around official worship schedules. If queues are very long, choose a calmer exterior or a museum instead of insisting on entering every sanctum. This plan gives the city space to reveal its religious and craft identities. It also leaves enough time for a meal, traffic delays and a respectful approach to festivals. If you can spend only one day, reduce the itinerary rather than shortening every experience to twenty minutes.

    When to travel and final checks

    Tamil Nadu's hotter months can make midday temple visits demanding. Cooler periods are generally more comfortable, but festivals may create crowding and accommodation pressure. Monsoon rain can affect roads and walking surfaces; check local forecasts and seasonal patterns for your precise dates. Before leaving, consult the district administration and temple-specific notices, verify current access for non-worshipping visitors and confirm a legitimate workshop if silk weaving is important to you. Do not present quoted temple times from past years as permanent. Kanchipuram rewards curiosity and patience more than speed. The best outcome is a visit that respects the living city, recognizes its artisans and appreciates the different religious traditions without reducing them to a series of impressive towers.

    Frequently asked questions

    Is one day enough for Kanchipuram?

    You can visit a few highlights in a day from Chennai, but two days are more comfortable for temples, craft heritage and breaks.

    Can non-Hindu visitors enter all temple areas?

    No single rule covers every complex. Some sanctums or ritual spaces may be restricted; follow local instructions and respect worshippers.

    How can you shop for genuine Kanchipuram silk?

    Choose an established producer or cooperative, request a receipt and check reliable certification or geographical-indication information rather than judging solely by price.

    Is Kanchipuram suitable for older visitors?

    Yes with careful planning, transport between temples and attention to heat, queues and the step-free routes available at individual sites.

    More travel ideas

    • Tamil Nadu in 10 Days: Chennai, Mamallapuram, Thanjavur and Madurai Without Rushing Temple Country
    • Chennai in 5 Days: Mylapore, Marina and Tamil Culture Without Spending the Trip in Traffic
    • Chettinad, Tamil Nadu: Historic Mansions, Athangudi Tiles and the Food of Karaikudi
    • Puducherry in 4 Days: White Town, Promenade and Auroville Without Turning It Into a Chennai Day Trip

    Official information and planning sources

  • Winter Holidays Without Skiing: Snowy Landscapes, Cozy Towns and Safer Plans

    Winter Holidays Without Skiing: Snowy Landscapes, Cozy Towns and Safer Plans

    A winter holiday does not require skis, expensive equipment or a taste for steep slopes. Snowy mountain towns, frozen-lake viewpoints, thermal baths, museums and scenic railways can create a memorable trip for people who prefer gentler days. This type of holiday can work for children, older adults and mixed-ability groups, provided expectations match the destination. Winter brings special logistics: daylight is limited, road surfaces change quickly and a hotel that looks close to the village may sit at the top of a steep icy path. Plan the warmth, transport and rhythm first, then enjoy the scenery.

    Choose a winter atmosphere rather than a winter sport

    There are several kinds of snow holiday. An alpine village offers mountain views, heated cafés and cable cars where pedestrian access is allowed. A northern city may provide museums, winter light displays and short outdoor walks, with more reliable transit than a remote valley. A lakeside or forest destination offers quiet scenery but may have fewer indoor alternatives during a storm. Decide whether the trip is primarily about snow, seasonal events, northern lights, wellness or simply slow time away. No one destination guarantees deep snow, sunshine or an aurora at a particular moment.

    Check the typical climate and daylight for the actual month. Early December can be very different from February. Weather averages help with planning, but they do not predict the conditions of your week. If children are hoping to build snowmen, have an alternative plan in case snow cover is limited.

    Research access beyond the railway station

    A hotel described as ‘five minutes from the center’ may require a steep descent across compacted snow. Look at pedestrian routes, public transport frequency, taxi availability and how luggage reaches the entrance. Ask whether pavements are cleared and whether the accommodation offers luggage assistance. For someone with balance difficulties or a stroller, the slope and surface matter more than a short distance on a map. Many mountain regions have excellent trains and buses, but some services reduce frequency outside peak holiday periods.

    If driving, check whether winter tires, chains or other equipment are required by law for the dates and roads. Rental companies may charge for winter equipment, and your contract might exclude certain roads. Avoid late-night mountain arrivals when you do not know the route. A picturesque mountain pass can become impassable during a storm, so keep a sheltered and transport-connected alternative.

    Plan around the short winter day

    In high latitudes, daylight can last only a few hours or disappear for part of winter. Even in lower mountain resorts, the sun may leave the valley early. Put your main outdoor activity during the brightest and most stable period, then enjoy indoor attractions later. Check individual operating hours for cable cars, historic sites and museums; winter timetables can be limited, especially midweek. Do not schedule a complicated transfer immediately after a short scenic excursion just because both fit on a digital map.

    A good rhythm might include one outdoor highlight before lunch, a substantial warm meal, and a relaxed afternoon activity. Families often need time to change wet clothing; older travelers may appreciate longer breaks. A winter trip feels richer when it includes warm pauses rather than treating them as failed sightseeing.

    Snow Covered Residential Street In Canada

    Find non-ski activities that are genuinely accessible

    Pedestrian cable-car rides, winter scenic trains, accessible viewpoints, horse-drawn sleigh routes and easy village walks may be offered, but each operator has its own rules. Check whether non-skiers can buy lift tickets and whether there is a safe way to return without skiing. Snowshoeing requires suitable conditions and route knowledge; it is not automatically an easy walk. Some marked winter paths close after storms or pass through avalanche terrain. Choose organized activities with competent local providers when unfamiliar with winter mountain conditions.

    For families, a designated snow-play area may be safer than sledding on an improvised hillside near roads. Check age and equipment restrictions for sled tracks and ice-skating rinks. Travelers with mobility aids should inquire about step-free access and surfaces before paying for scenic lifts or excursions.

    Dress in layers that allow flexibility

    Warmth depends on staying dry, managing wind and avoiding overheating. A moisture-managing base layer, insulating middle layer and weather-resistant outer layer are often more adaptable than one enormous coat. Protect head, hands and feet, and carry a dry pair of socks for a long day outside. Ordinary fashion shoes may have little grip on ice; consider winter footwear designed for the surfaces you expect. Traction accessories can help in some settings but may be unsuitable indoors or prohibited on delicate floors.

    Children can feel cold before they describe it clearly. Older adults and people with certain health conditions may be more vulnerable to cold exposure; individual medical questions should be discussed with a clinician. Watch for numbness, unusual drowsiness, confusion or uncontrollable shivering and move to shelter. The CDC provides official guidance about frostbite and hypothermia; cold injury is not limited to dramatic blizzards.

    Book warmth and comfort as carefully as scenery

    Check heating availability, room insulation, elevator access, indoor drying space and proximity to restaurants. A remote chalet may feel romantic but require a car for every meal. If an apartment has a fireplace, understand instructions and ventilation; never improvise with portable fuel-burning heaters. Some spa facilities have age limits, health-related restrictions or advance-booking requirements. Thermal pools outdoors can be beautiful, but icy approaches and changing areas matter as much as the water temperature.

    For older travelers or people with limited mobility, choose accommodation with easy transfers and a reliable lift or ground-floor room. A large resort may involve considerable walking between wings. Ask specific questions about entrances, ramps and cleared paths, rather than relying on the word ‘luxury’ as evidence of comfort.

    Keep weather disruption in the budget

    Winter storms can delay trains, close mountain roads and interrupt flights. Check the cancellation conditions of lodging and activities, and leave time before a crucial international connection. Travel insurance varies in coverage for weather disruptions and winter activities; read exclusions instead of assuming every snowy experience is covered. Some policies classify snowmobiling, sledding or guided off-piste activities differently from normal sightseeing. Record emergency numbers and download maps before heading into areas with weak mobile reception.

    A realistic budget includes winter clothing, heated indoor breaks, local buses or taxis and possibly more expensive accommodation during school holidays. Choosing fewer destinations can save money otherwise spent on transfers and reduce exposure to travel disruption.

    Make the trip enjoyable across generations

    One family member may dream of skating while another prefers a café overlooking the mountains. Plan shared moments rather than identical activity levels. Agree on a scenic lunchtime meeting place, and let people choose an easy walk or an indoor attraction according to comfort. Keep children’s outdoor sessions shorter with warm rest stops. For teenagers, offer choice in the day’s experience; for older guests, prioritize meaningful scenery without forcing a long hike. Accessible winter visits require asking about cleared paths, snow depth and transport assistance on the exact day.

    Snow Covered Canadian Mountain Highway

    The holiday can still feel adventurous without pushing anyone beyond their limits. A train through white valleys, a quiet market and an evening meal may become more memorable than a rushed list of attractions.

    A three-day winter break without skis

    On day one, arrive during daylight, check into a conveniently located hotel and explore the village before dinner. Day two can include a scenic rail journey or pedestrian lift if conditions allow, with a warm lunch and a museum or spa afterward. Day three might feature a short marked winter walk or guided nature excursion, while keeping an indoor backup if weather changes. Leave extra time for the departure transfer rather than booking a high-risk early journey on an unfamiliar snowy road.

    This style of holiday is about experiencing the season, not proving sporting ability. With realistic clothing, flexible plans and transport checks, winter can be welcoming to a much wider range of travelers.

    Understanding icy streets and winter transport disruptions

    Check whether the accommodation has a covered or heated entrance and whether the final approach from the bus stop is regularly cleared. In some historic towns, picturesque cobbled streets become slippery when snow melts and refreezes. A stroller with small wheels may be difficult to use, and wheelchair users may need a transport service whose driver can stop directly at the hotel. Ask the destination’s tourism office what accessibility measures operate during the dates of your trip, not merely in the summer brochure.

    When purchasing train tickets, research whether the itinerary uses local mountain railways or cross-border services with separate conditions. A winter train trip can be lovely, but luggage transfers and missed connections remain possible. Do not book the last available bus of the evening if an earlier service would leave a useful buffer. Carry the telephone number of the hotel in case weather disrupts your arrival.

    Keep the mood of the trip flexible. A snowy evening may be perfect for a relaxed restaurant meal, while a bright morning deserves the view you hoped for. Rather than defining success as seeing six winter attractions, select a few highlights and leave room for changing weather and the comfort of the people traveling with you.

    Frequently asked questions

    Do I need skis to enjoy a mountain resort? No. Many offer sightseeing, wellness and pedestrian activities; check the specific resort.

    Is snowshoeing a simple alternative to walking? Not always. Deep snow, weather and terrain can make it demanding, so choose an appropriate marked or guided route.

    Can winter holidays work with toddlers? Yes, with short outdoor sessions, warm clothing, easy accommodation access and flexible routines.

    Are mountain trains more reliable than cars in storms? It depends on the route and conditions. Check live operator notices rather than assuming either mode is unaffected.

    What should I check before a cable-car ride? Pedestrian ticket validity, altitude, return operations, weather closures and any mobility-access requirements.

    Official resources to check before traveling

    Requirements and facilities change. These primary sources are starting points; verify the rules for your precise dates and itinerary.

  • Ankara in 4 Days: Anıtkabir, Anatolian History and Modern Capital Without Rushing Central Türkiye

    Ankara in 4 Days: Anıtkabir, Anatolian History and Modern Capital Without Rushing Central Türkiye

    Ankara is very different from Istanbul, and that is exactly why it belongs in a wider Türkiye trip. The capital combines Anıtkabir, exceptional Anatolian archaeology, a citadel district, Roman remains and a modern political and cultural city. Four days lets those layers connect without turning Ankara into a stop between flights and trains.

    If this stop is part of a wider journey, compare the pacing with Türkiye in 10 Days: Istanbul, Cappadocia and Ephesus Without Losing Days to Transfers. Use that wider route for country-level decisions and this guide for destination-level detail.

    Quick trip summary

    • Ideal stay: 4 days for a first visit.
    • Best approach: group each day by geography and keep one block flexible.
    • Good for: independent travellers, couples, families and slower-paced trips.
    • Main planning risk: adding too many fixed activities and underestimating local transfers.

    Is this the right trip for you?

    Ankara suits travellers interested in archaeology, republican history, museums and contemporary urban life more than postcard scenery. It is also a useful base for a central Anatolia journey because high-speed rail links and domestic transport are strong. The city is large, so choosing a well-connected district matters more than staying beside one attraction.

    Where to stay

    Area Why choose it
    Kızılay Central, transport-rich and practical for restaurants, metro connections and a first visit.
    Kavaklıdere / Tunalı Good for cafés, embassies, shopping and a more polished evening atmosphere.
    Ulus Best for immediate access to the castle, Roman heritage and Museum of Anatolian Civilizations, though evenings are quieter in some streets.
    Çankaya Useful for longer stays, parks and a residential feel; choose a location near metro or major bus routes.

    Choose accommodation by the journeys you will repeat, not by a small difference in nightly price. Check the route to your first morning attraction, likely dinner area and departure point for any fixed excursion. Recent reviews about noise, air-conditioning or heating, lift access and luggage handling can be more useful than a generic star rating.

    How to get there

    Ankara Esenboğa Airport sits outside the centre, so allow meaningful transfer time. High-speed trains connect Ankara with Istanbul, Konya and other Turkish cities. If your wider route includes Cappadocia, compare bus, flight and private transfer options by total door-to-door time rather than assuming the shortest map distance is easiest.

    Save the accommodation name and address offline before travelling. Keep arrival day low-risk: avoid a non-refundable attraction immediately after a flight or long transfer, and leave extra time for baggage, traffic, platform changes and finding the correct entrance.

    Getting around

    The metro, buses and taxis cover a large urban area. Ulus and the castle district are walkable once you arrive, but hills and traffic make repeated cross-city trips tiring. Group Anıtkabir and central modern districts separately from the old citadel day.

    Compare journeys door to door rather than only looking at distance. Waiting time, stairs, traffic, the final walk and the number of transfers can matter more than the nominally fastest route, especially for families, senior travellers or anyone carrying luggage.

    A realistic day-by-day itinerary

    The schedule below is a framework rather than a rigid timetable. Recheck opening days, weather and local transport shortly before each block. If one major experience is closed or conditions are poor, move the entire block instead of forcing the rest of the trip to become inefficient.

    Day 1 – Anıtkabir and modern Ankara

    Start with Anıtkabir and allow time for the museum as well as the monumental complex. Continue toward Kızılay or Tunalı for a sense of contemporary Ankara. Keep the first evening simple because the scale of the city is easier to understand after one full day.

    Day 2 – Anatolian Civilizations and the citadel

    Make the Museum of Anatolian Civilizations the main morning experience, then walk through the Ankara Castle area, old houses and market streets. Add one smaller monument or Roman site rather than trying to collect every museum in Ulus.

    Day 3 – Roman Ankara and arts

    Use the morning for Roman and early civic heritage around Ulus, then shift to CerModern, a state museum or a performance depending on your interests. Ankara’s arts scene is a stronger part of the city than many first-time visitors expect.

    Day 4 – Beypazarı or a slower capital day

    Beypazarı can work as a regional extension if you have reliable transport and want Ottoman-era streets and a smaller-town contrast. Otherwise keep the final day for parks, additional museums and local neighbourhoods. Do not add a long Cappadocia excursion as a day trip; it deserves its own base.

    Keep enough margin for meals, transport and an unscheduled stop. If this block runs long, remove the lowest-priority extra rather than turning the rest of the day into a race.

    Best time to visit

    Spring and autumn are the easiest seasons for walking. Summers can be hot and dry, while winters are cold and can bring snow. Ankara’s altitude makes temperature swings more noticeable than travellers expecting a Mediterranean climate may assume.

    Do not choose dates from average temperature alone. Check daylight, rainfall, local holidays, school breaks and major events. A slightly less famous month can be better if it gives you easier accommodation, comfortable walking conditions and fewer queues.

    Food and meal planning

    Ankara offers both central Anatolian dishes and a broad capital-city restaurant scene. Try local forms of döner, Ankara tava, simit and regional bakery products, but keep meals geographically aligned with the day because traffic can turn a restaurant detour into a long transfer.

    Keep meal geography aligned with the day. Crossing the destination for a famous restaurant can waste more time than the meal adds. One carefully chosen reservation is usually more useful than building every sightseeing block around food bookings.

    One day trip or regional extension

    Beypazarı is the most practical heritage extension for many visitors. If your wider trip already includes Cappadocia or Konya, use Ankara itself as the slower museum-and-history base rather than stacking another distant destination into the schedule.

    A day trip should add a genuinely different experience. Measure it from hotel door to first attraction and back again, including waiting time, so a destination described as “nearby” does not quietly become a full transport day.

    How many days do you really need?

    For most first-time visitors, the suggested length works because it protects the essential experiences while leaving one flexible half-day for weather, fatigue or something discovered after arrival. With less time, remove the day trip or secondary excursion before compressing the core sights. With extra time, add a slower neighbourhood, nature block or second museum instead of extending every sightseeing day into the evening.

    Think in half-days rather than individual attractions. One major museum, historic complex, long walk or excursion can easily consume a half-day once transport, tickets, meals and pauses are included. A realistic itinerary often looks less ambitious on paper but feels far better on the ground.

    For families with children

    Families can balance large museums with parks and the castle district. Anıtkabir is significant but can be a long visit for young children, so do not pair it with another demanding museum on the same half-day.

    Older children can help choose one experience per day. That small decision makes museums, historic districts and city walks feel less like a fixed adult schedule. On hot or wet days, move the most exposed activity to a better time rather than forcing the original order.

    For senior travellers and slower-paced trips

    A slower trip should reduce repeated crossings of the destination, not necessarily remove the headline sights. Stay near the area you will use most, choose the easiest transport for hills or long approaches and sit down before fatigue becomes the main memory of the day. A taxi or private transfer can be excellent value when it protects energy for the actual attraction.

    Check lift access, seating, stairs and walking surfaces at major attractions before booking. Historic centres can be compact but physically demanding because of cobbles, slopes and standing time. The best route for a senior traveller is often not the shortest route on a map.

    Accessibility

    Modern museums and transport facilities are generally easier than the steep, uneven streets around the citadel. Confirm lifts, accessible entrances and taxi drop-off points for the exact attractions you plan to visit.

    When choosing accommodation, ask about the route from reception to the room, lift dimensions, shower access and the real street approach. A property described as accessible can still sit on a steep street, sandy path or difficult route from public transport.

    Budget and booking strategy

    Spend first on the parts of the trip that are difficult to replace: a well-located room, a timed attraction you genuinely care about and any excursion with limited capacity. Save on ordinary meals, secondary attractions and transport choices that do not meaningfully improve the day. The cheapest hotel can become expensive if it creates two paid transfers every day.

    Book early only where scarcity is real. Flexible accommodation and cancellable tours are valuable when weather controls the experience. Compare the total cost of an excursion including transfers, entrance fees and meals rather than comparing only the headline price.

    Money and payments

    Carry more than one payment method and keep a small amount of local cash where useful. Card acceptance, tipping expectations and ATM fees vary, so check current local guidance rather than relying on a rule from another country. Keep your main card and backup card in different places.

    How to handle bad weather or extreme heat

    Build one movable indoor block into the itinerary. In hot weather, move the longest walk to the morning and protect the middle of the day; in rain or cold, use a museum, market or long lunch as the flexible block. The goal is to reorganise the day rather than force the original order.

    Solo travel

    Solo travellers can simplify logistics by choosing a central base and joining a guided walk or small-group excursion only where it adds context or solves transport. Keep a charged phone, offline map and the accommodation address available without internet. Late at night, prioritise a simple route home over saving a small amount on transport.

    Evenings and nightlife

    Do not turn every evening into another sightseeing shift. One planned dinner, performance, waterfront walk or neighbourhood bar is enough. Keeping some evenings light protects early starts and gives the trip the feeling of a holiday rather than a schedule that must be completed.

    Photography without turning the trip into a photo shoot

    Early morning and late afternoon usually bring softer light and fewer people, but good travel photography comes from understanding a place rather than blocking it. Respect restrictions in religious sites and museums, ask before photographing people closely and avoid staging pictures in doorways or narrow lanes where others need to pass.

    Shopping and souvenirs

    Look for products connected to the destination rather than generic travel merchandise. Markets, museum shops and independent stores are often the easiest places to understand provenance. Check customs rules before carrying food, plants, animal products, antiques or unusually large quantities across borders.

    What to pack

    Comfortable footwear is the first priority. Add layers appropriate to the season, a compact rain layer, sun protection and a reusable water bottle where practical. A small day bag is more useful than carrying the contents of a suitcase through museums, historic streets or long walking routes.

    Common planning mistakes

    • Choosing accommodation by headline price without checking the repeated daily journey.
    • Booking major attractions on arrival day with no margin for delays.
    • Crossing the destination several times because sights were listed by fame rather than geography.
    • Assuming a short map distance means an easy walk regardless of hills, heat, cobbles, sand or queues.
    • Keeping every day full and leaving no space for weather or fatigue.
    • Adding a day trip that duplicates a destination already scheduled later in the wider journey.

    Practical habits that make the trip easier

    • Save offline maps and the exact name of your hotel, station, terminal and meeting points.
    • Download tickets and confirmations before leaving reliable Wi-Fi.
    • Check the last practical return option before starting any excursion.
    • Carry a small amount of local cash even where cards are widely accepted.
    • Recheck opening hours and transport notices on the morning of any fixed reservation.
    • Keep one half-day flexible so a delay does not damage the rest of the trip.

    Final planning checklist

    • Confirm entry, transit and insurance requirements relevant to your nationality.
    • Choose accommodation by location, noise, access and transport as well as price.
    • Reserve only the attractions or excursions that genuinely control the day.
    • Keep offline copies of tickets, hotel details and important contact information.
    • Check the exact station, airport terminal, ferry terminal, parking area or pickup point before travel.
    • Leave enough time for meals and unscheduled stops.
    • Recheck official information shortly before departure.

    Final thoughts

    A good trip is not the itinerary with the highest number of pins. It is the one that protects the experiences you care about, groups the day sensibly and leaves enough energy to notice what happens between attractions. Use this structure as a framework, then let weather, local events and your own pace decide the final order.
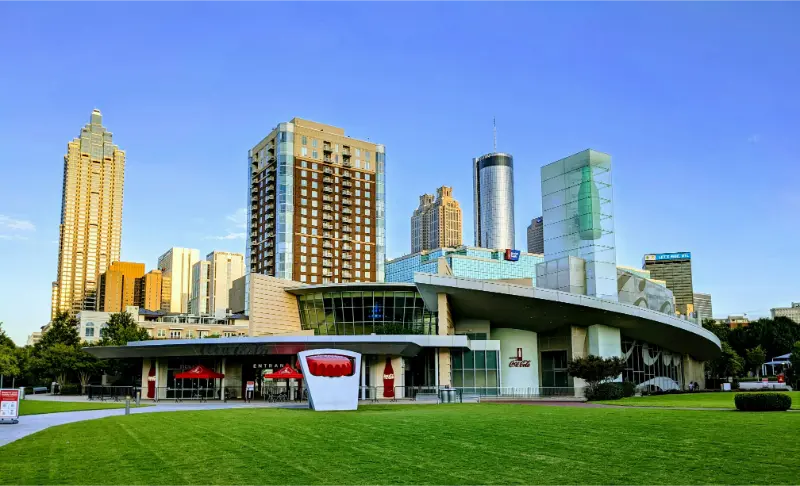
    Official information to check before you go

    Opening days, transport, weather-sensitive access and event schedules can change. Recheck the details that control fixed reservations shortly before travel, especially during public holidays, festivals or severe weather.

  • Canadian Rockies in 7 Days: Banff, Icefields Parkway and Jasper at a Realistic Pace

    Canadian Rockies in 7 Days: Banff, Icefields Parkway and Jasper at a Realistic Pace

    A Canadian Rockies road trip is easy to underestimate because the main highway distances appear manageable. The problem is that almost every hour of driving contains reasons to stop: lakes, viewpoints, wildlife, trailheads and changing weather. A two-hour map estimate can become most of a day once you include parking, walking and the simple fact that you came to see the mountains rather than the dashboard.

    This seven-day route gives Banff and Jasper enough time to feel distinct and treats the Icefields Parkway as a destination in its own right. Conditions and access can change, and Jasper has continued to publish specific reopening and closure information following the 2024 wildfire, so official park updates should be part of the daily routine.

    Quick trip summary

    • Use two main bases—Banff/Lake Louise area and Jasper—rather than moving every night.
    • Treat the Icefields Parkway as a full scenic day, not a transfer to complete quickly.
    • Check Parks Canada bulletins, trail conditions and wildfire-related access before setting out.
    • Wildlife viewing should happen from a safe distance; never turn a roadside sighting into a traffic hazard.
    • Summer accommodation and popular activities can require early booking, but daily hiking choices should remain flexible for weather.

    Who this itinerary is for — and who should change it

    This route is designed for a first visit with a moderate pace: enough structure to avoid wasting days on poor logistics, but enough freedom to respond to weather, energy and unexpected discoveries. It suits couples, solo travellers, families and mixed-age groups who would rather remember several places clearly than remember a blur of transfers.

    If your priority is nightlife, serious hiking, luxury resorts or a single specialist interest, use the route as a geographic framework and replace the lower-priority days. A useful itinerary is not a test of how many attractions you can complete. It should make the important parts easier while leaving room to stop when something is better than expected.

    Where to stay: location decisions that change the trip

    Accommodation has more impact than the room itself. Check the first journey each morning, the last journey at night, luggage access, hills or stairs, nearby food and whether you can return for a break. A cheaper property that creates two difficult transfers every day can cost more in time, taxis and energy than a slightly more expensive base in the right place.

    BaseBest use and trade-off
    Banff townBest for restaurants, services and easy evening walks. It is convenient but busy and often expensive.
    CanmoreA practical alternative east of Banff with more accommodation and dining choice, though it adds driving to Lake Louise and western trailheads.
    Lake Louise areaExcellent for early access to nearby scenery, but accommodation is limited and costly. Parking/transit arrangements need checking.
    Jasper townThe natural base for the northern park. Availability and services may be affected by ongoing recovery, so verify what is open for your travel dates.

    A realistic day-by-day route

    Day 1: Calgary to Banff or Canmore

    Collect the car, buy anything you need for the first days and drive west without adding a major mountain hike after a long flight.

    Use the afternoon for Banff town, Bow River paths or an easy viewpoint depending on energy.

    If jet lag is significant, an early dinner and sleep will improve the rest of the week more than a forced sunset mission.

    Day 2: Banff-area highlights without chasing every lake

    Choose one substantial morning activity and one lighter afternoon area. Johnston Canyon, Lake Minnewanka, Sulphur Mountain or local trails should not all be squeezed into one day.

    Parking and shuttle systems can shape the order more than distance does. Check the current access rules rather than relying on an old itinerary.

    Keep the evening flexible for weather or wildlife-related delays.

    Day 3: Lake Louise and Moraine Lake planning

    Make this the Lake Louise zone day and follow the current Parks Canada shuttle/transport arrangements for Moraine Lake and other controlled-access areas.

    Select a walk appropriate to the group’s ability rather than choosing a trail solely because it is popular online. Mountain weather can change quickly.

    If travelling with young children or older adults, a lakeshore visit plus one short viewpoint can be a complete day when transport and crowds are included.

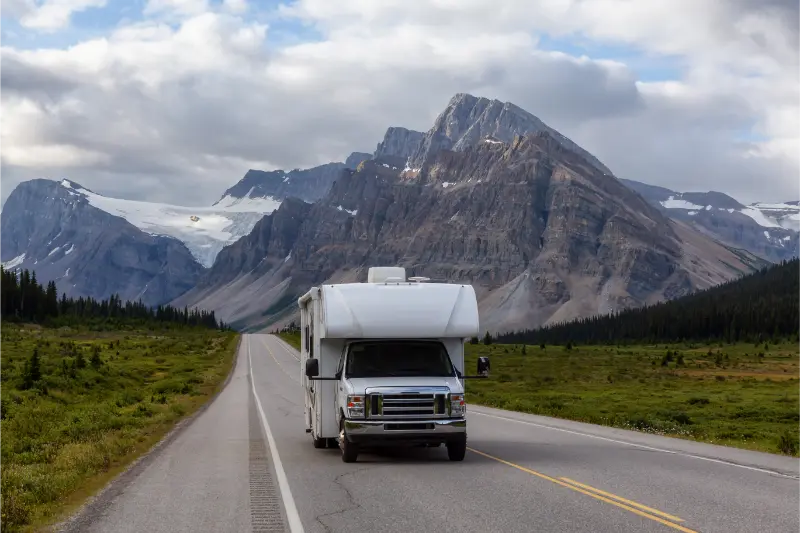
    Truck Driving On Mountain Highway Canadian Rockies

    Day 4: Icefields Parkway to Jasper

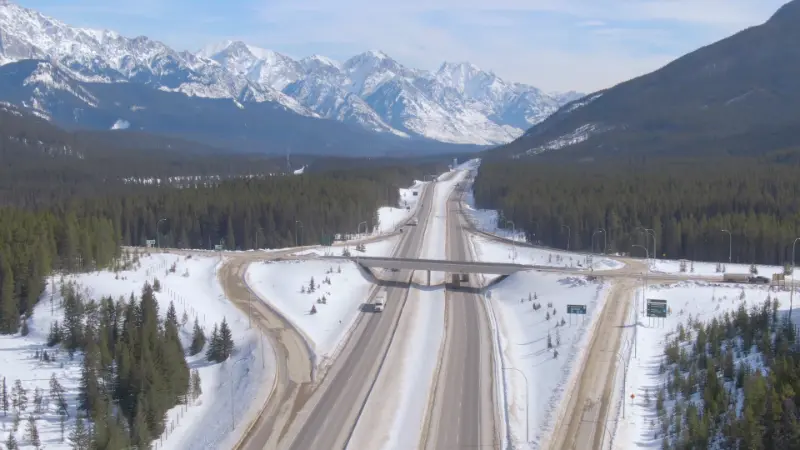
    Leave early with fuel, water and food. The road itself is the itinerary: viewpoints, short walks and glacier scenery can easily fill the day.

    Do not count on constant mobile coverage or services. Decide in advance which stops are priorities so you can skip lower-value ones if weather or traffic slows you.

    Arrive in Jasper before everyone is exhausted; wildlife is more safely appreciated when the driver is not rushing after dark.

    Day 5: Jasper close to town

    Use the first Jasper day for accessible sights near town, lakes or a moderate trail depending on what is open.

    Because wildfire recovery has changed access in some areas, verify current status with Parks Canada instead of copying a route published before 2024.

    A quieter afternoon in town or by a lake is often a better balance after the long Parkway day.

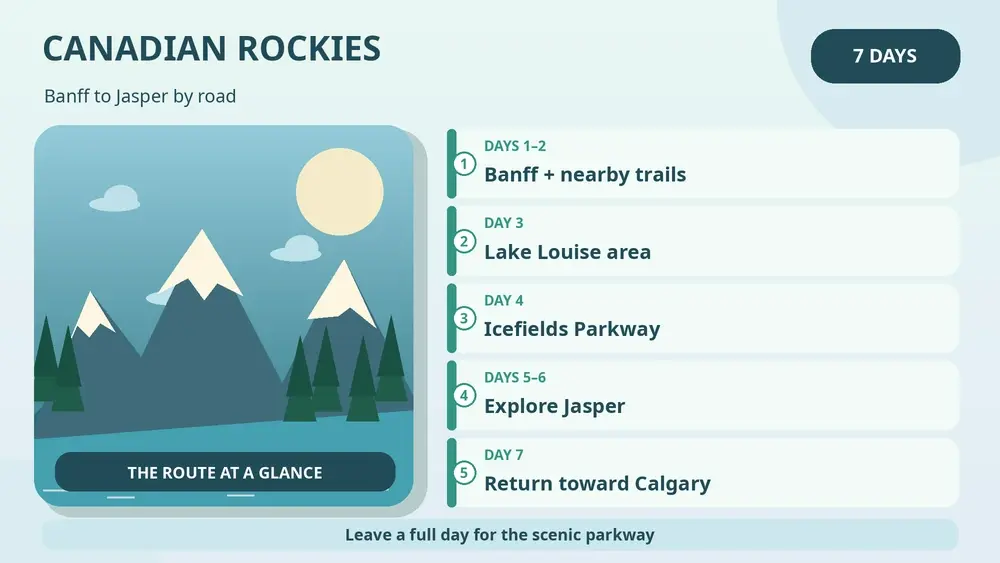
    Illustrated Canadian Rockies road trip from Banff through the Icefields Parkway to Jasper

    Day 6: one Jasper priority day

    Choose one major experience: Maligne area if accessible, a longer hike, a scenic drive or another park zone confirmed open.

    Avoid driving large distances merely to recreate an old checklist when closures or conditions make another area more practical.

    Use the evening to prepare for the return drive and check weather across the route.

    Day 7: return toward Calgary with realistic flight planning

    If your flight is the same day, leave substantial margin and consider sleeping farther south the previous night. Mountain roads, stops and weather are poor companions to a tight airport deadline.

    If you have another night, break the drive in Banff/Canmore and make the final airport transfer calmer.

    Do not schedule the most important hike on the departure morning.

    Pace check: if the previous stage ran late, remove the lowest-priority stop rather than stealing time from meals, sleep or the next transfer. The route is deliberately built with places where you can simplify it without breaking the whole trip.

    Transport reality: what the map does not show

    A rental car gives the most flexibility, but the parks increasingly use transit and shuttle systems at heavily visited locations. Current access rules around Lake Louise and Moraine Lake should be checked directly with Parks Canada. On the Icefields Parkway, start with sufficient fuel and do not assume every service is open. Download offline maps, but treat official closure information as more authoritative than routing software. Mountain passes, construction, snow and wildfire conditions can change the trip even outside winter.

    Door-to-door time is the number that matters. Add checkout, reaching the station or port, waiting, boarding, transfers, finding the new accommodation and the possibility that everyone wants food immediately after arrival. This is why a “two-hour journey” can easily occupy half a day. Our guide to building realistic itineraries explains how to protect transfer days instead of pretending they are normal sightseeing days.

    Food strategy: eat well without making meals another timetable

    Banff, Canmore and Jasper provide the easiest meal options, while scenic driving days need more preparation. Carry water and a proper lunch, not just emergency snacks. Wildlife-safe food storage matters whenever you are picnicking or camping. A supermarket stop before the Parkway can save both money and time. If dining late is difficult for children or older adults, reserve or eat earlier because popular mountain towns can become busy quickly.

    One planned meal per day is usually enough. Leave the other meal flexible so it can respond to where you actually are, not where you expected to be six months earlier. Keep a simple backup option close to the hotel for evenings when the group is tired. This matters even more with children and older adults, because hunger turns a minor transport delay into a much larger problem.

    Turquoise Alpine Lake In Canadian Rockies

    When to go and how weather changes the route

    Summer gives the widest access but also the strongest demand. Late spring and autumn can be beautiful yet snow and trail conditions remain possible. Winter is a different trip entirely and requires appropriate driving confidence, tires and activity planning. Wildfire smoke can affect summer air quality even when roads remain open. Build the itinerary so one poor-weather day can be swapped with a lower-altitude or town-based activity.

    Instead of searching for one universal “best month,” choose which compromise matters most: comfortable temperatures, swimming, long daylight, lower prices, fewer visitors or full seasonal transport. Every destination trades one advantage for another. Build at least one indoor, low-effort or easily movable half-day into the plan so weather does not force you into a bad decision.

    Budget: where spending improves the trip

    Accommodation, rental cars and fuel dominate the budget. Staying in Canmore can sometimes reduce room cost, but calculate the extra driving if most activities are around Lake Louise. Park fees and shuttles are not large compared with lodging, yet missing a required reservation can cost a day. For road trips, our budgeting framework is especially useful because the cheapest nightly rate can increase fuel and driving time.

    The most valuable upgrades are often logistical rather than luxurious: a central hotel, a direct transfer after a long flight, a reserved seat on a scarce connection or a guide who turns a wildlife or archaeological visit into something you understand. Cut low-value extras before cutting the pieces that keep the route reliable.

    Common mistakes to avoid

    • Planning the Icefields Parkway as a two- or three-hour transfer.
    • Ignoring current Jasper closure and recovery information.
    • Stopping unsafely for wildlife or approaching animals for photographs.
    • Building every day around a famous lake without checking shuttle and parking rules.
    • Booking a same-day long mountain drive before an international flight.

    Most itinerary problems do not come from one disastrous decision. They come from stacking small optimistic assumptions: a transfer that “should” be quick, a hotel that is “only” a kilometre away, a hike described as easy, and a dinner reservation on the opposite side of town. Leave margins in the plan before you need them.

    Families, older travellers and mixed-age groups

    Children often remember lakes, wildlife and short exploration stops more than a sequence of long hikes. Alternate vehicle time with simple walks and avoid making every day an endurance test. Older travellers can enjoy the Rockies through viewpoints, gondolas, boat experiences and short lakeshore paths, but accessibility varies. Check elevation, surface, toilets and walking distance from parking before assuming a “short stop” is easy.

    For mixed-age groups, decide which experiences everyone will share and which are optional. Splitting for two hours can be healthier than forcing the entire group through one person’s priority. Build toilets, shade, seating, lifts, step-free transport and realistic meal times into the plan with the same seriousness as famous attractions. Our guide to travelling with parents and older adults covers this style of planning in more detail.

    If you have more or less time

    With ten days, add more Jasper time, Yoho National Park or an extra Banff day rather than extending the driving radius dramatically. With five days, focus on Banff, Lake Louise and part of the Parkway instead of forcing a Jasper return. A shorter route with time outside the car usually delivers more mountain experience.

    When shortening the trip, remove an entire base before cutting every destination to one night. When lengthening it, add depth before adding distance. An extra morning in a place you already understand often creates a better memory than another three-hour transfer to a new pin on the map.

    Useful official resources

    Timetables, closures, ticket systems and access rules can change. Recheck the details that affect your exact travel dates shortly before departure and again before any critical transfer.

    Final planning checklist

    • Confirm passport, visa and transit requirements for your own nationality and route.
    • Book the genuinely scarce ticket or transport segment before non-refundable secondary activities.
    • Check the exact luggage journey from one accommodation to the next, not only the main train, road or ferry time.
    • Save offline copies of reservations, insurance details and the address of each accommodation.
    • Recheck weather, transport notices and official access information shortly before each important day.
    • Keep one flexible half-day that can absorb rain, fatigue or a delayed transfer.
    • Choose footwear and clothing for the real surfaces and climate, not only for photographs.
    • Leave a generous buffer before international flights and other connections you cannot easily replace.

    The goal is not to return home with proof that you visited everything. It is to come back with a clear memory of how the places felt, enough energy to enjoy them and confidence that the route helped rather than controlled you. Use this plan as a strong starting point, then remove anything that does not fit your interests, mobility or travel rhythm.

  • Observation Decks and Rooftop Views Around the World: How to Choose the Best City Panorama

    Observation Decks and Rooftop Views Around the World: How to Choose the Best City Panorama

    Seeing a city from above can reveal its rivers, street patterns, landmarks and dramatic setting in a way that ordinary sightseeing cannot. Observation decks, hilltop terraces, towers, rooftop gardens and panoramic bars offer very different experiences, however. Some are expensive ticketed attractions with timed entry; others are free public viewpoints reached by transit or a gentle walk. Weather can transform an excellent skyline into a wall of cloud, and a famous height does not always provide the most interesting photograph. This guide explains how to choose a good viewpoint, time the visit, compare genuine costs and consider accessibility, safety and the needs of all generations.

    Choose a viewpoint by what you want to see

    A tower in the middle of a skyline lets visitors identify streets and landmarks close by; a viewpoint farther away can show the skyline as a coherent whole. If you especially want to photograph a famous tower, standing on that very tower may remove it from the picture. Consider the angle of the sun, the direction of the skyline and the distance to the waterfront or mountain backdrop. A lower public terrace can be more memorable than the city’s highest observation floor when the composition is better.

    Decide whether the priority is a sweeping landscape, architectural detail, sunset colours or simply a relaxed break. Families may want a wide enclosed space with toilets and seating; photographers may prefer an outdoor terrace without reflective glass. Travellers who dislike heights may enjoy a gently elevated park rather than a dramatic glass-floor installation. A city with several famous rooftops does not require collecting them all. One carefully selected view can be more meaningful than paying for three near-identical panoramas.

    Ticketed decks, public terraces and rooftop bars

    Commercial observation decks often provide organised queues, security screening, lift access and interpretive displays. Their entry prices and timed slots can be substantial, especially for families. Public terraces, hilltop parks and pedestrian bridges may offer excellent views without a ticket, but they might require outdoor walking or close early. Rooftop bars can have minimum spends, dress codes, reservations and age restrictions; ordering one inexpensive drink may not satisfy a venue’s access policy. Check whether a restaurant view is available only to diners and whether children are welcome at the chosen time.

    Compare total costs rather than the headline attraction price. A deck’s premium sunset slot, fast-track admission, digital photo package and viewing experience may each cost extra. Transport and food can add more. Conversely, a free viewpoint might require a long taxi ride or a steep path unsuitable for some travellers. If an attraction is included in a city pass, verify whether timed reservations are still necessary and whether the relevant ticket tier is included. Booking through the official operator usually provides clearer information about access and restrictions.

    Timing: morning, golden hour, sunset or after dark?

    Morning visits can offer softer crowds and clearer air in some destinations, but local conditions vary widely. Sunset is popular for good reason: the skyline changes colour and the first city lights appear. It is also one of the busiest periods, and choosing a timed ticket exactly at the published sunset time may mean spending the best light in a security queue. Plan enough arrival margin and remember that the most dramatic light can occur before or after the official sunset. Daylight offers easier landmark identification and can be more comfortable for travellers with children.

    After dark, illuminated buildings and traffic trails create another perspective. Outdoor terraces may feel windy and cold even in warm seasons, while glass panels can reflect interior lights into photographs. An enclosed deck may be a sensible choice for rain or winter weather. If your goal is to enjoy the view rather than collect photographs, choose a time when everyone is alert and comfortable. A tired toddler at the end of a long attraction day is unlikely to appreciate a premium sunset reservation, however spectacular the brochures look.

    New York Rooftop View At Dusk

    Check the weather and visibility before committing

    Height does not defeat clouds, haze, fog or wildfire smoke. An expensive observatory can offer almost no distant visibility when a low cloud layer surrounds the building. Look at local forecasts and real-time conditions, but avoid assuming a clear sky on the ground guarantees a clear horizon. Check the attraction’s weather policy before purchasing a non-refundable ticket. Some decks remain open in poor weather and do not offer free changes; outdoor areas may close in strong winds while interior areas continue operating.

    If flexibility matters, reserve closer to the visit where availability permits or choose a free alternative that does not penalise a last-minute change. In stormy conditions, never cross restricted barriers or enter a rooftop closed for weather. Lightning, high winds and slippery surfaces deserve respect even when the city looks beautiful. A lower sheltered viewpoint might make the day more enjoyable. For travellers with respiratory sensitivities, poor air quality can be a reason to select an indoor setting or postpone outdoor time rather than chase the perfect skyline image.

    Accessibility involves more than an elevator

    An attraction may advertise lift access while providing an outdoor upper tier reached only by steps. Ask which level has the actual panorama, whether wheelchair users can reach the window edge, and whether queues and security areas are step-free. Glass barriers, standing crowds and window heights can affect the view from seated positions. Other practical points include accessible bathrooms, seating, support for service animals and an alternative procedure when the main lift is unavailable. The elevator ride itself may be quick, but queue routes can be long.

    For visitors with vertigo, sensory sensitivities or anxiety around heights, check whether the attraction has glass floors, moving platforms, very loud effects or immersive simulations. These features may be optional rather than inherent to the viewpoint. Ask whether there is a quiet exit path. Older adults may appreciate a deck with seating and an easy return journey rather than a viewpoint reached by hundreds of steps. A family including both adventurous teenagers and cautious grandparents can often select a mixed indoor-and-outdoor attraction that suits different comfort levels.

    Photography without missing the experience

    Glass reflections are the main challenge at enclosed viewing areas. Clean camera lenses, avoid flash through windows and try to position the lens close to the glass without pressing equipment against a protected surface. A dark-coloured jacket can help reduce reflection in some settings. Check whether tripods, large camera bags or drones are prohibited. Drone use over skyscrapers or busy public places carries separate aviation and privacy rules and is not a shortcut around admission charges. Follow the operator’s instructions before setting up any equipment.

    For skyline photographs, include a foreground element such as a river, bridge or distinctive roof to give scale. A wider shot can describe the city’s layout, while a tighter frame highlights architectural detail. If travelling with a group, take a few pictures and then give everyone time to look without a phone. Never climb railings, step onto ledges or lean over barriers for an image. A viewpoint is designed to be admired from its authorised visitor areas, not modified into an extreme-sports experience by the visitor.

    Safer visits with children and larger groups

    Keep children close in queues and on terraces, particularly where there are numerous escalators, glass walls and crowds. Explain clear boundaries before entry, and do not let a child climb or sit on barriers. Some attractions offer engaging displays about urban development that make the visit more than a quick photo stop. If the group includes a baby, ask about stroller rules, baby-changing areas and security restrictions on large bags. A timed admission means the family should plan a feeding or bathroom stop before joining the main queue.

    Teenagers may enjoy comparing views from different heights or identifying landmarks on a map. Older relatives might prefer a sheltered terrace with seating and a café rather than a lengthy rooftop bar experience. Agree on a meeting point if people want to explore different levels. Mobile reception can be unreliable inside towers or underground entrance queues, so do not rely entirely on instant messages. A straightforward visit with enough time to sit and take in the skyline usually creates a better shared memory than rushing to the next reserved slot.

    Crowded New York Observation Deck With Skyline View

    Skyline alternatives that cost less

    Before purchasing an expensive deck ticket, look for municipal lookout points, elevated parks, harbour promenades, hilltop public gardens and waterfront crossings. A skyline seen from across a river can be more atmospheric than a view straight down from the highest building. Public observation platforms may be free but have opening restrictions or require timed reservations. Some museums include rooftop terraces with regular admission. Check that access is currently permitted, especially if an old travel article recommends a terrace that has since closed for construction.

    A sunset from a quiet public park can be a good choice for travellers on a modest budget and those who prefer more space. Pair it with an easy meal and public transport back to the accommodation. However, avoid entering isolated parks or poorly lit trails after closing just to obtain a night photograph. The route home is part of the experience. Choose a viewpoint with a reliable departure option and carry an extra layer for changing temperatures when visiting hilltops or waterfronts.

    Common booking mistakes and better decisions

    Visitors sometimes pay extra for a premium time without checking the forecast, buy a city pass without confirming reservation rules, or book two towers offering essentially the same view. Another mistake is misunderstanding what a rooftop bar’s reservation includes. A table booking might not guarantee an outdoor seat or a clear skyline angle. Families should check age restrictions before paying any deposit. Travellers with access requirements need specifics about actual viewing levels rather than a generic accessible logo.

    A quick decision checklist includes the exact view, price, weather exposure, crowd conditions, route, accessibility and cancellation terms. If two options appear equally attractive, favour the one that fits naturally into the itinerary rather than the one with the most aggressive marketing. Views are often at their best when you have time to identify what you’re seeing, notice the city’s geography and appreciate the distance between the neighbourhoods you have already visited.

    Frequently asked questions

    Is the highest observation deck always the best?

    No. A lower or more distant platform may frame landmarks, rivers or a skyline better. Consider the angle, visibility, ticket price, crowds and accessibility rather than ranking viewpoints by height alone.

    Is sunset worth the higher price?

    It depends on the weather and your goals. Sunset can be beautiful but busy, and a timed slot may involve queues. Morning or daytime visits may offer clearer identification of landmarks and a calmer family experience. Compare the complete conditions before paying a premium.

    Can I visit a rooftop bar without buying a full dinner?

    Some venues allow drinks-only reservations, while others impose minimum spends, dress codes or age restrictions. Check the actual venue policy and whether an outdoor table is guaranteed. Do not assume a bar admission policy is the same as that of a public viewing deck.

    Are observation decks suitable for wheelchair users?

    Many have accessible routes, but not every viewing tier or outdoor section is equally accessible. Confirm step-free access to the panorama, sightlines from seated height, bathrooms and procedures if a lift is out of service. Written venue-specific information is more useful than broad marketing language.

    What happens if weather hides the view?

    Policies differ. Some attractions offer flexible changes, while others remain open and do not refund poor visibility. Read the official conditions before buying and avoid assuming cloudy weather automatically qualifies for compensation.

    Finish with a view that fits your journey

    Choose one panorama for its composition, convenience and atmosphere. Check the weather, verify real access, understand the total cost and leave enough time to enjoy the scene beyond photographs. Whether it is a celebrated skyscraper or a free garden overlooking a river, the best city view helps you understand the destination more deeply without letting the ticket become the whole purpose of the day.

    Quick planning table

    What to checkRecommended action
    Ticketed observatoryVerify timed entry, priority upgrades and weather terms
    Public viewpointCheck route, opening hours and evening safety
    Rooftop barConfirm minimum spend, age rules and seating
    Accessible panoramaCheck viewing level, lift access and sightlines

    Official resources and further reading

    Regulations, access and operating conditions may change. Check the relevant official source and provider for the exact destination and dates.

  • National Park Holidays Around the World: Permits, Trails and Accessible Nature

    National Park Holidays Around the World: Permits, Trails and Accessible Nature

    National parks offer extraordinary ways to experience landscapes, wildlife and cultural heritage, but there is no single model of what a national park visit looks like. Some have paved walks, visitor centers and public buses; others require long wilderness journeys and permits issued months ahead. A trip can be wonderful without climbing a famous summit. For families, older travelers and visitors with disabilities, a carefully chosen lookout, guided nature program or short boardwalk may be far more rewarding than a strenuous hike that leaves everyone exhausted. Planning begins with the official park website, not a photo of an empty trail.

    Know who manages the park and what protection means

    National park labels differ between countries and sometimes between regions of one country. Check the management authority, park boundaries, rules for vehicles and wildlife, and whether private land or indigenous territories exist within the wider landscape. Some parks contain sacred places or communities whose rights and instructions deserve respect. A recognized protected area is not automatically a free public playground. Certain trails, beaches or cultural sites can close seasonally for conservation or safety reasons.

    Use official information to distinguish open viewpoints from restricted zones. Ask whether a guided visit is mandatory for certain areas, whether drones are prohibited and what photography rules apply. Respect for nature and local communities is part of the experience, not an optional extra after choosing the itinerary.

    Check permits, entrance fees and reservation systems

    In busy parks, a ticket to enter the wider area may not be sufficient for a popular trail, campsite, shuttle or timed vehicle entry. Some permits are limited by quota or allocated through lotteries; others are available close to departure. Fees can vary for residents, international visitors, vehicles, children and seniors. Confirm the official booking provider and understand whether a pass covers admission or merely a portion of the experience. The US National Park Service, for example, recommends checking each park’s own alerts, reservations and access rules, while Recreation.gov hosts many but not all federally managed bookings.

    Avoid purchasing high-priced ‘guaranteed passes’ from unverified resellers. If a headline attraction is sold out, seek officially approved alternatives rather than entering a closed trail. Keep booking confirmation accessible offline where mobile signal may be limited.

    Pick a base that reduces unnecessary travel

    A popular park may be several hours from the nearest major airport. Staying within or near the park can shorten morning transfers, but accommodation may be limited or expensive. Calculate the actual route from your hotel to the entrance you will use, not merely the distance to a park pin on a map. Some entrance roads close in winter, while a shuttle may replace private cars in peak season. A village on the wrong side of a mountain range can look close on a map and still require a long drive.

    For mixed-age groups, choose a base with food shops, medical services and rest opportunities. Do not book a beautiful lodge solely because it is isolated. A comfortable night, predictable meals and fewer early alarms usually improve the quality of time spent outdoors.

    Use trail details rather than vague difficulty labels

    A trail called ‘easy’ may be short but contain steep steps, loose gravel, heat exposure or no shade. Read distance, elevation gain, route surface, estimated time, water availability and whether the return is uphill. Look at accessible-route information separately from general difficulty. Check whether trails are loops or out-and-back and identify turnaround points. Weather, altitude and recent closures can change the real difficulty dramatically.

    For children, pick a route with engaging stops rather than a long monotonous ascent. For older walkers, allow extra time and rests without treating age itself as a diagnosis. Travelers using wheelchairs or mobility aids should request current details about slopes, surfaces, accessible restrooms and shuttle lifts. Official park accessibility contacts can often clarify what a generic travel review cannot.

    Take wildlife safety and habitat protection seriously

    Wild animals are not attractions to feed, touch or approach for photographs. Distance recommendations and rules vary by species and park. Use the official advice for encounters with bears, big cats, bison, monkeys or marine animals where they are relevant. Keep food secured and never leave rubbish or scented items in areas where animals can access them. Feeding wildlife can change behavior and create danger for both visitors and the animal. Stay on authorized paths and observe seasonal closures designed to protect breeding or nesting areas.

    If traveling with children, explain these boundaries before arriving. A child who understands why quiet observation matters may enjoy watching birds and tracks more than attempting a close-up selfie. Bring binoculars if appropriate, and value not disturbing the animal as a successful outcome.

    Check seasonal conditions and natural hazards

    A park open all year may have only part of its road network accessible in winter. At other times, wildfire smoke, floods, tropical rain, lightning, heat or rockfall can close routes suddenly. Consult park alerts and the local meteorological authority shortly before each visit. A forecast for the nearest city may be a poor description of conditions at high elevation. During hot periods, plan short morning walks, carry enough drinking water according to park guidance and choose shaded activities in the afternoon.

    Do not depend solely on mobile reception. Download maps and tell someone your planned route when venturing beyond busy areas. For backcountry travel, local expertise and additional equipment may be necessary. Beginner visitors should not interpret a popular social-media photo as evidence that the journey is straightforward or safe.

    Build an itinerary with different levels of activity

    Instead of stacking three major hikes in one day, pair one primary experience with one flexible alternative. A morning ranger program, a scenic drive and a short accessible path can fill a satisfying day. Include stops for meals, toilets and hydration. Families may benefit from nature discovery programs, junior ranger activities or cultural demonstrations where available. Older visitors might choose interpretive trails and guided drives that reveal more about the landscape with less physical strain.

    Choose one location where the group can separate for a short time if appropriate: keen hikers take a longer approved route while others visit a visitor center, then everyone meets at a fixed point. Agree on communication before the group splits, particularly where phone service is uncertain.

    Make conservation part of the travel budget

    Park fees can fund visitor management or conservation, but effects vary across jurisdictions. Choose authorized guides and locally operated services that follow park rules. Stay on established paths, take litter home, observe fire restrictions and avoid removing rocks, shells, plants or artifacts. In sensitive communities, ask whether a site or ceremony welcomes visitors before arriving. The UNESCO sustainable tourism approach emphasizes participation by local communities and protection of heritage values, an idea worth applying beyond famous World Heritage destinations.

    Avoid rushing from one fragile viewpoint to another simply to collect photographs. Spending longer in fewer places can reduce driving and improve appreciation. Choose experiences whose operators explain protection measures rather than treating conservation as decorative marketing.

    A simple two-day park plan

    Day one can begin with the visitor center for current trail conditions, then a short interpretive walk and a relaxed scenic drive. Leave the afternoon open for a ranger talk or wildlife viewing from an approved distance. Day two can be a moderate trail chosen according to actual surfaces, weather and ability, with a shorter backup option already selected. If a permit is necessary, secure it before locking in accommodation. Keep a food, water and emergency plan proportionate to the route.

    The right plan is the one that leaves room to notice sounds, light and landscapes. A national park visit is not measured by altitude climbed or number of trail photos shared.

    Interpret visitor information carefully before entering the park

    An official map may use symbols for trailheads, accessible routes, picnic areas, potable water and emergency points. Learn what each icon means for that particular park. A marked path does not guarantee phone coverage, wheelchair usability or protection from lightning. If a trail crosses a river or snowfield, the conditions can change after the map was printed. Visitor-center staff can often explain which options are currently open and appropriate, but you still need to describe your group’s abilities and intended plans honestly.

    Check whether advance reservations are required for guided interpretation, accessible transportation or special equipment. Some parks offer educational programs for children and visitors with different sensory needs. Others have quiet times or restricted areas to protect wildlife. A visitor with hearing loss may benefit from printed interpretation; someone with low vision might appreciate tactile exhibits or an audio tour where offered. These details can transform a nominally accessible trip into one that is genuinely enjoyable.

    Make a decision point part of every outing: before leaving a visitor center, identify what conditions would make you turn around. Heat, tiredness, deteriorating weather or a closed path are sensible reasons to change plans. A park visit should leave people feeling connected to the landscape rather than obligated to finish a route simply because it appeared in an itinerary.

    Frequently asked questions

    Are all national parks free to enter? No. Fees, passes and permits vary, sometimes even within one park.

    Do I need a guide? Some activities or protected areas require one; others are self-guided. Check official park rules.

    Are national parks accessible to wheelchair users? Many offer some accessible facilities, but paths and transport vary substantially; verify individual routes.

    Can I use a drone? Restrictions often apply. Never fly without checking park and aviation rules.

    Is a popular route always safe for beginners? No. Weather, altitude, terrain and personal capacity matter more than popularity.

    Official resources to check before traveling

    Requirements and facilities change. These primary sources are starting points; verify the rules for your precise dates and itinerary.

  • Fuerteventura in 7 Days: Corralejo, Betancuria and Jandía Without Spending the Week in the Car

    Fuerteventura in 7 Days: Corralejo, Betancuria and Jandía Without Spending the Week in the Car

    Fuerteventura deserves a trip built around its geography rather than a checklist. Fuerteventura looks simple because one main island road links the major resort zones, yet a good trip depends on not treating every beach as interchangeable. Seven days lets you combine the dunes and surf atmosphere of the north, the historic interior, long southern beaches and one more remote day around Jandía without crossing the island from end to end every morning.

    If this destination is part of a longer journey, compare the pacing with Canary Islands in 10 Days. The useful question is not how many places fit on a map, but how much usable holiday time remains after transfers, check-in, weather and meals.

    Quick trip summary

    • Recommended time: 7 days.
    • Best planning principle: group days by geography and protect the transport or reservation that controls access.
    • Best for: independent travellers, couples, families and slower-paced visitors who prefer a realistic rhythm.
    • Keep flexible: at least one half-day for weather, sea conditions, traffic or simple rest.
    • Book first: scarce transport, protected-area access, signature guided experiences and accommodation in the most useful base.

    Is Fuerteventura the right trip for you?

    Fuerteventura works best for travellers who are happy to make a few decisions in advance but do not want every hour reserved. The destination has enough variety to reward a short stay, yet the best experiences often depend on weather, local transport or access rules. A good itinerary therefore protects one or two priorities and leaves the rest movable.

    Fuerteventura’s distances can be deceptive. Corralejo and the beaches of Jandía may both look like easy stops on an island map, but going back and forth between them takes a large part of the day. Decide which coast you want to spend most time on, then build the rest of the week around it.

    Where to stay: choose location before hotel style

    BaseWhy choose it
    CorralejoBest for dunes, ferries, restaurants and northern beaches.
    Costa CalmaA practical southern base for Sotavento and easier access toward Jandía.
    Morro JableBest for travellers prioritising southern beaches and a more complete town atmosphere.

    Moving south halfway through the week makes sense if you want several days around Costa Calma, Morro Jable and Jandía. It makes less sense if you’ll spend that time checking out, packing and searching for parking. Choose two bases only when the second one gives you something you couldn’t comfortably enjoy from the first.

    For a family stay, a sheltered pool, nearby restaurants and a short route to the beach can matter more than a grand view. If anyone finds walking difficult, ask how far the room really is from reception and whether reaching the sand involves steps or a long path. Beachfront doesn’t always mean easy access.

    Fuerteventura White Town And Hills

    A realistic 7 days itinerary

    Day 1: Corralejo and dunes

    Settle in, explore Corralejo on foot and visit the dune area in softer late-afternoon light rather than driving immediately across the island.

    Day 2: El Cotillo and northwest coast

    Combine El Cotillo with nearby lagoons and viewpoints. Wind and surf conditions should decide where you swim.

    Day 3: Betancuria and the interior

    Drive through the central mountains, stop in Betancuria and choose a few viewpoints instead of every roadside pullout.

    Day 4: transfer south

    Move toward Costa Calma or Morro Jable with a relaxed beach stop en route.

    Day 5: Sotavento

    Use the day for the broad southern beaches, walking and water sports if conditions suit your ability.

    Day 6: Jandía and Cofete decision

    Attempt Cofete only with suitable vehicle, road and weather conditions; otherwise use a safer Jandía beach-and-viewpoint day.

    Day 7: easy final morning

    Keep the final hours near your base and leave a generous airport buffer.

    How to move around without wasting the day

    A rental car gives the most freedom, especially for the interior and south. Resort buses are useful on main corridors but do not replace a car for scattered viewpoints. Remote tracks such as the road toward Cofete require extra caution and should not be treated like ordinary paved sightseeing roads.

    Before fixing a departure time, work backwards from the part that can’t move: the flight, ferry or hotel check-in. From Jandía to the airport, for example, leave time for the drive, returning a rental car and the usual airport procedures. Don’t squeeze in one last remote beach if missing the connection would spoil the trip.

    If a rental car is involved, check parking rules, road surface, insurance exclusions and whether the driver is comfortable with the local conditions. If boats are involved, protect a buffer before flights or expensive onward connections. Transport is not background logistics; in destinations like Fuerteventura, it can determine whether the trip feels relaxed or fragmented.

    Best time to visit

    Fuerteventura has a mild year-round climate and can work in every season. Wind is part of the island’s character, so the best beach on a given day may depend more on direction and exposure than on a fixed ranking.

    Look at wind and sea conditions as well as air temperature. A sunny day can still feel chilly on an exposed beach, and a calm-looking stretch of water isn’t automatically safe for swimming. The best month for lounging by the pool may not be the one you prefer for surfing or long coastal walks.

    Treat the beach plan as something you can change each morning. If the wind makes one part of the coast uncomfortable, choose a more sheltered spot or spend time in Betancuria and the inland villages. You don’t have to give up a whole day just because the beach you had in mind isn’t pleasant.

    Fuerteventura White Coastal Village

    What to book first

    Book the flights and the accommodation that suits your chosen base first. If you want a rental car, compare collection points, insurance terms and whether unpaved roads are excluded. Leave ordinary beach visits flexible; conditions on Fuerteventura are often more useful than a calendar when choosing where to go.

    A flexible hotel rate is worth considering if you’re splitting the stay between north and south or combining the island with a ferry trip. You may not need cancellable tickets for every activity, but avoiding a chain of tightly connected bookings gives you room to deal with travel delays or a change in conditions.

    Food strategy: eat well without scheduling every meal

    Make room for simple meals during beach days. A bakery stop before setting off, lunch near the water and a relaxed seafood dinner can be more enjoyable than racing across the island for a famous restaurant. Carry drinking water and something to eat when heading towards quieter beaches, where facilities may be limited.

    On the day you move from Corralejo to the south, plan lunch somewhere along your route rather than rushing to reach a dinner booking. Betancuria can fit into an inland day, but it shouldn’t become another stop you have to tick off before sunset. A slower transfer day often turns into one of the nicest parts of the week.

    Travelling with children

    Families often do best with two bases at most, shallow beaches chosen according to wind and short driving days. Pools and protected coves are valuable backup plans when the ocean is rough.

    Children usually enjoy Fuerteventura more when there’s time to return to a beach they already like. Choose a base with easy food options and somewhere to swim if the sea is rough. Instead of planning a long drive every day, alternate excursions with mornings near the hotel, especially when the wind is strong.

    A visit to the dunes or an outing into the hills may sound exciting, but hot sun, wind and a long drive can leave younger children exhausted. Keep the following afternoon open for the pool, an easy walk or a snack by the sea. Plan around the children you’ve got, not around an adult sightseeing checklist.

    Travelling at a slower pace or as a senior

    Most major resort areas are straightforward, but beach access can involve sand, wind and long walks from parking. Choose accommodation with a sheltered pool and lift access if mobility is limited.

    Ask about the exact way onto the beach before booking accommodation or an excursion. Some stretches have deep sand, long approaches or steps from the promenade; others are easier to reach. If you need accessible transport, a suitable bathroom or a short walk from parking, confirm those details with the property or operator directly.

    Fuerteventura is generally mild, but the wind can make an exposed coastal walk surprisingly tiring. Put longer hikes or scenic drives early in the day, carry water and allow time to rest afterwards. If your priority is a calm holiday, you can still enjoy the island’s landscapes without trying to reach every remote viewpoint.

    Budget: where the money really goes

    Car hire can save time but fuel and insurance add up. Self-catering apartments, local bakeries and simple seafood meals help balance the cost of resort accommodation.

    Fuerteventura White Coastal Town

    A rental car is often the biggest practical decision in a Fuerteventura budget. Compare the full cost of hire, fuel, parking and insurance with the journeys you actually intend to make. If most of your week will be spent near one resort, you may prefer local transport and a limited number of organised excursions.

    A low hotel rate isn’t a saving if it means driving a long way for every beach and evening meal. Compare places in Corralejo, Costa Calma and Morro Jable against the days you’ve planned, not just against each other. Spending slightly more on the right base can give you several extra hours to enjoy the island.

    Weather fallback plan

    Keep a few alternative days in mind rather than fixing every beach in advance. Save Sotavento or another exposed beach for conditions you can enjoy, and use a windy day to visit Betancuria or explore the towns. If the sea is rough, a sheltered pool or a scenic drive is a better option than forcing a swim.

    If the wind ruins a planned morning on the beach, don’t try to compensate by driving to three more spots before dinner. Choose one comfortable alternative and enjoy it. The island is large enough for a varied week, but you’ll remember a relaxed afternoon much more fondly than a series of hurried car-park stops.

    Connectivity, cash and small practical details

    Download an offline map before driving into the quieter parts of the island, and save your accommodation details somewhere you can open without a signal. A charged phone is useful, but so are some cash, a spare payment card and a bottle of water in the car. Don’t depend on being able to buy everything at a remote beach.

    If you’re heading onto a remote trail or towards Cofete, tell someone where you’re going and when you expect to return. Check road advice and any restrictions from your rental company before setting off. When local warnings or the condition of the road suggest turning back, take them seriously; the scenery isn’t going anywhere.

    What to pack

    • Comfortable footwear chosen for the real surface rather than for photographs.
    • A light rain layer and one warmer layer, even when the destination is usually associated with sunshine.
    • Sun protection, refillable water bottle and any medication that may be difficult to replace locally.
    • Offline maps plus screenshots of tickets, accommodation addresses and emergency contacts.
    • A small day bag that can carry water, layers and valuables without becoming a burden.
    • Any destination-specific sea, trail or wildlife equipment recommended by the official authority or operator.

    Common mistakes to avoid

    • Trying to see Corralejo and Jandía repeatedly from one base.
    • Treating the Cofete road as a normal rental-car excursion.
    • Ignoring wind direction when choosing a beach.
    • Scheduling a ferry or flight tightly after a long drive from the south.
    • Assuming all coastal roads are paved and easy.

    Responsible travel and local etiquette

    The dunes, beaches and dry inland landscapes need care. Use established access routes, respect barriers and follow local signs, even when you see other visitors cutting across fragile areas. A shortcut over protected ground might save a few minutes, but it can damage places that take far longer to recover.

    Fuerteventura Volcanic Coast Aerial

    Give wildlife space, take your rubbish away from quieter beaches and choose local cafés or guides when it suits your plans. Fuerteventura’s appeal is in its open landscapes as much as its resorts. Treating those places carefully helps keep them enjoyable for the people who live here and those who visit after you.

    If you have less or more time

    If you remove days from this itinerary, remove a whole excursion rather than shortening every stop. Protect the place or experience that best represents Fuerteventura, then build the shorter trip around it. Constantly moving faster rarely creates more meaningful travel.

    With an extra couple of days, stay longer in the area you liked best. That could mean another afternoon at El Cotillo, a quieter day around Morro Jable or a better-weather chance to explore the coast. You don’t need to add another island or change hotels just because you have more time.

    How to choose between similar experiences

    If two beaches seem equally appealing, choose the one that fits the day’s drive and conditions. El Cotillo works naturally with a northwest outing; Jandía makes more sense when you’re already based in the south. Don’t spend half the afternoon chasing a photograph of a beach when you’re already close to a beautiful one.

    Think about where you’ll spend your evenings as well as your beach days. A simple apartment near places to eat may suit you better than a larger resort that requires a drive every night. On an island where long journeys add up, being able to walk out for dinner is a real holiday pleasure.

    Safety and decision-making on the day

    Know when to turn around on a remote drive or walk. If a road looks unsuitable, the wind picks up or you start later than planned, choose a nearer stop instead. That’s particularly important around exposed parts of Jandía, where the route matters as much as the destination.

    Carry more water than you think you’ll need on an inland drive or a quiet beach day, along with sun protection and a light layer against the wind. Keep the essentials within reach, not buried in a suitcase. Those small things make it much easier to change plans without turning back to the hotel.

    Useful official and planning resources

    Timetables, protected-area rules, road conditions, fees and visitor procedures change more often than the landscape. Recheck the source below shortly before departure.

    Final planning checklist

    • Confirm passport, visa, transit and health requirements for your nationality.
    • Reserve the transport, permit or guide that controls the rest of the itinerary.
    • Check how luggage moves between airport, road transfer, ferry, train or accommodation.
    • Download offline maps and save key tickets outside your email app.
    • Recheck weather, sea, road, trail or park notices before each critical day.
    • Keep at least one half-day that can absorb a delay or become simple rest.
    • Leave a generous buffer before international flights and other costly connections.

    A good trip to Fuerteventura should feel like you understood the place, not merely that you passed through it. Keep the transport anchors fixed, leave room for conditions to change, and remove anything that does not fit your interests, mobility or energy. The result is usually more enjoyable than the most ambitious version of the same route.

  • San Antonio in 4 Days: River Walk, Missions and Texas Culture Without Staying Only Downtown

    San Antonio in 4 Days: River Walk, Missions and Texas Culture Without Staying Only Downtown

    If this destination is part of a wider trip, compare the pace with Texas Hill Country in 9 Days: Austin, San Antonio and Fredericksburg. Use that article for the larger route and this guide for the practical details of staying in the destination itself.

    Quick trip summary

    • Ideal stay: 4 days for a first visit.
    • Best approach: one major experience per half-day, with at least one flexible block for weather, fatigue or transport changes.
    • Good for: first-time Texas visitors, families, couples, history travellers and road-trippers combining Austin or the Hill Country.
    • Main planning risk: treating map distance as if transfers, queues, heat, weather and meals took no time.

    Is this the right trip for you?

    San Antonio’s River Walk is the obvious first image, but a strong trip goes beyond one downtown loop. The Alamo, the UNESCO-listed missions, Mexican American culture, the Pearl, neighbourhood food and the river’s quieter reaches create a more complete city. Four days gives you time to see those layers without turning every meal into another downtown tourist stop.

    A realistic itinerary does not try to prove how much you can fit into a day. It protects the experiences that justify the trip and leaves room for meals, transport and the small discoveries that make one destination feel different from another.

    Where to stay

    AreaWhy choose it
    Downtown / River WalkBest for a first visit, major sights and walking; convenient but often the most expensive and tourist-oriented.
    Pearl / northern river areaExcellent for food, design and a more contemporary atmosphere with river access.
    Southtown / King WilliamHistoric houses, galleries and restaurants south of downtown; good for travellers who want neighbourhood character.
    Near the airport / north sideOften cheaper and practical for early flights, but a car or ride-hailing budget becomes more important.

    Choose accommodation by the journeys you will repeat. Map the first morning, the area where you are likely to eat dinner and the departure point for any fixed excursion. A room that removes two awkward transfers every day can be better value than a cheaper property that creates constant taxi or transit costs.

    How to get there

    San Antonio International Airport is north of downtown and is reached by taxi, ride-hailing, rental car and public transport. If the trip is entirely central, you may not need a car every day. If you are continuing through Texas Hill Country, a rental car becomes more useful after the city portion rather than on every downtown day.

    San Antonio River Walk At Night

    Save the accommodation address offline and screenshot the first transfer before travelling. Arrival day should carry less risk than the rest of the trip: avoid a non-refundable attraction immediately after a flight or long road journey, and leave extra time when baggage, immigration, weather or traffic can affect the first connection.

    Getting around

    Walk the central River Walk and downtown, use river boats for sightseeing rather than as your only transport plan, and consider cycling or driving for the mission corridor depending on heat and fitness. Buses and ride-hailing fill gaps well. Parking downtown can be expensive, so compare hotel parking before bringing a car into the centre.

    Compare journeys door to door rather than station to station. Waiting time, stairs, the final walk and the number of transfers can matter more than the nominally fastest route, especially for families, senior travellers or anyone carrying luggage.

    A realistic itinerary

    The schedule below is a framework rather than a rigid timetable. Opening days, seasonal transport, weather and local events should determine the exact order. If a major attraction is closed or conditions are poor, move the whole block instead of forcing the rest of the trip to become inefficient.

    Day 1 – Alamo, downtown and the central River Walk

    Start with the Alamo area and surrounding historic plaza, then explore downtown on foot. Use the River Walk as a route rather than an attraction you must complete in one direction. End with dinner away from the busiest tourist stretch if you want better value and a different atmosphere.

    Day 2 – San Antonio Missions and the south side

    Make the UNESCO mission corridor the focus. Mission San José is a strong anchor, and adding one or two other missions provides context without turning the day into a checklist. Use a bike only if weather and fitness make sense; in high heat, a car or guided tour is more comfortable.

    Day 3 – Pearl, museums and neighbourhood food

    Spend the morning around the Pearl and northern river area, then choose a museum or cultural institution according to your interests. Continue into nearby neighbourhoods for dinner. This is the day to see San Antonio as a living city rather than only a historic attraction zone.

    Day 4 – Market Square, Southtown and a flexible final block

    Visit Market Square or Southtown, then use the last afternoon for a museum, botanical garden, river walk or anything missed. If you are driving to Austin, Fredericksburg or elsewhere in Hill Country, leave enough daylight for the next leg instead of starting a long drive after a packed day.

    San Antonio Red Sports Car On Road

    Keep enough margin for meals, transport and an unscheduled stop. If this block runs long, remove the lowest-priority extra rather than turning the rest of the day into a race.

    How many days do you really need?

    4 days is a strong length for a first visit because it gives the destination one full block for its essential sights and enough margin for neighbourhoods, weather or transport. With one less day, remove the lowest-priority excursion rather than compressing every meal and transfer. With one extra day, add a regional experience or a deliberately slow day instead of stretching each sightseeing day until evening.

    If this stop sits inside a longer itinerary, count hotel changes, airport transfers and recovery time as real parts of the trip. A night that prevents two consecutive transfer days can be more valuable than another attraction.

    Best time to visit

    Spring and autumn are generally the most comfortable for walking. Summer heat can be intense, so start early and use air-conditioned breaks. Fiesta and other major events create a vibrant atmosphere but also increase demand for rooms and transport.

    Do not choose dates from average temperature alone. Check daylight, rainfall, local holidays, school breaks and the seasonal schedule of the one experience that matters most to you. Shoulder season is excellent only when the things you actually want to do are operating.

    What deserves advance booking?

    Reserve central hotels early for major events and book any timed Alamo experience or special tour you care about. Most River Walk time can remain flexible. If you plan to dine at a specific Pearl restaurant on a weekend, reservations can be worthwhile.

    Book the scarce item first, then shape flexible sightseeing around it. Avoid prepaying every hour of the trip: a delayed flight, hot afternoon, heavy rain or long lunch should not create a chain of missed reservations.

    Where and what to eat

    San Antonio is a strong city for Tex-Mex, barbecue, breakfast tacos, Mexican regional cooking and contemporary Texas cuisine. Do not eat every meal on the central River Walk. Southtown, the Pearl and other neighbourhoods broaden the experience and often provide better value.

    Use meal planning to reduce unnecessary travel. If the day ends in a particular neighbourhood, eat there instead of crossing the city because one restaurant looked attractive online. Keep at least one meal unreserved so you can follow a market recommendation or change plans when energy is low.

    Families, older travellers and accessibility

    Families benefit from the River Walk’s visual interest, museums and spacious mission grounds, but strollers can be awkward on steps and crowded sections. Older travellers should use elevators and street-level alternatives where available and avoid long mission rides in peak summer heat. Accessible hotel rooms should be confirmed directly.

    San Antonio Modern Architectural Complex

    For mixed-age groups, plan around the slowest realistic pace rather than the fastest walker. One important sight in the morning and one flexible block in the afternoon usually works better than four timed entries. If step-free access, seating, toilets or lift availability are essential, confirm them directly with the attraction or hotel; historic districts often have partial accessibility rather than a simple yes-or-no answer.

    Budget: where to spend and where to save

    Many historic areas and public spaces are inexpensive or free, while downtown parking, central hotels and attraction tickets add up. Spend on location if you want to walk at night and save by eating some meals outside the tourist core. If you rent a car, compare hotel parking charges with ride-hailing before deciding.

    Compare the total cost of a day, not only individual ticket prices. A hotel that removes repeated transfers, a driver that replaces three difficult connections or a flexible ticket that protects a weather-dependent plan may be better value than the cheapest option on paper.

    Safety and practical awareness

    Use normal city awareness, especially at night away from busy areas, and protect yourself from heat. River Walk edges and stairs can be slippery after rain. If driving, do not leave luggage visible in the vehicle and build rest into longer Texas road-trip days.

    Save offline copies of hotel details, insurance information, essential tickets and emergency contacts. Split cards and cash so one lost wallet does not become a trip-wide problem. If official advice or local conditions change, adjust the plan even when that means abandoning a reservation.

    If you have one extra day

    With an extra day, Fredericksburg and Hill Country are a natural extension, but they deserve a full daylight outing. New Braunfels and Gruene are other options depending on interests. Do not combine a long regional drive with a late flight from San Antonio.

    Responsible travel and local rhythm

    Historic centres, markets, beaches, religious sites and residential streets are working parts of local life. Keep doorways and pavements clear, follow photography rules, dress appropriately where required and choose locally run businesses when they fit naturally into the day. In natural areas, use marked paths and respect closures even when a shortcut looks easy.

    A slower schedule makes responsible travel easier because you are less tempted to ignore local rules just to keep an overloaded itinerary on time.

    Common mistakes to avoid

    • Spending the entire trip within two blocks of the central River Walk.
    • Visiting several missions at midday in extreme summer heat.
    • Renting a car for downtown days without checking parking costs.
    • Assuming Texas road-trip distances are short because they look close on a state map.
    • Eating every meal in the most tourist-heavy riverfront restaurants.

    Most tiring trips are not ruined by one dramatic mistake. They become difficult through a chain of optimistic assumptions. Add margin before you need it.

    A slower experience worth protecting

    Walk a quieter section of the river north toward the Pearl or south toward King William in the early morning. The waterway feels completely different when you leave the busiest restaurant zone behind.

    San Antonio Historic Tower

    How to make the trip feel less rushed

    Separate fixed commitments from flexible interests. Put only transport departures, limited-entry attractions and weather-dependent excursions into the fixed category. Keep markets, viewpoints, cafés, parks and smaller museums movable. Each evening, look at the next day again and remove one low-priority stop early if the group is tired.

    Also distinguish between distance and effort. Two kilometres on flat shaded pavements is not the same as two kilometres in tropical humidity, winter cold, steep streets, altitude or exposed heat. Plan by the physical reality of the destination, not only by map distance.

    Photography, weather and the best time of day

    Early mornings are useful for quieter streets and cooler conditions in most destinations, while late afternoon often gives softer light and a more relaxed pace. Do not build a whole itinerary around one photograph: weather and crowds change, and the best viewpoint is often the one you can reach without sacrificing the rest of the day.

    Keep one indoor alternative saved on your phone. A museum, market, café or cultural centre can rescue a day affected by rain, heat, wind or transport disruption without forcing an expensive last-minute change.

    Shopping and souvenirs

    Buy things that connect to the destination rather than generic travel souvenirs. Markets, museum shops and specialist food stores are usually better places to understand provenance. If you are flying internationally, check customs rules before buying food, plants, animal products or large quantities of liquids.

    What to pack

    Comfortable shoes, strong sun protection and a refillable bottle are essential for warm months. Carry a light layer for heavily air-conditioned interiors and a compact rain layer in storm season.

    Official information to check before you go

    Opening days, transport, weather-sensitive access and event schedules can change. Recheck the details that control fixed reservations shortly before travel, especially during public holidays, major festivals or severe weather.

    Final planning checklist

    • Confirm passport, visa, entry and transit requirements for your nationality.
    • Choose accommodation by the journeys you will repeat, not by price alone.
    • Reserve only the attractions or excursions that genuinely control the day.
    • Save offline copies of tickets, hotel details, insurance information and essential addresses.
    • Check the exact airport, station, bus terminal, ferry pier or pickup point before arranging transfers.
    • Keep one flexible half-day for weather, fatigue or something discovered after arrival.
    • Recheck official opening information and local transport shortly before each fixed day.

    Final thoughts

    A good stay is not the itinerary with the highest number of pins. It is the one that protects the experiences you care about, leaves enough energy to notice the destination between them and can absorb a delayed flight, a hot afternoon or a change of weather without collapsing. Use this plan as a structure, then let local conditions and your own pace decide the final order.