Category: Asia

Travel guides for Asia with practical itineraries, transport strategies, cultural considerations and realistic advice for different ages.

  • Yokohama in 4 Days: Minato Mirai, Chinatown and Port History Without Treating It as a Tokyo Evening Trip

    Yokohama in 4 Days: Minato Mirai, Chinatown and Port History Without Treating It as a Tokyo Evening Trip

    Yokohama deserves enough time to feel like a destination rather than a box between better-known stops. 4 days give a first-time visitor room for essential sights, neighbourhood life, meals and a flexible block without turning every morning into a race.

    If Yokohama is part of a wider journey, compare the pace with Japan Beyond Tokyo in 10 Days: Kyoto, Nara, Hiroshima and Osaka Without Constant Packing. This city guide adds local depth rather than repeating the broader route.

    Quick trip summary

    • Ideal stay: 4 days for a first visit.
    • Best planning rule: group days geographically and protect one flexible half-day.
    • Best for: first-time visitors, couples, solo travellers, families and slower-paced travellers.
    • Main risk: adding too many excursions or cross-city transfers and losing the destination itself.

    Why 4 days works

    The aim is not to maximise the number of attractions. A useful city itinerary should reduce backtracking, keep the hardest reservation or weather-dependent experience protected, and leave enough unstructured time for meals, rest and the small discoveries that make a destination feel distinct. Four or five days also allow different travellers to move at different speeds without turning every delay into a problem.

    Yokohama has enough contrast to justify a real stay, but it remains manageable when each day has a geographic focus. Alternate heavier sightseeing with easier periods so the trip works for different ages, interests and energy levels.

    Where to stay

    AreaWhy choose it
    Minato MiraiBest for harbour views, modern hotels, museums and an easy first visit.
    Kannai / BashamichiGood for port history, access to Chinatown and a more textured mix of old and new.
    Motomachi / YamateQuieter and atmospheric, with historic foreign-influenced streets and hillside walks.
    Yokohama Station areaExtremely practical for regional transport and shopping, though less distinctive as an evening base.

    Choose a base according to the part of the city you will use after 18:00, not only the attractions you will visit at 10:00. Evening restaurants, lighting, gradients, transit frequency and the final walk back to the hotel often matter more than saving a few euros. Before paying, check recent reviews for noise, lift access, air conditioning or heating, and the exact distance from the transport stop you expect to use.

    A realistic 4-day itinerary

    Day 1: Minato Mirai and the waterfront

    Start around Sakuragicho and Minato Mirai, walking toward the Red Brick Warehouse and harbour. Keep one museum or observation stop as the anchor rather than trying to enter every waterfront attraction.

    Day 2: Chinatown, Yamashita Park and Motomachi

    Explore Chinatown outside the absolute meal rush if possible, then connect Yamashita Park, Motomachi and Yamate. These areas fit one coherent day and show a different side of the port city.

    Day 3: port history, Kannai and local Yokohama

    Use Bashamichi, Kannai and one cultural museum or garden. Finish in Noge or another local dining area so the day is not entirely built around landmark waterfront spaces.

    Day 4: Sankeien, flexible harbour time or Kamakura decision

    Choose Sankeien, another museum, a slow harbour day or a carefully considered Kamakura outing. If Kamakura already has its own place in the wider Japan route, stay in Yokohama.

    Arrival strategy

    Yokohama is extremely well connected. The official visitor bureau notes that central Yokohama is roughly 30 minutes from Haneda Airport and around 25 minutes from central Tokyo by common rail routes; Shin-Yokohama connects the city to the Tokaido Shinkansen. Confirm whether your hotel is nearer Yokohama, Sakuragicho or another station before choosing a transfer.

    Arrival day should carry less risk than the rest of the trip. Save the accommodation address offline, know the first transport option before landing or leaving the station, and avoid a non-refundable attraction immediately after a long journey.
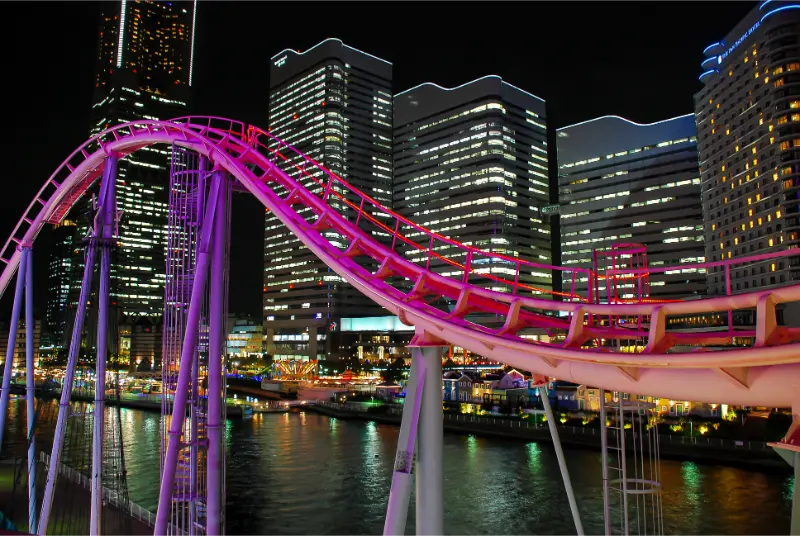
    Diving Coaster Vanish Yokohama Cosmo World Kanagawa Japan At Night

    Getting around efficiently

    The visitor core is compact enough for walking combined with the Minatomirai Line, JR, buses and boats. The Akai Kutsu sightseeing bus can help on the bay–Chinatown axis, but the simplest plan is still to group Minato Mirai, Kannai/Chinatown and Yamate into separate blocks.

    Compare routes door to door, not station to station. Waiting time, stairs, transfers and the final walk can make the nominally fastest option worse for a family, a senior traveller or anyone carrying luggage.

    Best time to visit

    Spring and autumn are excellent for walking; summer is hot and humid, while winter often brings clear views and comfortable daytime exploration. Weekends, holidays and events can make Chinatown and waterfront areas much busier.

    Seasonal planning should also consider daylight, local holidays, school breaks and whether your most important experience depends on clear skies, calm water or outdoor access.

    What to book before arrival

    Book only the elements that can genuinely disrupt the trip if they sell out: a timed landmark, scarce train, special performance, high-demand excursion or airport transfer at an awkward hour. Leave ordinary museums, neighbourhood walks and most meals flexible unless your dates coincide with a major event or public holiday. Recheck official opening information shortly before travel because maintenance, weather and local events can change access.

    Food strategy

    Chinatown is an obvious attraction, but Yokohama has more than one food identity. Add local ramen history, Noge izakaya streets or station-area dining, and avoid making every meal a queue at a famous Chinatown restaurant.

    Meals should also function as rest. A very good restaurant ten minutes from where you already are can be a better travel decision than a famous address requiring forty minutes of extra transport.

    What is actually worth prioritising

    Prioritise Minato Mirai, the historic port axis, Chinatown plus Yamate, and one quieter cultural area such as Sankeien. Yokohama is strongest when modern harbour architecture and the history of international exchange are experienced together.
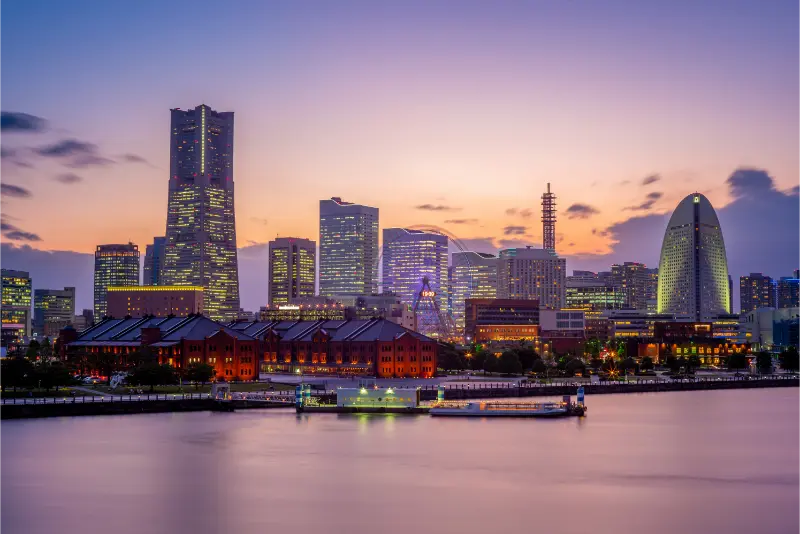
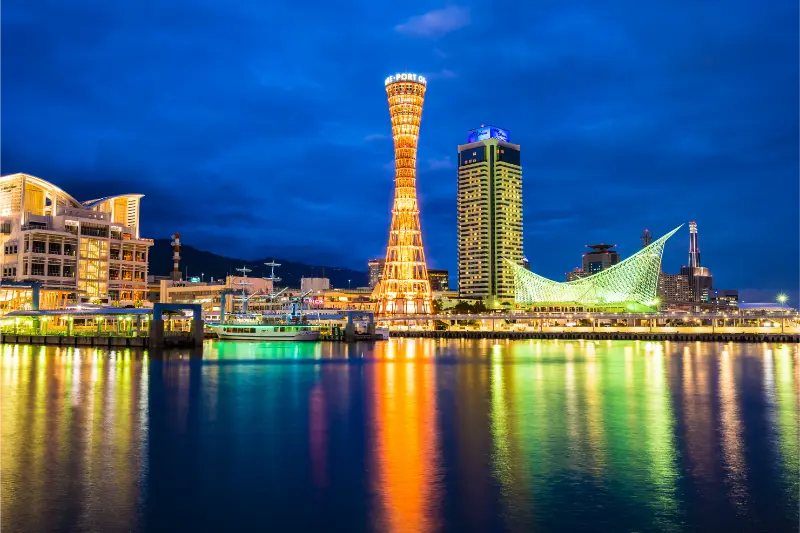
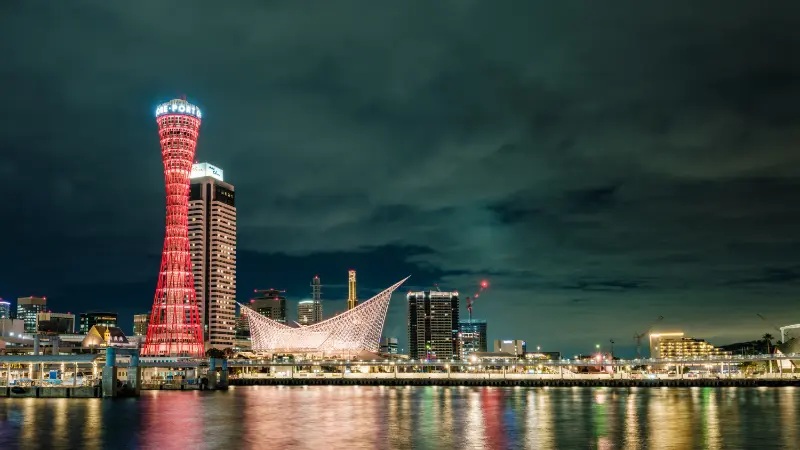
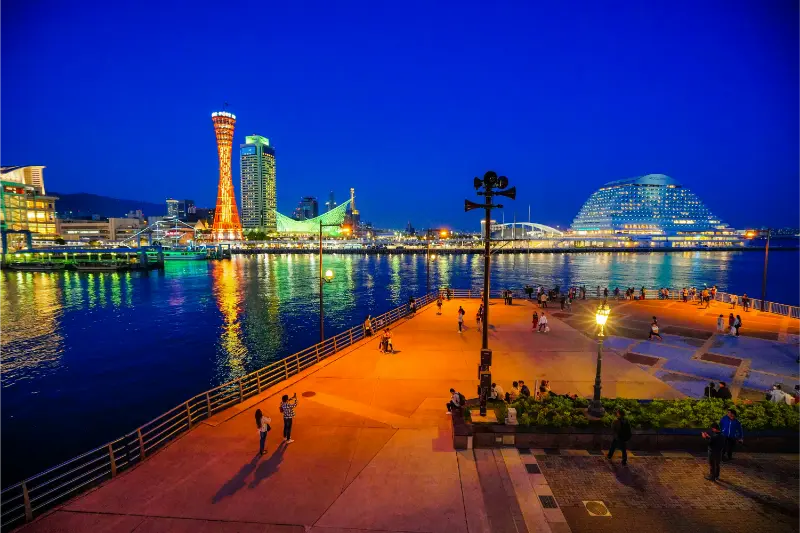
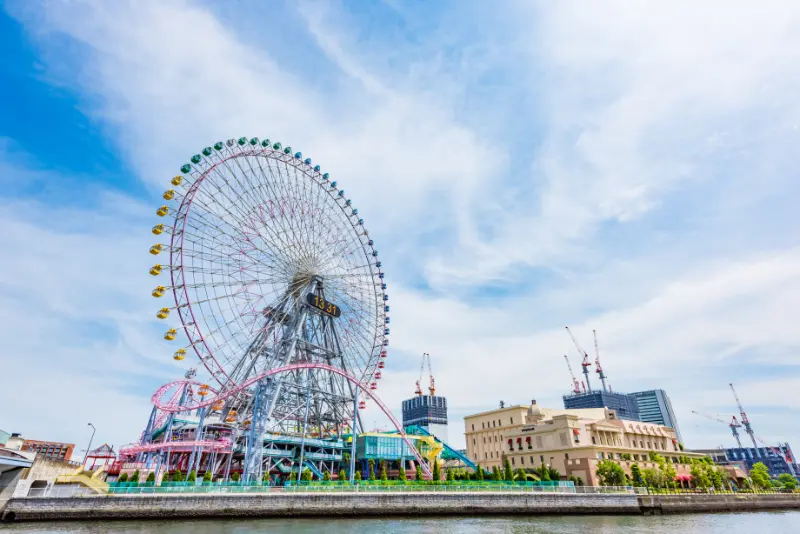
    The Minato Mirai waterfront and skyline in Yokohama

    A practical decision that saves time

    The official visitor guide lists direct airport and Tokyo rail connections and several local day passes. A pass is worthwhile only if your actual route uses enough eligible trains or buses; otherwise an IC card and normal fares may be simpler.

    Less obvious experiences worth keeping

    Noge, Bashamichi and the hillside streets of Yamate provide the texture missing from a waterfront-only itinerary. They help the city feel distinct from Tokyo rather than like a collection of attractions beside Tokyo Bay.

    Should you add a day trip?

    Kamakura is close and tempting, yet Yokohama does not need to be sacrificed for it. If the wider Japan trip already includes temples, coastal towns or Tokyo day trips, keep all four days in the city and use the final day for Sankeien or neighbourhood depth.

    A day trip earns its place when it adds a landscape, historical layer or experience that the city cannot provide. Count total door-to-door time, not only the advertised train, ferry or driving time.

    Travelling with children

    For families, the most resilient pattern is one main attraction before lunch, an easier second block, then an evening close to the hotel. Playgrounds, parks, aquariums, boats and markets can be more valuable than another formal museum. Build toilet, snack and shade opportunities into the route and verify age, height and stroller rules directly with any attraction where they matter.

    Travelling as a senior or at a slower pace

    Slower-paced travellers should reduce daily crossings before reducing the number of days. A central hotel, one taxi at the right moment and an afternoon rest can improve the trip more than deleting an important sight. Check lifts, steps, surfaces, heat exposure and seating for the exact attraction; broad claims that a whole district is accessible are rarely useful enough.
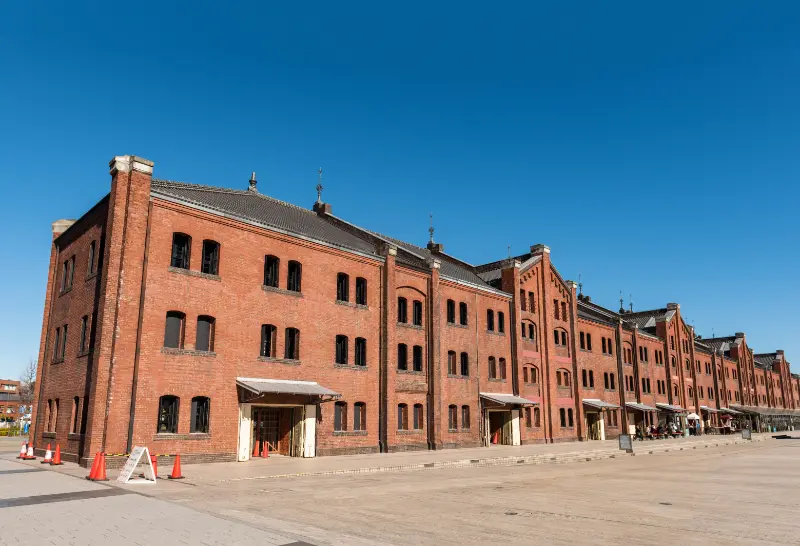
    Yokohama Red Brick Warehouse Kanagawa Japan

    Budget planning

    Separate the budget into accommodation, local transport, paid sights, meals and optional excursions. This makes trade-offs obvious: a more central hotel can reduce taxi costs, while one premium guided experience may provide more value than several mediocre admissions. Keep a contingency for weather changes, late transport and a meal chosen for convenience rather than price.

    Weather backup plan

    Prepare at least one indoor substitute and one outdoor activity that can move between days. Do not lock the entire trip to a forecast several weeks in advance; instead recheck two or three days before each weather-sensitive block. If conditions turn poor, protect the experience that is hardest to replace and move the flexible neighbourhood day.

    Accessibility and mobility

    Accessibility is route-specific. A destination may have accessible public transport yet still include steep streets, old paving, stairs or crowded entrances. Travellers using wheelchairs, walkers or strollers should verify the exact station exit and attraction entrance, and should consider a taxi for the one transfer that removes the largest physical barrier.

    Connectivity, payments and practical details

    Download offline maps, store the accommodation address in the local language where useful and keep an offline copy of important tickets. A local eSIM or SIM can make transport changes easier, but the day should not fail because a phone battery dies. Carry a power bank, a backup payment method and enough local currency for small transactions where cards or apps are unreliable.

    What to pack

    Comfortable walking shoes, destination-appropriate layers, sun or rain protection and a small day bag matter more than extra outfits. Add personal medication, a refillable bottle where practical and a compact power bank. Pack for the actual humidity, rain, wind, heat or cold of the destination rather than the average temperature shown by a generic weather widget.

    Common mistakes to avoid

    • Treating Yokohama as a two-hour evening extension of Tokyo.
    • Spending all four days in Minato Mirai.
    • Arriving at Yokohama Station and assuming every attraction is immediately outside it.
    • Queuing for every Chinatown meal at peak time.
    • Adding Kamakura automatically without considering the wider Japan itinerary.

    Responsible travel and local etiquette

    Residential streets, markets, places of worship and working neighbourhoods are part of daily life, not open-air sets. Keep doorways clear, follow photography rules, dress appropriately where required and support local businesses when it fits naturally. In natural or coastal areas, follow marked routes, local swimming guidance, closures and current environmental rules.

    If you have less or more time

    With one day less, remove the most distant excursion or the day with the most transport instead of compressing every highlight. With one or two extra days, add neighbourhood depth, a slower museum block or one nearby excursion that offers something genuinely different. Extra time should make the trip calmer, not simply add more pins to the map.

    Safety and decision-making on the day

    Use ordinary situational awareness, control valuables in crowded transport and use clearly identified taxis or trusted ride services where relevant. Conditions vary by neighbourhood and time of day, so current local advice is more useful than blanket labels. On excursion and departure days, set a turnaround time early enough that a delay does not threaten an expensive connection.

    Useful official resource

    Opening hours, fees, access rules, transport schedules and seasonal operations can change. Recheck the official source shortly before departure.

    Final planning checklist

    • Confirm passport, visa, transit and health requirements for your nationality.
    • Reserve the attraction or transport that controls the rest of the itinerary.
    • Save the accommodation address and first-day route offline.
    • Recheck weather, closures and transport notices before each critical day.
    • Keep at least one half-day flexible enough to absorb a delay.
    • Leave a generous buffer before flights and other expensive connections.

    A strong trip to Yokohama should feel as though you understood how the place fits together, not merely that you collected its famous names. Protect the reservations that matter, group the rest by geography and remove anything that creates more transit than experience.
  • Izumo, Japan: Sacred Shrine, Ancient History Museum and Sea Coast

    Izumo, Japan: Sacred Shrine, Ancient History Museum and Sea Coast

    Izumo, on Japan’s western Sea of Japan coast, offers something very different from the densely scheduled city breaks common in Tokyo or Kyoto. Its most famous shrine is closely tied to Japanese mythology, while a nearby history museum, a broad beach and a windswept cape turn the visit into a rewarding combination of culture and coast. The area is manageable without a rental car if you respect bus and rail timetables, but it is not a single pedestrian district. Visitors who allow two days can appreciate the places individually rather than spending most of their time rushing between stops.

    At a glance

    DestinationIzumo, Japan
    Suggested stay2 days
    HighlightsIzumo Taisha, museum, Inasa Beach
    Plan aheadMuseum closures and sparse coastal buses

    In this guide

    Why Izumo is a special cultural destination

    Izumo Taisha is among Japan’s most important Shinto shrines and is associated with the deity Ōkuninushi. The traditions surrounding the region appear in early Japanese chronicles and remain significant to worshippers today. That context matters when exploring: the shrine is not simply an architectural backdrop, and visitors should be considerate of people coming to pray. Reading basic etiquette beforehand makes the experience more rewarding than walking straight through the gates for photographs.

    Unlike the concentrated temple districts of some famous Japanese destinations, Izumo combines religious sites with a rural and coastal landscape. A visitor can move from the shrine approach to a historical museum, then continue toward the open sea. Distances are larger than they initially appear on a map, so an itinerary should reflect the transport options rather than a fantasy of effortless walking. This is especially important for anyone traveling with young children or limited mobility.

    Izumo Taisha and the shrine approach

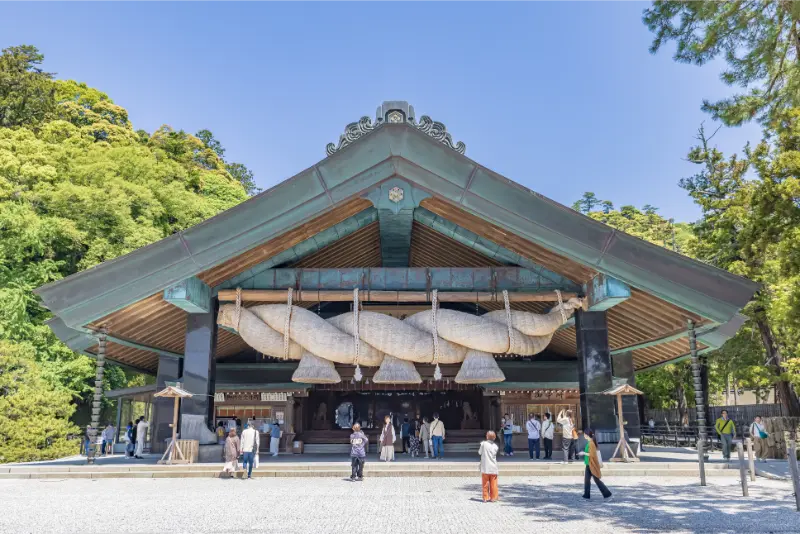
    Approach Izumo Taisha along the designated routes and take time to notice the torii gates and landscaped setting. The shrine is known for its distinctive large sacred straw ropes and its role in traditions connected with relationships and good fortune. Different parts of the precinct have different functions; observe signs, avoid restricted religious areas and keep conversations subdued around worshippers. Photography may be inappropriate in particular locations even if cameras are allowed elsewhere.

    The approach street, Shinmon-dori, provides opportunities to pause at shops or try a local snack. Rather than visiting only the main sanctuary and leaving immediately, allow time to understand the spatial relationship between the town and the pilgrimage site. If you cannot comfortably walk long distances, find the closest suitable bus stop and ask staff about the most practical entrance. The grandeur of the grounds does not guarantee that every surface or route is step-free.

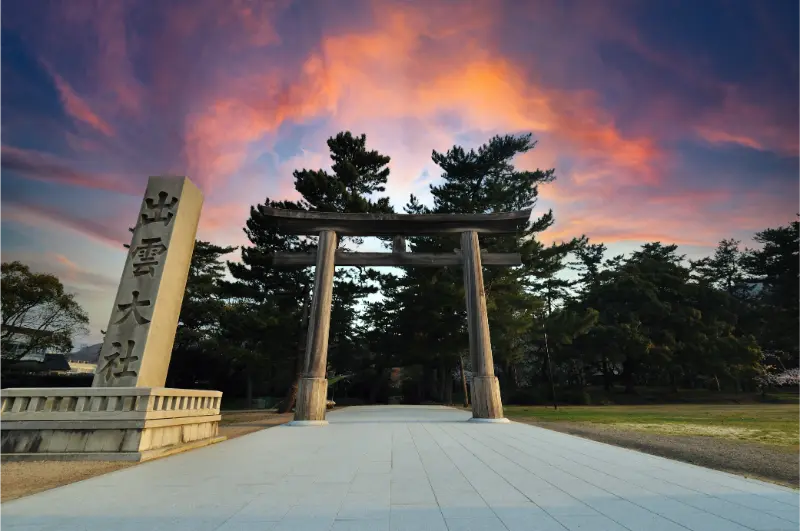
    Izumo Taisha Entrance Torii And Stone Inscription Izumo Shimane Japan

    Shimane Museum of Ancient Izumo

    The Shimane Museum of Ancient Izumo adds depth to a shrine visit, particularly for anyone who does not already know the region’s history. Exhibits include archaeological bronze finds, models and interpretation of shrine architecture and the surrounding culture. The collection makes the transition from mythology to evidence tangible, helping visitors understand how ancient communities organized ritual, trade and regional identity.

    The museum stands near the shrine but has its own opening calendar. Its published hours differ between warmer and colder periods, and it can close on specified Tuesdays or for maintenance. Treat that as an important scheduling detail: verify the date before arranging a day around it. Families may find the models more engaging than a lengthy written exhibit, while anyone requiring accessible facilities should check the museum’s current visitor guidance before arriving.

    Inasa Beach and the landscape of legend

    Inasa Beach, or Inasa no Hama, offers a short journey from the shrine area and connects local spiritual traditions to the physical coast. A distinctive rock feature, Bentenjima, gives the shoreline an easily recognizable focal point. This is a place to pause, hear the surf and look across the Sea of Japan rather than necessarily spend an entire afternoon swimming. Beaches that are photogenic can still have changing currents and wave conditions.

    A sunset stop can be particularly atmospheric, but plan the return bus or taxi before you stay until the last light. The combination of wind, sand and temperature often feels different from conditions around the shrine. Families should supervise children near surf and slippery rock; people using mobility aids should check the approach surface rather than assuming beach access will be easy. Religious or local ceremonies should be observed respectfully and without obstructing participants.

    Hinomisaki Lighthouse and coastal shrine

    Hinomisaki is a separate coastal excursion with cliffs, sea views and a striking white lighthouse. The nearby shrine adds cultural interest even if you decide not to climb the tower. The route can be beautiful, but wind and weather are important considerations. Japan’s official tourism guidance describes a substantial staircase inside the lighthouse, which makes the tower climb unsuitable for many travelers even when the surrounding area can still be visited.

    Do not confuse reaching the cape with having to climb the lighthouse. A calm walk near the permitted viewpoints may be rewarding on its own. The coastal landscape includes sensitive habitats, and access restrictions should be respected rather than bypassed to take photographs. Buses serving the area may operate at intervals that require planning; if you take a taxi outward, confirm how you will get back before the driver leaves.

    Izumo soba and everyday food choices

    Izumo is known for a darker style of soba noodle, often served in stacked round bowls or with toppings and broth arranged for personal preference. Trying it is a pleasant way to connect the region’s cultural visit with ordinary local food. Look for restaurants near the shrine approach or station, but do not assume that every shop serves meals all day. Some establishments have shorter opening periods or close once ingredients run out.

    Vegetarian or allergy-sensitive travelers should ask about stock and seasonings, as a dish that appears plant-based may contain fish-derived ingredients. Families can choose flexible restaurants where children can eat without a formal multi-course meal. Small cafes can also break up a long morning of walking. Having some cash remains useful in smaller businesses, even though card payment is becoming more common across Japan.

    Getting there and using local transport

    JR Izumoshi is a useful arrival hub for regional trains, while the Ichibata railway and local buses connect parts of the shrine region. The two rail systems do not always operate like a single seamless network, so plan transfers from the actual station names, not just “Izumo.” Travelers coming from Okayama or Matsue should compare departure and arrival stations and leave a sensible transfer margin. Flight connections may also involve local airport buses.

    For the shrine, museum and beach, public transport can work if you are comfortable consulting timetables. Hinomisaki is less convenient for spontaneous visits, especially later in the day. Download or print the relevant bus schedule before leaving Wi-Fi and note the last return service. A taxi can reduce walking but may cost more than expected over rural distances; confirm approximate fares and payment methods when budgeting.

    A realistic two-day itinerary

    Day one is best devoted to the shrine district. Start at Izumo Taisha before the busiest part of the day, explore Shinmon-dori, then visit the Ancient Izumo Museum after lunch. Finish with Inasa Beach if weather and energy allow. This sequence gives you time to read exhibits and observe the shrine without immediately hurrying toward a distant cape. In poor weather, shorten the beach visit and enjoy another indoor stop instead.

    Use day two for Hinomisaki, a longer regional excursion or a return to the shrine area at a quieter time. The cape deserves a proper half-day once transport and conditions are considered. If you have only one day, prioritize the shrine and museum; the beach is a reasonable addition, while squeezing in the lighthouse may make the entire trip feel rushed. A one-day visit can still be meaningful if you make deliberate choices.

    Where to stay and what to book ahead

    Accommodation around Izumoshi Station is convenient for trains, onward travel and evening meals. Staying nearer the shrine can provide a different atmosphere but may be less useful if you rely on early or late regional connections. Choose according to where you will spend most of your time, not simply which property has a traditional-looking photograph. Verify whether a hotel offers luggage storage, reliable breakfast hours and a practical route from the station.

    For visitors with mobility requirements, confirm elevator access, bed height, bathroom arrangements and walking distances to transport. Some traditional accommodations use tatami rooms and floor bedding, which can be uncomfortable for people who struggle to rise from a low sleeping position. Family room occupancy, child meals and any communal bathing arrangements need direct confirmation. Book the room that fits your group, not the one with the most appealing marketing language.

    Seasons, ceremonies and responsible visiting

    The area can be enjoyable across the year, although wind, rainfall and coastal conditions influence outdoor plans. Festivals and shrine ceremonies can attract many worshippers, change traffic flow and restrict access to particular precincts. The seasonal rhythm of the older lunar calendar also means that a religious observance described as taking place in one traditional month does not necessarily match the same Gregorian dates every year.

    Check the shrine’s calendar and the museum’s closure schedule close to your visit. If hoping for fall color or a particular ceremony, verify local timing rather than relying on a generic national Japan calendar. Never obstruct a ritual for photographs, and avoid entering roped-off areas. At the coast, keep distance from seabirds and other wildlife and obey restrictions on fragile natural sites.

    Families, accessibility and common planning errors

    Children may enjoy the great shrine gates, museum models and a beach stop, but not necessarily a full day of historical interpretation. Give younger visitors a simple theme to follow—boats, stories, buildings or unusual objects—and allow time to move around. Older travelers may prefer the shrine and museum with a seated lunch over a full coastal outing. Visitors with wheelchairs should check step-free paths and accessible restrooms separately for each stop, especially around older shrines.

    The most common mistakes are assuming every landmark is in one walkable cluster, arriving at the museum on a closure day, missing a sparse return bus from Hinomisaki and treating the lighthouse staircase as essential. Another mistake is assuming beach scenery means safe swimming. Prioritize experiences your group genuinely wants, reserve flexibility for the weather and use the official tourism and museum websites for current access details.

    • Matsuyama, Japan: Castle Views, Dōgo Onsen and a Relaxed Shikoku Stay
    • Tottori, Japan: Sand Dunes, Sand Museum and the Sea of Japan Coast
    • Shimonoseki, Japan: Karato Market, Kanmon Strait and an Undersea Walk to Kyushu

    Map and useful official information

    Frequently asked questions

    How long should I spend in Izumo, Japan?

    2 days is a sensible starting point. Use the time for izumo taisha, museum, inasa beach, then extend the trip only if you have specific additional activities in mind.

    Can families and older travelers enjoy Izumo, Japan?

    Yes, provided activities are selected according to individual needs. Pay particular attention to museum closures and sparse coastal buses, and confirm access at each venue rather than assuming every stop suits every visitor.

    What should I check before departure?

    Confirm current opening dates, transport arrangements, weather, site rules and any necessary bookings. Carry offline details for return journeys and leave room for changes to your plan.

  • Sukhothai in 4 Days: Historical Park, Temples and Si Satchanalai Without Rushing Thailand’s Ancient Capital

    Sukhothai in 4 Days: Historical Park, Temples and Si Satchanalai Without Rushing Thailand’s Ancient Capital

    If this stop is part of a wider trip, compare the pace with Northern Thailand in 9 Days: Chiang Mai and Chiang Rai Without Adding Too Many Mountain Stops. Use that article for the larger route and this guide for the practical details of staying in Sukhothai itself.

    Quick trip summary

    • Ideal stay: 4 days for a first visit.
    • Best approach: one major experience per half-day, with at least one flexible block for weather, fatigue or transport changes.
    • Good for: first-time visitors, couples, families, senior travellers and independent travellers who prefer a realistic pace.
    • Main planning risk: treating map distance as if transfers, queues, terrain, heat and meals took no time.

    Is this the right trip for you?

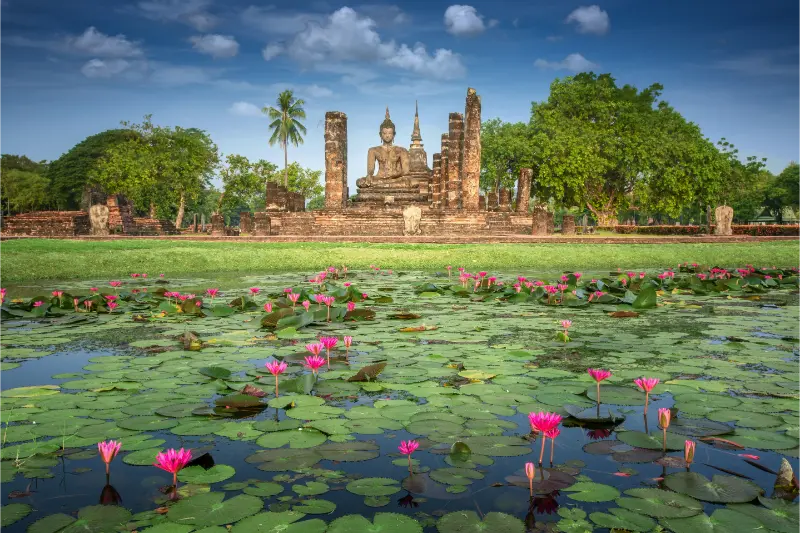
    Sukhothai is one of Thailand’s most rewarding historical destinations because the landscape is part of the experience. Temple ruins, ponds, trees and quiet roads spread across a broad archaeological area, making cycling and slow exploration more useful than a rushed list of monuments. Four days also gives you time for Si Satchanalai without turning the stay into constant road transfers.

    This destination works best for travellers who value a sense of place as much as a list of attractions. A realistic itinerary protects the experiences that justify the trip and leaves room for meals, transport and small discoveries. That matters even more when weather, terrain or seasonal transport can change the order of the day.

    Where to stay

    Area Why choose it
    Old Sukhothai / Historical Park Best for sunrise or early temple visits, cycling and a calm atmosphere after tour groups leave.
    New Sukhothai More local restaurants, services and transport links, but you need regular transfers to the park.
    Between old and new town Some resorts provide a quiet base with shuttle or taxi access; check distances carefully before booking.
    Si Satchanalai area Only sensible for travellers deliberately splitting the trip; most first-time visitors should stay around Sukhothai itself.

    Choose accommodation by the journeys you will repeat. Map the first morning, the area where you are likely to eat dinner and the departure point for any fixed excursion. A room that removes two awkward transfers every day can be better value than a cheaper property that creates constant taxi or transit costs.

    Before booking, read recent reviews specifically for noise, air-conditioning or heating, lift access, luggage handling and late check-in. These practical details often affect the trip more than decorative room features, especially in historic buildings, beach resorts or mountain towns.

    How to get there

    Sukhothai can be reached by domestic flight, long-distance bus or road transfer from northern and central Thailand. The airport is outside the main sightseeing area, and bus terminals are not beside the historical park. Arrange the first transfer in advance if arriving late.

    Save the accommodation address offline and screenshot the first transfer before travelling. Arrival day should carry less risk than the rest of the trip: avoid a non-refundable attraction immediately after a flight, long rail journey or road transfer, and leave extra time when baggage, immigration, weather or traffic can affect the first connection.

    Getting around

    Bicycles are ideal inside and around the main historical park for travellers comfortable in heat. Electric carts or local transport are better for some visitors, while outer temple zones require more distance. Between New Sukhothai and the historical park, use local transport, taxi or hotel transfer.

    Compare journeys door to door rather than station to station. Waiting time, stairs, the final walk and the number of transfers can matter more than the nominally fastest route, especially for families, senior travellers or anyone carrying luggage.

    A realistic itinerary

    The schedule below is a framework rather than a rigid timetable. Opening days, seasonal transport, weather and local events should determine the exact order. If a major attraction is closed or conditions are poor, move the whole block instead of forcing the rest of the trip to become inefficient.

    Day 1 – Central Historical Park

    Start early at the central zone with Wat Mahathat and nearby monuments. Move slowly, using a bicycle if comfortable, and take a long midday break. Return later for softer light rather than trying to cover every ruin before lunch.

    Day 2 – Northern and western temple zones

    Explore Wat Si Chum and other outer monuments, then choose a western-zone group according to heat and energy. Distances are larger and shade varies, so this day rewards a realistic pace more than a long checklist.

    Day 3 – New Sukhothai and local life

    Spend time in New Sukhothai for markets, food and a sense of the modern town, then return to one favourite historical area near sunset. This slower day helps prevent temple fatigue.

    Day 4 – Si Satchanalai

    Make a focused day trip to Si Satchanalai Historical Park if transport is arranged. The site is quieter and complements rather than duplicates Sukhothai. Leave enough daylight for the return.

    Keep enough margin for meals, transport and an unscheduled stop. If this block runs long, remove the lowest-priority extra rather than turning the rest of the day into a race.

    How many days do you really need?

    The itinerary above assumes a first visit with enough time to absorb the destination rather than simply photograph it. If you have one day less, remove the lowest-priority excursion and protect the core city experience. If you have one extra day, add a slower neighbourhood, a second nature block or a rest day instead of stretching every sightseeing day until evening.

    4 days is a strong first-trip length here because it gives the destination enough time for its essential sights and at least one slower or weather-flexible block. Travellers on a longer regional route can shorten the stay, but the cut should come from an excursion rather than compressing the core experience.

    Best time to visit

    The cooler dry season is easiest for cycling and long outdoor days. Hot months require very early starts and long midday breaks. Rain can make paths wet but also turns the landscape green; check local conditions rather than assuming every rainy-season day is unusable.

    Do not choose dates from average temperature alone. Check daylight, rainfall, local holidays, school breaks and the seasonal schedule of the one experience that matters most to you. Shoulder season is excellent only when the things you actually want to do are operating.

    What deserves advance booking?

    Accommodation near the historical park is worth booking early around major festivals, especially Loy Krathong. Most temple exploration stays flexible, but arrange long-distance transfers and Si Satchanalai transport in advance if your schedule is tight.

    Book the scarce item first, then build flexible sightseeing around it. A good trip does not need a reservation every two hours. Weather, transport delays, long lunches and simple fatigue are normal parts of travel, so leave at least one half-day that can move without causing a chain of missed bookings.

    Where and what to eat

    Try Sukhothai noodles and local market dishes, balancing street food with simple sit-down meals. The old-town tourist zone has convenient options, while New Sukhothai offers a wider local range. Carry water when cycling between temple groups.

    Do not make every meal a destination restaurant. A mix of one or two planned meals, cafés, markets and simple local places usually gives a better picture of how people actually eat. Keep dietary needs written in the local language if allergies or restrictions are important.

    Families, senior travellers and accessibility

    Older children often enjoy cycling and open temple grounds, but midday heat can quickly reduce attention. Senior travellers should consider electric transport, shaded breaks and hotels close to the park. Uneven surfaces and steps make some ruins only partially accessible.

    For mixed-age groups, plan around the slowest realistic pace. One major experience in the morning and one flexible block later usually works better than several timed entries. If step-free access, seating, toilets or lift availability are essential, confirm them directly with the attraction or hotel because historic districts and natural sites often provide only partial accessibility.

    Budget: where to spend and where to save

    The destination is good value compared with major Thai resort areas. Spend on comfortable local transport if heat or mobility makes cycling difficult, and on a well-located hotel that lets you visit the park early without a long transfer.

    Compare the total cost of a day, not only individual ticket prices. A hotel that removes repeated transfers, a driver that replaces three difficult connections or a flexible ticket that protects a weather-dependent plan may be better value than the cheapest option on paper.

    Safety and practical awareness

    Heat, dehydration, road awareness and uneven ruins are the main practical risks. Dress respectfully around sacred sites, avoid climbing restricted structures and use lights or reflective gear if cycling near dusk.

    Keep digital and offline copies of important booking details, use official or reputable transport and avoid carrying every card and document in one place. Before travel, check current government entry requirements and local official guidance because visa, health, transport and security conditions can change.

    One day trip or regional extension

    Si Satchanalai is the best historical extension. Do not combine it with several distant attractions on the same day; the value is having enough time to see how the second ancient city differs from Sukhothai.

    A day trip should add a different experience, not duplicate something already scheduled later in the journey. Measure it from hotel door to first attraction and back again, including waiting time, so a destination described as nearby does not quietly become a full transport day.

    How to handle bad weather or extreme heat

    Build one movable indoor block into the trip. Museums, markets, historic interiors, cafés or a long lunch can absorb the worst weather while viewpoints, waterfront walks and outdoor excursions shift to a better window. In hot climates, move the longest walk to the morning and protect the middle of the day; in cool or wet places, carry a light layer rather than cancelling the whole schedule at the first shower.

    Photography without turning the trip into a photo shoot

    Early morning and late afternoon usually offer softer light and fewer people, but the best photographs often come from staying long enough to understand how a place is used. Ask before photographing people at close range, respect restrictions in religious or museum spaces and avoid blocking narrow streets, trails or viewpoints for staged images.

    Common planning mistakes

    Common mistakes include staying far from the park without checking transfers, cycling through the hottest hours, visiting only the central zone and assuming all historical monuments can be covered comfortably in one day.

    A second mistake is leaving no recovery margin. Travel days, temperature changes and unfamiliar food or sleep patterns affect energy. The easiest way to protect the trip is to keep one low-priority block that can disappear without damaging the experiences you travelled for.

    Practical habits that make the trip easier

    • Save offline maps and the exact names of stations, terminals and hotel entrances.
    • Carry a small amount of local cash even when cards are widely accepted.
    • Check the last practical return option before starting a day trip.
    • Download tickets and booking confirmations before leaving reliable Wi-Fi.
    • Separate one payment card from your main wallet and keep backup contact details offline.
    • Recheck weather, transport notices and opening hours on the morning of any fixed excursion.

    Shopping and souvenirs

    Buy things that connect to the destination rather than generic travel souvenirs. Markets, museum shops and specialist craft or food stores are usually better places to understand provenance. If you are flying internationally, check customs rules before buying food, plants, animal products, antiques or large quantities of liquids.

    What to pack

    Comfortable footwear is the first priority. Add sun protection, a light rain layer and one modest outfit suitable for religious or formal cultural sites. Pack for the terrain and transport you will actually use: a small day bag is more useful than carrying the contents of your suitcase through a historic centre, beach or mountain railway.

    Official information to check before you go

    Opening days, transport, weather-sensitive access and event schedules can change. Recheck the details that control fixed reservations shortly before travel, especially during public holidays, major festivals or severe weather.

    Final planning checklist

    • Confirm passport, visa, entry and transit requirements for your nationality.
    • Choose accommodation by the journeys you will repeat, not by price alone.
    • Reserve only the attractions or excursions that genuinely control the day.
    • Save offline copies of tickets, hotel details, insurance information and essential addresses.
    • Check the exact airport, station, bus terminal, ferry pier or pickup point before arranging transfers.
    • Keep one flexible half-day for weather, fatigue or something discovered after arrival.
    • Recheck official opening information and local transport shortly before each fixed day.

    Final thoughts

    A good stay is not the itinerary with the highest number of pins. It is the one that protects the experiences you care about, leaves enough energy to notice the destination between them and can absorb a delayed arrival, hot afternoon or change of weather without collapsing. Use this plan as a structure, then let local conditions and your own pace decide the final order.

  • Seoul in 5 Days: Palaces, Markets and Neighbourhoods Without Spending the Trip Underground

    Seoul in 5 Days: Palaces, Markets and Neighbourhoods Without Spending the Trip Underground

    Seoul deserves a trip built around geography and real travel time rather than a checklist. Seoul’s subway is so effective that it is tempting to plan a day with six districts simply because every place has a station. The result is often more time underground than in the city. Five days works better when you group the historic centre, western neighbourhoods, the Han River and southern districts into separate zones and allow markets and cafés to be genuine experiences rather than transfer points.

    If this destination is part of a longer journey, compare the pacing with South Korea in 10 Days: Seoul, Gyeongju and Busan Without Changing Hotels Every Night. The useful question is not how many famous names fit on the map, but how much usable holiday time remains after transfers, check-in, meals, weather and rest.

    Quick trip summary

    • Recommended time: 5 days.
    • Best planning principle: group each day by geography and protect only the reservations that control access.
    • Best for: independent travellers, couples, families and slower-paced visitors who prefer a realistic rhythm.
    • Keep flexible: at least one half-day or one major activity that can move with weather, traffic or energy.
    • Book first: the accommodation location, scarce transport and any permit, timed entry or signature experience that shapes the rest of the trip.

    Is Seoul the right trip for you?

    Seoul suits travellers who enjoy contrasts: royal palaces beside office towers, markets near design districts, mountains visible beyond dense neighbourhoods and late-night food after museum days. It is excellent for families and independent travellers because transit is strong, but distances are large and stations can involve long corridors, stairs and transfers that matter for slower-paced visitors.

    The practical test is simple: decide what would make you disappointed if you missed it, then build the trip around that one or two priorities. Everything else should earn its place by fitting the same area of the day. This is especially important when travelling with children, older relatives or anyone who enjoys a slower pace.

    Where to stay: choose location before hotel style

    Base Why choose it
    Myeongdong / Euljiro Best for first-time access to central sights, airport buses and multiple subway lines, with many food options.
    Hongdae Best for younger travellers, nightlife, airport-rail convenience and cafés; less efficient for repeated palace mornings.
    Jongno / Insadong Best for historic sights, traditional streets and a calmer cultural focus close to several palaces.

    A more attractive room is not always a better travel decision. Before booking, map the first activity of the morning, the likely dinner area and the departure route. If the hotel adds two unnecessary transfers every day, the hidden cost is time as well as money.

    A realistic 5-day itinerary

    Day 1: palaces, Insadong and central Seoul

    Choose one main palace and give it proper time, then walk through Insadong or Ikseon-dong and finish near Cheonggyecheon. Avoid visiting multiple palaces simply because they are adjacent; their value increases when you have enough attention to understand one.

    Day 2: Bukchon, museum time and an evening district

    Visit Bukchon early and quietly, remembering it is residential, then move to a museum or cultural area. Finish in Myeongdong or another central district rather than crossing the river late solely to add a famous nightlife street.

    Day 3: Hongdae, Yeonnam and western Seoul

    Spend a slower day in Hongdae and Yeonnam, adding a market, university-area walk or cultural venue. The neighbourhood works best when you allow street life and cafés to fill time rather than scheduling a new attraction every hour.

    Day 4: Han River and southern Seoul

    Cross to Gangnam, COEX or another southern focus, then use the Han River as a genuine break. Choose one observation deck, design complex or shopping area instead of linking every modern landmark on the map.

    Day 5: choose a mountain, DMZ-style excursion or deeper city day

    Pick one major extension based on interests and current availability. A city hike gives a completely different Seoul experience; an organized border-area tour needs its own logistics. If neither appeals, use the day for markets, museums and a neighbourhood you missed.

    How to move around without wasting the day

    Seoul’s subway and buses cover the city extensively, and a rechargeable transport card simplifies transfers. Station names and signs are widely multilingual, but transfer walks can be long. Airport rail links Incheon and Gimpo with central Seoul, while airport buses can be easier with heavy luggage if they stop near your hotel. Compare door-to-door effort, not just train speed.

    Do not judge a journey only by kilometres. A short distance can include traffic, security, parking, boat boarding, luggage handling or a long final walk. For every important transfer, think in door-to-door time and keep a margin before anything expensive or difficult to replace.

    Best time to visit

    Spring and autumn are popular for mild weather, summer is hot and humid with rain periods, and winter is cold but often clear. Air quality and heat can matter as much as rain. Keep one museum or indoor district flexible and move outdoor palace or mountain time to the better part of the forecast.

    Seasonal advice should guide the style of the trip, not become a promise. Climate averages cannot tell you the exact conditions on your dates. Check the local forecast and any official closure, transport or safety notice again shortly before each weather-sensitive day.

    What to book first

    Most daily transit does not require advance booking, but special palace programs, performances, popular restaurants and organized border tours may. Book those anchors first. Leave markets and neighbourhoods open because Seoul rewards spontaneous food and café stops more than a rigid timetable.

    After those anchors are secure, leave ordinary meals, short walks and secondary sights open. A timetable with every hour reserved is fragile: one delay turns the rest of the day into a sequence of apologies and missed slots.

    Food strategy: eat well without scheduling every meal

    Markets, barbecue, noodles, cafés and convenience-store food can all fit one trip. For mixed-age groups, choose at least some restaurants where ordering and seating are straightforward rather than making every meal an adventure. Busy barbecue restaurants can involve waits, so have a nearby alternative rather than crossing the city for one famous venue.

    For a multi-age group, a reliable breakfast and an easy lunch often matter more than one additional attraction. Keep water accessible, avoid waiting until everyone is exhausted to look for food and use meal stops as genuine rest rather than another item to complete quickly.

    Travelling with children

    Children usually enjoy palaces more when combined with costume experiences, parks, river time or interactive museums. Subway travel is easy but stations are large, so a stroller can involve elevators and detours. Build fewer district changes into the day and keep snacks available between long transfers.

    Children do not need a simplified version of every adult attraction. They usually need a different rhythm: movement, shade, snacks, toilets and periods when nobody is asking them to pay attention. Protect those needs and the whole group usually sees more, not less.

    Travelling at a slower pace or as a senior

    Stay near a station with direct lines to your highest-priority districts and use taxis selectively for the last difficult connection. Palaces and museums can be spacious, so reduce the number of major sites before reducing rest. Avoid hotels reached only by steep lanes if mobility is a concern, even if the neighbourhood looks charming in photos.

    When mobility or stamina is limited, reduce transitions before reducing experiences. One well-located base, a direct transfer and a shorter route often preserve the most memorable parts of a trip far better than trying to keep the original schedule with longer rest stops.

    Budget: where the money really goes

    Public transport is economical, while cafés, shopping, observation decks and repeated ride-hailing can raise costs. Airport transfers vary by convenience. A good-value trip usually spends on one or two experiences that matter and uses the subway for ordinary movement rather than paying to avoid every transfer.

    Track the total cost of each planning choice. A lower hotel rate can be false economy after taxis, parking or long transfers, while a more expensive excursion may be reasonable if it replaces a rental car, guide and separate admission fees. Compare complete days rather than isolated prices.

    Weather fallback plan

    Rain favours museums, markets and covered shopping districts; extreme heat may justify a long midday indoor break. For mountain walks, check conditions and daylight rather than assuming a city trail is risk-free. If air quality is poor, move strenuous outdoor activity rather than stubbornly following the original sequence.

    The useful fallback is not a list of random indoor attractions. It is one realistic substitute that fits the same area or preserves the next day. Keep at least one activity movable so a poor forecast does not force you to choose between losing money and doing something unsafe.

    Connectivity, cash and small practical details

    Keep a local map app available because some global mapping functions are less useful in South Korea than travellers expect. Save addresses in Korean when possible and keep your transport card topped up. Public Wi-Fi is common, but a local data connection makes navigation and translation much easier.

    Save hotel addresses, tickets, permits, insurance details and the next transfer outside your email app. Offline access matters most precisely when the network is weak, your battery is low or you are trying to solve a delay.

    What to pack

    Wear shoes suited to long station corridors and hills. Summer requires light clothing, rain protection and hydration; winter needs a real insulated layer. Carry a small reusable bag because shopping and market stops often happen without planning them in advance.

    A small day bag should hold water, medication, sun or rain protection and the layer you are most likely to need. The goal is not to carry everything; it is to avoid having the useful items locked in a suitcase or parked car when conditions change.

    Common mistakes to avoid

    • Planning six distant districts in one day because the subway map makes them look easy to connect.
    • Visiting multiple palaces without giving any of them enough time.
    • Treating Bukchon as a photo set instead of a residential neighbourhood.
    • Booking a hotel near a station without checking how steep or complicated the final walk is.
    • Assuming every map app works equally well for Korean addresses and transit.

    Responsible travel and local etiquette

    Keep noise low in residential lanes such as Bukchon, follow posted photography guidance and use public spaces without blocking narrow streets. At palaces and memorial sites, treat cultural rules as part of the visit. Public transport makes low-impact travel easy, while city hiking should stay on marked routes.

    The best rule is to treat the destination as a real place rather than a stage built for visitors. Follow staff and ranger instructions, respect residential space and protected environments, and spend with businesses that add genuine local value instead of rewarding the most aggressive sales pitch.

    If you have less or more time

    Three days can cover the historic centre, one modern district and one neighbourhood day. Four days adds the river or a mountain. A week gives space for Suwon, a border-area tour or additional markets without forcing several far-apart districts into each day.

    Extra days are most useful when they reduce pressure. Before adding another distant stop, ask whether the trip improves more by sleeping in the same place, repeating a favourite beach or neighbourhood, waiting for better weather or enjoying a late breakfast without watching the clock.

    How to choose between similar experiences

    Choose Hongdae for youth culture and nightlife, Insadong/Jongno for history and central access, and Gangnam for modern Seoul. For a viewpoint, decide whether you want a tower experience or a free mountain panorama. The better choice is the one that contrasts with the rest of your itinerary.

    When two options offer a similar experience, choose the one that fits the geography and energy of the day. The extra hour of transfer rarely creates an extra hour of enjoyment, especially in heat, traffic, rough water or at altitude.

    Safety and decision-making on the day

    Seoul is generally easy for visitors, but crowded platforms, late-night districts and mountain weather still require ordinary judgement. Stand clear of platform flows, keep belongings controlled in dense markets and do not underestimate summer heat or winter cold during outdoor walks.

    Local warnings, ranger instructions and transport operators have more value than an itinerary written months earlier. Set a practical turnaround time for hikes, drives and water days, and change the plan when conditions deteriorate rather than trying to complete the original checklist.

    Useful official and planning resources

    Opening hours, protected-area rules, transport schedules, fees and visitor procedures change more often than the landscape. Recheck the source below shortly before departure.

    Final planning checklist

    • Confirm passport, visa, transit and health requirements for your nationality.
    • Reserve the transport, permit or timed entry that controls the rest of the itinerary.
    • Check how luggage moves between airport, road transfer, ferry, train or accommodation.
    • Download offline maps and save key tickets outside your email app.
    • Recheck weather, sea, road, trail or park notices before each critical day.
    • Keep at least one half-day that can absorb a delay or become simple rest.
    • Leave a generous buffer before international flights and other costly connections.

    A good trip to Seoul should feel like you understood the place, not merely that you passed through it. Keep the transport anchors fixed, leave room for conditions to change, and remove anything that does not fit your interests, mobility or energy. The result is usually more enjoyable than the most ambitious version of the same route.

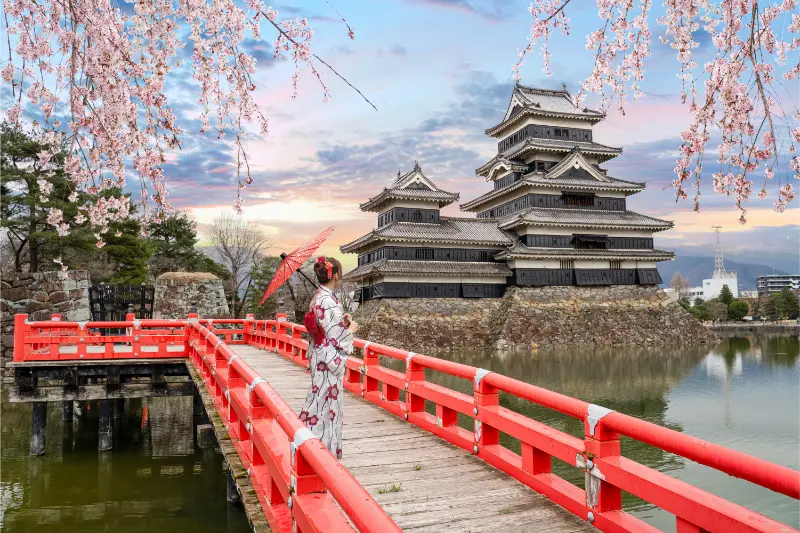
  • Matsumoto in 4 Days: Castle, Art and Japan Alps Without Using the City Only as a Mountain Gateway

    Matsumoto in 4 Days: Castle, Art and Japan Alps Without Using the City Only as a Mountain Gateway

    Matsumoto deserves enough time to feel like a destination rather than a box between two more famous places. 4 days give a first-time visitor room for the essential sights, neighbourhood life, meals and one flexible block without turning every morning into a race.

    If Matsumoto is part of a wider journey, compare the pace with our Japan Alps itinerary through Kanazawa, Takayama and Matsumoto. This city guide adds local depth rather than repeating the broader route.

    Quick trip summary

    • Ideal stay: 4 days for a first visit.
    • Best planning rule: group days geographically and protect one flexible half-day.
    • Best for: first-time visitors, couples, solo travellers, families and slower-paced travellers.
    • Main risk: using the destination only as a gateway or adding too many day trips.

    Why 4 days works

    A useful city break is not a contest to collect the maximum number of attractions. The best plan groups places that naturally belong together, protects the one or two reservations that genuinely matter and leaves enough slack for meals, weather, queues and simple wandering. That matters for every traveller, but especially for families, older visitors and anyone who prefers to finish the trip with energy left rather than needing a holiday from the holiday.

    Matsumoto has enough contrast to justify a real stay, but it is still manageable when each day has a clear geographic focus. The itinerary below alternates heavier sightseeing with easier periods so it works for different ages, interests and energy levels rather than only for fast-moving travellers.

    Where to stay

    Area Why choose it
    Central Matsumoto / station side Best for rail and bus connections, restaurants and easy luggage handling, with the castle still walkable.
    Castle / Nakamachi area More atmospheric for early walks and heritage streets, though some lodging is smaller and less convenient with large bags.
    Asama Onsen A good choice for hot-spring atmosphere and a quieter evening, but it requires local transport to the centre.
    Northern / residential Matsumoto Useful for slower stays and local life, but less efficient for a short first visit.

    Choose location before hotel style. Map the first morning, likely dinner area and departure route. A beautiful room that creates two extra transfers every day can cost more in time and energy than a slightly dearer room in the right district. Families should check room size, cot policy and lift access; light sleepers should read recent comments about street noise rather than trusting a neighbourhood label.

    A realistic 4-day itinerary

    Day 1: Matsumoto Castle and old streets

    Visit the castle early, then continue through Nawate and Nakamachi at a slower pace. Use the first day to understand the compact centre and avoid adding a mountain excursion immediately after arrival.

    Day 2: art, local history and neighbourhood time

    Build the day around the city art museum and one or two additional cultural stops, then leave room for cafés, shops and a relaxed meal. Matsumoto’s value is greater than the castle alone, so give contemporary culture a place in the itinerary.

    Day 3: Kamikochi or another mountain landscape

    Use the best weather day for Kamikochi when the route is in season, or choose another accessible mountain area such as Utsukushigahara or Norikura depending current transport and trail conditions. Start early, but keep the excursion proportional to your fitness and the season.

    Day 4: onsen, museum depth or a flexible finish

    Use the last day for Asama Onsen, the Former Kaichi School area, shopping or anything displaced by weather. If you are continuing toward Tokyo, Nagano or the Alps, protect the departure instead of forcing another distant viewpoint.

    Arrival strategy

    Matsumoto is reached efficiently by rail from Tokyo, Nagoya and other central Japan hubs, with buses also linking Alpine destinations. The main station is close to the city centre. For Kamikochi and some mountain areas, public transport is often preferable or required because private-car access can be restricted on key routes.

    Arrival day should carry less risk than the rest of the trip. Save the accommodation address offline, know the first transport option before landing or leaving the station, and avoid a non-refundable attraction immediately after a flight, train or long road journey. If the journey is delayed, remove a secondary sight rather than beginning the holiday by rushing with luggage.

    Getting around efficiently

    Central Matsumoto is compact enough for walking, with local buses useful for outer neighbourhoods and onsen areas. Mountain day trips require more careful timetable planning. Buy or reserve the critical transport segment first, then build the sightseeing around it rather than assuming a mountain bus will operate as frequently as urban rail.

    Compare routes door to door, not station to station. Waiting time, stairs, transfers and the final walk can make the nominally fastest option worse for a family, a senior traveller or anyone carrying luggage. Use transport to remove unrewarding distance and save walking energy for places where the surroundings are actually part of the experience.

    Best time to visit

    Spring and autumn are excellent for combining the castle with mountain scenery, while summer is useful for higher-elevation hiking. Winter can be beautiful but changes transport, clothing and trail expectations. The official tourism site publishes seasonal climate ranges and road or trail updates, which matter more than a generic Japan weather forecast.

    Seasonal planning should also consider daylight, local holidays, school breaks and whether your most important experience depends on clear skies, calm water or outdoor access. A shoulder-season trip is not automatically better if the one thing you came to do operates on a reduced schedule.

    What to book before arrival

    Book first the things that can genuinely damage the itinerary if unavailable: a capacity-limited landmark, a specific long-distance connection, a guided experience with few departures or a weather-dependent excursion. Keep ordinary neighbourhood walks, markets and flexible museums movable whenever possible. Leave a margin around timed entries so one slow meal or transport delay does not damage the rest of the day.

    Avoid the opposite mistake of reserving every hour. A useful booking creates certainty around something scarce; an unnecessary booking removes your ability to respond to weather, fatigue, local events or a place you unexpectedly want to explore longer. Keep at least one half-day with no fixed admission time.

    Food strategy

    Look for soba, local produce, miso-based dishes and regional sake while keeping meal logistics simple. A mountain excursion day needs an early, reliable breakfast and a realistic lunch plan. In the city, leave one evening unbooked so you can choose a place near the neighbourhood you actually finish exploring.

    Meals should also function as rest. A very good restaurant ten minutes from where you already are can be a better travel decision than a famous address requiring forty minutes of extra transport. Keep breakfast reliable, lunch practical and one or two dinners memorable rather than turning every meal into logistics.

    What is actually worth prioritising

    Matsumoto deserves one full city day even if the Alps are the main reason you came. The castle, traditional streets, art and onsen culture create a complete destination. One well-chosen mountain day is more satisfying than trying to use Matsumoto as a launchpad for several far-apart valleys in four days.

    Mountain access, seasonality and 2026 planning

    Mountain transport around Matsumoto is highly seasonal and can change with road, trail and weather conditions. The official tourism site posts current updates for routes such as Kamikochi and Norikura. It also notes that an accommodation tax applies to stays from June 1, 2026. Recheck the practical details close to travel instead of relying on a timetable saved months earlier.

    Should you add a day trip?

    Kamikochi is the classic choice when open and suitable for your group, but Norikura and Utsukushigahara can be better depending weather, interests and onward routing. If Takayama or another Alpine town appears elsewhere in your itinerary, avoid duplicating long mountain transfers from Matsumoto simply because they are possible.

    A day trip earns its place when it adds a landscape, historical layer or experience that the city cannot provide. It is less useful when it simply repeats a destination already included later in the same journey. Count total door-to-door time, not only the advertised train, ferry or driving time.

    Travelling with children

    With children, reduce transitions before reducing highlights. One substantial visit in the morning, an easy lunch and a park, waterfront, market or interactive stop in the afternoon usually works better than three formal attractions. Keep snacks, water and a simple exit route available. For babies and toddlers, check surfaces, stairs and changing facilities instead of assuming that “walkable” means stroller-friendly.

    Travelling as a senior or at a slower pace

    For senior travellers or anyone who prefers a slower pace, remove low-value walking rather than removing the experiences themselves. Use public transport, taxis, lifts or short transfers where they save energy, then spend that energy on the historic streets, viewpoints, gardens and museums that justify the trip. Check hotel lifts, shower access and the exact entrance route to older attractions before booking.

    Budget planning

    Build the budget in layers: accommodation, airport or station transfer, local transport, fixed attractions, food and a reserve for weather or fatigue. A cheaper hotel is not automatically a cheaper trip if it creates repeated taxi rides or long commutes. If a tourist pass exists, calculate it against the exact attractions and journeys you will use rather than buying it because the discount headline looks impressive.

    Weather backup plan

    Before each day, identify one outdoor anchor and one indoor alternative. Move museums, covered markets and cafés into the worst weather window and protect the experience that most needs good visibility or dry conditions. Temperature alone is not enough: wind, humidity, rain intensity, snow and daylight can completely change the practical value of a plan.

    Accessibility and mobility

    Accessibility varies sharply between modern transport and historic streets. If step-free access matters, verify the exact station exit, attraction entrance and hotel approach rather than relying on a general city label. Cobblestones, steep lanes, heat, ice, sand and older buildings without lifts can be more limiting than the nominal walking distance.

    Connectivity, payments and practical details

    Download an offline map, save the accommodation address and keep screenshots or offline copies of critical tickets. A local eSIM or data plan can make live transport easier, but the day should not fail because a phone battery dies. Carry a backup payment method and a small amount of local currency where markets, taxis or small businesses may still prefer it.

    What to pack

    Comfortable walking shoes, weather-appropriate layers, sun or rain protection and a small day bag matter more than extra outfits. Add personal medication, a refillable bottle where practical and a compact power bank if navigation and tickets are digital. Pack for the destination’s real conditions, not only for the headline temperature shown a week before departure.

    Common mistakes to avoid

    • Treating Matsumoto Castle as the only reason to stay overnight.
    • Planning Kamikochi without checking seasonal transport and current road conditions.
    • Assuming private cars can reach every mountain destination directly.
    • Booking back-to-back mountain days with no weather flexibility.
    • Ignoring the time needed to collect luggage before a long onward train.

    Responsible travel and local etiquette

    Residential streets, markets, places of worship and working neighbourhoods are part of daily life, not open-air sets. Keep entrances clear, follow photography rules, dress appropriately where required and support local businesses when it fits naturally. In natural areas, respect marked routes, closures and current safety guidance rather than looking for unofficial shortcuts.

    If you have less or more time

    With one day less, remove the most distant excursion or the day with the most transport instead of compressing every highlight. With one or two extra days, add neighbourhood depth, a slower museum block or one nearby excursion that offers something genuinely different. Extra time should make the trip calmer, not simply add more pins to the map.

    Safety and decision-making on the day

    Use ordinary situational awareness, keep valuables controlled in crowded transport and use clearly identified taxis or trusted ride services where relevant. Conditions can vary by neighbourhood and time of day, so current local advice is more useful than blanket labels. On excursion and departure days, set a turnaround time early enough that a delay does not put an expensive connection at risk.

    Current planning note

    Visit Matsumoto currently highlights Matsumoto Castle, museums, hot springs and mountain areas including Kamikochi, Norikura and Utsukushigahara. Its 2026 updates include seasonal road information and the accommodation tax introduced for stays from June 1, 2026.

    Useful official resource

    Opening hours, fees, access rules, transport schedules and seasonal operations can change. Recheck the official source shortly before departure.

    Final planning checklist

    • Confirm passport, visa, transit and health requirements for your nationality.
    • Reserve the attraction or transport that controls the rest of the itinerary.
    • Save the accommodation address and first-day route offline.
    • Recheck weather, closures and transport notices before each critical day.
    • Keep at least one half-day flexible enough to absorb a delay.
    • Leave a generous buffer before flights and other expensive connections.

    A strong trip to Matsumoto should feel as though you understood how the place fits together, not merely that you collected its famous names. Protect the reservations that matter, group the rest by geography and remove anything that creates more transit than experience.
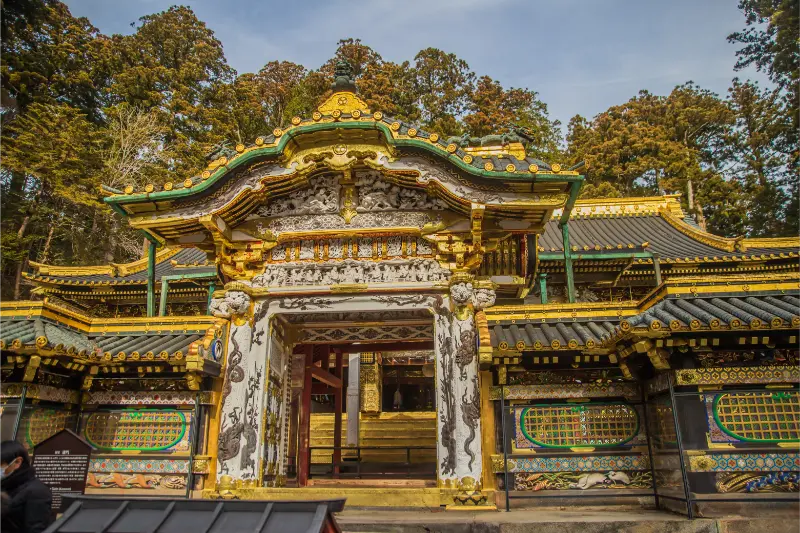
  • Nikko in 4 Days: World Heritage Shrines, Lake Chuzenji and Okunikko Without a Tokyo Day-Trip Rush

    Nikko in 4 Days: World Heritage Shrines, Lake Chuzenji and Okunikko Without a Tokyo Day-Trip Rush

    Nikko is often sold as an easy Tokyo day trip, but that format compresses its most important shrine complex and leaves little room for Lake Chuzenji, waterfalls and the quieter landscapes of Okunikko.

    This four-day plan uses central Nikko and the lake area as two practical zones. Buses are the backbone of local transport, so the route is organised around corridors rather than repeated returns to Tokyo.

    The official tourism guidance itself encourages visitors to stay longer than a day if they want to combine the World Heritage area with lakes, waterfalls and nature.

    Quick trip summary

    • 2 nights central Nikko and 1 night near Lake Chuzenji or Okunikko, with Day 4 departure.
    • Give the World Heritage shrines and temples a full unhurried day.
    • Move uphill to Lake Chuzenji rather than commuting from Tokyo each day.
    • Use buses for the core route and check current passes before purchase.
    • Keep autumn traffic and seasonal conditions in mind.

    Why this route works

    Central Nikko and Okunikko are different experiences, so one overnight in the higher lake area reduces repeated bus travel.

    Four days creates space for cultural depth and nature without demanding long hikes.

    The route is manageable without a car, which makes it useful for a wide range of travellers.

    A realistic itinerary at a glance

    Days Base Main focus
    1 Central Nikko Arrival and town
    2 Central Nikko World Heritage shrines and temples
    3 Lake Chuzenji/Okunikko Kegon Falls, lake and higher Nikko
    4 Departure Morning nature time and onward travel

    Day-by-day plan

    Day 1: Arrive and slow down

    Travel from Tokyo or elsewhere in Japan, check in and use the afternoon for the river, local streets and a light temple or food experience.

    Do not spend the arrival day trying to complete the full World Heritage circuit after a train journey.

    Day 2: World Heritage Nikko

    Give Toshogu, Rinnoji and Futarasan Shrine enough time to appreciate the details and forest setting rather than treating them as three quick tickets.

    Take breaks between complexes. Stone steps, crowds and humidity can make the area more tiring than its map size suggests.

    Day 3: Lake Chuzenji and waterfalls

    Travel by bus toward Lake Chuzenji, where the journey itself climbs dramatically into Okunikko. Kegon Falls, the lakefront and a short walk are enough for a full day.

    Stay in the area if possible so you are not forced onto an evening bus after every outdoor activity.

    Day 4: Okunikko morning and departure

    Use the morning for a lakeside walk, Ryuzu Falls, Senjogahara direction or another low-pressure nature stop according to season and mobility.

    Return toward the station with a large buffer, particularly during autumn foliage when roads can be heavily congested.

    Where to stay and how many hotel changes to make

    Central Nikko is best for the shrine district and evening convenience, while Lake Chuzenji or Yumoto gives quieter access to nature.

    A split stay is justified here because it reduces repeated mountain-bus travel rather than simply changing hotels for variety.

    Choose accommodation for geography before décor. A well-positioned room can save an hour every day and often matters more than a small difference in nightly rate.

    Read recent guest reviews for practical details that booking pages rarely emphasise: stairs, parking, road noise, breakfast hours, heating or air conditioning, and the real walk from transport.

    For rural bases, confirm dinner options and late-arrival procedures before booking. A beautiful property loses much of its appeal when every evening requires another difficult drive.

    Transport: what is worth planning in advance

    Buses are the main local transport and connect the station area with the World Heritage sites and Okunikko.

    Compare current passes with your exact journeys and remember that road congestion can make timetable estimates less reliable in peak foliage season.

    Measure every move door to door rather than by headline distance. Waiting, luggage, parking, ferries, mountain roads and the final local transfer can turn a short-looking journey into half a day.

    Save tickets, hotel addresses and maps offline. The places where navigation matters most are often exactly where mobile coverage becomes weakest.

    On transfer days, plan only one meaningful stop. Trying to turn every relocation into a sightseeing marathon is one of the fastest ways to arrive tired and late.

    Food and daily rhythm

    Yuba, soba, local sweets and ryokan meals can give the trip a strong regional identity.

    If staying in a quieter lake or onsen area, confirm whether dinner is included because evening restaurant choice can be limited.

    Use meals to shape the rhythm of the day. A long regional lunch can be both an experience and a recovery period after museums, hiking, heat or an early start.

    Do not make every meal another reservation. Mix destination restaurants with markets, bakeries, cafés and simple local places so food improves the trip instead of controlling it.

    If alcohol is part of the region’s identity, build the transport plan first. A tasting should never dictate risky driving later in the day.

    Families, children and older travellers

    Children can enjoy waterfalls, lakes and Edo-period experiences when temple time is balanced with outdoor movement.

    Older travellers should account for shrine steps and bus boarding; staying close to the main areas can reduce unnecessary walking.

    For multigenerational travel, the right pace is the one at which the least mobile member still enjoys the day. That usually creates a better shared trip for everyone.

    When accessibility matters, ask precise questions about steps, trail surfaces, boat boarding, lifts, toilets and vehicle access rather than relying on a generic accessibility label.

    Families should protect one low-pressure block every two or three days. That buffer is often more valuable than adding another attraction.

    Budget: where the money really goes

    Transport passes may save money only if they match your journeys, while ryokan stays can increase the nightly budget but include meals and onsen access.

    A single well-chosen overnight in Okunikko can be better value than repeated long day trips from Tokyo.

    Compare total trip cost rather than headline prices. Parking, transfers, fuel, tolls, ferries and guided activities can erase an apparent saving.

    The best splurges usually remove friction: a central room, a direct transfer, a good local guide or one extra night that prevents an exhausting move.

    Save money on low-value convenience rather than high-value experience. A cheaper hotel far from the places you care about can cost more in time and transport.

    Best time to go

    Spring and early summer are lush, autumn is spectacular but extremely popular, and winter creates a quieter snowy landscape with more limited conditions.

    Peak foliage periods require the most conservative transport planning because road delays can be substantial.

    Shoulder season often balances weather, crowds and prices well, but rural attractions, ferries, mountain services and seasonal restaurants may run reduced schedules.

    Weather should change the order of the day. Keep indoor or lower-effort alternatives so rain, heat, wind, snow or cloud does not force you to waste the trip.

    Recheck local conditions shortly before travel. Seasonal road access, boat operations and protected-area rules can change after the article is published.

    Comfort, accessibility and realistic pacing

    Separate the dense cultural day from the higher-altitude outdoor day.

    Use short walks and viewpoints rather than assuming every visitor needs a long hike around the lake.

    Travel fatigue compounds. One difficult relocation can weaken the following two days, which is why this itinerary avoids one-night bases unless geography genuinely requires them.

    A free half-day is not wasted time. It is insurance for weather, traffic, a tired child or a place you discover only after arriving.

    The best itinerary is not the one with the most pins on a map; it is the one that still feels enjoyable near the end of the trip.

    Small decisions that improve the trip

    Stay overnight

    Nikko becomes much calmer after day-trippers leave.

    Move uphill once

    A lake-area night reduces repeat bus time.

    Expect autumn congestion

    Build buffers rather than relying on the printed timetable.

    Do not rush the shrine complex

    The details are the point.

    What I would leave out on this length of trip

    Do not add multiple distant theme parks, Kinugawa and long Okunikko hikes to the same four days.

    Leave a full Lake Chuzenji circuit hike for travellers specifically prepared for it.

    Mistakes that make this trip harder than it needs to be

    • Treating Nikko as only a shrine day trip.
    • Visiting every temple complex without breaks.
    • Ignoring autumn road congestion.
    • Buying a transport pass without checking current coverage.
    • Booking a rural stay without understanding dinner options.
    • Planning a tight Tokyo connection after an Okunikko bus.

    How I would adapt the itinerary

    With one day, focus only on the World Heritage area.

    With six days, add Kinugawa, longer walks or a second nature night rather than commuting back and forth.

    Before booking

    • Check current bus timetables and passes.
    • Reserve ryokan meals/accommodation if desired.
    • Pack layers for the altitude difference.
    • Allow extra time in foliage season.
    • Save station and bus-stop names offline.

    Practical questions

    Is Nikko worth more than a day trip?

    Yes if you want Lake Chuzenji, waterfalls, onsen or quieter time around the shrines.

    Do I need a car?

    No for the core route. Buses cover the main visitor corridor.

    Where should I stay?

    Use central Nikko first, then consider one night near Lake Chuzenji or Okunikko.

    Final thoughts

    Nikko changes character when you stay overnight: the shrines stop feeling like a Tokyo excursion and the mountain landscape becomes part of the trip.

    Four days is enough for culture, lake scenery and a slower Okunikko experience without overloading the itinerary.

    How to keep the itinerary resilient

    Keep the nature choices on Days 3 and 4 flexible around visibility, rain and bus conditions.

    If traffic is severe, shorten the final morning rather than risking the onward train.

    What to book early and what can stay flexible

    Book the genuinely capacity-limited pieces first: ferries, protected-area permits, high-demand accommodation, guided activities and any transport that has only a few useful departures. Leave ordinary meals, secondary museums and weather-dependent outdoor plans looser. This creates a trip that is organised without becoming brittle.

    A week before departure, check official transport, attraction and weather information again. The night before every important move, verify the departure point, expected journey time and opening status. That small routine catches many avoidable problems before they become expensive or exhausting.

    A simple daily pacing rule

    Aim for one main experience, one secondary activity and one open block rather than three headline attractions. The open block can become lunch, a viewpoint, another café, a beach stop or simple rest. Finishing with energy left is usually better than forcing one more attraction.

  • Chiang Rai in 4 Days: Temples, Lanna Culture and Mountain Landscapes Without Rushing Northern Thailand

    Chiang Rai in 4 Days: Temples, Lanna Culture and Mountain Landscapes Without Rushing Northern Thailand

    Chiang Rai Chiang Rai deserves more than a rapid temple circuit between Chiang Mai and the border. Four days allow the White Temple, Blue Temple and Baan Dam to sit alongside markets, local food and one carefully chosen mountain or Doi Tung-area day. The key is avoiding the common mistake of turning every day into a long private-car excursion.

    If Chiang Rai is part of a wider journey, compare the pace with Northern Thailand in 9 Days: Chiang Mai and Chiang Rai Without Adding Too Many Mountain Stops. This city guide is designed to add local depth rather than duplicate the broader route.

    Quick trip summary

    • Ideal stay: 4 days for a first visit.
    • Best planning rule: group each day geographically and keep one weather or delay buffer.
    • Best for: first-time visitors, couples, solo travellers, families and slower-paced travellers.
    • Main risk: adding too many transfers, reservations or day trips to a compact stay.

    Why 4 days works

    Chiang Rai becomes easier to understand when the trip is divided into geographic themes rather than a master list of attractions. One main anchor per half-day is normally enough. That leaves space for meals, queues, unexpected closures, weather changes and the simple act of noticing a neighbourhood rather than photographing it and leaving.

    The first priority is to protect anything that is genuinely capacity-limited or weather-dependent. The second is to keep minor sights flexible. This distinction matters because travellers often overbook a city break with reservations that create stress but add little value.

    Where to stay

    Area Why choose it
    Central Chiang Rai Best for the night bazaar, bus links, restaurants and travellers without a car.
    Kok River area Quieter and greener, often with resort-style accommodation, though transport to evening food areas may be needed.
    North of centre Useful for some temple routes and larger properties, but check exact distance before assuming a walkable stay.
    Countryside stay Good for travellers prioritising scenery and quiet, but only if transfers are organised and city access is not important every evening.

    Choose location before hotel style. Map the first morning, the likely dinner area and the departure route. A beautiful room that forces two extra rides every day can be more expensive in time and energy than a slightly dearer hotel in the right district. Families and seniors should also check lifts, stairs, steep streets and the distance from the nearest practical transport stop.

    A realistic 4-day itinerary

    Day 1: centre, market and city temples

    Begin with central Chiang Rai rather than immediately leaving town. Visit a local temple or museum, explore markets and use the evening for the night bazaar. This gives context before the more famous contemporary temple sites.

    Day 2: White Temple, Blue Temple and Baan Dam selectively

    Group the major art-and-temple attractions geographically with a driver, tour or carefully planned transport. Do not force every photogenic site into the route. Leave enough time to look rather than only queue for photos.

    Day 3: Doi Tung or another mountain-area day

    Choose one mountain focus such as Doi Tung and its gardens, or another nature/cultural area that suits current road and weather conditions. The Tourism Authority of Thailand highlights several mountain attractions, but trying to combine all of them in one day creates more driving than experience.

    Day 4: slower local day or Golden Triangle only if it matters

    Use the final day for cafés, markets, river time or a selective Golden Triangle excursion. The border region is interesting, but it should not be automatic; travellers with limited interest in border history may gain more from a relaxed local day.

    Arrival strategy

    Chiang Rai has an airport and bus links to Chiang Mai and other northern destinations. Road travel from Chiang Mai is common but takes enough time that arrival and departure days should remain light. If flying onward, avoid returning from a distant mountain excursion immediately before the flight.

    Arrival day should carry less risk than the rest of the trip. Save the accommodation address offline, know the first transport option before landing and avoid a non-refundable attraction immediately after a flight, train or border crossing. If the journey is delayed, remove a secondary sight rather than beginning the holiday by rushing with luggage.

    Getting around efficiently

    The centre is manageable, but major attractions are spread out. Songthaews, taxis, ride services, private drivers and tours can all be useful. For mountain days, prioritise a safe vehicle and a realistic route over the cheapest possible transport.

    Compare routes door to door, not station to station. Waiting time, stairs, the walk to the stop, transfers and the final approach can make the nominally fastest option worse for a family, a senior traveller or anyone carrying luggage. Use transport to remove unrewarding distance, then spend walking energy where the surroundings are actually worth seeing.

    Best time to visit

    Cooler months are popular for mountain views and outdoor travel. Hot-season heat and seasonal haze can reduce the value of viewpoints, while wet-season landscapes are lush but roads and outdoor plans need flexibility. Check current air-quality and weather conditions rather than relying only on historical averages.

    Seasonal planning should also consider daylight, local holidays, school breaks and whether your most important experience depends on clear skies, calm water, mountain access or outdoor seating. A shoulder-season trip is not automatically better if the one thing you came to do is operating on a reduced schedule.

    What to book before arrival

    Pre-book only the elements that can break the itinerary if unavailable: a capacity-limited landmark, a specific long-distance connection, a weather-sensitive tour with limited spaces or an airport transfer at an awkward hour. Leave ordinary museums, cafés and neighbourhood walks flexible unless official guidance indicates otherwise.

    For timed tickets, build at least 30 to 60 minutes of margin around meals and local transport. A city itinerary should not become a chain of appointments where one slow queue ruins the rest of the day.

    Food strategy

    Northern Thai food is a major reason to slow down. Seek khao soi, local curries, grilled dishes, market snacks and coffee from the broader northern region. Spread tastings across the stay instead of turning one evening into an oversized food checklist.

    Meals should also function as rest. A very good restaurant ten minutes from where you already are can be a better travel decision than a famous address requiring forty minutes of extra transport. Keep breakfast reliable, lunch practical and one or two dinners memorable rather than turning every meal into logistics.

    Travelling with children

    With children, reduce transitions before reducing highlights. One major visit plus a park, market, waterfront or easy interactive stop often works better than three formal attractions. Carry snacks and water, know where the nearest easy transport option is, and leave the late afternoon flexible enough for a hotel break.

    For babies and toddlers, check stroller conditions rather than assuming “walkable” means smooth. Cobblestones, stairs, heat, snow, crowded markets and historic entrances can change the best route completely. A short taxi or public-transport hop can preserve enough energy to enjoy the destination rather than merely complete it.

    Travelling as a senior or at a slower pace

    Slower travel often improves a city itinerary because it forces better geographic choices. Use lifts, trams, metro, taxis or door-to-door transfers to remove unrewarding distance, then spend walking energy on the streets, parks, markets and viewpoints that make Chiang Rai distinctive.

    Check hotel lifts, shower access and the exact approach to major attractions if mobility is limited. “Accessible” can mean different things in a modern museum, a historic church and a centuries-old street. When in doubt, verify the specific entrance rather than relying on a general city label.

    Budget planning

    Build the budget in layers: accommodation, arrival and departure transport, local movement, fixed attractions or excursions, food and a reserve for changes. The cheapest hotel is not always the cheapest trip if it creates repeated taxi or transit costs. A city card is useful only when its zones and included attractions match the itinerary you will actually follow.

    Keep a small contingency for weather or fatigue. A taxi in heavy rain, an indoor attraction, a shuttle or a different departure time can protect a travel day. Saving money is valuable; sacrificing the main experience to avoid every small practical cost usually is not.

    Weather backup plan

    Before each day, identify one outdoor anchor and one indoor alternative. Move museums, markets, cafés or covered heritage visits into the worst weather window and protect the experience that most needs good conditions. Do not read only the temperature: wind, humidity, visibility, rain intensity, snow, sea state or air quality can matter far more.

    Accessibility and mobility

    Accessibility can differ sharply between modern transport, historic streets, older hotels and individual attractions. If step-free access matters, verify the exact station exit, hotel entrance and attraction route. Cobblestones, steep lanes, sand, stairs, altitude or heat may be the real constraint even when a destination is broadly described as accessible.

    Connectivity, payments and practical details

    Download an offline map, keep screenshots or offline copies of critical tickets and carry a backup payment method. A local eSIM or data plan can make live transport easier, but the day should not fail because a phone battery dies. Keep a modest amount of local currency where small businesses or transport may still require it.

    What to pack

    Comfortable walking shoes, weather layers, sun protection and a small day bag matter more than extra outfits. Add personal medication, a refillable bottle where practical and a compact power bank if tickets and navigation are digital. Pack for the destination’s real conditions, not only the headline temperature.

    Common mistakes to avoid

    • Treating Chiang Rai as only a one-day temple tour from Chiang Mai.
    • Combining the White Temple, Doi Tung and Golden Triangle in one rushed circuit.
    • Ignoring seasonal haze when planning mountain viewpoints.
    • Choosing remote accommodation without arranging evening transport.
    • Photographing religious spaces without respecting dress and local instructions.

    Responsible travel and local etiquette

    Residential streets, markets, places of worship, memorials and working neighbourhoods are real parts of a community rather than scenery. Follow local instructions, keep doorways and pavements passable, ask before photographing people in sensitive settings and spend with local businesses when it fits naturally.

    In natural areas, stay on marked routes, respect closures and follow current safety guidance. A weather closure, red flag, poor air-quality alert or transport suspension is not an invitation to find an unofficial alternative.

    If you have less or more time

    With one day less, remove the most distant excursion or the day with the most transport rather than compressing every highlight. With one or two extra days, add neighbourhood depth, a slower museum block or one nearby excursion that offers something genuinely different. The extra time should make the trip calmer, not simply increase the number of pins on the map.

    Safety and decision-making on the day

    Use ordinary situational awareness, keep valuables controlled in crowded places, use clearly identified transport and follow current local advice about specific streets, weather or transport hubs. Conditions can vary by neighbourhood and time of day, so current local guidance is more useful than blanket labels.

    Set a practical turnaround time for excursion and departure days. Missing a secondary attraction is cheaper than missing a flight, train or tour, and safer than forcing a route after conditions have changed.

    Current planning note

    Thailand’s official tourism authority highlights Wat Rong Khun, Baan Dam, Doi Tung and mountain landscapes around Chiang Rai, confirming that the province is much broader than a single temple circuit.

    Useful official resource

    Opening hours, fees, access rules and transport schedules change. Recheck the official source shortly before departure.

    Final planning checklist

    • Confirm passport, visa, transit and health requirements for your nationality.
    • Reserve the attraction or transport that controls the rest of the itinerary.
    • Save the accommodation address and first-day route offline.
    • Recheck weather, closures and transport notices before each critical day.
    • Keep at least one half-day flexible enough to absorb a delay.
    • Leave a generous buffer before flights and other expensive connections.

    A strong trip to Chiang Rai should feel as though you understood how the place fits together, not merely that you collected its famous names. Protect the reservations that matter, group the rest by geography and remove anything that creates more transit than experience.
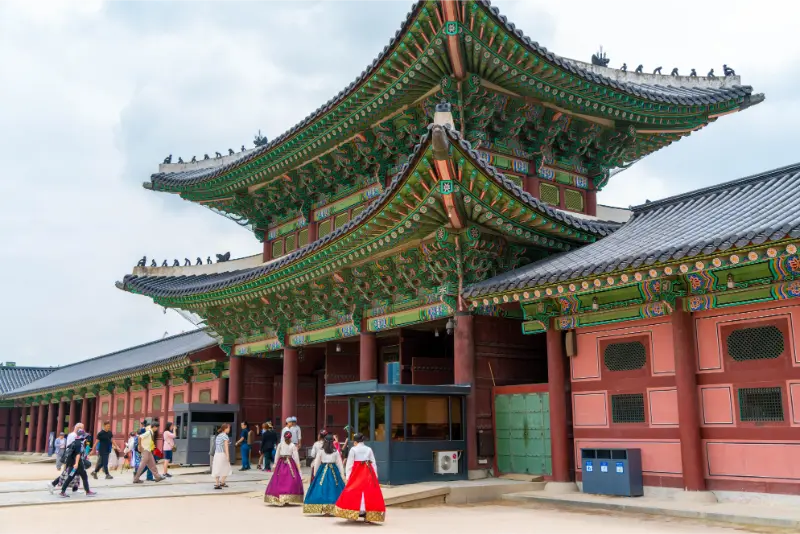
  • Kobe in 4 Days: Harbour, Kitano and Arima Onsen Without Treating It as an Osaka Side Trip

    Kobe in 4 Days: Harbour, Kitano and Arima Onsen Without Treating It as an Osaka Side Trip

    Kobe works best when it is treated as a destination rather than a box to tick inside a larger route. Kobe sits close enough to Osaka that many travellers reduce it to lunch and a harbour walk. Four days reveal a more complete city: international-port history, hillside neighbourhoods, sake brewing, mountain views, waterfront redevelopment and one of Japan’s classic hot-spring towns within the same municipal area.

    If Kobe is part of a wider trip, compare this city-level plan with Japan Beyond Tokyo in 10 Days: Kyoto, Nara, Hiroshima and Osaka Without Constant Packing. The broader itinerary helps with regional pacing; this guide focuses on the decisions that matter once you actually stay in Kobe.

    Quick trip summary

    • Ideal stay: 4 days for a first visit.
    • Best planning rule: group each day geographically and protect one flexible half-day.
    • Best for: first-time visitors, couples, solo travellers, families, older travellers and mixed-age groups.
    • Main risk: treating the city as a lunch stop from Osaka.

    Why 4 days works

    Kobe has enough range to reward several days, but it does not need an exhausting schedule. The key is to separate the large, time-consuming experiences from neighbourhood time. A good first visit should include headline sights, one or two deeper cultural blocks, ordinary meals and enough unstructured walking to understand how the city fits together.

    The itinerary below deliberately avoids putting a major attraction in every available slot. Queues, transit, weather, meal breaks and simple fatigue are part of travel. A plan that looks slightly under-filled at home often feels exactly right on the ground, especially when the destination includes museums, hills, large parks or a full-day excursion.

    The mountain and onsen parts of Kobe are not simply extensions of the flat waterfront. Check last transport, ropeway conditions and bathing rules before you commit to a late return.

    Where to stay in Kobe

    AreaWho it suits
    Sannomiya / MotomachiThe most practical first-time base for rail connections, restaurants, Chinatown and access to both the harbour and hills.
    Harborland / Meriken ParkBest for waterfront views and families who like modern promenades, though evenings can feel quieter than Sannomiya.
    Kitano / Shin-KobeUseful for travellers who prefer historic hillside streets and easy access to the ropeway and Shinkansen station.

    For a first visit, choose the district that shortens your most frequent journeys. A larger or cheaper room far from the places you care about can be a false saving once repeated transfers are included. Open the route from the hotel to your first morning stop, your likely dinner area and your departure station before booking.

    If noise matters, do not assume “central” means one thing. A room facing a nightlife street can feel completely different from a hotel two blocks away. Families and older travellers should also check lifts, steps, station exits and the final walk from public transport rather than relying only on the property’s distance from the centre.

    Getting there and getting around

    Kobe is served by JR, Hankyu, Hanshin, subway and local bus networks. Shin-Kobe is the Shinkansen station, while Sannomiya is the everyday urban transport hub. The city is compact east-to-west but climbs quickly toward the mountains, so a route that looks short can involve significant elevation. Arima Onsen and Mount Rokko need deliberate transport planning.

    For a wider Asian itinerary, compare high-speed rail, domestic flights and airport-transfer time door to door; the fastest segment on paper is not always the easiest overall journey.

    Plan journeys door to door. Add the walk to the station, security or ticket checks, platform changes and the final connection. A route shown as twenty minutes in a transport app can easily become forty once the whole movement is counted. The most efficient itinerary usually has fewer transfers, not the highest number of attractions.

    Kobe day-by-day itinerary

    Day 1: harbour, Chinatown and Motomachi

    Start around Meriken Park and Harborland, then walk toward Nankinmachi Chinatown and Motomachi. The route explains Kobe’s port-city identity without demanding much transport. Finish around Sannomiya, where there is a wider choice of restaurants than on the waterfront.

    Kobe Port Tower Against Stormy Night Sky

    Day 2: Kitano, Nunobiki and hillside Kobe

    Explore the Kitano district in the morning, then use the ropeway or walking routes around Nunobiki if weather is suitable. The contrast between foreign residences, greenery and the dense city below is central to Kobe’s character. Keep the afternoon light because hills add more effort than map distance suggests.

    Day 3: Nada sake district and Mount Rokko option

    Visit part of the Nada sake-producing area, choosing a few museums or breweries rather than trying to collect every tasting stamp. In the afternoon, use clear weather for Mount Rokko or Maya views. Travellers who do not drink can still enjoy the industrial and cultural history of the district.

    Day 4: Arima Onsen

    Make Arima Onsen the deliberate final day. Choose a public bath, day-use onsen or ryokan experience according to comfort and budget, and leave time for the compact town itself. Returning to Kobe in the evening is easy enough, but an overnight stay can be worthwhile if the wider Japan itinerary allows it.

    What to book in advance

    Reserve the few elements that can genuinely control the day: limited-capacity museums, timed heritage sites, a priority guided tour or an event you would be disappointed to miss. Leave ordinary meals and flexible neighbourhood walks unbooked. A city break becomes brittle when breakfast, lunch, dinner and every attraction all have fixed times.

    Before paying for a city pass, list the attractions you would actually enter and the transport you would actually use. Passes can be excellent value for a museum-heavy day but poor value when most of the itinerary is walking, markets and neighbourhoods. Check the current inclusions on the official website rather than relying on an old comparison table.

    Food and drink

    Kobe beef is the obvious splurge, but the city’s food identity is broader: Chinese-influenced dishes, bakeries, sweets, sake and casual local restaurants all matter. If Kobe beef is a priority, book a reputable restaurant and choose the meal that fits your budget rather than assuming the most expensive course is automatically better.

    Build meals into the geography of the day. Crossing the city twice for a restaurant seen on social media can cost more sightseeing time than the meal is worth. One destination restaurant is fine; the rest of the trip is often better when lunch and dinner happen naturally near the neighbourhood already being explored.

    For mixed-age groups, alternate quick meals with at least one comfortable seated meal each day. Carry water and a small snack so a delayed lunch does not force everyone into the first tourist trap. If anyone has allergies, dietary restrictions or religious requirements, prepare translated wording before travel instead of explaining it under pressure.

    Best time to visit Kobe

    Spring and autumn are excellent for combining hills, harbour and city walks. Summer is hot and humid; winter can be clear and crisp, especially for views. Mountain and ropeway conditions can change with weather, so keep the hillside day movable.

    Shoulder seasons often balance weather, room prices and crowds, but there is no universally best month. The right period depends on whether your priorities are outdoor time, museums, festivals, food, swimming, mountain views or lower costs. Check public holidays and major local events because one weekend can behave very differently from the week before it.

    Families, older travellers and accessibility

    For families, shorten museum blocks and alternate structured sightseeing with parks, food stops or open space. Older travellers often benefit from the same rhythm. A midday pause is not lost time if it prevents the final two hours of the day from becoming uncomfortable. Mixed-age groups should agree that splitting for one specialist attraction is perfectly reasonable.

    Accessibility varies not only by city but by individual attraction. Historic paving, stairs, steep streets, long metro corridors and crowded entrances can matter more than a distance shown on a map. Check the official accessibility information for any essential site and contact the venue directly if step-free access, wheelchair space or a specific lift is critical.

    Kobe Harbor Tower And Waterfront At Night

    A useful rule for multigenerational travel is to protect the first half of the day and simplify the second. Put the priority attraction in the morning, eat before everyone becomes tired, and keep the late afternoon optional. That structure makes it easier to recover from heat, rain, queues or a poor night’s sleep.

    A realistic budget

    Accommodation location usually matters more than a small difference in room price. A cheaper hotel that adds two long transfers every day can cost more in transport and, more importantly, consume the best sightseeing hours. Build the budget around a useful base, local transport, one or two paid priorities each day, food and a contingency margin.

    Keep a small daily buffer for ordinary friction: lockers, local taxes, luggage storage, an occasional taxi, extra drinks, a replacement transit ticket or a café stop during bad weather. These costs are normal. The budget becomes stressful only when every day has been planned with no margin at all.

    Weather backup plan

    Keep one indoor-heavy half-day movable. Museums, covered markets, cafés and long lunches are part of a resilient itinerary, not consolation prizes. Use the clearest weather for viewpoints, gardens and long outdoor walks, and move indoor culture to the weaker forecast instead of forcing the original order.

    For any exposed viewpoint, mountain, waterfront or long outdoor day, check conditions again on the morning itself. Visibility and comfort can change quickly. When the weather is poor, choosing a strong indoor alternative usually produces a better trip than forcing the original plan simply because it was written weeks earlier.

    Common mistakes to avoid

    • Visiting only for a Kobe beef lunch from Osaka.
    • Underestimating the steep walk from Sannomiya toward Kitano.
    • Trying to combine Arima Onsen, Mount Rokko and the harbour in one rushed day.
    • Booking a waterfront hotel without checking the evening atmosphere you actually want.
    • Treating Nada sake visits as a drinking challenge rather than a cultural experience.

    Most problems come from the same source: trying to extract maximum quantity from limited time. The best version of Kobe is not the itinerary with the most pins. It is the one that keeps travel distances sensible, gives major places enough attention and leaves enough energy to enjoy the city in the evening.

    Safety and practical habits

    Use ordinary big-city precautions: keep valuables secure in crowded transport and markets, use official or well-reviewed transport, and save the hotel address offline. Keep a backup payment method separate from the main wallet. Entry rules, health advice and local regulations can change, so check official government sources for your nationality before departure.

    Save essential addresses and tickets offline, keep a charging option for the phone and know which station or terminal you are actually using. If a day includes a long excursion, check the last realistic return connection before leaving in the morning. Small logistical checks prevent the kind of avoidable problems that consume an entire evening.

    Official information to check before you go

    For current visitor information, events, transport changes and attraction updates, use Visit Kobe. For the dates of your visit, verify opening hours, ticket arrangements and local transport rules before committing to reservations.

    Final planning checklist

    • Confirm passport, visa, entry and transit rules for your nationality.
    • Choose accommodation for location and transport convenience before room size.
    • Reserve only the attractions or events that genuinely control the day.
    • Save offline copies of tickets, hotel details and essential addresses.
    • Check the exact airport, railway station or terminal before booking transfers.
    • Keep one flexible half-day for weather, fatigue or something discovered after arrival.
    • Recheck official opening information and local transport shortly before each fixed day.

    Final thoughts

    Kobe becomes much more rewarding when the itinerary has enough structure to remove friction but not so much structure that every delay feels like a failure. 4 days give a first-time visitor room for the essential places, food, neighbourhoods and one or two deeper experiences without racing across the city. Keep the geography sensible, protect the experiences that matter most and let the rest of the trip breathe.

  • Phuket in 6 Days: Beaches, Old Town and Phang Nga Bay Without Changing Resorts Every Night

    Phuket in 6 Days: Beaches, Old Town and Phang Nga Bay Without Changing Resorts Every Night

    Phuket deserves a trip built around geography and real travel time rather than a checklist. Phuket is large enough that choosing the wrong base can turn a beach holiday into a daily traffic problem. Six days works well if you stay in one main area, group the southern beaches and viewpoints together, give Phuket Old Town its own half-day or evening, and keep only one major boat excursion fixed. The island becomes much easier when you stop trying to sample every resort strip.

    If this destination is part of a longer journey, compare the pacing with Southern Thailand in 10 Days: Krabi, Koh Lanta and Khao Sok Without Island-Hopping Every Day. The useful question is not how many famous names fit on the map, but how much usable holiday time remains after transfers, check-in, meals, weather and rest.

    Quick trip summary

    • Recommended time: 6 days.
    • Best planning principle: group each day by geography and protect only the reservations that control access.
    • Best for: independent travellers, couples, families and slower-paced visitors who prefer a realistic rhythm.
    • Keep flexible: at least one half-day or one major activity that can move with weather, traffic or energy.
    • Book first: the accommodation location, scarce transport and any permit, timed entry or signature experience that shapes the rest of the trip.

    Is Phuket the right trip for you?

    Phuket can suit almost any traveller, but not every part of Phuket suits every traveller. Patong is useful for nightlife and dense services; Kata and Karon balance beach access with restaurants; Kamala is calmer; Nai Yang and Mai Khao make sense for quieter stays and airport convenience. Families, couples, solo travellers and older visitors can all have a good trip if the base matches the desired pace.

    The practical test is simple: decide what would make you disappointed if you missed it, then build the trip around that one or two priorities. Everything else should earn its place by fitting the same area of the day. This is especially important when travelling with children, older relatives or anyone who enjoys a slower pace.

    Where to stay: choose location before hotel style

    Base Why choose it
    Kata / Karon Best all-round base for first visits: beaches, restaurants and reasonable access to southern viewpoints without Patong’s intensity.
    Kamala / Bang Tao Best for a calmer resort atmosphere and travellers who want good facilities without being in the main nightlife zone.
    Phuket Old Town Best for food and heritage rather than a classic beach stay; excellent for a split stay only if changing hotels adds real value.

    A more attractive room is not always a better travel decision. Before booking, map the first activity of the morning, the likely dinner area and the departure route. If the hotel adds two unnecessary transfers every day, the hidden cost is time as well as money.

    A realistic 6-day itinerary

    Day 1: arrive and use the nearest beach

    Do not cross the island for sightseeing after a flight. Settle into your chosen base, walk the local beach, identify transport options and have an easy dinner nearby. Phuket traffic can make a short map distance surprisingly slow at peak times.

    Day 2: southern beaches and viewpoints

    Group Kata, Karon, Nai Harn or a viewpoint according to where you stay. Choose two beach stops, not five. Swimming conditions change with season and red flags should be treated seriously. Sunset is more enjoyable when you are not trying to race from one crowded viewpoint to another.

    Day 3: Phuket Old Town and food

    Spend the hotter middle of the day in cafés, museums or shaded heritage streets. Old Town adds architecture and local food that a resort-only visit misses. Return to your beach base before late traffic if you want a relaxed evening.

    Day 4: Phang Nga Bay or another major boat day

    Use one full day for a bay or island excursion. Compare boat size, transfer time, passenger count and route, not only the list of photo stops. Sea conditions matter, and a smaller itinerary with more time at each place is usually better than eight rushed stops.

    Day 5: flexible beach, spa or northern island day

    Keep this day movable. If the sea is calm, use it for a second water activity; if weather is poor, choose Old Town, a cooking class or a slower resort day. Travellers staying north can explore quieter beaches rather than crossing south again.

    Day 6: easy morning and airport buffer

    Stay close to your base and leave more time than the raw distance suggests for the airport. Traffic around the island can be unpredictable. A final massage, breakfast or beach walk is a better use of the morning than one last distant attraction.

    How to move around without wasting the day

    Phuket does not have a rail system, and road traffic is the main constraint. Taxis, ride-hailing, hotel transfers and some bus services can all work, but no single option is perfect for every beach. Renting a scooter is not a beginner-friendly solution to traffic; road conditions, helmets, licensing and insurance matter. If you rent a car, parking and one-way loops in busy resort areas need to be part of the plan.

    Do not judge a journey only by kilometres. A short distance can include traffic, security, parking, boat boarding, luggage handling or a long final walk. For every important transfer, think in door-to-door time and keep a margin before anything expensive or difficult to replace.

    Best time to visit

    The drier period roughly from November to April is popular for beach conditions, while the southwest monsoon from around May to October can bring rougher seas and heavier showers. That does not mean rain every day, but boat trips and swimming become more weather-dependent. Red-flag beach warnings are more important than a generic seasonal label.

    Seasonal advice should guide the style of the trip, not become a promise. Climate averages cannot tell you the exact conditions on your dates. Check the local forecast and any official closure, transport or safety notice again shortly before each weather-sensitive day.

    What to book first

    Book accommodation and one priority boat excursion first. Keep other activities flexible enough to move around the weather. If you are travelling during Christmas, New Year or other peak periods, reserve airport transfers and high-demand restaurants earlier. Check whether hotel prices include the taxes and service charges shown only at the final booking step.

    After those anchors are secure, leave ordinary meals, short walks and secondary sights open. A timetable with every hour reserved is fragile: one delay turns the rest of the day into a sequence of apologies and missed slots.

    Food strategy: eat well without scheduling every meal

    Phuket is much more interesting if you leave the beachfront restaurant strip occasionally. Old Town has strong local Thai and Peranakan-influenced food, while beach areas offer everything from street food to international dining. Use busy, well-run stalls and restaurants, drink safe water and be specific about spice levels if the group has different tolerances.

    For a multi-age group, a reliable breakfast and an easy lunch often matter more than one additional attraction. Keep water accessible, avoid waiting until everyone is exhausted to look for food and use meal stops as genuine rest rather than another item to complete quickly.

    Travelling with children

    Choose a beach with convenient shade, toilets and food rather than chasing the most photogenic cove. Boat days can be long for small children, so ask about life jackets, shade and transfer time before booking. A resort pool or short beach morning is not a wasted day; it often keeps the rest of the family itinerary enjoyable.

    Children do not need a simplified version of every adult attraction. They usually need a different rhythm: movement, shade, snacks, toilets and periods when nobody is asking them to pay attention. Protect those needs and the whole group usually sees more, not less.

    Travelling at a slower pace or as a senior

    For older travellers, base location is more important than island coverage. Stay where restaurants and the beach are reachable without a steep road. Ask hotels about slopes, elevators and shuttle carts. On boat trips, speedboats can be physically demanding in choppy water; a larger vessel may be a better choice even if it takes longer.

    When mobility or stamina is limited, reduce transitions before reducing experiences. One well-located base, a direct transfer and a shorter route often preserve the most memorable parts of a trip far better than trying to keep the original schedule with longer rest stops.

    Budget: where the money really goes

    Phuket ranges from inexpensive local food to luxury beach clubs and resorts. Transport can quietly become one of the biggest costs if you cross the island repeatedly. A slightly more expensive hotel in the right base can therefore save both money and time. Compare excursion prices by inclusions, especially hotel pickup, park fees and meals.

    Track the total cost of each planning choice. A lower hotel rate can be false economy after taxis, parking or long transfers, while a more expensive excursion may be reasonable if it replaces a rental car, guide and separate admission fees. Compare complete days rather than isolated prices.

    Weather fallback plan

    Keep one fully flexible day. If the sea is rough, do not try to rescue the schedule with another boat company promising a smoother trip. Move inland to Old Town, a spa, café hopping or a cooking experience. Tropical showers can be brief, but lightning and strong surf require a real change of plan.

    The useful fallback is not a list of random indoor attractions. It is one realistic substitute that fits the same area or preserves the next day. Keep at least one activity movable so a poor forecast does not force you to choose between losing money and doing something unsafe.

    Connectivity, cash and small practical details

    Carry small cash for local purchases even though cards are widely used in hotels and larger businesses. Save your hotel name and address in Thai or on a map. For airport day, ask about realistic travel time at the exact hour you will leave rather than relying on the distance shown at noon.

    Save hotel addresses, tickets, permits, insurance details and the next transfer outside your email app. Offline access matters most precisely when the network is weak, your battery is low or you are trying to solve a delay.

    What to pack

    Light clothing, sun protection, a compact rain layer and sandals are obvious, but add secure footwear for viewpoints and boat piers. A dry bag protects phones on wet transfers. Reef-safe behaviour matters more than buying specialist gear: do not stand on coral or touch marine life.

    A small day bag should hold water, medication, sun or rain protection and the layer you are most likely to need. The goal is not to carry everything; it is to avoid having the useful items locked in a suitcase or parked car when conditions change.

    Common mistakes to avoid

    • Choosing a hotel solely because it says Phuket without checking which coast or beach it is on.
    • Renting a scooter without the licence, insurance and experience required for local roads.
    • Planning a boat trip for every day and leaving no weather buffer.
    • Ignoring red swimming flags because the beach looks calm near shore.
    • Crossing the island repeatedly for dinner, nightlife and sightseeing instead of grouping days geographically.

    Responsible travel and local etiquette

    Follow beach safety flags, avoid wildlife attractions that depend on inappropriate animal handling and choose marine operators that respect protected-area rules. Reduce single-use plastic where practical and never leave rubbish on remote beaches. In temples and local communities, dress and behave for the setting rather than as if the entire island were a resort complex.

    The best rule is to treat the destination as a real place rather than a stage built for visitors. Follow staff and ranger instructions, respect residential space and protected environments, and spend with businesses that add genuine local value instead of rewarding the most aggressive sales pitch.

    If you have less or more time

    With three days, stay in one beach base, add Old Town and choose one excursion. Four or five days is enough for a strong first visit. A week or more lets you add a second base in the quieter north or continue to Khao Lak, Krabi or an island without making Phuket itself frantic.

    Extra days are most useful when they reduce pressure. Before adding another distant stop, ask whether the trip improves more by sleeping in the same place, repeating a favourite beach or neighbourhood, waiting for better weather or enjoying a late breakfast without watching the clock.

    How to choose between similar experiences

    Choose Phuket when you want extensive accommodation, restaurants and easy flight access with beach variety. Choose Krabi for dramatic limestone scenery and a smaller mainland base; choose Koh Lanta for a slower island rhythm. If your wider trip already includes several islands, Phuket Old Town and one strong beach may add more variety than another sequence of boat tours.

    When two options offer a similar experience, choose the one that fits the geography and energy of the day. The extra hour of transfer rarely creates an extra hour of enjoyment, especially in heat, traffic, rough water or at altitude.

    Safety and decision-making on the day

    Road safety and sea conditions are the two everyday issues travellers should take most seriously. Wear helmets, use seatbelts when available and do not treat a short scooter ride as risk-free. On the water, follow crew instructions and postpone trips when conditions are poor. Protect valuables on crowded beaches without becoming anxious about normal travel.

    Local warnings, ranger instructions and transport operators have more value than an itinerary written months earlier. Set a practical turnaround time for hikes, drives and water days, and change the plan when conditions deteriorate rather than trying to complete the original checklist.

    Useful official and planning resources

    Opening hours, protected-area rules, transport schedules, fees and visitor procedures change more often than the landscape. Recheck the source below shortly before departure.

    Final planning checklist

    • Confirm passport, visa, transit and health requirements for your nationality.
    • Reserve the transport, permit or timed entry that controls the rest of the itinerary.
    • Check how luggage moves between airport, road transfer, ferry, train or accommodation.
    • Download offline maps and save key tickets outside your email app.
    • Recheck weather, sea, road, trail or park notices before each critical day.
    • Keep at least one half-day that can absorb a delay or become simple rest.
    • Leave a generous buffer before international flights and other costly connections.

    A good trip to Phuket should feel like you understood the place, not merely that you passed through it. Keep the transport anchors fixed, leave room for conditions to change, and remove anything that does not fit your interests, mobility or energy. The result is usually more enjoyable than the most ambitious version of the same route.

  • Nagoya in 4 Days: Castle, Industry and Local Food Without Treating It as a Train Change

    Nagoya in 4 Days: Castle, Industry and Local Food Without Treating It as a Train Change

    Nagoya Nagoya is one of Japan’s largest cities yet many rail travellers experience it only as a station name between Tokyo and Kyoto. Four days reveals a city with major industrial heritage, strong food traditions, accessible museums and a practical urban layout. It is particularly useful for travellers who enjoy understanding how modern Japan works, not only visiting preserved historic districts.

    If this destination is part of a wider trip, compare the pacing with Japan Beyond Tokyo in 10 Days: Kyoto, Nara, Hiroshima and Osaka Without Constant Packing. This city guide adds local depth; the wider itinerary is better for deciding how the stop fits into the rest of the journey.

    Quick trip summary

    Ideal stay4 days for a first trip
    Best approachGroup each day by geography and keep one flexible block for weather, energy or closures
    Transport strategyUse the most predictable transport for long moves, then explore each district locally
    Who it suitsFirst-time visitors, couples, solo travellers, families and slower-paced travellers
    Most common mistakeAdding another distant attraction because it looks close on a map

    How to plan the trip before booking

    Start by separating the itinerary into fixed reservations, weather-sensitive experiences and flexible neighbourhood time. Fixed reservations should be the things that can genuinely sell out or determine the rest of the day. Weather-sensitive blocks should stay movable until the forecast becomes useful. Everything else should be grouped geographically so that a late breakfast, a long museum visit or an unexpected queue does not break the schedule.

    A good 4-day trip does not look completely full on paper. Most days need one main anchor, one secondary experience and enough open time for a meal, rest, shopping, a viewpoint or something you discover after arrival. That unused space is not wasted time; it is what allows the itinerary to survive real travel.

    Where to stay: choose location before hotel style

    BaseWhy choose it
    Nagoya StationThe easiest base for shinkansen arrivals, airport connections and day trips.
    SakaeBest for nightlife, shopping and central urban energy, with strong subway connections.
    FushimiA useful middle ground between station and Sakae, with museums and restaurants nearby.
    KanayamaA transport-focused alternative with good rail links, useful when airport or regional trains matter more than central nightlife.

    A beautiful room is not automatically a useful base. Map the first activity of the morning, the likely dinner area and the route you will use on departure day. If the hotel creates two unnecessary transfers every day, the hidden cost is time and energy as well as money. For a short trip, location usually matters more than a larger room several kilometres away.

    A realistic 4-day itinerary

    Day 1: Nagoya Station, central orientation and Sakae

    Settle around the station, then use subway or a manageable walk toward Fushimi and Sakae. See the city as a functioning metropolitan centre rather than racing immediately to a day trip. An evening around Sakae introduces local food and makes the transport system familiar before the more structured museum days.

    Day 2: Nagoya Castle area and cultural museums

    Use the morning for the castle precinct and nearby historic or cultural sites, checking current access because restoration and building-access conditions can change. Continue to a museum that genuinely interests you rather than assuming every castle-related stop is essential. Finish with a meal built around Nagoya specialties.

    Day 3: Toyota industrial heritage and western city

    Reserve a substantial block for the Toyota Commemorative Museum of Industry and Technology or another industrial/transport museum. These sites explain a side of Japan that many itineraries skip. Pair the visit with the station area or Noritake Garden rather than crossing the city repeatedly.

    Nagoya TV Tower Mirrored By Oasis 21 Japan At Night

    Day 4: Atsuta, Osu and flexible neighbourhood time

    Visit Atsuta Jingu early, then move toward Osu for shopping streets, temples and a more informal atmosphere. If you have already seen enough urban sights, use part of the day for a nearby excursion such as Inuyama, but only if it adds something not already covered elsewhere in your Japan route.

    Getting from the airport or station and handling arrival day

    Nagoya Station is a major shinkansen and regional rail hub. Chubu Centrair International Airport connects by rail and other transport, but exact services and stopping patterns should be checked for your arrival time. The station complex is large, so save the hotel exit and route before arrival rather than relying on visual memory after a long journey.

    Arrival day should carry less risk than the rest of the trip. Keep the first reservation easy to cancel, know how you will reach the hotel before landing and save the address offline. If a flight or train is delayed, skip a secondary sight instead of beginning the trip by rushing across an unfamiliar city with luggage.

    Getting around without wasting the day

    Subway and rail are the backbone of a short visit. Buses fill specific gaps, but most visitors can group attractions by line and avoid complex transfers. Day passes can be useful on transit-heavy days, though they should be evaluated against your actual route.

    When comparing two routes, include the walk to the stop, waiting time, transfers and the final approach. The route with fewer changes is often better for families, luggage, older travellers and anyone visiting in difficult weather. Use transport to remove unrewarding distance, then spend walking energy on streets, viewpoints, markets and museums that actually define Nagoya.

    Best time to visit and how the season changes the itinerary

    Spring and autumn are comfortable for walking, summer is hot and humid, and winter is generally cool and drier. Indoor museums make Nagoya relatively resilient in poor weather, while shrine and castle grounds are better in comfortable conditions.

    Season changes more than temperature. It affects daylight, hotel prices, operating hours, event calendars and how tiring a normal sightseeing day feels. If your dates are fixed, adapt the daily rhythm rather than forcing an itinerary designed for another month.

    What to book first

    Reserve only the parts that genuinely control the itinerary: a high-demand attraction, a limited-capacity excursion, a special transport product or a restaurant that is central to the trip. Avoid pre-booking every hour. The more fixed reservations you add, the harder it becomes to react to weather, tiredness or a neighbourhood you unexpectedly want to explore for longer.

    Recheck opening days, reservation procedures, transport notices and access rules shortly before departure. These operational details change faster than the basic geography of a good itinerary. When an official source conflicts with an old screenshot, saved social post or outdated blog, use the current official information.

    Food strategy: eat well without crossing the city for every meal

    Nagoya has a distinctive food identity: hitsumabushi, miso katsu, tebasaki, kishimen and morning café culture are common starting points. Spread specialties across several meals rather than trying to eat a checklist in one evening. Station complexes are useful for food, but neighbourhood restaurants give the city more texture.

    For a multi-age group, a reliable breakfast and an easy lunch often matter more than one additional attraction. Use meals as genuine rest and part of the travel experience. A restaurant that is ten minutes from where you already are can be a better choice than a famous address that requires forty minutes of extra transport each way.

    Nagoya TV Tower Hisaya Odori Park In Daylight Japan

    Travelling with children

    Industrial and transport museums can work especially well for school-age children. Balance them with Osu or open shrine grounds rather than scheduling several formal museums consecutively. The station is enormous, so agree on a meeting point when travelling as a group.

    With children, reduce transitions before reducing the highlights. Alternate one structured visit with something that allows movement, and always know the easiest route back to the hotel before starting a long afternoon. A flexible snack and rest stop can protect the whole day better than another timed ticket.

    Travelling at a slower pace or as a senior

    Stay near a station with straightforward lift access and use subway connections instead of long surface walks in summer. Large museum campuses can involve more standing than expected, so keep the following block easy. Nagoya is a good city for slower travel because many major experiences are indoors and well connected.

    Slower travel often improves a destination itinerary because it forces better geographic choices. Use lifts, public transport, taxis or door-to-door transfers to remove unrewarding distance, then spend walking energy where the surroundings are worth noticing. Keep a seated break in the middle of any day with significant climbing, heat or museum time.

    Budget planning

    Build the budget in layers: accommodation, arrival and departure transport, local movement, fixed attractions or excursions, food and a reserve for spontaneous changes. The cheapest hotel is not always the cheapest trip if it creates two extra rides every day. Likewise, a city or transport pass is worthwhile only when its zones and included attractions match the itinerary you will actually follow.

    Keep a separate allowance for weather-driven changes. A taxi during heavy rain, a last-minute indoor attraction, a shuttle or a different departure can protect a travel day without representing a planning failure. Saving money is useful; sacrificing the main experience to avoid a modest practical cost often is not.

    Weather backup plan

    Rain is a good time for industrial museums, shopping complexes and food-focused exploration. Move Atsuta or other outdoor grounds to a drier window. In extreme summer heat, start outside earlier and use air-conditioned museums through the afternoon.

    Do not read only the temperature. Wind, visibility, rain intensity, humidity, sea state, snow and daylight can change the quality of an experience much more than a few degrees. The best itineraries have at least one outdoor block that can trade places with an indoor or neighbourhood day.

    Connectivity, payments and small practical details

    Download an offline map before arrival, save the accommodation address and keep screenshots or offline copies of critical tickets. A local data plan or eSIM can simplify live transport information where available, but do not depend on a phone battery for every part of the day. Carry a small power bank on long excursion days if navigation and tickets are digital.

    Payment habits differ by destination and smaller businesses may work differently from hotels. Keep a backup payment method and a modest amount of local currency when useful. Check whether transport uses contactless bank cards, a dedicated travel card, app tickets or paper validation rather than assuming the system matches another city.

    Accessibility and mobility planning

    Accessibility can vary greatly between modern transport, historic streets, older hotels and individual attractions. If step-free access is important, verify the exact station exit, hotel entrance and attraction route instead of relying on a general claim that a city is accessible. Historic centres may have cobbles, steep lanes or narrow pavements even when major museums provide lifts.

    Nagoya TV Tower Above City Street

    Travellers using wheelchairs, mobility aids or strollers should build in more time for transfers and keep an alternative route for the most important day. A hotel near the right transport line can remove more difficulty than any sightseeing pass.

    What to pack

    Comfortable walking shoes, a small day bag, sun protection and weather layers matter more than extra outfits. Add any medication you may need during the day and a refillable bottle where practical. Pack for the conditions at the destination rather than the temperature outside your hotel, and keep a light layer for strongly air-conditioned vehicles or indoor spaces.

    Common mistakes to avoid

    • Treating Nagoya only as a transfer between Tokyo and Kyoto.
    • Assuming all areas of Nagoya Castle have unchanged access during restoration work.
    • Crossing between distant museums without grouping by transit line.
    • Eating only inside the station and concluding the city lacks neighbourhood character.
    • Adding a distant day trip when the wider Japan itinerary already changes hotels frequently.

    Responsible travel and local etiquette

    Treat residential streets, markets, places of worship, memorial sites and working neighbourhoods as real parts of a community rather than scenery. Follow local instructions, keep entrances and pavements passable, ask before photographing people in sensitive settings and spend with local businesses when it fits naturally. Clothing, photography and behaviour expectations can change between religious, cultural and recreational spaces.

    In natural settings, stay within marked routes and respect closures even when another visitor appears to ignore them. Access rules often protect both visitors and the place itself. Wildlife should never be approached for a photograph, and weather or safety closures are not an invitation to find an unofficial route around a barrier.

    If you have less or more time

    With one day less, remove the most distant excursion or the day with the most transport rather than compressing every highlight. With one or two extra days, add neighbourhood depth, a slower museum block or a nearby excursion that offers something genuinely different. Extra time is most valuable when it lowers daily pressure, not when it simply adds another checklist.

    Safety and decision-making on the day

    Use ordinary situational awareness: keep valuables controlled in crowded places, use clearly identified transport and follow current local advice about specific streets, weather or transport hubs. Safety conditions can differ by neighbourhood and time of day, so official notices and recent local guidance are more useful than blanket claims that an entire destination is either “safe” or “unsafe”.

    Set a practical turnaround time for excursions and departure days. Missing a secondary attraction is cheaper than missing a flight, travelling exhausted late at night or forcing a route after conditions have changed. When a plan stops making sense, simplify it rather than trying to recover every item on the original list.

    Useful official and planning resources

    Opening hours, fees, transport schedules and access rules change more often than the overall itinerary. Recheck the official source shortly before departure.

    Final planning checklist

    • Confirm passport, visa, transit and health requirements for your nationality.
    • Reserve the attraction, tour or transport that controls the rest of the itinerary.
    • Save your accommodation address and first-day route offline.
    • Recheck weather, closures and transport notices before each critical day.
    • Keep at least one half-day that can absorb a delay or become simple rest.
    • Leave a generous buffer before flights and other costly connections.

    A strong trip to Nagoya should feel as though you understood how the place fits together, not merely that you collected its famous names. Protect the reservations that matter, group the rest by geography and remove anything that creates more transit than experience.