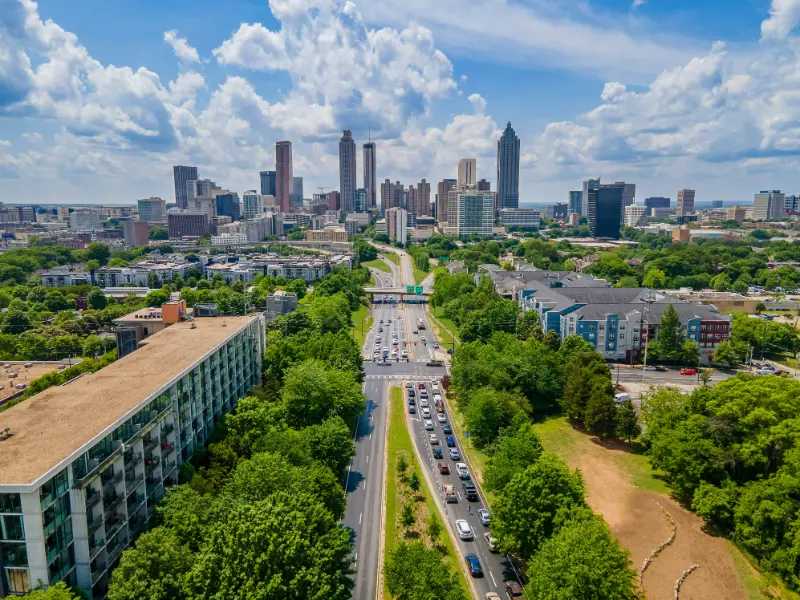
Category: North America

Practical travel guides for destinations in North America, focused on neighbourhood planning, transport, costs and first-time itineraries.

  • Atlanta in 4 Days: Civil Rights History, BeltLine and Neighbourhoods Without Spending the Trip on Highways

    Atlanta in 4 Days: Civil Rights History, BeltLine and Neighbourhoods Without Spending the Trip on Highways

    If this destination is part of a wider trip, compare the pace with Georgia, USA in 8 Days: Atlanta, Blue Ridge and Savannah Without Driving the State Twice. Use that article for the larger route and this guide for the practical details of staying in Atlanta itself.

    Quick trip summary

    • Ideal stay: 4 days for a first visit.
    • Best approach: one major experience per half-day, with at least one flexible block for weather, fatigue or transport changes.
    • Good for: U.S. city-break travellers, families, history travellers, food-focused visitors, sports and event trips and road trips through Georgia.
    • Main planning risk: treating map distance as if transfers, queues, heat, weather and meals took no time.

    Is this the right trip for you?

    Atlanta is spread out, but a good first trip does not need to become a motorway tour. The city makes more sense when you group Downtown attractions, civil rights history, BeltLine neighbourhoods and food districts into separate geographic days, using MARTA where it genuinely helps and rideshares only for the gaps.

    A realistic itinerary does not try to prove how much you can fit into a day. It protects the experiences that justify the trip and leaves room for meals, transport and the small discoveries that make one destination feel different from another. That matters even more when the city has strong seasonal weather, steep streets, busy transport or attractions with timed entry.

    Where to stay

    AreaWhy choose it
    MidtownStrong balance of MARTA access, restaurants, museums and walkability; one of the easiest first-time bases.
    DowntownConvenient for major attractions and conventions, but the experience varies sharply block by block and by event schedule.
    Old Fourth Ward / BeltLine areaExcellent for neighbourhood atmosphere, food and walking, though rail access is less direct in some sections.
    BuckheadUpscale hotels and shopping with MARTA access in parts, but farther from several historic attractions.

    Choose accommodation by the journeys you will repeat. Map the first morning, the area where you are likely to eat dinner and the departure point for any fixed excursion. A room that removes two awkward transfers every day can be better value than a cheaper property that creates constant taxi or transit costs.

    Before booking, read recent reviews specifically for noise, air-conditioning or heating, lift access, luggage handling and late check-in. These practical details often affect the trip more than decorative room features, especially in historic buildings or hot climates.
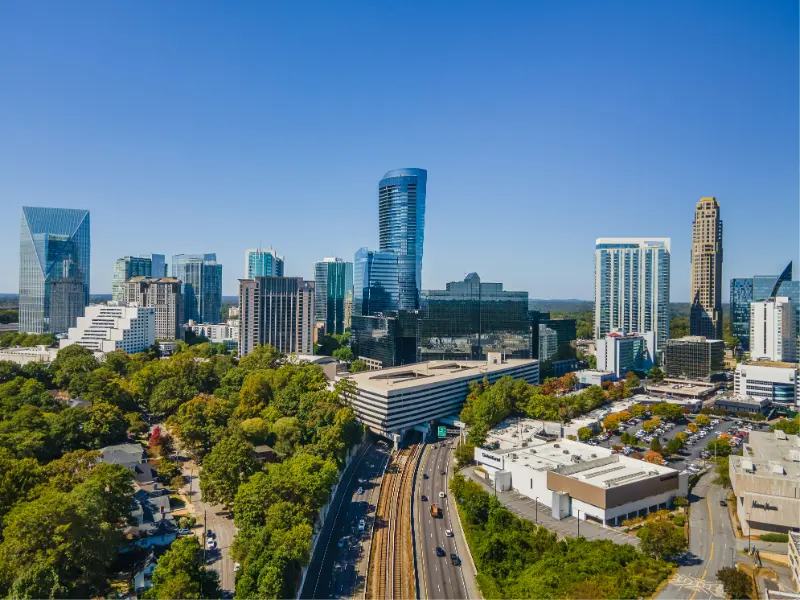
    Atlanta Piedmont Park Aerial View

    How to get there

    Hartsfield-Jackson Atlanta International Airport is connected directly to the MARTA rail network, which can be faster and simpler than driving to a central hotel. If renting a car for a wider Georgia trip, consider collecting it only when leaving the city so you avoid several days of parking costs.

    Save the accommodation address offline and screenshot the first transfer before travelling. Arrival day should carry less risk than the rest of the trip: avoid a non-refundable attraction immediately after a flight or long rail journey, and leave extra time when baggage, immigration, weather or traffic can affect the first connection.

    Getting around

    Use MARTA for the airport, Midtown, Downtown and selected north-south/east-west corridors. Walk within neighbourhood clusters and use rideshare for connections that would otherwise require awkward transfers. A car is useful for some outer attractions but is not mandatory for every visitor.

    Compare journeys door to door rather than station to station. Waiting time, stairs, the final walk and the number of transfers can matter more than the nominally fastest route, especially for families, senior travellers or anyone carrying luggage.

    A realistic itinerary

    The schedule below is a framework rather than a rigid timetable. Opening days, seasonal transport, weather and local events should determine the exact order. If a major attraction is closed or conditions are poor, move the whole block instead of forcing the rest of the trip to become inefficient.

    Day 1 – Downtown museums and Centennial Olympic Park area

    Group the major Downtown attractions you genuinely care about rather than buying tickets to all of them. The Georgia Aquarium, World of Coca-Cola, National Center for Civil and Human Rights and nearby park can fill more than a day, so choose two anchors and leave room for meals and lines.

    Day 2 – Martin Luther King Jr. history and Old Fourth Ward

    Make the Martin Luther King Jr. National Historical Park area the morning focus, then move into Old Fourth Ward and the BeltLine. Continue toward Ponce City Market if it suits your interests, using the afternoon as a neighbourhood day rather than returning Downtown repeatedly.

    Day 3 – Midtown, Piedmont Park and arts

    Use Midtown for the High Museum or another cultural priority, then spend time in Piedmont Park and nearby streets. This day is deliberately less ticket-heavy and works well after two structured sightseeing days.
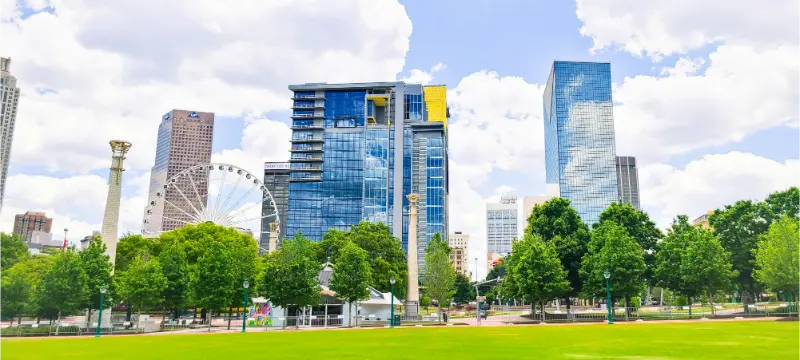
    Atlanta Midtown Towers From Park

    Day 4 – Choose one Atlanta beyond the core

    Pick one theme: Buckhead and history, a sports or event experience, food neighbourhoods, or an outer attraction such as the Atlanta History Center area. If beginning a Georgia road trip, use the second half of the day to collect the car and leave the city without backtracking.

    Keep enough margin for meals, transport and an unscheduled stop. If this block runs long, remove the lowest-priority extra rather than turning the rest of the day into a race.

    How many days do you really need?

    4 days is a strong length for a first visit because it gives the destination enough time for its essential sights and at least one slower or weather-flexible block. With one less day, remove the lowest-priority excursion rather than compressing every meal and transfer. With one extra day, add a regional experience or a deliberately slow day instead of stretching each sightseeing day until evening.

    If this stop sits inside a longer itinerary, count hotel changes, airport or station transfers and recovery time as real parts of the trip. A night that prevents two consecutive transfer days can be more valuable than another attraction.

    Best time to visit

    Spring and autumn are especially comfortable, though pollen can be significant in spring. Summers are hot and humid with thunderstorms, while winter is usually mild but can bring occasional disruptions. Major conventions, games and festivals can affect hotel prices more than the season itself.

    Do not choose dates from average temperature alone. Check daylight, rainfall, local holidays, school breaks and the seasonal schedule of the one experience that matters most to you. Shoulder season is excellent only when the things you actually want to do are operating.

    What deserves advance booking?

    Reserve high-demand attractions, major sports events and popular restaurants when your dates are fixed. Aquarium tickets and special exhibitions can be time-sensitive. Keep parks, BeltLine walking and neighbourhood exploration flexible.

    Book the scarce item first, then shape flexible sightseeing around it. Avoid prepaying every hour of the trip: a delayed flight, hot afternoon, heavy rain or long lunch should not create a chain of missed reservations.

    Where and what to eat

    Atlanta’s food scene ranges from Southern cooking and barbecue to global neighbourhood restaurants and modern tasting menus. Do not spend every meal around Downtown attractions; build at least one evening around the neighbourhood where you actually want to eat.

    Use meal planning to reduce unnecessary travel. If the day ends in a particular neighbourhood, eat there instead of crossing the city because one restaurant looked attractive online. Keep at least one meal unreserved so you can follow a market recommendation or change plans when energy is low.

    Families, older travellers and accessibility

    Families have many strong indoor attractions, but trying to combine all of them creates ticket fatigue. Older travellers should choose a hotel near MARTA or use rideshare strategically. Pavement and transit accessibility are generally better than in historic European centres, but distances between attractions can still be substantial.
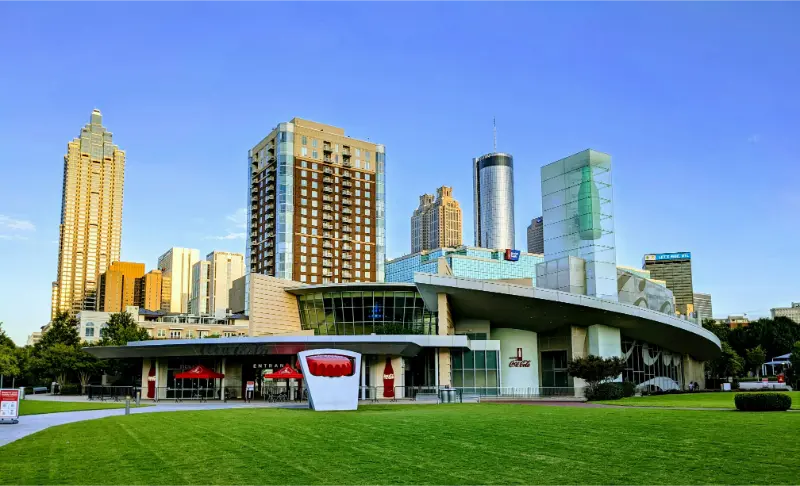
    Atlanta Centennial Olympic Park Skyline

    For mixed-age groups, plan around the slowest realistic pace rather than the fastest walker. One important sight in the morning and one flexible block in the afternoon usually works better than four timed entries. If step-free access, seating, toilets or lift availability are essential, confirm them directly with the attraction or hotel; historic districts often have partial accessibility rather than a simple yes-or-no answer.

    Budget: where to spend and where to save

    Attraction tickets and parking are the major cost drivers. Save by using MARTA from the airport, choosing a central base and mixing paid museums with parks and BeltLine time. Spend on the one attraction or event that matters most rather than buying every bundled experience automatically.

    Compare the total cost of a day, not only individual ticket prices. A hotel that removes repeated transfers, a driver that replaces three difficult connections or a flexible ticket that protects a weather-dependent plan may be better value than the cheapest option on paper.

    Safety and practical awareness

    Atlanta is a large city with neighbourhood-by-neighbourhood variation. Use normal urban awareness, especially late at night, and check current local guidance around your hotel and transit stop. Heat, traffic and pedestrian-unfriendly road crossings are also practical concerns.

    Keep digital and offline copies of important booking details, use official or reputable transport and avoid carrying every card and document in one place. Before travel, check current government entry requirements and local official guidance because visa, health, transport and security conditions can change.

    One day trip or regional extension

    Stone Mountain, small Georgia towns and North Georgia can be extensions, but they make more sense with a car. Savannah is not a casual Atlanta day trip; if it matters to your itinerary, give it separate nights.

    A day trip should add a different experience, not duplicate something already scheduled later in the journey. Measure it from hotel door to first attraction and back again, including waiting time, so a “one-hour” destination does not quietly become a four-hour transport day.

    How to handle bad weather or extreme heat

    Build every itinerary with one movable indoor block. Museums, markets, historic interiors, cafés or a long lunch can absorb the worst weather, while outdoor viewpoints and waterfront time can shift to a better window. In hot destinations, move the longest walk to the morning and protect the middle of the day; in rainy climates, carry a light layer rather than cancelling the entire schedule at the first shower.

    Photography without turning the trip into a photo shoot

    Early morning and late afternoon usually offer softer light and fewer people, but the best photographs often come from staying long enough to understand how a place is used. Ask before photographing people at close range, respect restrictions in religious or museum spaces and avoid blocking narrow streets for staged images.
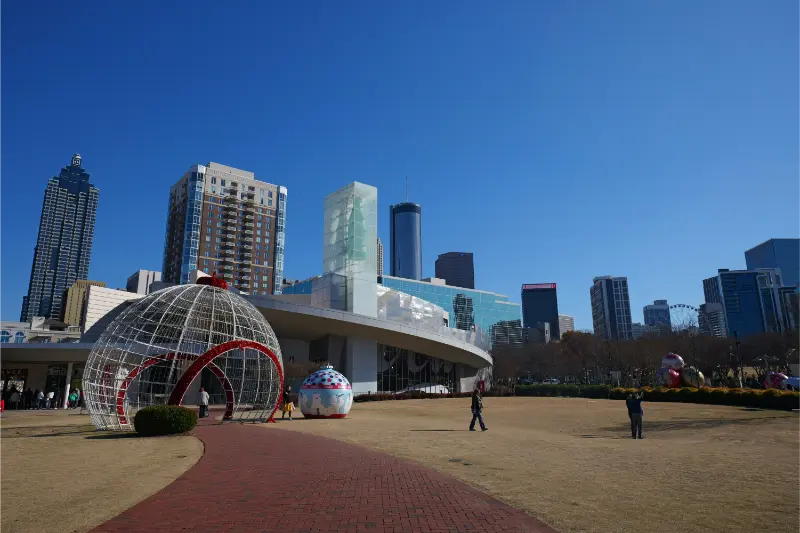
    Atlanta Centennial Olympic Park Plaza

    Common planning mistakes

    The biggest mistake is renting a car automatically and then paying to park it for four days. Others include booking a Downtown hotel solely on map distance, underestimating event traffic and trying to fit every major family attraction into a single day.

    A second mistake is leaving no recovery margin. Travel days, temperature changes and unfamiliar food or sleep patterns affect energy. The easiest way to protect the trip is to keep one low-priority block that can disappear without damaging the experiences you travelled for.

    Practical habits that make the trip easier

    • Save offline maps and the exact names of stations, terminals and hotel entrances.
    • Carry a small amount of local cash even when cards are widely accepted.
    • Check the last practical return option before starting a day trip.
    • Keep a refillable bottle where tap-water conditions and local guidance make that appropriate.
    • Download tickets before leaving reliable Wi-Fi.
    • Separate one payment card from your main wallet.

    Shopping and souvenirs

    Buy things that connect to the destination rather than generic travel souvenirs. Markets, museum shops and specialist craft or food stores are usually better places to understand provenance. If you are flying internationally, check customs rules before buying food, plants, animal products or large quantities of liquids.

    What to pack

    Comfortable footwear is the first priority. Add sun protection, a light rain layer and one modest outfit suitable for religious or formal cultural sites. In hot climates carry breathable layers; in places with strong air-conditioning, wind or cool evenings, keep a light extra layer in the day bag.

    Official information to check before you go

    Opening days, transport, weather-sensitive access and event schedules can change. Recheck the details that control fixed reservations shortly before travel, especially during public holidays, major festivals or severe weather.

    Final planning checklist

    • Confirm passport, visa, entry and transit requirements for your nationality.
    • Choose accommodation by the journeys you will repeat, not by price alone.
    • Reserve only the attractions or excursions that genuinely control the day.
    • Save offline copies of tickets, hotel details, insurance information and essential addresses.
    • Check the exact airport, station, bus terminal, ferry pier or pickup point before arranging transfers.
    • Keep one flexible half-day for weather, fatigue or something discovered after arrival.
    • Recheck official opening information and local transport shortly before each fixed day.

    Final thoughts

    A good stay in Atlanta is not the itinerary with the highest number of pins. It is the one that protects the experiences you care about, leaves enough energy to notice the destination between them and can absorb a delayed arrival, hot afternoon or change of weather without collapsing. Use this plan as a structure, then let local conditions and your own pace decide the final order.
  • Canadian Rockies in 7 Days: Banff, Icefields Parkway and Jasper at a Realistic Pace

    Canadian Rockies in 7 Days: Banff, Icefields Parkway and Jasper at a Realistic Pace

    A Canadian Rockies road trip is easy to underestimate because the main highway distances appear manageable. The problem is that almost every hour of driving contains reasons to stop: lakes, viewpoints, wildlife, trailheads and changing weather. A two-hour map estimate can become most of a day once you include parking, walking and the simple fact that you came to see the mountains rather than the dashboard.

    This seven-day route gives Banff and Jasper enough time to feel distinct and treats the Icefields Parkway as a destination in its own right. Conditions and access can change, and Jasper has continued to publish specific reopening and closure information following the 2024 wildfire, so official park updates should be part of the daily routine.

    Quick trip summary

    • Use two main bases—Banff/Lake Louise area and Jasper—rather than moving every night.
    • Treat the Icefields Parkway as a full scenic day, not a transfer to complete quickly.
    • Check Parks Canada bulletins, trail conditions and wildfire-related access before setting out.
    • Wildlife viewing should happen from a safe distance; never turn a roadside sighting into a traffic hazard.
    • Summer accommodation and popular activities can require early booking, but daily hiking choices should remain flexible for weather.

    Who this itinerary is for — and who should change it

    This route is designed for a first visit with a moderate pace: enough structure to avoid wasting days on poor logistics, but enough freedom to respond to weather, energy and unexpected discoveries. It suits couples, solo travellers, families and mixed-age groups who would rather remember several places clearly than remember a blur of transfers.

    If your priority is nightlife, serious hiking, luxury resorts or a single specialist interest, use the route as a geographic framework and replace the lower-priority days. A useful itinerary is not a test of how many attractions you can complete. It should make the important parts easier while leaving room to stop when something is better than expected.

    Where to stay: location decisions that change the trip

    Accommodation has more impact than the room itself. Check the first journey each morning, the last journey at night, luggage access, hills or stairs, nearby food and whether you can return for a break. A cheaper property that creates two difficult transfers every day can cost more in time, taxis and energy than a slightly more expensive base in the right place.

    BaseBest use and trade-off
    Banff townBest for restaurants, services and easy evening walks. It is convenient but busy and often expensive.
    CanmoreA practical alternative east of Banff with more accommodation and dining choice, though it adds driving to Lake Louise and western trailheads.
    Lake Louise areaExcellent for early access to nearby scenery, but accommodation is limited and costly. Parking/transit arrangements need checking.
    Jasper townThe natural base for the northern park. Availability and services may be affected by ongoing recovery, so verify what is open for your travel dates.

    A realistic day-by-day route

    Day 1: Calgary to Banff or Canmore

    Collect the car, buy anything you need for the first days and drive west without adding a major mountain hike after a long flight.

    Use the afternoon for Banff town, Bow River paths or an easy viewpoint depending on energy.

    If jet lag is significant, an early dinner and sleep will improve the rest of the week more than a forced sunset mission.

    Day 2: Banff-area highlights without chasing every lake

    Choose one substantial morning activity and one lighter afternoon area. Johnston Canyon, Lake Minnewanka, Sulphur Mountain or local trails should not all be squeezed into one day.

    Parking and shuttle systems can shape the order more than distance does. Check the current access rules rather than relying on an old itinerary.

    Keep the evening flexible for weather or wildlife-related delays.

    Day 3: Lake Louise and Moraine Lake planning

    Make this the Lake Louise zone day and follow the current Parks Canada shuttle/transport arrangements for Moraine Lake and other controlled-access areas.

    Select a walk appropriate to the group’s ability rather than choosing a trail solely because it is popular online. Mountain weather can change quickly.

    If travelling with young children or older adults, a lakeshore visit plus one short viewpoint can be a complete day when transport and crowds are included.

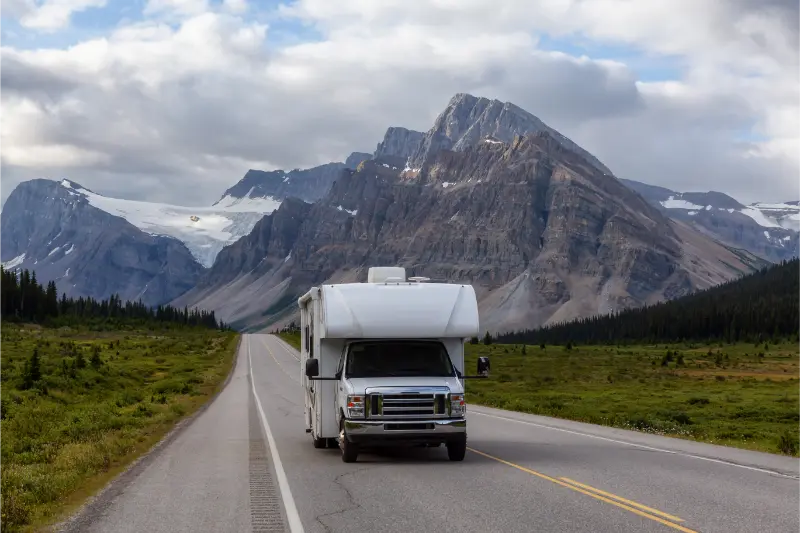
    Truck Driving On Mountain Highway Canadian Rockies

    Day 4: Icefields Parkway to Jasper

    Leave early with fuel, water and food. The road itself is the itinerary: viewpoints, short walks and glacier scenery can easily fill the day.

    Do not count on constant mobile coverage or services. Decide in advance which stops are priorities so you can skip lower-value ones if weather or traffic slows you.

    Arrive in Jasper before everyone is exhausted; wildlife is more safely appreciated when the driver is not rushing after dark.

    Day 5: Jasper close to town

    Use the first Jasper day for accessible sights near town, lakes or a moderate trail depending on what is open.

    Because wildfire recovery has changed access in some areas, verify current status with Parks Canada instead of copying a route published before 2024.

    A quieter afternoon in town or by a lake is often a better balance after the long Parkway day.

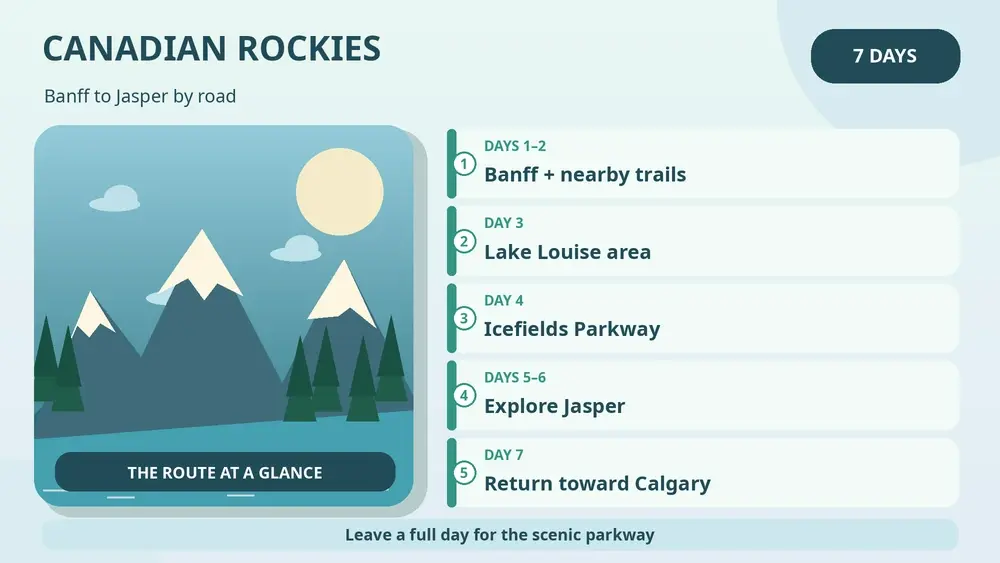
    Illustrated Canadian Rockies road trip from Banff through the Icefields Parkway to Jasper

    Day 6: one Jasper priority day

    Choose one major experience: Maligne area if accessible, a longer hike, a scenic drive or another park zone confirmed open.

    Avoid driving large distances merely to recreate an old checklist when closures or conditions make another area more practical.

    Use the evening to prepare for the return drive and check weather across the route.

    Day 7: return toward Calgary with realistic flight planning

    If your flight is the same day, leave substantial margin and consider sleeping farther south the previous night. Mountain roads, stops and weather are poor companions to a tight airport deadline.

    If you have another night, break the drive in Banff/Canmore and make the final airport transfer calmer.

    Do not schedule the most important hike on the departure morning.

    Pace check: if the previous stage ran late, remove the lowest-priority stop rather than stealing time from meals, sleep or the next transfer. The route is deliberately built with places where you can simplify it without breaking the whole trip.

    Transport reality: what the map does not show

    A rental car gives the most flexibility, but the parks increasingly use transit and shuttle systems at heavily visited locations. Current access rules around Lake Louise and Moraine Lake should be checked directly with Parks Canada. On the Icefields Parkway, start with sufficient fuel and do not assume every service is open. Download offline maps, but treat official closure information as more authoritative than routing software. Mountain passes, construction, snow and wildfire conditions can change the trip even outside winter.

    Door-to-door time is the number that matters. Add checkout, reaching the station or port, waiting, boarding, transfers, finding the new accommodation and the possibility that everyone wants food immediately after arrival. This is why a “two-hour journey” can easily occupy half a day. Our guide to building realistic itineraries explains how to protect transfer days instead of pretending they are normal sightseeing days.

    Food strategy: eat well without making meals another timetable

    Banff, Canmore and Jasper provide the easiest meal options, while scenic driving days need more preparation. Carry water and a proper lunch, not just emergency snacks. Wildlife-safe food storage matters whenever you are picnicking or camping. A supermarket stop before the Parkway can save both money and time. If dining late is difficult for children or older adults, reserve or eat earlier because popular mountain towns can become busy quickly.

    One planned meal per day is usually enough. Leave the other meal flexible so it can respond to where you actually are, not where you expected to be six months earlier. Keep a simple backup option close to the hotel for evenings when the group is tired. This matters even more with children and older adults, because hunger turns a minor transport delay into a much larger problem.

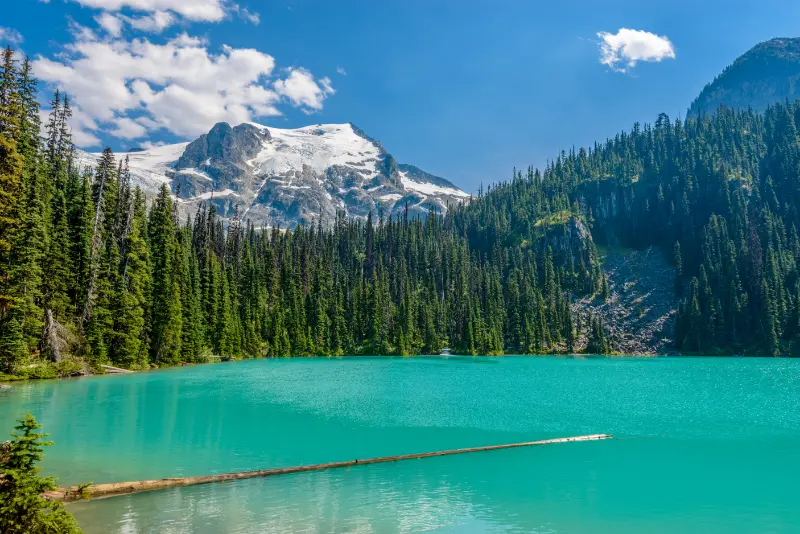
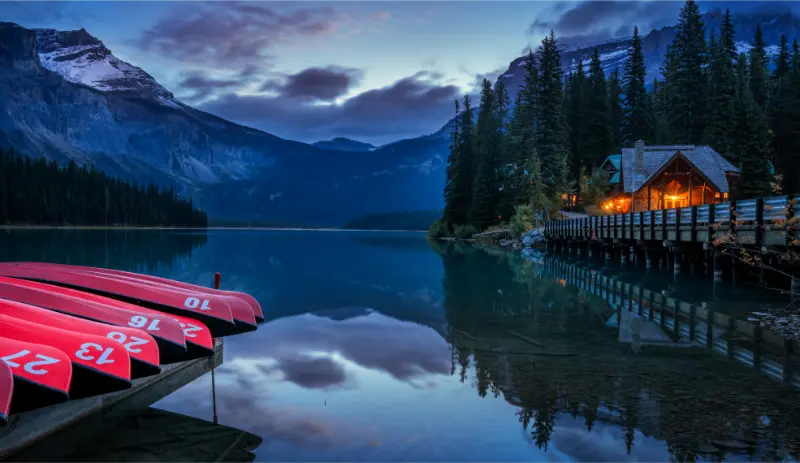
    Turquoise Alpine Lake In Canadian Rockies

    When to go and how weather changes the route

    Summer gives the widest access but also the strongest demand. Late spring and autumn can be beautiful yet snow and trail conditions remain possible. Winter is a different trip entirely and requires appropriate driving confidence, tires and activity planning. Wildfire smoke can affect summer air quality even when roads remain open. Build the itinerary so one poor-weather day can be swapped with a lower-altitude or town-based activity.

    Instead of searching for one universal “best month,” choose which compromise matters most: comfortable temperatures, swimming, long daylight, lower prices, fewer visitors or full seasonal transport. Every destination trades one advantage for another. Build at least one indoor, low-effort or easily movable half-day into the plan so weather does not force you into a bad decision.

    Budget: where spending improves the trip

    Accommodation, rental cars and fuel dominate the budget. Staying in Canmore can sometimes reduce room cost, but calculate the extra driving if most activities are around Lake Louise. Park fees and shuttles are not large compared with lodging, yet missing a required reservation can cost a day. For road trips, our budgeting framework is especially useful because the cheapest nightly rate can increase fuel and driving time.

    The most valuable upgrades are often logistical rather than luxurious: a central hotel, a direct transfer after a long flight, a reserved seat on a scarce connection or a guide who turns a wildlife or archaeological visit into something you understand. Cut low-value extras before cutting the pieces that keep the route reliable.

    Common mistakes to avoid

    • Planning the Icefields Parkway as a two- or three-hour transfer.
    • Ignoring current Jasper closure and recovery information.
    • Stopping unsafely for wildlife or approaching animals for photographs.
    • Building every day around a famous lake without checking shuttle and parking rules.
    • Booking a same-day long mountain drive before an international flight.

    Most itinerary problems do not come from one disastrous decision. They come from stacking small optimistic assumptions: a transfer that “should” be quick, a hotel that is “only” a kilometre away, a hike described as easy, and a dinner reservation on the opposite side of town. Leave margins in the plan before you need them.

    Families, older travellers and mixed-age groups

    Children often remember lakes, wildlife and short exploration stops more than a sequence of long hikes. Alternate vehicle time with simple walks and avoid making every day an endurance test. Older travellers can enjoy the Rockies through viewpoints, gondolas, boat experiences and short lakeshore paths, but accessibility varies. Check elevation, surface, toilets and walking distance from parking before assuming a “short stop” is easy.

    For mixed-age groups, decide which experiences everyone will share and which are optional. Splitting for two hours can be healthier than forcing the entire group through one person’s priority. Build toilets, shade, seating, lifts, step-free transport and realistic meal times into the plan with the same seriousness as famous attractions. Our guide to travelling with parents and older adults covers this style of planning in more detail.

    If you have more or less time

    With ten days, add more Jasper time, Yoho National Park or an extra Banff day rather than extending the driving radius dramatically. With five days, focus on Banff, Lake Louise and part of the Parkway instead of forcing a Jasper return. A shorter route with time outside the car usually delivers more mountain experience.

    When shortening the trip, remove an entire base before cutting every destination to one night. When lengthening it, add depth before adding distance. An extra morning in a place you already understand often creates a better memory than another three-hour transfer to a new pin on the map.

    Useful official resources

    Timetables, closures, ticket systems and access rules can change. Recheck the details that affect your exact travel dates shortly before departure and again before any critical transfer.

    Final planning checklist

    • Confirm passport, visa and transit requirements for your own nationality and route.
    • Book the genuinely scarce ticket or transport segment before non-refundable secondary activities.
    • Check the exact luggage journey from one accommodation to the next, not only the main train, road or ferry time.
    • Save offline copies of reservations, insurance details and the address of each accommodation.
    • Recheck weather, transport notices and official access information shortly before each important day.
    • Keep one flexible half-day that can absorb rain, fatigue or a delayed transfer.
    • Choose footwear and clothing for the real surfaces and climate, not only for photographs.
    • Leave a generous buffer before international flights and other connections you cannot easily replace.

    The goal is not to return home with proof that you visited everything. It is to come back with a clear memory of how the places felt, enough energy to enjoy them and confidence that the route helped rather than controlled you. Use this plan as a strong starting point, then remove anything that does not fit your interests, mobility or travel rhythm.

  • San Antonio in 4 Days: River Walk, Missions and Texas Culture Without Staying Only Downtown

    San Antonio in 4 Days: River Walk, Missions and Texas Culture Without Staying Only Downtown

    If this destination is part of a wider trip, compare the pace with Texas Hill Country in 9 Days: Austin, San Antonio and Fredericksburg. Use that article for the larger route and this guide for the practical details of staying in the destination itself.

    Quick trip summary

    • Ideal stay: 4 days for a first visit.
    • Best approach: one major experience per half-day, with at least one flexible block for weather, fatigue or transport changes.
    • Good for: first-time Texas visitors, families, couples, history travellers and road-trippers combining Austin or the Hill Country.
    • Main planning risk: treating map distance as if transfers, queues, heat, weather and meals took no time.

    Is this the right trip for you?

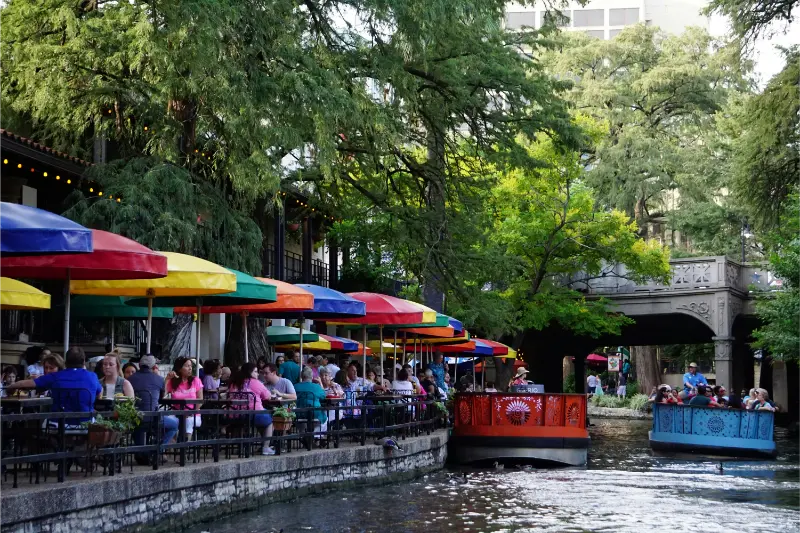
    San Antonio’s River Walk is the obvious first image, but a strong trip goes beyond one downtown loop. The Alamo, the UNESCO-listed missions, Mexican American culture, the Pearl, neighbourhood food and the river’s quieter reaches create a more complete city. Four days gives you time to see those layers without turning every meal into another downtown tourist stop.

    A realistic itinerary does not try to prove how much you can fit into a day. It protects the experiences that justify the trip and leaves room for meals, transport and the small discoveries that make one destination feel different from another.

    Where to stay

    AreaWhy choose it
    Downtown / River WalkBest for a first visit, major sights and walking; convenient but often the most expensive and tourist-oriented.
    Pearl / northern river areaExcellent for food, design and a more contemporary atmosphere with river access.
    Southtown / King WilliamHistoric houses, galleries and restaurants south of downtown; good for travellers who want neighbourhood character.
    Near the airport / north sideOften cheaper and practical for early flights, but a car or ride-hailing budget becomes more important.

    Choose accommodation by the journeys you will repeat. Map the first morning, the area where you are likely to eat dinner and the departure point for any fixed excursion. A room that removes two awkward transfers every day can be better value than a cheaper property that creates constant taxi or transit costs.

    How to get there

    San Antonio International Airport is north of downtown and is reached by taxi, ride-hailing, rental car and public transport. If the trip is entirely central, you may not need a car every day. If you are continuing through Texas Hill Country, a rental car becomes more useful after the city portion rather than on every downtown day.

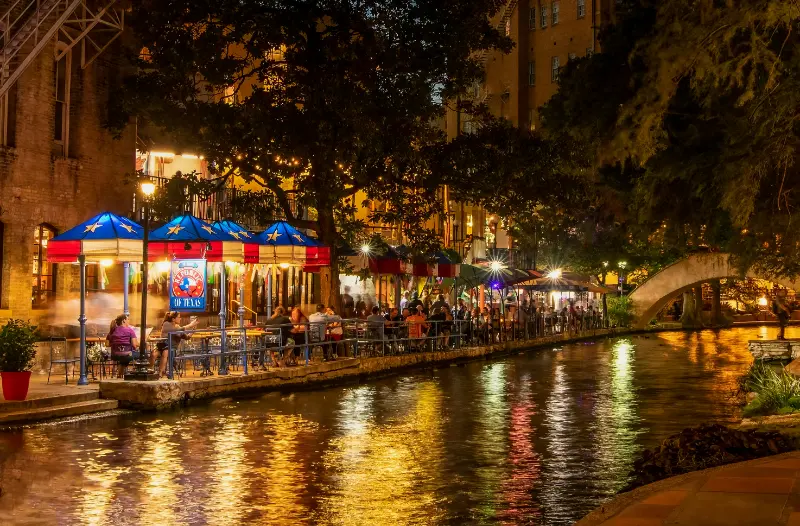
    San Antonio River Walk At Night

    Save the accommodation address offline and screenshot the first transfer before travelling. Arrival day should carry less risk than the rest of the trip: avoid a non-refundable attraction immediately after a flight or long road journey, and leave extra time when baggage, immigration, weather or traffic can affect the first connection.

    Getting around

    Walk the central River Walk and downtown, use river boats for sightseeing rather than as your only transport plan, and consider cycling or driving for the mission corridor depending on heat and fitness. Buses and ride-hailing fill gaps well. Parking downtown can be expensive, so compare hotel parking before bringing a car into the centre.

    Compare journeys door to door rather than station to station. Waiting time, stairs, the final walk and the number of transfers can matter more than the nominally fastest route, especially for families, senior travellers or anyone carrying luggage.

    A realistic itinerary

    The schedule below is a framework rather than a rigid timetable. Opening days, seasonal transport, weather and local events should determine the exact order. If a major attraction is closed or conditions are poor, move the whole block instead of forcing the rest of the trip to become inefficient.

    Day 1 – Alamo, downtown and the central River Walk

    Start with the Alamo area and surrounding historic plaza, then explore downtown on foot. Use the River Walk as a route rather than an attraction you must complete in one direction. End with dinner away from the busiest tourist stretch if you want better value and a different atmosphere.

    Day 2 – San Antonio Missions and the south side

    Make the UNESCO mission corridor the focus. Mission San José is a strong anchor, and adding one or two other missions provides context without turning the day into a checklist. Use a bike only if weather and fitness make sense; in high heat, a car or guided tour is more comfortable.

    Day 3 – Pearl, museums and neighbourhood food

    Spend the morning around the Pearl and northern river area, then choose a museum or cultural institution according to your interests. Continue into nearby neighbourhoods for dinner. This is the day to see San Antonio as a living city rather than only a historic attraction zone.

    Day 4 – Market Square, Southtown and a flexible final block

    Visit Market Square or Southtown, then use the last afternoon for a museum, botanical garden, river walk or anything missed. If you are driving to Austin, Fredericksburg or elsewhere in Hill Country, leave enough daylight for the next leg instead of starting a long drive after a packed day.

    San Antonio Red Sports Car On Road

    Keep enough margin for meals, transport and an unscheduled stop. If this block runs long, remove the lowest-priority extra rather than turning the rest of the day into a race.

    How many days do you really need?

    4 days is a strong length for a first visit because it gives the destination one full block for its essential sights and enough margin for neighbourhoods, weather or transport. With one less day, remove the lowest-priority excursion rather than compressing every meal and transfer. With one extra day, add a regional experience or a deliberately slow day instead of stretching each sightseeing day until evening.

    If this stop sits inside a longer itinerary, count hotel changes, airport transfers and recovery time as real parts of the trip. A night that prevents two consecutive transfer days can be more valuable than another attraction.

    Best time to visit

    Spring and autumn are generally the most comfortable for walking. Summer heat can be intense, so start early and use air-conditioned breaks. Fiesta and other major events create a vibrant atmosphere but also increase demand for rooms and transport.

    Do not choose dates from average temperature alone. Check daylight, rainfall, local holidays, school breaks and the seasonal schedule of the one experience that matters most to you. Shoulder season is excellent only when the things you actually want to do are operating.

    What deserves advance booking?

    Reserve central hotels early for major events and book any timed Alamo experience or special tour you care about. Most River Walk time can remain flexible. If you plan to dine at a specific Pearl restaurant on a weekend, reservations can be worthwhile.

    Book the scarce item first, then shape flexible sightseeing around it. Avoid prepaying every hour of the trip: a delayed flight, hot afternoon, heavy rain or long lunch should not create a chain of missed reservations.

    Where and what to eat

    San Antonio is a strong city for Tex-Mex, barbecue, breakfast tacos, Mexican regional cooking and contemporary Texas cuisine. Do not eat every meal on the central River Walk. Southtown, the Pearl and other neighbourhoods broaden the experience and often provide better value.

    Use meal planning to reduce unnecessary travel. If the day ends in a particular neighbourhood, eat there instead of crossing the city because one restaurant looked attractive online. Keep at least one meal unreserved so you can follow a market recommendation or change plans when energy is low.

    Families, older travellers and accessibility

    Families benefit from the River Walk’s visual interest, museums and spacious mission grounds, but strollers can be awkward on steps and crowded sections. Older travellers should use elevators and street-level alternatives where available and avoid long mission rides in peak summer heat. Accessible hotel rooms should be confirmed directly.

    San Antonio Modern Architectural Complex

    For mixed-age groups, plan around the slowest realistic pace rather than the fastest walker. One important sight in the morning and one flexible block in the afternoon usually works better than four timed entries. If step-free access, seating, toilets or lift availability are essential, confirm them directly with the attraction or hotel; historic districts often have partial accessibility rather than a simple yes-or-no answer.

    Budget: where to spend and where to save

    Many historic areas and public spaces are inexpensive or free, while downtown parking, central hotels and attraction tickets add up. Spend on location if you want to walk at night and save by eating some meals outside the tourist core. If you rent a car, compare hotel parking charges with ride-hailing before deciding.

    Compare the total cost of a day, not only individual ticket prices. A hotel that removes repeated transfers, a driver that replaces three difficult connections or a flexible ticket that protects a weather-dependent plan may be better value than the cheapest option on paper.

    Safety and practical awareness

    Use normal city awareness, especially at night away from busy areas, and protect yourself from heat. River Walk edges and stairs can be slippery after rain. If driving, do not leave luggage visible in the vehicle and build rest into longer Texas road-trip days.

    Save offline copies of hotel details, insurance information, essential tickets and emergency contacts. Split cards and cash so one lost wallet does not become a trip-wide problem. If official advice or local conditions change, adjust the plan even when that means abandoning a reservation.

    If you have one extra day

    With an extra day, Fredericksburg and Hill Country are a natural extension, but they deserve a full daylight outing. New Braunfels and Gruene are other options depending on interests. Do not combine a long regional drive with a late flight from San Antonio.

    Responsible travel and local rhythm

    Historic centres, markets, beaches, religious sites and residential streets are working parts of local life. Keep doorways and pavements clear, follow photography rules, dress appropriately where required and choose locally run businesses when they fit naturally into the day. In natural areas, use marked paths and respect closures even when a shortcut looks easy.

    A slower schedule makes responsible travel easier because you are less tempted to ignore local rules just to keep an overloaded itinerary on time.

    Common mistakes to avoid

    • Spending the entire trip within two blocks of the central River Walk.
    • Visiting several missions at midday in extreme summer heat.
    • Renting a car for downtown days without checking parking costs.
    • Assuming Texas road-trip distances are short because they look close on a state map.
    • Eating every meal in the most tourist-heavy riverfront restaurants.

    Most tiring trips are not ruined by one dramatic mistake. They become difficult through a chain of optimistic assumptions. Add margin before you need it.

    A slower experience worth protecting

    Walk a quieter section of the river north toward the Pearl or south toward King William in the early morning. The waterway feels completely different when you leave the busiest restaurant zone behind.

    San Antonio Historic Tower

    How to make the trip feel less rushed

    Separate fixed commitments from flexible interests. Put only transport departures, limited-entry attractions and weather-dependent excursions into the fixed category. Keep markets, viewpoints, cafés, parks and smaller museums movable. Each evening, look at the next day again and remove one low-priority stop early if the group is tired.

    Also distinguish between distance and effort. Two kilometres on flat shaded pavements is not the same as two kilometres in tropical humidity, winter cold, steep streets, altitude or exposed heat. Plan by the physical reality of the destination, not only by map distance.

    Photography, weather and the best time of day

    Early mornings are useful for quieter streets and cooler conditions in most destinations, while late afternoon often gives softer light and a more relaxed pace. Do not build a whole itinerary around one photograph: weather and crowds change, and the best viewpoint is often the one you can reach without sacrificing the rest of the day.

    Keep one indoor alternative saved on your phone. A museum, market, café or cultural centre can rescue a day affected by rain, heat, wind or transport disruption without forcing an expensive last-minute change.

    Shopping and souvenirs

    Buy things that connect to the destination rather than generic travel souvenirs. Markets, museum shops and specialist food stores are usually better places to understand provenance. If you are flying internationally, check customs rules before buying food, plants, animal products or large quantities of liquids.

    What to pack

    Comfortable shoes, strong sun protection and a refillable bottle are essential for warm months. Carry a light layer for heavily air-conditioned interiors and a compact rain layer in storm season.

    Official information to check before you go

    Opening days, transport, weather-sensitive access and event schedules can change. Recheck the details that control fixed reservations shortly before travel, especially during public holidays, major festivals or severe weather.

    Final planning checklist

    • Confirm passport, visa, entry and transit requirements for your nationality.
    • Choose accommodation by the journeys you will repeat, not by price alone.
    • Reserve only the attractions or excursions that genuinely control the day.
    • Save offline copies of tickets, hotel details, insurance information and essential addresses.
    • Check the exact airport, station, bus terminal, ferry pier or pickup point before arranging transfers.
    • Keep one flexible half-day for weather, fatigue or something discovered after arrival.
    • Recheck official opening information and local transport shortly before each fixed day.

    Final thoughts

    A good stay is not the itinerary with the highest number of pins. It is the one that protects the experiences you care about, leaves enough energy to notice the destination between them and can absorb a delayed flight, a hot afternoon or a change of weather without collapsing. Use this plan as a structure, then let local conditions and your own pace decide the final order.
  • Washington State in 10 Days: Seattle, Olympic and Mount Rainier With Realistic 2026 Park Planning

    Washington State in 10 Days: Seattle, Olympic and Mount Rainier With Realistic 2026 Park Planning

    Washington State contains three national parks, a major city, islands, volcanoes and a huge coastline, so a ten-day trip becomes much better when you stop trying to include everything. This route deliberately skips North Cascades to give Olympic and Mount Rainier enough time.

    The itinerary uses Seattle first, then a four-night Olympic Peninsula road block and two nights near Mount Rainier. The route ends close enough to Seattle-Tacoma Airport that the final day is not a cross-state race.

    For 2026, the National Park Service says Mount Rainier does not require timed-entry reservations anywhere in the park. Olympic, however, has 2026 construction and road disruptions in several areas, so live NPS conditions are essential; Hurricane Ridge also has limited services and no potable water at the temporary contact station.

    Quick trip summary

    • 3 nights Seattle, 4 nights Olympic Peninsula, 2 nights Mount Rainier, Day 10 departure.
    • Do not add North Cascades to this ten-day route.
    • Mount Rainier has no timed-entry reservation in 2026, but parking congestion remains real.
    • Check Olympic road closures daily.
    • Use at least two Olympic bases because the park wraps around a large peninsula.

    Why this route works

    Seattle deserves several nights without a car for markets, neighbourhoods, museums and waterfront time.

    Olympic is not one park road; mountains, rainforest and Pacific coast sit hours apart, so four nights and two bases make the geography realistic.

    Mount Rainier works best as the final outdoor block because it can be placed geographically near the airport route and adjusted around mountain weather.

    A realistic itinerary at a glance

    DaysBaseMain focus
    1–3SeattleCity, waterfront and optional local day
    4–7Olympic PeninsulaHurricane Ridge, rainforest, lakes and coast
    8–9Mount RainierParadise/Sunrise region according to access
    10DepartureSeattle-Tacoma Airport

    Day-by-day plan

    Day 1: Seattle arrival

    Stay central and keep the day to Pike Place/waterfront or one neighbourhood. Do not collect the road-trip car until it is useful.

    Seattle Waterfront Downtown Aerial

    Day 2: Seattle properly

    Choose a museum/Seattle Center cluster, neighbourhood food and waterfront time. The city should not be sacrificed simply because national parks are nearby.

    Day 3: Flexible Seattle day

    Use a ferry, Ballard, another museum or genuine recovery from long-haul travel. Collect the car tonight or tomorrow morning.

    Day 4: Seattle to Port Angeles

    Drive or use the ferry-route combination that best fits your plan, then use Lake Crescent or an easy peninsula stop without pushing to the Pacific coast.

    Day 5: Hurricane Ridge and north Olympic

    Check NPS status that morning. In 2026 there is construction in the Hurricane Ridge developed area and limited services; bring water and be prepared for temporary changes.

    Day 6: Move toward the west side

    Travel to Forks/Kalaloch area, using one rainforest or beach stop. Olympic road distances are slow enough that this move should not contain six attractions.

    Day 7: Rainforest and Pacific coast

    Use Hoh/Quinault-style rainforest and one coastal area according to current access. In 2026, NPS has road construction affecting some west-side access, so alternative beaches may be necessary.

    Day 8: Olympic to Mount Rainier area

    Make the relocation the main activity. Stay near the park entrance that fits tomorrow’s planned sector.

    Day 9: Mount Rainier

    Visit Paradise, Sunrise or another open area according to season and road status. NPS states no timed-entry reservation is required in 2026, but recommends early or later visits when parking is less congested.

    Day 10: Departure

    Drive to Sea-Tac with a generous traffic buffer. Do not attach a mountain hike to the flight morning.

    Where to stay and how many hotel changes to make

    Seattle should remain car-free if possible. On Olympic, two bases such as Port Angeles plus Forks/Kalaloch reduce huge daily backtracking.

    At Mount Rainier, choose accommodation by the entrance/sector you plan to use; a cheap room on the wrong side can add hours.

    Seattle Waterfront City Towers

    Hotel geography matters more than a small nightly-price difference. A room that removes a repeated transfer or a difficult parking problem often adds more value than a prettier property in the wrong place.

    Read recent reviews for the practical details that promotional photos rarely show: stairs, lift size, street noise, parking, breakfast hours and how far you actually carry luggage from the station, ferry or car park.

    Transport: what is worth planning in advance

    A car becomes essential after Seattle because Olympic and Rainier are geographically dispersed.

    Ferry schedules, park roads and construction all matter more than straight-line mileage; check official conditions rather than trusting a single map estimate.

    Measure every move door to door rather than by the timetable headline. Checkout, waiting, luggage and the final transfer can turn a short train, road or ferry journey into half a day.

    Save tickets, accommodation addresses and essential timetables offline. Rural roads, parks and islands are exactly where mobile coverage or battery life can become least reliable.

    Food and daily rhythm

    Seattle provides the strongest restaurant range, while park sections need more self-sufficiency: carry water, snacks and simple lunches.

    Do not assume every park visitor area has full food service, especially with construction or seasonal closures.

    Use meals to control the rhythm of the day. A long regional lunch can be both an experience and a recovery period after museums, hiking, heat or an early start.

    Do not make every meal another attraction. Mix destination restaurants with markets, bakeries, cafés and simple local places so food improves the trip instead of controlling it.

    Families, children and older travellers

    Ferries, beaches, rainforest and mountain viewpoints give children excellent variety.

    Older travellers can use scenic drives and short accessible viewpoints instead of long hikes; the main challenge is driving time, not a lack of low-effort scenery.

    For multigenerational travel, the useful pace is the one at which the least mobile member still enjoys the day. That normally produces a better trip for everyone.

    Seattle Skyline At Night

    When accessibility matters, ask specific questions about steps, surfaces, boat boarding, lifts and vehicle access rather than relying on a generic accessibility label.

    Budget: where the money really goes

    Car hire and peak-season lodging near the parks are the main costs. Booking geographically smart hotels often saves enough driving to justify a higher rate.

    Seattle parking is expensive, another reason to delay rental pickup.

    Compare total trip cost rather than headline room or ticket prices. Parking, taxis, transfers, luggage and time lost reaching remote accommodation can erase an apparent saving.

    The best splurges usually remove friction: a central room, a direct transfer, a good guide where context matters, or one extra night that prevents an exhausting move.

    Best time to go

    Summer provides the broadest high-elevation access, but wildfire smoke and crowds can affect plans.

    Spring and autumn are beautiful but mountain snow and road closures make live-condition checking essential.

    Shoulder season often balances weather, demand and prices well, but ferries, mountain services and rural attractions may run less frequently.

    Heat, rain, snow, wind and daylight should change the order of a day. Use the most comfortable hours for exposed outdoor sights and keep easier alternatives available.

    Comfort, accessibility and realistic pacing

    The route protects one full Olympic block and one Rainier block instead of alternating long park drives with Seattle.

    Never treat Hurricane Ridge, Hoh rainforest and a Pacific beach as one easy day; they sit in very different parts of the peninsula.

    Travel fatigue compounds. One difficult transfer can reduce the quality of the following two days, which is why this itinerary avoids one-night bases unless geography genuinely requires them.

    A free half-day is not wasted time. It is insurance for weather, transport disruption, a tired child or a place you discover only after arriving.

    Small decisions that improve the trip

    Skip North Cascades this time

    Three national parks would turn ten days into road logistics.

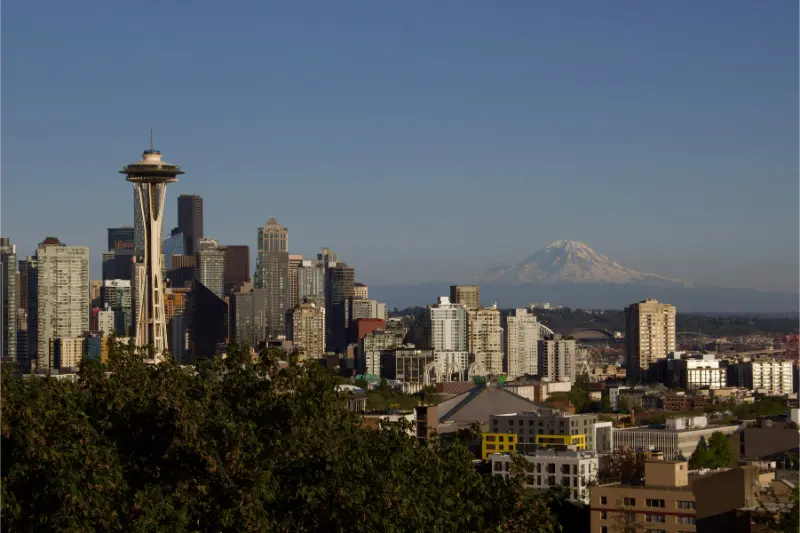
    Seattle Skyline And Mount Rainier

    Use two Olympic bases

    The peninsula is too large for one convenient centre.

    Delay the rental car

    Seattle does not need it.

    Use NPS live conditions

    2026 construction and mountain weather are operational facts.

    What I would leave out on this length of trip

    Leave North Cascades and the San Juan Islands for another Washington trip.

    Skip long hikes on the final day before a flight.

    Mistakes that make this trip harder than it needs to be

    • Using one Olympic hotel.
    • Assuming Mount Rainier still uses 2024-style timed entry.
    • Ignoring Olympic 2026 construction notices.
    • Driving Seattle with a rental car for no reason.
    • Trying to see rainforest, ridge and coast in one day.
    • Leaving Rainier too late for Sea-Tac.

    How I would adapt the itinerary

    With seven days, use Seattle plus Olympic or Seattle plus Rainier, not both parks deeply.

    With two weeks, add North Cascades or San Juan Islands with several proper nights.

    Before booking

    • Check Mount Rainier and Olympic NPS alerts.
    • Reserve peak-season park-area lodging early.
    • Carry water at Hurricane Ridge.
    • Download offline maps.
    • Protect the final airport drive.

    Practical questions

    Does Mount Rainier require timed entry in 2026?

    No. NPS announced no timed-entry reservation for any portion of the park in 2026.

    How many nights for Olympic?

    Four nights is a strong minimum if you want mountains, rainforest and coast.

    Can I add North Cascades?

    Not without making the ten-day itinerary much more road-heavy.

    Final thoughts

    Washington State is best when its landscapes are allowed to feel large.

    Seattle, Olympic and Mount Rainier create a ten-day trip through urban waterfront, rainforest, wild Pacific coast and volcanic mountains without pretending the state is compact.

    How to keep this itinerary resilient

    Check NPS road and construction notices every evening, not just before departure.

    Keep one Olympic day flexible so a closed road or mountain cloud can be replaced with rainforest, lake or coast.

  • Yellowstone and Grand Teton in 9 Days: A Realistic 2026 Road Trip With Fewer Hotel Changes

    Yellowstone and Grand Teton in 9 Days: A Realistic 2026 Road Trip With Fewer Hotel Changes

    Yellowstone and Grand Teton sit next to each other on the map but together cover an enormous amount of ground. A nine-day trip can be excellent if you stop thinking in terms of one hotel and use three carefully chosen bases.

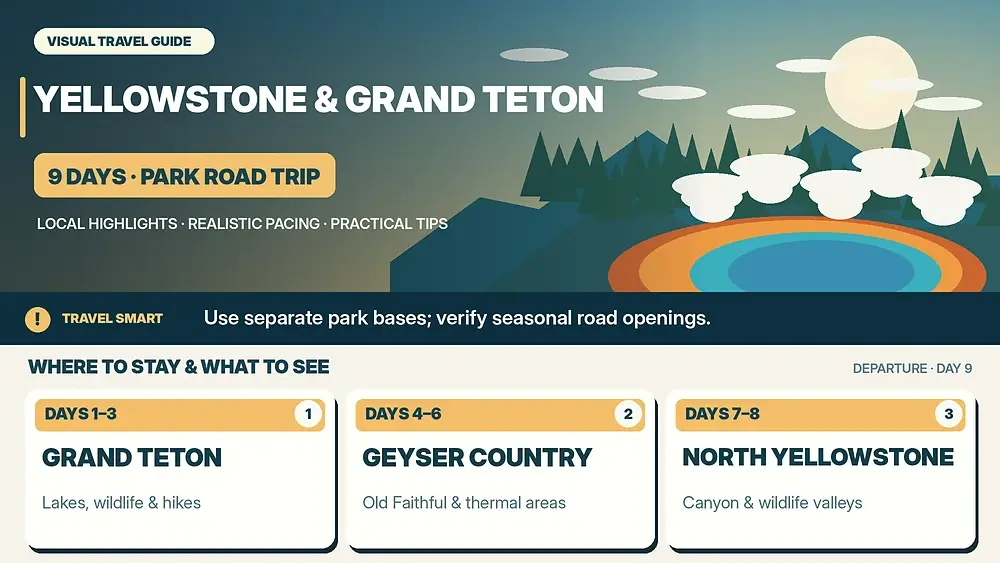
    This route uses Jackson/Grand Teton first, a west or south Yellowstone base for geyser country, then a north Yellowstone base for Canyon, Mammoth and wildlife valleys.

    For 2026 planning, the Yellowstone NPS road page lists projected opening windows that vary by road and elevation. Grand Teton NPS confirms no general timed-entry reservation is required, but 2026 construction can create delays and closures.

    Quick trip summary

    • 3 nights Jackson/Grand Teton, 3 nights West Yellowstone/Old Faithful side, 2 nights north Yellowstone, Day 9 departure.
    • Do not use one hotel for both parks.
    • Check 2026 road openings and construction.
    • Grand Teton has no general timed entry.
    • Protect sleep after long wildlife or driving days.

    Why this route works

    Grand Teton deserves three nights because lakes, wildlife and hikes should not be reduced to a drive-through.

    West/south Yellowstone is the best first geyser base for Old Faithful and nearby thermal areas.

    A north-side final base reduces the backtracking required for Canyon, Mammoth and Lamar-style wildlife time.

    A realistic itinerary at a glance

    Days Base Main focus
    1–3 Jackson / Grand Teton Lakes, wildlife and one main hike
    4–6 West Yellowstone / Old Faithful side Geysers and thermal areas
    7–8 North Yellowstone Canyon, Mammoth and wildlife valleys
    9 Departure Bozeman/Jackson/Salt Lake positioning

    Day-by-day plan

    Day 1: Jackson arrival

    Keep the day light. Altitude, driving and wildlife on roads make a rushed evening loop a poor choice.

    Day 2: Grand Teton scenic day

    Use Jenny Lake, viewpoints and a moderate walk according to access. In 2026, construction around Moose-Wilson and Death Canyon can affect routes.

    Day 3: Grand Teton wildlife or hike

    Start early for wildlife or light, then choose a longer hike, float trip or slower lake day.

    Day 4: Grand Teton to Yellowstone

    Drive north only if the South Entrance route is open for your dates. Yellowstone’s projected 2026 road openings vary by segment.

    Day 5: Geyser country

    Give Old Faithful, Upper Geyser Basin and selected nearby thermal areas the day.

    Day 6: Yellowstone west/south flexible day

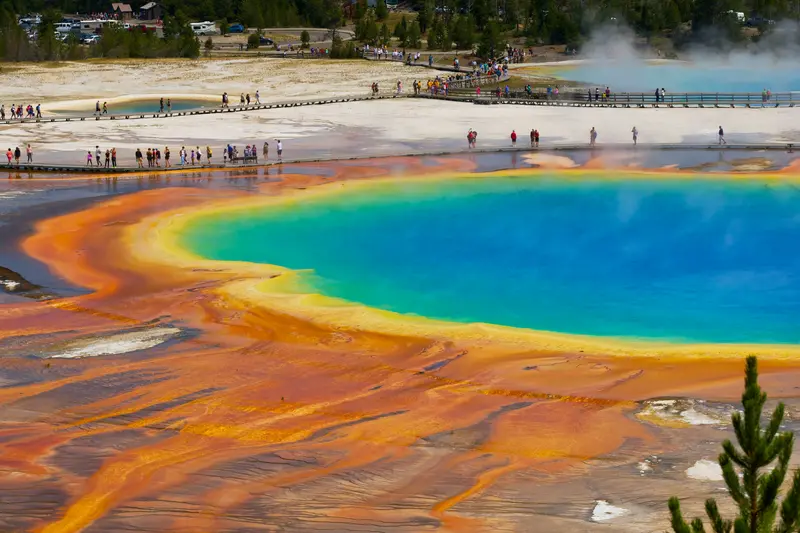
    Use Grand Prismatic, Norris, Yellowstone Lake or another cluster according to parking and road status.

    Day 7: Move north via Canyon

    Use Grand Canyon of the Yellowstone as the main sightseeing focus while transferring north.

    Day 8: Lamar Valley and Mammoth/north

    Use dawn wildlife time if the group can handle it, then rest and add Mammoth or another nearby area.

    Day 9: Departure

    Exit toward the chosen airport with generous time for park traffic, wildlife jams and roadwork.

    Where to stay and how many hotel changes to make

    In-park lodging saves driving but fills early; Jackson, West Yellowstone and Gardiner provide more services. Choose each base by the geography of the next two days.

    For Yellowstone and Grand Teton, location matters more than a small difference in nightly rate. A hotel that removes repeated transfers usually adds more value than a prettier property in the wrong part of the route.

    Illustrated road trip through Grand Teton and the geyser and canyon areas of Yellowstone

    Read recent guest reviews for practical details that booking photos rarely show: stairs, lift size, road noise, parking access, breakfast hours and the final walk from transport.

    Transport: what is worth planning in advance

    A car is essential unless joining a fully guided tour. Yellowstone seasonal roads and Grand Teton construction must be checked live rather than assumed from a map.

    Measure every move door to door rather than by the headline timetable. Checkout, terminal access, waiting, luggage and the final connection can turn a short journey into half a day.

    Use inflexible tickets only when the saving is meaningful and the day is genuinely fixed. Weather-sensitive coast, mountain, wildlife and boat plans benefit from flexibility.

    Food and daily rhythm

    Park dining can be limited and busy, so carry water, snacks and a simple lunch on long wildlife or thermal days.

    Use meals to control the rhythm of the day. A long regional lunch can be an experience and a recovery period, especially after hiking, museums, wildlife outings or early starts.

    Do not make every meal another attraction. Mix local specialties with simple food so that the destination, not the restaurant schedule, remains the centre of the trip.

    Families, children and older travellers

    Geysers, lakes and wildlife are excellent for children, but thermal boardwalks require close supervision. Older travellers can use short boardwalks and scenic drives for high-value days.

    For multigenerational travel, the useful pace is the one at which the least mobile member still enjoys the day. That normally produces a better shared trip for everyone.

    When accessibility matters, ask specific questions about steps, trail surfaces, boat boarding, lift dimensions and vehicle access rather than relying on a generic label.

    Budget: where the money really goes

    Lodging inside or near the parks is the largest expense; sometimes a more expensive location saves hours of fuel and driving.

    Compare total trip cost rather than headline prices. Parking, transfers, luggage, park transport, tours and time lost reaching a remote hotel can erase an apparent saving.

    Keep a contingency rather than allocating every day to the last euro or dollar. Weather, a changed ferry, a taxi or an extra night can appear even on a carefully planned journey.

    Best time to go

    Summer offers broadest access and crowds; shoulder seasons can be excellent but road openings, snow and facility schedules matter much more.

    Shoulder season often balances weather, demand and room prices well, but ferries, mountain services, wildlife excursions and rural restaurants may run less frequently.

    Heat, rain, snow, wind and daylight should change the order of your day. Use the most comfortable hours for exposed outdoor sights and keep lower-effort alternatives available.

    Comfort, accessibility and realistic pacing

    Three bases reduce total mileage dramatically. Do not schedule dawn wildlife after a late cross-park transfer.

    Travel fatigue compounds. One difficult transfer can reduce the quality of the following two days, which is why this itinerary avoids one-night bases unless geography genuinely requires them.

    A free half-day is not wasted time. It is insurance for weather, laundry, a delayed service, a tired child or a place you discover only after arriving.

    Small decisions that improve the trip

    Use three geographic bases

    This is the biggest way to reduce windshield time.

    Plan from NPS road status

    2026 construction and seasonal openings matter.

    Separate geysers from wildlife valleys

    They deserve different days.

    What I would leave out on this length of trip

    Leave Beartooth Highway or extensive backcountry hikes out if they distort a first trip.

    Skip using Jackson for every Yellowstone day or West Yellowstone for every Grand Teton day.

    Mistakes that make this trip harder than it needs to be

    • Using one hotel for both parks.
    • Ignoring 2026 road construction.
    • Stopping illegally for wildlife.
    • Driving five park sectors in one day.
    • Booking shoulder-season hotels before checking road patterns.
    • Connecting a park exit directly to a tight flight.

    How I would adapt the itinerary

    With six days, choose one park as the main focus and give the other a short section.

    With twelve days, add a fourth base only if it opens a genuinely different park sector.

    Before booking

    • Check Yellowstone 2026 road status.
    • Check Grand Teton construction alerts.
    • Reserve lodging/campgrounds early.
    • Carry food, water and layers.
    • Choose airport geometry before the final base.

    Practical questions

    Do I need timed entry?

    Grand Teton does not require a general timed entrance reservation; always check specific activities and current Yellowstone rules.

    How many nights for Yellowstone?

    Four to five nights is excellent for a first visit.

    Can I use one hotel?

    Technically yes, but it creates very long drives.

    Final thoughts

    Yellowstone and Grand Teton reward geographic planning more than aggressive sightseeing.

    Three bases over nine days let geysers, mountains and wildlife each have their own time while keeping 2026 road realities in the plan.

    How to keep this itinerary resilient

    Check NPS alerts every evening and morning because construction or wildlife incidents can redirect the day.

    Keep one Yellowstone day flexible rather than assigning every thermal basin to an exact hour months ahead.

    Who this route suits best

    This route is designed for travellers who prefer depth over collecting places. It keeps hotel changes low, protects flexible time and assumes that a good meal, an unexpectedly interesting neighbourhood or a slower morning can be as valuable as another attraction. That makes it particularly suitable for first-time visitors, couples, families and multigenerational groups.

    More energetic travellers can add a longer hike, an extra museum or a second excursion on the flexible days. Travellers who prefer an easier pace can remove those extras and still keep the core journey intact. Before booking, identify the two or three experiences that would genuinely disappoint you to miss; those are the ones to reserve or protect first.

    What to book early and what can wait

    Book the elements with genuinely limited capacity first: high-demand accommodation, protected-area access, popular trains or ferries, and any guided experience that is central to the trip. Leave ordinary meals, minor attractions and weather-dependent outdoor activities more flexible whenever possible. This prevents the itinerary from becoming a chain of reservations that forces you to ignore how the destination actually feels on the day.

    One week before departure, check the official transport or park information again. The evening before each major move, confirm departure points, opening status and the hotel address. That small routine catches most avoidable travel problems before they become expensive or tiring.

  • Oklahoma in 8 Days: Oklahoma City, Tulsa and Route 66 With a Realistic 2026 Centennial Plan

    Oklahoma in 8 Days: Oklahoma City, Tulsa and Route 66 With a Realistic 2026 Centennial Plan

    Oklahoma is one of the best places to experience Route 66 in its centennial year because the highway crosses the state through cities, small towns, museums and surviving roadside architecture. But a good 2026 trip should still be more than a sequence of neon signs.

    This eight-day route uses Oklahoma City and Tulsa as the two main bases, with selected Route 66 segments and one nature/cultural day. It avoids changing hotels every night along the old road.

    The official Oklahoma Route 66 Centennial information confirms that 2026 marks the highway’s 100th anniversary and that the state commission has coordinated programmes and special events. Check event dates before locking hotel locations.

    Quick trip summary

    • 3 nights Oklahoma City, 3 nights Tulsa, one flexible Route 66/nature day, Day 8 departure.
    • Use two main hotels rather than a motel every night.
    • Check 2026 Centennial events before booking weekends.
    • Choose a handful of roadside icons and museums, not every marker.
    • Give Native American and Black history real time alongside Route 66.

    Why this route works

    Oklahoma City provides the strongest state-history, memorial and food introduction.

    Tulsa adds Art Deco architecture, Black Wall Street history and a different Route 66 city experience.

    Using two urban bases lets you explore old-road sections in daylight and still have reliable food and accommodation each night.

    A realistic itinerary at a glance

    DaysBaseMain focus
    1–3Oklahoma CityHistory, museums and western Route 66
    4–6TulsaArt Deco, Greenwood and eastern Route 66
    7FlexibleSelected small towns or nature
    8DepartureTulsa/OKC onward

    Day-by-day plan

    Day 1: Oklahoma City arrival

    Stay near Downtown, Bricktown, Midtown or another convenient district and keep the first evening local.

    Day 2: Oklahoma City history

    Use the National Memorial, First Americans Museum or another major institution, then balance the day with neighbourhood food and river/park space.

    Oklahoma City Skyline At Sunset

    Day 3: Western Route 66

    Drive a selected segment toward El Reno/Clinton or another priority direction, choosing one museum and several roadside stops rather than attempting the entire western state.

    Day 4: Oklahoma City to Tulsa

    Follow a meaningful Route 66 section through towns such as Arcadia or Chandler, arriving in Tulsa before dinner. The road itself is the day.

    Day 5: Tulsa city

    Use downtown Art Deco, Greenwood/Black Wall Street history, museums and the river/park system. Do not reduce Tulsa to another roadside stop.

    Day 6: Eastern Route 66

    Choose a focused eastern segment, roadside architecture and one museum or small town, returning to Tulsa rather than moving hotels.

    Day 7: Flexible Oklahoma

    Use a Centennial event, Pawhuska/Tallgrass direction, another cultural site or a nature day according to interests and weather.

    Day 8: Departure

    Use the airport that best matches the open-jaw route rather than backtracking just to return the car.

    Where to stay and how many hotel changes to make

    Central Oklahoma City and Tulsa both reduce evening driving. During centennial weekends, location can matter more than saving on a distant highway motel.

    If a major Route 66 festival falls in a small town you genuinely want to attend, one special overnight can be worthwhile, but it should replace rather than add to the plan.

    Choose accommodation for geography before decoration. A well-positioned room can save an hour every day and often matters more than a small difference in nightly rate.

    Read recent guest reviews for practical details that hotel pages rarely emphasise: stairs, parking, road noise, breakfast hours, room temperature and the real walk from a station, ferry terminal or car park.

    Transport: what is worth planning in advance

    A rental car is essential for the Route 66 sections, but the old road should not be driven after dark simply to cover mileage.

    Oklahoma City Downtown Street At Golden Hour

    Use current mapping resources because historic alignments can differ from modern highways and some roadside sites have limited opening days.

    Measure every move door to door rather than by the headline journey time. Luggage, road conditions, parking, waiting and the final connection can turn a short move into half a day.

    Save important tickets, addresses and maps offline. The places where navigation matters most are often exactly where mobile coverage becomes unreliable.

    Food and daily rhythm

    Oklahoma’s food story includes barbecue, onion burgers, Native food traditions, Vietnamese communities and modern city dining.

    Do not make every Route 66 stop a diner just because it looks nostalgic; choose quality over theme.

    Use meals to shape the rhythm of the day. A long regional lunch can be both an experience and a recovery period after hiking, museums, heat or an early start.

    Do not make every meal another reservation. Mix destination restaurants with markets, bakeries, cafés and simple local places so food improves the trip instead of controlling it.

    Families, children and older travellers

    Roadside icons, science/western museums and city parks work well for families.

    Older travellers benefit from the two-base structure because it avoids nightly motel changes and long late drives.

    For multigenerational travel, the right pace is the one at which the least mobile member still enjoys the day. That usually creates a better shared trip for everyone.

    When accessibility matters, ask precise questions about steps, path surfaces, boat boarding, lifts, toilets and vehicle access rather than relying on a generic accessibility label.

    Budget: where the money really goes

    Centennial events can raise hotel rates, especially on weekends. Book known event dates early.

    Roadside sightseeing itself can be inexpensive, while museums and fuel are the main daily variables.

    Compare total trip cost rather than headline prices. Parking, transfers, fuel, luggage and guided excursions can erase an apparent saving.

    Oklahoma City Downtown Roads Aerial

    The best splurges usually remove friction: a central room, a direct transfer, a quality local guide or one extra night that prevents an exhausting move.

    Best time to go

    Spring and autumn are comfortable but severe weather is possible; summer can be very hot.

    2026 event calendars matter more than usual, so season choice should include the Centennial schedule.

    Shoulder season often balances weather, crowds and prices well, but rural attractions and mountain or marine services may run less frequently.

    Weather should change the order of the day. Keep lower-effort alternatives so wind, rain, heat or snow do not force you to waste the trip.

    Comfort, accessibility and realistic pacing

    Two main hotels make a road-trip theme feel like a holiday rather than a packing exercise.

    The final flexible day absorbs event changes or weather.

    Travel fatigue compounds. One difficult transfer can weaken the following two days, which is why this itinerary avoids one-night bases unless geography genuinely requires them.

    A free half-day is not wasted time. It is insurance for weather, delays, a tired child or a place you discover only after arriving.

    Small decisions that improve the trip

    Treat 2026 as context

    The centennial should enhance the trip, not force attendance at every event.

    Use two cities as anchors

    OKC and Tulsa are destinations in their own right.

    Choose roadside stops selectively

    A dozen memorable places beat fifty rushed ones.

    Use open-jaw flights if practical

    Avoid unnecessary backtracking.

    What I would leave out on this length of trip

    Leave the Panhandle and far southeast for another Oklahoma itinerary.

    Skip driving the entire state border-to-border on Route 66 in one day.

    Mistakes that make this trip harder than it needs to be

    • Booking hotels before checking centennial events.
    • Treating Tulsa as a one-hour stop.
    • Driving historic alignments after dark.
    • Ignoring Native and Black history.
    • Collecting roadside attractions without downtime.
    • Backtracking across the state for the flight.

    How I would adapt the itinerary

    With five days, use Oklahoma City and Tulsa with one Route 66 transfer day.

    Oklahoma City City Center Aerial

    With ten days, add more small-town Route 66 nights or Tallgrass Prairie with real time.

    Before booking

    • Check the 2026 centennial calendar.
    • Reserve major event weekends early.
    • Download offline route maps.
    • Plan severe-weather alternatives.
    • Compare one-way rental/airport options.

    Practical questions

    Why visit Oklahoma in 2026?

    Route 66 turns 100, and Oklahoma has organised centennial programmes and events.

    Do I need a car?

    Yes for the route.

    How much of Route 66 should I drive?

    Selected sections between the two city bases are enough for an eight-day first trip.

    Final thoughts

    Oklahoma’s 2026 Route 66 story is strongest when it is connected to the cities, communities and history that the highway actually passes through.

    Oklahoma City, Tulsa and selected old-road segments create an eight-day centennial trip with far more depth than a motel-by-motel dash.

    How to keep the itinerary resilient

    Keep Day 7 open for weather or a centennial event discovered later.

    If storms threaten a road day, switch to museums and city history rather than forcing long exposed drives.

    Who this route suits best

    This itinerary works best for travellers who value depth over collecting places. It keeps hotel changes low, protects flexible time and assumes that a good meal, a slower morning or an unexpectedly interesting local stop can be as valuable as another famous attraction. That approach works especially well for first-time visitors, couples, families and multigenerational groups.

    More energetic travellers can add a longer hike, another museum or a second excursion on flexible days. Travellers who prefer an easier pace can remove those extras and still keep the core journey intact. Before booking, identify the two or three experiences that would genuinely disappoint you to miss; those are the ones to reserve first.

  • Alaska in 10 Days: Anchorage, Seward and Denali With Realistic 2026 Park Road Planning

    Alaska in 10 Days: Anchorage, Seward and Denali With Realistic 2026 Park Road Planning

    Alaska punishes rushed itineraries more than almost any U.S. destination. Anchorage, Seward, Denali, Fairbanks and the Inside Passage may all look possible on a state map, but the scale and weather make a focused ten-day route much stronger.

    This itinerary uses Anchorage, Seward and Denali. It combines a Kenai Fjords marine block with an interior mountain and wildlife block and keeps Fairbanks optional.

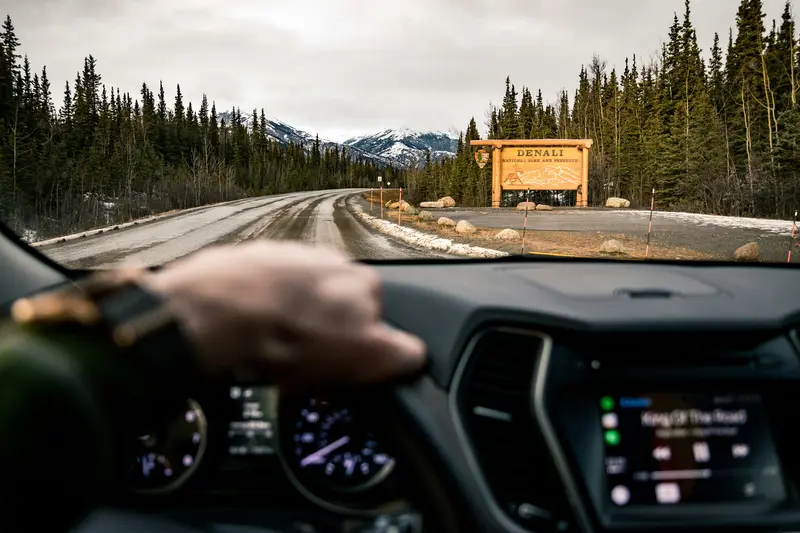
    For summer 2026, the National Park Service confirms Denali Park Road bus operations remain limited to East Fork at Mile 43. As of late August 2026 hikers and cyclists can travel beyond Mile 43, but buses do not; full bus service along the park road is expected to resume in 2027.

    For current destination-wide information, use the Denali National Park current conditions before finalising transport, opening times or seasonal activities.

    Quick trip summary

    • 2 nights Anchorage, 3 nights Seward, 3 nights Denali, 1 final positioning night, Day 10 departure.
    • Give Kenai Fjords two weather opportunities.
    • In 2026 Denali buses travel only to Mile 43.
    • Use rail or road based on schedule, not novelty.
    • Do not add Fairbanks unless it improves the flight plan.

    Why this route works

    Anchorage is a worthwhile logistics base with museums, food and enough urban context to avoid arriving and immediately driving exhausted.

    Seward deserves three nights because marine weather can cancel or change the best Kenai Fjords day.

    Denali needs several nights even with the 2026 road limitation because wildlife, hiking and bus experiences are weather-dependent.

    A realistic itinerary at a glance

    Days Base Main focus
    1–2 Anchorage Arrival, city and preparation
    3–5 Seward Kenai Fjords and coastal time
    6–8 Denali Bus, trails and wildlife
    9 Anchorage/Fairbanks Flight positioning
    10 Departure Onward flight

    Day-by-day plan

    Day 1: Anchorage arrival

    Keep the day to food, waterfront trail or museum depending on flight time. Do not begin the Seward Highway tired.

    Day 2: Anchorage

    Use the Anchorage Museum, Alaska Native cultural context or a simple local nature day.

    Day 3: Anchorage to Seward

    Take the scenic train or drive, but treat the transfer itself as part of the experience.

    Day 4: Kenai Fjords marine day

    Use a reputable boat operator if weather is suitable. Motion-sickness planning matters.

    Day 5: Seward flexible day

    Use Exit Glacier-area trails, another marine day or harbour time. This buffer protects the trip from bad weather.

    Day 6: Seward to Denali

    This is a substantial transfer. Arrive before a very early wildlife or bus day.

    Day 7: Denali bus day

    Use the 2026 bus service within the current road limit. NPS says buses run no farther than East Fork at Mile 43 for the 2026 season.

    Day 8: Denali hiking and wildlife

    Use entrance-area trails, ranger programmes or another bus experience. Wildlife is never guaranteed.

    Day 9: Position for departure

    Return toward Anchorage or continue to Fairbanks only if the flight plan makes that more efficient.

    Day 10: Departure

    Do not place an all-day park transfer under a major flight.

    Where to stay and how many hotel changes to make

    In Anchorage use logistics, in Seward harbour proximity is convenient for early boats, and in Denali compare park-entrance access with shuttle and meal availability.

    Hotel geography matters more than a small difference in nightly rate. A room that removes a repeated transfer, difficult parking or an early-morning commute often adds more value than a prettier property in the wrong part of the route.

    Read recent guest reviews for practical details that promotional photos rarely show: stairs, lift size, street noise, parking access, breakfast hours and the final walk from transport. Those details matter most on multi-base trips when luggage and early departures are involved.

    For families and older travellers, central or transport-friendly accommodation can reduce taxis, fatigue and lost time enough to justify a slightly higher price.

    Transport: what is worth planning in advance

    The Alaska Railroad can replace some driving, but choose it for schedule and experience. Rental cars add flexibility but one-way fees and long distances matter.

    Measure every move door to door rather than by the headline timetable. Checkout, terminal access, waiting, luggage and the final connection can turn a short journey into half a day.

    Use inflexible tickets only when the saving is meaningful and the day is genuinely fixed. Weather-sensitive island, mountain, marine and park plans benefit from flexibility.

    Save tickets, hotel addresses and essential timetables offline. Rural roads, national parks and islands are exactly where mobile coverage or battery life can become least reliable.

    Food and daily rhythm

    Anchorage has the broadest dining; Seward and Denali have more limited peak-season capacity. Carry snacks and water on long boat or bus days.

    Use meals to control the rhythm of the day. A long regional lunch can be both an experience and a recovery period after museums, hiking, heat or an early start.

    Do not make every meal another attraction. Mix destination restaurants with markets, bakeries, cafés and simple local places so food improves the route instead of controlling it.

    Reserve only the meals that genuinely matter. Leaving other meals open prevents unnecessary cross-town travel and gives room for discoveries.

    Families, children and older travellers

    Boats, wildlife and trains are memorable for children, but long transport days need breaks. Older travellers should consider boat motion and bus duration.

    For multigenerational travel, the useful pace is the one at which the least mobile member still enjoys the day. That usually creates a better shared trip for everyone.

    Children often respond better to a change of format than to another famous sight: a beach after a museum, a ferry after a city walk, wildlife after a road day or a pool after a hike.

    When accessibility matters, ask specific questions about steps, trail surfaces, boat boarding, lifts and vehicle access rather than relying on a generic accessibility label.

    Budget: where the money really goes

    Alaska is expensive because lodging, rental cars, rail and guided marine trips all carry high seasonal demand. Spend where logistics matter most.

    Compare total trip cost rather than headline prices. Parking, transfers, luggage, tours and time lost reaching a remote hotel can erase an apparent saving.

    The best splurges usually remove friction: a central room, a direct transfer, a guide where context matters or one extra night that prevents an exhausting move.

    Keep a contingency rather than allocating every day to the last euro or dollar. Weather, a changed service, a taxi or an extra night can appear even on a well-planned journey.

    Best time to go

    Summer gives broadest access and long daylight; shoulder seasons reduce crowds but change services quickly. Weather can still be cool, wet and windy.

    Shoulder season often balances weather, demand and prices well, but ferries, mountain services, wildlife excursions and rural attractions may run less frequently.

    Heat, rain, snow, wind and daylight should change the order of a day. Use the most comfortable hours for exposed outdoor sights and keep easier alternatives available.

    Pack for the entire route rather than the destination stereotype. Coast, mountains, cities and highland environments can require very different layers in the same week.

    Comfort, accessibility and realistic pacing

    The route never asks you to do a marine day and a huge road transfer together, and the final positioning night protects the flight.

    Travel fatigue compounds. One difficult transfer can reduce the quality of the following two days, which is why this itinerary avoids one-night bases unless geography genuinely requires them.

    A free half-day is not wasted time. It is insurance for weather, transport disruption, a tired child or a place you discover only after arriving.

    Decide before the trip which experiences are essential and which are optional. Shortening a day then feels like a deliberate choice rather than a failure.

    Small decisions that improve the trip

    Use only Seward and Denali as major nature blocks

    They already provide coast and interior.

    Respect the 2026 Denali road limit

    Plan from current NPS operations, not old itineraries.

    Give Seward a weather buffer

    Marine Alaska should never have only one chance.

    What I would leave out on this length of trip

    Leave Homer, Wrangell-St. Elias and the Inside Passage for separate Alaska trips.

    Skip trying to see Denali, Seward and Fairbanks with one night in each.

    Mistakes that make this trip harder than it needs to be

    • Driving tired after a long flight.
    • Booking only one Kenai Fjords weather window.
    • Planning Denali from pre-landslide itineraries.
    • Expecting guaranteed wildlife.
    • Underestimating transfer distances.
    • Driving from Denali directly to a tight Anchorage flight.

    How I would adapt the itinerary

    With seven days, use Anchorage, Seward and one shorter Denali block.

    With two weeks, add Fairbanks or Homer with proper nights.

    Before booking

    • Check current Denali NPS conditions.
    • Reserve peak-season buses and lodging.
    • Plan motion-sickness needs.
    • Compare rail versus rental-car costs.
    • Protect the final flight day.

    Practical questions

    How far can Denali buses go in 2026?

    NPS says buses travel no farther than East Fork at Mile 43 during the 2026 summer season.

    Do I need a car?

    Not necessarily; rail plus transfers can build much of this route.

    Is ten days enough?

    Yes for Anchorage, Seward and Denali, not the whole state.

    Final thoughts

    Alaska works best when you choose one coastal ecosystem and one interior ecosystem and give both enough time.

    Anchorage, Seward and Denali create a ten-day trip with glaciers, marine wildlife and mountain wilderness while respecting 2026 access realities.

    How to keep the itinerary resilient

    Before departure, rank the plan into essential experiences, strong options and easy-to-drop extras. If weather, traffic, fatigue or a changed service affects the day, remove an extra first. This protects the reason you chose the destination and prevents one disruption from turning the whole trip into catch-up travel.

    A useful daily rule is one main experience, one secondary activity and one open block rather than three major commitments. The open block can become lunch, a swim, a viewpoint, a café, another museum room or simply rest. If the group still has energy, add something optional; if not, finishing early is usually better than beginning the following morning already tired.

    One week before departure, check official transport, park or tourism information again. The evening before each major move, confirm the departure point, opening status, weather and hotel address. This simple routine catches most avoidable travel problems before they become expensive or tiring.

  • California Road Trip in 10 Days: San Francisco, Yosemite and the Central Coast Without Driving Every Day

    California Road Trip in 10 Days: San Francisco, Yosemite and the Central Coast Without Driving Every Day

    California road trips often become unrealistic because the state looks manageable when viewed as a single outline. San Francisco, Yosemite, Big Sur, Los Angeles, San Diego, Sequoia and Lake Tahoe can all appear on one ten-day wish list, but connecting them means hours of driving that displace the experiences you came for. A stronger first trip uses three main zones and accepts that California deserves multiple visits.

    This itinerary combines San Francisco, Yosemite National Park and the Central Coast. It is deliberately designed so you do not drive every day. You begin car-free in San Francisco, collect a rental only when leaving the city, spend two nights near or inside Yosemite, then give the coast enough time for road conditions and viewpoints before finishing in the Bay Area or another logical departure point.

    Quick trip summary

    • Stay car-free in San Francisco and collect the rental only when leaving the city.
    • Spend at least two nights for Yosemite; one overnight turns the park into a long driving exercise.
    • For 2026, Yosemite does not require an entrance reservation, but lodging and camping still need early planning.
    • Check highway conditions before committing to the coastal route; closures can change Big Sur logistics.
    • Finish within easy reach of your departure airport instead of scheduling a huge last-day drive.

    Who this itinerary is for — and when to change it

    This route is designed for a first visit with a moderate pace. It assumes you want the destination’s defining experiences without turning every day into an early start, late arrival and luggage transfer. Couples, solo travellers, families and mixed-age groups can all use the same geographic structure, but the number of activities inside each day should change with mobility, heat, jet lag and personal interests.

    The easiest way to personalize it is to identify your two non-negotiable experiences before booking hotels. Protect those first, then let the rest of the itinerary support them. If a weather-dependent activity matters more than a museum or city walk, give it the flexible day rather than hoping the forecast behaves exactly as expected.

    Where to stay: choose the base before the hotel

    Accommodation is a transport decision as much as a comfort decision. Check how you will reach the first activity in the morning, how you will return after dinner, whether the property has stairs or parking, and what happens with luggage on transfer days. A cheaper room that creates two difficult journeys every day can cost more in taxis, time and energy than a slightly more expensive base in the right place.

    California Rocky Pacific Coast Bay
    BaseWhy it works — and the trade-off
    San Francisco: Union Square / Embarcadero / MarinaChoose according to transit and evening style. A central hotel lets you avoid parking a rental car in the city.
    Yosemite Valley / park lodgingBest for reducing daily driving, but availability and price are major constraints. Reserve early.
    El Portal / Mariposa / OakhurstUseful gateway alternatives; compare the actual drive to your planned Yosemite sights rather than only the room price.
    Monterey / CarmelStrong base for the northern Central Coast, aquarium, 17-Mile Drive and Big Sur day sections.

    The four decisions that shape this trip most

    DecisionBest defaultWhen to change it
    Yosemite entranceNo timed vehicle reservation in 2026Still check current NPS updates shortly before travel; policies can change in future years.
    Yosemite sleepInside/near parkDo not save on a distant hotel if it creates hours of extra driving.
    Big SurRoad-condition dependentHave an inland fallback instead of assuming Highway 1 is fully open.
    Rental carDays 4–9Keeping it in San Francisco usually adds parking cost without adding freedom.

    Make these decisions before filling the calendar with attractions. They determine how many hotel changes, early starts and long journeys the trip contains. Once the structure is right, individual sightseeing choices become much easier to adjust.

    A realistic day-by-day route

    Days 1–3: San Francisco without a car

    Use arrival day around one waterfront or neighbourhood area and let jet lag determine the pace.

    On the first full day, connect a few nearby highlights—waterfront, North Beach, Chinatown or downtown—using walking and public transit. On the second, choose Golden Gate Park, the Presidio, Alcatraz or another major anchor rather than trying to cross the city repeatedly.

    Do not collect the rental car until the morning you leave. Parking cost and break-in risk make it poor value for most central sightseeing days.

    Golden Gate Bridge seen from above the San Francisco Bay entrance

    Days 4–5: San Francisco to Yosemite and a full park day

    Collect the car early and drive toward Yosemite, allowing for food, fuel and a stop before the park. Arrive with daylight if possible so the first mountain roads are not driven tired and in darkness.

    Use the full day around Yosemite Valley or the seasonally accessible area that best matches conditions. Waterfalls, viewpoints, short walks and shuttle use can create a complete day without a demanding hike.

    In 2026 the National Park Service states that an entrance reservation is not required, but parking congestion and accommodation scarcity still make early planning important.

    Day 6: Yosemite morning and transition west

    Use a final Yosemite morning for a viewpoint or walk you skipped, then drive west. Do not schedule a long coastal destination for the same evening unless the route is comfortably within daylight.

    Sleep in a logical transition town or continue to Monterey/Carmel if timing and conditions are good.

    This day is deliberately lighter because leaving a national park often takes longer than expected.

    California Palm Trees At Sunset

    Days 7–8: Monterey, Carmel and the accessible Big Sur coast

    Base in Monterey or Carmel for two nights. Use one day for the aquarium, waterfront, Carmel and nearby coast according to your interests.

    Use the second for the section of Big Sur that is open and practical at the time. Highway 1 is vulnerable to weather and landslide closures, so current road information should decide the route.

    Do not measure success by reaching a particular mile marker. Coastal viewpoints, redwood walks and beaches are the experience.

    Day 9: return toward the Bay Area

    Drive back toward San Francisco airport or another departure base using the route that current road conditions support.

    Return the rental car today if your final hotel has an airport shuttle or easy public transport.

    Keep the evening simple; a road trip is much more enjoyable when the last day is not a parking and packing emergency.

    Day 10: departure or final Bay Area buffer

    Use a late flight day for a nearby walk or meal rather than another distant excursion.

    If your trip continues elsewhere, today is a clean transfer day with no dependence on mountain or coastal roads.

    A buffer at the end is especially valuable in California because wildfire, winter weather, road works or coastal closures can reshape driving times.

    Pace check: if this stage runs late, remove the lowest-priority activity rather than stealing time from meals, sleep or the next transfer. A resilient itinerary should become simpler when something changes, not more frantic.

    Transport reality: plan door to door

    California is built for road trips once you leave San Francisco, but road conditions matter more than theoretical distance. Check Caltrans/official highway information for closures and the National Park Service for Yosemite conditions. The NPS states that Yosemite does not require an advance vehicle reservation in 2026, while lodging, camping and certain activities still require reservations or permits. If you travel in another year, verify the policy again rather than assuming 2026 rules still apply. Fuel up before entering remote areas and download offline maps.

    Door-to-door time is the number that matters. Add hotel checkout, reaching the station/airport/pier, waiting, boarding, collecting luggage, local transport at the other end and the possibility that everyone needs food immediately after arrival. This is why a “two-hour flight” or “three-hour drive” can consume most of a day. Our guide to building realistic 7-, 10- and 14-day itineraries explains how to treat transfer days honestly.

    California Palm Lined Coastal Boulevard

    Food strategy: make meals part of the route

    San Francisco is worth planning one or two specific meals, but road-trip days should remain flexible. Yosemite food options can be limited and busy, so carry breakfast/snacks and know what is available near your accommodation. Monterey and Carmel have broad restaurant choice, while Big Sur services are more spread out. Eating earlier can prevent the common problem of reaching a small town after kitchens have closed.

    One planned meal per day is usually enough. Keep the other meal flexible so it can respond to where you actually are, not where an old itinerary expected you to be. With children, older travellers or very hot weather, eating before everyone becomes tired is often more important than reaching the “best” restaurant on a list.

    When to go and how the season changes the plan

    California’s regions do not share one climate. San Francisco can be cool in summer, Yosemite access changes with snow and seasonal roads, and the Central Coast can be foggy even when inland areas are hot. Wildfire smoke can affect late-summer or autumn plans in some years. Build layers into your packing and use current conditions instead of assuming the same clothing works everywhere.

    Instead of searching for one universal best month, decide which compromise you prefer: better weather, fewer visitors, lower prices, long daylight, swimming conditions or seasonal wildlife. No month maximizes everything. Recheck short-term weather and official access information shortly before the relevant day, especially for roads, trails, boats and outdoor attractions.

    Budget: where spending actually improves the trip

    San Francisco hotels, rental cars, fuel and Yosemite-area accommodation are the major costs. Start the car rental late and return it early to avoid city parking. A more expensive Yosemite gateway hotel may actually save money if it reduces fuel and allows you to use park shuttles rather than driving back and forth. For a family trip, compare two hotel rooms with an apartment-style stay using our accommodation guide.

    The most useful upgrades are often logistical rather than luxurious: a hotel that removes a daily transfer, a direct ride after a long flight, a flexible ticket, an additional night in a weather-dependent region or a guide where interpretation genuinely adds value. Cut low-value extras before cutting the pieces that keep the route reliable.

    Common mistakes to avoid

    • Adding Los Angeles and San Diego to the same ten-day route without removing something else.
    • Keeping a rental car during the San Francisco portion and paying to park it.
    • Assuming an old blog post about Yosemite reservation rules is current for 2026.
    • Planning Big Sur without checking Highway 1 conditions shortly before travel.
    • Sleeping far from Yosemite solely for a lower nightly rate, then losing hours to daily driving.

    Most difficult trips are not ruined by one large mistake. They become tiring through a sequence of small optimistic assumptions: a transfer that “should” be quick, a hotel that is “only” a kilometre away, a famous walk that is assumed to suit everyone and a dinner reservation across town after an already long day. Leave margin before you need it.

    California Palm Lined City Street

    Families, older travellers and mixed-age groups

    This itinerary works well for families because it alternates city time, national-park scenery and coast. Yosemite has many shorter walks and viewpoints that do not require a full-day hike, while Monterey offers a strong weather-proof attraction in the aquarium. Older travellers should prioritize lodging close to the areas they want to visit and use shuttles/short trails to reduce fatigue. Avoid stacking a long coastal drive after a strenuous hiking morning.

    For mixed-age groups, agree which experiences everyone will share and which can be optional. Splitting for two hours is often healthier than forcing the entire group through one person’s priority. Build seating, toilets, shade, step-free access and realistic meal times into the plan with the same seriousness as headline attractions. Our guide to travelling with parents and older adults covers this approach in more detail.

    If you have more or less time

    With twelve to fourteen days, continue farther down the Central Coast or add Sequoia/Kings Canyon if seasonal access makes sense. With seven days, choose San Francisco + Yosemite + Monterey and keep Big Sur as a day section. California rewards regional focus far more than racing from San Francisco to San Diego.

    When shortening the trip, remove an entire base before cutting every destination to one night. When lengthening it, add depth before distance. An extra morning in a place you already understand often produces a better memory than another three-hour transfer to a new pin on the map.

    Useful official resources

    Opening hours, park rules, transport timetables, road conditions and visitor procedures can change. Use official sources for the details that affect your exact travel dates and recheck them shortly before departure.

    Final planning checklist

    • Confirm passport, visa, entry and transit requirements for your nationality and route.
    • Book the genuinely scarce transport or accommodation segment before secondary attractions.
    • Check the exact luggage journey between bases, including stairs, ferries, station exits and rental-car rules.
    • Save offline copies of essential reservations, insurance details and each accommodation address.
    • Recheck weather, road, park, trail or transport notices shortly before each critical day.
    • Keep at least one flexible half-day that can absorb rain, fatigue, a delay or a cancellation.
    • Choose clothing and footwear for the actual surfaces and climate, not only for photographs.
    • Leave a generous buffer before international flights and other connections that are expensive to miss.

    The purpose of a good itinerary is not to prove that you covered the maximum distance. It is to make the important experiences easier to enjoy and to leave enough energy for the unexpected parts that become the best memories. Use this route as a framework, then remove anything that does not fit your interests, mobility or travel rhythm.

  • Hawaii in 10 Days: Oahu and Maui Without Turning Island Hopping Into Airport Hopping

    Hawaii in 10 Days: Oahu and Maui Without Turning Island Hopping Into Airport Hopping

    Hawaii is one of those destinations where adding more islands can make a trip worse. Oahu, Maui, Kauai and Hawaiʻi Island each justify a holiday of their own, yet first-time visitors often try to fit three or four into ten days. The result is more packing, rental-car paperwork and airport time than the map suggests.

    A better ten-day introduction uses two islands. Oahu offers Honolulu, history, urban food and varied beaches; Maui adds a different landscape and a stronger road-trip feel. This plan protects enough time on both islands to understand them rather than treating each one as a collection of famous stops.

    Quick trip summary

    • Use only two islands in ten days.
    • Start with Oahu for 4 nights and give Maui about 5 nights plus the transfer day.
    • Rent a car only for the days when it improves access; Waikiki does not require one every day.
    • Treat the Road to Hana and Haleakalā as separate high-effort days.
    • Check park access, reservations, road conditions and ocean safety shortly before each outdoor day.

    Who this itinerary is for — and when to change it

    This route is designed for a first or early visit with a moderate pace. It assumes that the goal is to understand the destination rather than collect the highest possible number of stops. Couples, solo travellers, families and mixed-age groups can use the same geographic structure, but activity intensity should change with mobility, climate, jet lag and personal interests.

    Before booking every attraction, identify the two experiences you would most regret missing. Protect those first, then build the rest of the trip around them. Weather-dependent beaches, mountains, wildlife, boats and scenic roads should remain movable, while museums, markets and neighbourhood time can often shift more easily.

    Where to stay: choose the base before the hotel

    Accommodation is a transport decision as much as a comfort decision. Check how you will reach the first activity in the morning, what happens after dinner, whether the property has lifts or parking, and how luggage will move on transfer days. A cheaper room that creates two difficult journeys every day can cost more in taxis, time and energy than a slightly more expensive base in the right place.

    Base Why it works — and the trade-off
    Waikiki The easiest first-time Oahu base for beach access, food and transport; parking can be expensive if you keep a car throughout.
    Ko Olina Resort-oriented and calmer for families, but less convenient for Honolulu sightseeing.
    Maui: Kihei / Wailea Good access to south Maui beaches and services; Wailea is more resort-focused and usually pricier.
    Maui: Kaʻanapali / West Maui Strong beach-resort choice with sunset views, but road access and driving times should be checked for your specific plans.

    The four decisions that shape this trip most

    Decision Best default When to change it
    Number of islands Two Add a third only with 14+ days or if you already know exactly what you are sacrificing.
    Oahu car Part-time rental Keep one continuously only if parking cost and daily driving make sense.
    Maui car Yes for most itineraries Use transfers only if you plan to stay almost entirely at one resort.
    Big driving day Choose Hana or a very full upcountry day Do not stack multiple long scenic drives back to back.

    Make these choices before filling the calendar with attractions. They determine how many hotel changes, early starts and fragile connections the trip contains. Once the structure is right, individual sightseeing choices are much easier to adjust.

    A realistic day-by-day route

    Days 1–2: Waikiki and Honolulu orientation

    Keep arrival day around Waikiki, the beach and nearby food.

    Use the first full day for Pearl Harbor if it is a priority, downtown history and one neighbourhood or viewpoint rather than crossing the island repeatedly.

    Schedule reservations that matter, but leave evening flexible for jet lag.

    Days 3–4: one Oahu road day and one slower day

    Rent a car for a North Shore or windward-coast day, grouping stops in one direction.

    Choose a few beaches and viewpoints instead of trying to stop at every pin saved on your map.

    Use the second day for swimming, a museum, Diamond Head if appropriate, or a food-focused neighbourhood day.

    Illustrated ten-day itinerary for Oʻahu and Maui

    Day 5: fly to Maui

    Allow time for hotel checkout, returning the car if you rented one, airport security, the inter-island flight, collecting another car and checking in again.

    Do not call this a “half-day transfer” and then reserve a distant sunset activity.

    Shop for water and simple breakfasts after arrival if you are staying in a condo or apartment-style property.

    Days 6–8: Maui with one demanding day at a time

    Use one day for a beach-and-snorkel rhythm close to your base.

    Give the Road to Hana its own day only if everyone tolerates curves and long driving; otherwise explore a shorter east-Maui section.

    Make Haleakalā or upcountry a separate day, checking reservations and weather where required.

    Pace check: if this stage runs late, remove the lowest-priority activity rather than stealing time from meals, sleep or the next transfer. A resilient itinerary should become simpler when something changes, not more frantic.

    Days 9–10: flexible coast day and departure

    Keep day nine flexible for the beach, a boat trip, a missed weather-dependent activity or simply a slower final day.

    On departure day, leave rental-car and airport margin rather than squeezing in a remote beach.

    If your international flight leaves from Honolulu on a separate ticket, consider connection risk carefully rather than relying on a tight same-day inter-island flight.

    What is worth booking in advance

    Book the components that are genuinely scarce or that would break the route if unavailable: limited transport, a special accommodation, a high-priority guided activity or a reservation required by a park or attraction. Do not pre-book every hour. Leaving some meals, beaches, short walks and neighbourhood time open gives you somewhere to move when weather or energy changes.

    Keep confirmations offline and note cancellation windows. If two weather-sensitive activities are booked on consecutive days, understand whether either can move. The strongest itinerary is not the one with the most reservations; it is the one that still works when one reservation fails.

    Transport reality: plan door to door

    Inter-island flights are short in the air but much longer door to door. Add hotel checkout, car return, airport time, baggage, another car pickup and the drive to the next accommodation. On Oahu, buses, rideshares and walking can cover many Waikiki/Honolulu days. On Maui, a car is normally the practical choice because beaches, trailheads and scenic drives are dispersed. Never let an online route estimate replace current road and park information.

    Door-to-door time is the number that matters. Add hotel checkout, reaching the station, airport, ferry or pickup point, waiting, boarding, luggage, local transport at the other end and the possibility that everyone needs food immediately after arrival. This is why a “one-hour flight” or “two-hour drive” can consume half a day. Our guide to building realistic 7-, 10- and 14-day itineraries explains how to treat transfer days honestly.

    Food strategy: make meals part of the route

    Hawaii can be expensive, so mix destination meals with food trucks, plate lunches, supermarkets and simple breakfasts. Oahu has a broad restaurant scene and is ideal for trying local, Japanese, Filipino, Korean and Pacific influences. On Maui, plan food stops around long driving days because rural areas may have fewer late options. Carry water and snacks, but respect local rules about where food is allowed at beaches and parks.

    One planned meal per day is usually enough. Keep another meal flexible so it can respond to where you actually are, not where an old itinerary expected you to be. With children, older travellers or very hot/cold weather, eating before everyone becomes exhausted is often more important than reaching a restaurant that looked perfect months earlier.

    When to go and how the season changes the plan

    Hawaii works year-round, but winter surf, trade winds, rain patterns and whale season can change what a “perfect beach day” looks like. Different sides of each island can have different conditions on the same day. For ocean activities, local warnings matter more than a generic weather icon. Build flexibility around snorkeling, boat trips and exposed hikes.

    Instead of searching for one universal “best month,” decide which compromise you prefer: better weather, fewer visitors, lower prices, longer daylight, beach conditions, snow or wildlife. No period maximises everything. Recheck short-term weather and official access information shortly before each critical outdoor day.

    Budget: where spending actually improves the trip

    Accommodation, rental cars, parking, resort fees where applicable, food and inter-island flights drive the budget. The strongest saving is often structural: two islands instead of three, part-time car rental on Oahu, fewer paid activities and a property that reduces daily parking. Do not judge a condo only on nightly price; cleaning and other fees can materially change a short stay.

    The most useful upgrades are often logistical rather than luxurious: a hotel that removes a daily transfer, a direct ride after a long flight, a flexible ticket, an additional night in a weather-dependent region or a guide where interpretation genuinely adds value. Cut low-value extras before cutting the pieces that keep the route reliable. Our realistic travel-budget guide can help you account for the smaller costs between headline bookings.

    Common mistakes to avoid

    • Visiting three or four islands in ten days.
    • Keeping a rental car in Waikiki for days when it sits in expensive parking.
    • Underestimating the Road to Hana because the mileage looks short.
    • Ignoring ocean warnings because the beach looks calm from shore.
    • Booking a tight connection between separate inter-island and long-haul tickets.

    Most difficult trips are not ruined by one large mistake. They become tiring through a sequence of optimistic assumptions: a transfer that “should” be quick, a famous walk assumed to suit everyone, a meal delayed until everyone is hungry and a departure day with no margin. Leave space before you need it.

    Families, older travellers and mixed-age groups

    Oahu offers the easiest variety for families because an urban day, beach day and museum day can be mixed without long drives. On Maui, choose a base with easy food and swimming access so every day does not start in the car. For older travellers, reduce steep viewpoints and long driving combinations, and check whether boat excursions require beach launches or difficult boarding.

    For mixed-age groups, agree which experiences everyone will share and which can be optional. Splitting for two hours is often healthier than forcing the whole group through one person’s priority. Build seating, toilets, shade or warm shelter, step-free access and realistic meal times into the plan with the same seriousness as headline attractions. Our guide to travelling with parents and older adults develops this approach in more detail.

    If you have more or less time

    With seven days, stay on one island or use a 3/4-night split only if flights align well. With two weeks, add Hawaiʻi Island or Kauai rather than giving each existing stop only one extra day. A third island works best when it brings a clearly different priority such as volcano landscapes or hiking, not merely another beach.

    When shortening the trip, remove an entire base before cutting every destination to one night. When lengthening it, add depth before distance. An extra morning in a place you already understand often produces a better memory than another multi-hour transfer to a new pin on the map.

    Useful official resources

    Opening hours, transport timetables, road conditions, trail rules, sea conditions and visitor procedures can change. Use official sources for the details that affect your exact travel dates and recheck them shortly before departure.

    Final planning checklist

    • Confirm passport, visa, entry and transit requirements for your nationality and route.
    • Book the genuinely scarce transport or accommodation segment before secondary attractions.
    • Check the exact luggage journey between bases, including stairs, boats, station exits and rental-car rules.
    • Save offline copies of essential reservations, insurance details and each accommodation address.
    • Recheck weather, road, park, trail, sea or transport notices shortly before each critical day.
    • Keep at least one flexible half-day that can absorb rain, fatigue, a delay or a cancellation.
    • Choose clothing and footwear for the actual surfaces and climate, not only for photographs.
    • Leave a generous buffer before international flights and other connections that are expensive to miss.

    The purpose of a good itinerary is not to prove that you covered the maximum distance. It is to make the important experiences easier to enjoy and to leave enough energy for the unexpected parts that become the best memories. Use this route as a framework, then remove anything that does not fit your interests, mobility or travel rhythm.

  • Orlando in 5 Days: Theme Parks, Winter Park and Local Florida Without Theme-Park Burnout

    Orlando in 5 Days: Theme Parks, Winter Park and Local Florida Without Theme-Park Burnout

    If this destination is part of a wider trip, compare the pace with Central Florida in 8 Days: Orlando, Winter Park and the Space Coast. Use that article for the larger route and this guide for the practical details of staying in the destination itself.

    Quick trip summary

    • Ideal stay: 5 days for a first visit.
    • Best approach: one major experience per half-day, with at least one flexible block for weather, fatigue or transport changes.
    • Good for: families, couples, theme-park fans, multigenerational groups and travellers who want to see more than resort corridors.
    • Main planning risk: treating map distance as if transfers, queues, heat, weather and meals took no time.

    Is this the right trip for you?

    Orlando is not one destination but several travel styles layered together: huge theme-park resorts, convention and entertainment districts, suburban neighbourhoods, lakes and the older communities of central Florida. Five days works well when you limit the number of full park days and leave room for recovery, food and a different side of the region.

    A realistic itinerary does not try to prove how much you can fit into a day. It protects the experiences that justify the trip and leaves room for meals, transport and the small discoveries that make one destination feel different from another.

    Where to stay

    AreaWhy choose it
    Walt Disney World resort areaBest when Disney parks dominate the trip and you value resort transport; less convenient for downtown Orlando and Winter Park.
    Universal / International DriveGood for Universal-oriented trips, restaurants and attractions; traffic and pedestrian distances can still be significant.
    Downtown OrlandoUseful for local culture, events and neighbourhood dining, but not the easiest base for multiple theme-park mornings.
    Winter ParkPleasant, walkable centre with restaurants and lakes; ideal for a local Florida stay if theme parks are only part of the itinerary.

    Choose accommodation by the journeys you will repeat. Map the first morning, the area where you are likely to eat dinner and the departure point for any fixed excursion. A room that removes two awkward transfers every day can be better value than a cheaper property that creates constant taxi or transit costs.

    How to get there

    Orlando International Airport is the main gateway. Rental cars, ride-hailing, taxis, hotel transfers and selected rail or shuttle connections can all work depending on your hotel. Do not assume a resort is close simply because it uses an Orlando address; measure the exact airport, park and restaurant transfers before booking.

    Save the accommodation address offline and screenshot the first transfer before travelling. Arrival day should carry less risk than the rest of the trip: avoid a non-refundable attraction immediately after a flight or long road journey, and leave extra time when baggage, immigration, weather or traffic can affect the first connection.

    Orlando Universal Studios Florida Logo Wall

    Getting around

    Transport depends entirely on where you stay. Resort buses and hotel shuttles can reduce driving for theme parks, while a rental car becomes useful for Winter Park, neighbourhood restaurants and regional excursions. Ride-hailing can be efficient for a short stay, but surge pricing and long park pickup zones add time and cost.

    Compare journeys door to door rather than station to station. Waiting time, stairs, the final walk and the number of transfers can matter more than the nominally fastest route, especially for families, senior travellers or anyone carrying luggage.

    A realistic itinerary

    The schedule below is a framework rather than a rigid timetable. Opening days, seasonal transport, weather and local events should determine the exact order. If a major attraction is closed or conditions are poor, move the whole block instead of forcing the rest of the trip to become inefficient.

    Day 1 – Arrival, pool time and a low-pressure Orlando evening

    Do not start with a full theme-park ticket after a long flight unless your arrival is exceptionally early. Check in, recover and use the evening for a resort area, Disney Springs, Universal CityWalk, a local restaurant or simply the hotel pool. Protecting energy here improves the next two days.

    Day 2 – One major theme park, from opening to a sensible finish

    Choose the park that matters most to your group and build the day around it. Learn the current reservation, queue and transport system before arrival because park procedures change. Take a real meal break and decide in advance what you are willing to skip instead of trying to complete every attraction.

    Day 3 – Winter Park and local Orlando

    Change pace completely. Spend time around Park Avenue, the lakes, museums or gardens in Winter Park, then explore a local Orlando neighbourhood for dinner. This day is especially valuable for adults and multigenerational groups who need a break from long queues and amplified environments.

    Day 4 – Second park or a different kind of attraction

    Use a second full park day only if it is genuinely central to the trip. Otherwise choose Kennedy Space Center as a dedicated excursion, a wildlife experience, shopping or more local culture. Avoid combining a distant excursion with an evening park ticket unless everyone in the group has the stamina for it.

    Orlando Universal Studios Florida Globe Entrance

    Day 5 – Flexible favourite, shopping and departure buffer

    Return to a favourite area, schedule a character meal or attraction that did not fit earlier, or keep the day simple before a flight. A late checkout or pool morning can be more enjoyable than paying for another full attraction day you only use for a few hours.

    Keep enough margin for meals, transport and an unscheduled stop. If this block runs long, remove the lowest-priority extra rather than turning the rest of the day into a race.

    How many days do you really need?

    5 days is a strong length for a first visit because it gives the destination one full block for its essential sights and enough margin for neighbourhoods, weather or transport. With one less day, remove the lowest-priority excursion rather than compressing every meal and transfer. With one extra day, add a regional experience or a deliberately slow day instead of stretching each sightseeing day until evening.

    If this stop sits inside a longer itinerary, count hotel changes, airport transfers and recovery time as real parts of the trip. A night that prevents two consecutive transfer days can be more valuable than another attraction.

    Best time to visit

    Central Florida is hot and storm-prone in summer, with high humidity and frequent afternoon weather interruptions. Winter and spring can be more comfortable, while school holidays and special events strongly affect crowd levels and prices. Choose dates by both weather and park calendars.

    Do not choose dates from average temperature alone. Check daylight, rainfall, local holidays, school breaks and the seasonal schedule of the one experience that matters most to you. Shoulder season is excellent only when the things you actually want to do are operating.

    What deserves advance booking?

    Book high-priority theme-park tickets, resort stays and any dining or experience that has a strict reservation system. Procedures change often, so use official park information close to travel. Keep local restaurants and non-park sightseeing more flexible to recover from weather or fatigue.

    Book the scarce item first, then shape flexible sightseeing around it. Avoid prepaying every hour of the trip: a delayed flight, hot afternoon, heavy rain or long lunch should not create a chain of missed reservations.

    Where and what to eat

    Orlando’s food scene is broader than theme-park dining. Build at least one evening around a local neighbourhood or Winter Park, and avoid spending every meal inside attraction zones if food matters to you. In parks, mobile ordering and an early lunch can reduce wasted time, but current systems should be rechecked before arrival.

    Use meal planning to reduce unnecessary travel. If the day ends in a particular neighbourhood, eat there instead of crossing the city because one restaurant looked attractive online. Keep at least one meal unreserved so you can follow a market recommendation or change plans when energy is low.

    Families, older travellers and accessibility

    Orlando is built for families, but that does not mean a child can handle twelve-hour park days repeatedly. Alternate intense and light days, plan stroller or mobility-device logistics and identify air-conditioned rest spots. Older travellers benefit from accessible resort transport and realistic walking estimates—large parks can produce very high step counts even without obvious hikes.

    Orlando Seaworld Orca Leaping From Pool

    For mixed-age groups, plan around the slowest realistic pace rather than the fastest walker. One important sight in the morning and one flexible block in the afternoon usually works better than four timed entries. If step-free access, seating, toilets or lift availability are essential, confirm them directly with the attraction or hotel; historic districts often have partial accessibility rather than a simple yes-or-no answer.

    Budget: where to spend and where to save

    Theme-park tickets, parking, resort fees, food and queue-management add-ons can make Orlando expensive quickly. Decide which paid experiences actually change your trip. A cheaper off-site hotel may be poor value if it creates daily parking and ride-hailing costs; compare the full package, not just the room rate.

    Compare the total cost of a day, not only individual ticket prices. A hotel that removes repeated transfers, a driver that replaces three difficult connections or a flexible ticket that protects a weather-dependent plan may be better value than the cheapest option on paper.

    Safety and practical awareness

    Heat, lightning, dehydration and driving fatigue are common practical risks. Follow park weather instructions, never wait out thunderstorms in exposed areas and use sunscreen even on cloudy days. For rental cars, do not leave luggage visible and allow extra time around unfamiliar toll roads and complex interchanges.

    Save offline copies of hotel details, insurance information, essential tickets and emergency contacts. Split cards and cash so one lost wallet does not become a trip-wide problem. If official advice or local conditions change, adjust the plan even when that means abandoning a reservation.

    If you have one extra day

    With more time, Kennedy Space Center deserves its own day rather than being squeezed into a travel afternoon. Winter Garden, Mount Dora or other central Florida towns can provide a calmer contrast. If beaches are your priority, add an overnight or a dedicated coastal day instead of treating the drive as trivial.

    Responsible travel and local rhythm

    Historic centres, markets, beaches, religious sites and residential streets are working parts of local life. Keep doorways and pavements clear, follow photography rules, dress appropriately where required and choose locally run businesses when they fit naturally into the day. In natural areas, use marked paths and respect closures even when a shortcut looks easy.

    A slower schedule makes responsible travel easier because you are less tempted to ignore local rules just to keep an overloaded itinerary on time.

    Common mistakes to avoid

    • Booking five consecutive full theme-park days for a mixed-age group.
    • Choosing accommodation without calculating daily transport, parking and resort-fee costs.
    • Ignoring afternoon thunderstorms and heat when planning outdoor queues.
    • Assuming every attraction with an Orlando address is close to every other one.
    • Buying expensive add-ons before deciding which experiences actually matter to the group.

    Most tiring trips are not ruined by one dramatic mistake. They become difficult through a chain of optimistic assumptions. Add margin before you need it.

    Orlando Mickey And Minnie Riding Theme Park Float

    A slower experience worth protecting

    Protect one non-park evening with no timed attraction. Eat somewhere local, walk around Winter Park or stay by the pool. The trip often becomes more memorable once everyone has enough energy to enjoy the next park day.

    How to make the trip feel less rushed

    Separate fixed commitments from flexible interests. Put only transport departures, limited-entry attractions and weather-dependent excursions into the fixed category. Keep markets, viewpoints, cafés, parks and smaller museums movable. Each evening, look at the next day again and remove one low-priority stop early if the group is tired.

    Also distinguish between distance and effort. Two kilometres on flat shaded pavements is not the same as two kilometres in tropical humidity, winter cold, steep streets, altitude or exposed heat. Plan by the physical reality of the destination, not only by map distance.

    Photography, weather and the best time of day

    Early mornings are useful for quieter streets and cooler conditions in most destinations, while late afternoon often gives softer light and a more relaxed pace. Do not build a whole itinerary around one photograph: weather and crowds change, and the best viewpoint is often the one you can reach without sacrificing the rest of the day.

    Keep one indoor alternative saved on your phone. A museum, market, café or cultural centre can rescue a day affected by rain, heat, wind or transport disruption without forcing an expensive last-minute change.

    Shopping and souvenirs

    Buy things that connect to the destination rather than generic travel souvenirs. Markets, museum shops and specialist food stores are usually better places to understand provenance. If you are flying internationally, check customs rules before buying food, plants, animal products or large quantities of liquids.

    What to pack

    Comfortable walking shoes, sun protection, a refillable bottle, a compact poncho and a power bank are essential. Bring a light layer for strong indoor air-conditioning and label children’s essential items clearly on busy park days.

    Official information to check before you go

    Opening days, transport, weather-sensitive access and event schedules can change. Recheck the details that control fixed reservations shortly before travel, especially during public holidays, major festivals or severe weather.

    Final planning checklist

    • Confirm passport, visa, entry and transit requirements for your nationality.
    • Choose accommodation by the journeys you will repeat, not by price alone.
    • Reserve only the attractions or excursions that genuinely control the day.
    • Save offline copies of tickets, hotel details, insurance information and essential addresses.
    • Check the exact airport, station, bus terminal, ferry pier or pickup point before arranging transfers.
    • Keep one flexible half-day for weather, fatigue or something discovered after arrival.
    • Recheck official opening information and local transport shortly before each fixed day.

    Final thoughts

    A good stay is not the itinerary with the highest number of pins. It is the one that protects the experiences you care about, leaves enough energy to notice the destination between them and can absorb a delayed flight, a hot afternoon or a change of weather without collapsing. Use this plan as a structure, then let local conditions and your own pace decide the final order.