Category: North America

Practical travel guides for destinations in North America, focused on neighbourhood planning, transport, costs and first-time itineraries.

  • New England in 10 Days: Boston, Vermont, White Mountains and Acadia Without a Daily Hotel Change

    New England in 10 Days: Boston, Vermont, White Mountains and Acadia Without a Daily Hotel Change

    New England looks compact by American standards, which is why fall itineraries often become Boston, Vermont, White Mountains, Acadia and southern New England in a week. The mileage may fit, but the experience becomes a series of checkouts.

    This ten-day route uses Boston, Vermont, New Hampshire’s White Mountains and Bar Harbor/Acadia. It deliberately leaves southern New England and Cape Cod for another trip.

    The regional 2026 foliage guide recommends booking autumn lodging early, especially in Vermont, New Hampshire and Maine. At Acadia, the NPS requires Cadillac Summit Road vehicle reservations from May 20 through October 25, 2026.

    Quick trip summary

    • 2 nights Boston, 2 Vermont, 2 White Mountains, 3 Bar Harbor/Acadia, Day 10 departure.
    • Collect the rental car when leaving Boston.
    • Do not assume exact peak foliage dates.
    • Book fall lodging early.
    • Reserve Cadillac Summit Road if it matters to your 2026 plan.

    Why this route works

    Boston gives history and food without parking stress before the road trip begins.

    Vermont and the White Mountains provide two different inland landscapes; each deserves a multi-night base.

    Acadia is far enough east that three nights are needed to justify the drive and preserve a weather buffer.

    A realistic itinerary at a glance

    DaysBaseMain focus
    1–2BostonHistory, neighbourhoods and food
    3–4VermontSmall towns, scenic roads and hikes
    5–6White MountainsKancamagus region and mountain scenery
    7–9Bar Harbor / AcadiaCoast, park loops and weather buffer
    10DepartureBangor/Boston onward travel

    Day-by-day plan

    Day 1: Boston arrival

    Stay car-free and use the Freedom Trail area, waterfront or a neighbourhood meal according to arrival time.

    Day 2: Boston properly

    Choose history, museums, Cambridge or another neighbourhood cluster. Do not rent the road-trip car yet.

    Day 3: Boston to Vermont

    Collect the car and drive toward Woodstock, Stowe or another chosen base, using one town stop rather than crossing the whole state.
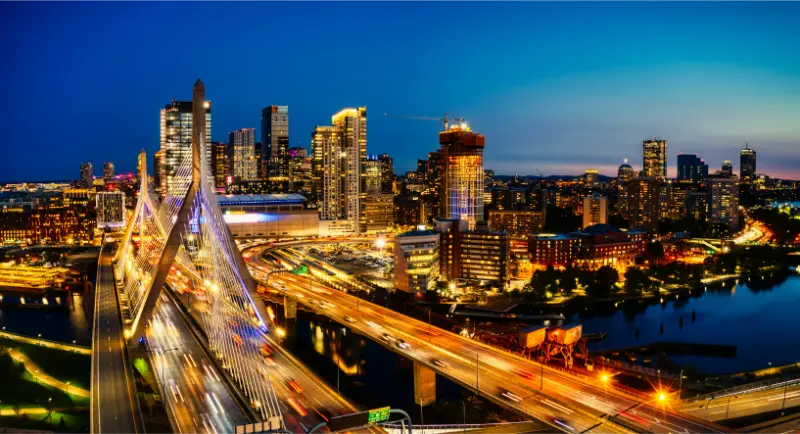
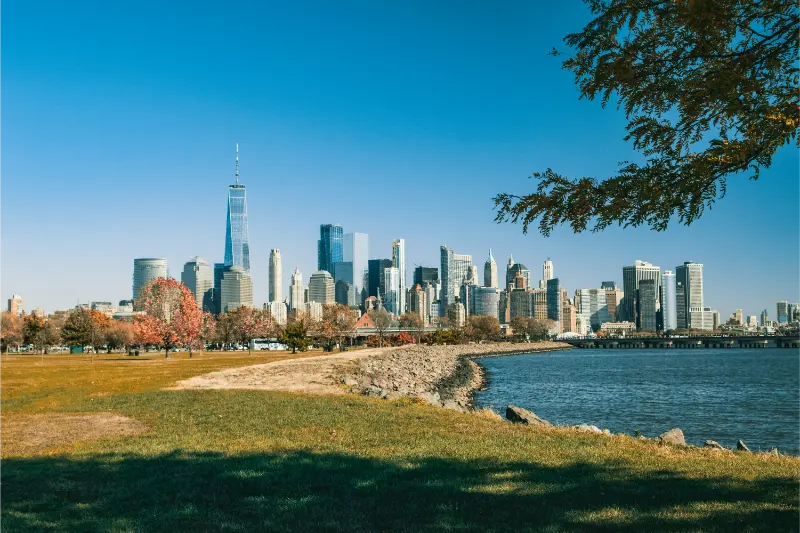
    Boston Zakim Bridge And Downtown At Night

    Day 4: Vermont foliage and town day

    Choose a scenic loop, short hike, farm or food stop and one village. Let current foliage reports influence direction.

    Day 5: Vermont to White Mountains

    Drive east and settle around North Conway, Lincoln or another practical base.

    Day 6: White Mountains

    Use the Kancamagus region, Franconia Notch or a focused hike. Fall traffic can be significant, so start early.

    Day 7: White Mountains to Bar Harbor

    This is the longest move; stop for lunch and one Maine town only.

    Day 8: Acadia main day

    Use Park Loop Road, Ocean Path, Jordan Pond or another cluster. If Cadillac Summit Road matters, follow the current reservation process.

    Day 9: Acadia weather buffer

    Use another trail, carriage roads, Schoodic or Bar Harbor according to conditions.

    Day 10: Departure

    Fly from Bangor when practical or begin the longer return to Boston with a proper buffer.

    Where to stay and how many hotel changes to make

    Boston should be central enough to remain car-free; in Vermont and New Hampshire choose one base rather than a sequence of inns; Bar Harbor is the easiest first Acadia base.

    For New England, location matters more than a small difference in nightly rate. A hotel that removes repeated transfers usually adds more value than a prettier property in the wrong part of the route.

    Read recent guest reviews for practical details that booking photos rarely show: stairs, lift size, road noise, parking access, breakfast hours and the final walk from transport.

    Transport: what is worth planning in advance

    A rental car is necessary once you leave Boston, but fall weekend traffic can make short scenic roads much slower than expected.

    Measure every move door to door rather than by the headline timetable. Checkout, terminal access, waiting, luggage and the final connection can turn a short journey into half a day.

    Use inflexible tickets only when the saving is meaningful and the day is genuinely fixed. Weather-sensitive coast, mountain, wildlife and boat plans benefit from flexibility.

    Boston Waterfront Skyline At Night

    Food and daily rhythm

    Boston offers broad dining while rural New England rewards bakeries, diners, farm shops and earlier dinner planning.

    Use meals to control the rhythm of the day. A long regional lunch can be an experience and a recovery period, especially after hiking, museums, wildlife outings or early starts.

    Do not make every meal another attraction. Mix local specialties with simple food so that the destination, not the restaurant schedule, remains the centre of the trip.

    Families, children and older travellers

    Short hikes, covered bridges, lakes and Acadia’s coast create variety. Older travellers can use scenic drives and carriage roads instead of long mountain hikes.

    For multigenerational travel, the useful pace is the one at which the least mobile member still enjoys the day. That normally produces a better shared trip for everyone.

    When accessibility matters, ask specific questions about steps, trail surfaces, boat boarding, lift dimensions and vehicle access rather than relying on a generic label.

    Budget: where the money really goes

    Autumn lodging can rise sharply in Vermont, New Hampshire and Bar Harbor. A Bangor departure or one-way car fee can be worth it if it saves a full return-driving day.

    Compare total trip cost rather than headline prices. Parking, transfers, luggage, park transport, tours and time lost reaching a remote hotel can erase an apparent saving.

    Keep a contingency rather than allocating every day to the last euro or dollar. Weather, a changed ferry, a taxi or an extra night can appear even on a carefully planned journey.

    Best time to go

    Fall color timing varies every year by latitude, elevation and weather; use current reports once the trip starts.

    Shoulder season often balances weather, demand and room prices well, but ferries, mountain services, wildlife excursions and rural restaurants may run less frequently.

    Boston Waterfront Financial District At Night

    Heat, rain, snow, wind and daylight should change the order of your day. Use the most comfortable hours for exposed outdoor sights and keep lower-effort alternatives available.

    Comfort, accessibility and realistic pacing

    The route has four bases in ten days but none is a one-night stop. The longest drive lands you in Acadia for three nights.

    Travel fatigue compounds. One difficult transfer can reduce the quality of the following two days, which is why this itinerary avoids one-night bases unless geography genuinely requires them.

    A free half-day is not wasted time. It is insurance for weather, laundry, a delayed service, a tired child or a place you discover only after arriving.

    Small decisions that improve the trip

    Do not chase exact foliage dates blindly

    Use current reports.

    Rent after Boston

    Urban parking is unnecessary.

    Give Acadia three nights

    Coastal weather deserves a buffer.

    What I would leave out on this length of trip

    Leave Cape Cod, Newport and the Berkshires for a southern New England trip.

    Skip trying to include all six New England states in ten days.

    Mistakes that make this trip harder than it needs to be

    • Changing inns every night.
    • Assuming peak foliage is the same week every year.
    • Ignoring Cadillac reservations.
    • Driving scenic roads only at midday on peak weekends.
    • Underestimating White Mountains-to-Acadia time.
    • Driving Acadia-to-Boston directly under an international flight.

    How I would adapt the itinerary

    With seven days, use Boston, White Mountains and Acadia or Boston, Vermont and White Mountains.

    With two weeks, add the Berkshires or coastal Maine south of Acadia.

    Before booking

    • Book autumn lodging early.
    • Check current foliage reports.
    • Reserve Cadillac Summit Road if desired.
    • Collect the car after Boston.
    • Protect the final flight.

    Practical questions

    When is peak foliage?

    There is no fixed date.

    Do I need a reservation for Acadia?

    General park entry is separate, but Cadillac Summit Road uses a seasonal vehicle reservation system.

    Is ten days enough?

    Yes for this northern route, not for all New England.

    Boston Subway Train At Station

    Final thoughts

    New England’s fall road trip becomes much better when foliage is treated as a landscape to live in rather than a color checklist.

    Boston, Vermont, the White Mountains and Acadia create a ten-day route with history, mountains and coast while preserving multi-night bases.

    How to keep this itinerary resilient

    Keep Day 9 uncommitted until you know which Acadia day has the best weather.

    In foliage season, plan alternate scenic roads because traffic and color can be better somewhere other than the famous route you originally saved.

    Who this route suits best

    This route is designed for travellers who prefer depth over collecting places. It keeps hotel changes low, protects flexible time and assumes that a good meal, an unexpectedly interesting neighbourhood or a slower morning can be as valuable as another attraction. That makes it particularly suitable for first-time visitors, couples, families and multigenerational groups.

    More energetic travellers can add a longer hike, an extra museum or a second excursion on the flexible days. Travellers who prefer an easier pace can remove those extras and still keep the core journey intact. Before booking, identify the two or three experiences that would genuinely disappoint you to miss; those are the ones to reserve or protect first.

    What to book early and what can wait

    Book the elements with genuinely limited capacity first: high-demand accommodation, protected-area access, popular trains or ferries, and any guided experience that is central to the trip. Leave ordinary meals, minor attractions and weather-dependent outdoor activities more flexible whenever possible. This prevents the itinerary from becoming a chain of reservations that forces you to ignore how the destination actually feels on the day.

    One week before departure, check the official transport or park information again. The evening before each major move, confirm departure points, opening status and the hotel address. That small routine catches most avoidable travel problems before they become expensive or tiring.
  • Vancouver Island in 10 Days: Victoria, Pacific Rim and the East Coast Without Driving End to End

    Vancouver Island in 10 Days: Victoria, Pacific Rim and the East Coast Without Driving End to End

    Vancouver Island is large enough to look manageable on a map and still surprise first-time visitors with its driving times. Mountains, ferry terminals, winding roads and irresistible coastal stops make a ten-day trip much better when it focuses on the southern and central island rather than trying to reach every community from Victoria to Cape Scott.

    The route below combines Victoria, the Pacific Rim and the east coast with three main bases. It leaves northern Vancouver Island for another trip, because adding it would turn relaxed coastal days into long transit stages.

    Wildlife, rainforests and ocean experiences are central to the island, but none should be treated as guaranteed. Weather and animal movement change daily, so a strong plan includes worthwhile beaches, towns and short walks even when a boat trip or wildlife sighting does not happen as expected.

    Quick trip summary

    • Allow 10 days for southern and central Vancouver Island.
    • Use Victoria, Tofino/Ucluelet and one east-coast base.
    • Do not add the far north unless you have more time.
    • Reserve summer ferries, Pacific Rim accommodation and key wildlife tours early.
    • Treat wildlife sightings as possibilities, not promises.

    Who this trip is best for

    This trip suits road trippers who enjoy ocean scenery, temperate rainforest, small cities, wildlife and a mixture of easy and moderate outdoor activity. Families and older travellers can enjoy most of the route without difficult hiking.

    It also suits travellers who want a Canada trip with varied landscapes but limited hotel changes. Anyone focused on remote wilderness expeditions or northern communities should plan a separate, longer island itinerary.

    How many days do you really need?

    Ten days is a strong first-trip length. Seven days can work with Victoria and Pacific Rim only, while two weeks allows Campbell River, Strathcona or the north without making every other day a transfer.

    Ten days give Vancouver Island enough breathing room for Victoria, the Pacific Rim and a portion of the east coast. If you have only a week, resist the temptation to keep all three at full length: the drive across the island deserves time, and Tofino and Ucluelet are places to linger rather than photograph from a car window. A slower route feels much more like a holiday.

    Where to stay and how to choose your bases

    Three bases keep the route simple. Add a fourth only if it clearly reduces driving for an activity you care about, not merely because another town appears on the map.

    Base Why it works
    Victoria Best for arrival, harbour atmosphere, gardens, museums and southern-island day trips.
    Tofino or Ucluelet Best for Pacific Rim beaches, rainforest walks, surf culture and marine excursions.
    Nanaimo, Parksville or Comox Valley Useful east-coast base for beaches, food, forests and onward ferry or driving connections.

    Treat your accommodation choices as three different parts of the journey. A walkable base helps in Victoria, while on the Pacific Rim it may be worth staying near the beaches or trails you expect to visit. On the east coast, consider where you want your final ferry or flight connection to begin. Check parking and late-arrival arrangements before committing.

    A realistic day-by-day itinerary

    Day 1: Arrive in Victoria

    Collect the car only when you need it, settle in and explore the harbour and walkable central area.

    If you arrive by ferry or flight, avoid an immediate multi-hour drive to the west coast.

    Day 2: Victoria and the south island

    Choose museums, gardens, a coastal walk or a wildlife tour if conditions suit.

    Keep marine activities on a day when you can move other sightseeing around the weather.

    Day 3: Victoria to Pacific Rim

    Drive toward Tofino or Ucluelet, allowing far more time than the map suggests for stops, road works and scenic detours.

    Buy groceries before the final part of the drive if your accommodation is self-catering.

    Day 4: Pacific Rim beaches and rainforest

    Use short rainforest walks and beach time to understand the landscape before committing to a longer activity.

    Check tide, surf and storm conditions; the ocean is beautiful but not automatically safe for swimming.

    Day 5: Wildlife, paddling or a flexible ocean day

    Take a responsible marine excursion, paddle with a guide or choose a second beach-and-trail day.

    If a boat is cancelled, keep the day useful rather than trying to drive back across the island.

    Day 6: A slower Pacific Rim day

    Spend another day around the west coast, adding a short hike, cultural experience or relaxed town time.

    Three nights here are more useful than one rushed “Tofino day” between long drives.

    Day 7: Cross to the east coast

    Drive toward Nanaimo, Parksville or Comox Valley, stopping at forests or lakes en route when conditions allow.

    Treat the crossing as a scenic travel day and avoid adding a late-evening wildlife excursion.

    Day 8: East-coast communities and beaches

    Explore the chosen base with an easy beach, food stop, market or forest walk.

    The east coast is a good place to reduce the pace after more weather-dependent west-coast days.

    Day 9: Optional Campbell River, Strathcona edge or local day

    Choose one larger excursion north or inland, or keep the day local if the group is tired.

    Do not add a distant destination simply because this is the last full day; choose the experience with the best conditions.

    Day 10: Ferry or flight onward

    Return the car and connect to the mainland or your next destination.

    Reserve a generous ferry or airport buffer, particularly in busy summer periods.

    Transport: what works best

    A rental car gives the best flexibility once you leave Victoria, but the route includes ferries, road works and mountain driving that can lengthen journey times. Fuel before remote stretches and do not rely on a last-minute charging plan if using an electric vehicle.

    Ferry reservations can be important during busy periods, especially when travelling with a vehicle. Arrive with enough check-in margin and avoid building an international flight around the minimum theoretical connection.

    Driving is usually the most flexible way to join these parts of Vancouver Island, but the roads do not invite constant detours. The cross-island journey can take longer with traffic, roadworks or stops, and the final return journey deserves its own margin. Save maps before setting off and keep ferry check-in requirements separate from the driving estimate.

    Best time to visit

    Late spring through early autumn offers the broadest mix of activities and longer daylight. Summer is busiest and requires earlier accommodation planning, while spring and autumn can be excellent for a quieter trip with more variable weather.

    The west coast is known for rain and dramatic storms outside summer. That can be part of the appeal, but dress for it and choose accommodation that is comfortable enough to enjoy when outdoor plans shorten.

    The Pacific coast is dramatic in more than sunshine. Mist can make rainforest walks atmospheric, while strong wind or rough water can change boat plans. Choose a season that suits your main interests, but keep the whale-watching or paddling day movable when possible. The forecast and operator’s safety decision matter more than the calendar label.

    How to pace each day

    The island’s scale is the biggest planning trap. Victoria to Pacific Rim and west coast to the east coast are real travel stages, not empty gaps that can absorb several major attractions.

    Give each part of the island a different rhythm. Victoria invites walking and museums; around Pacific Rim, a beach and a rainforest trail can easily fill a day; on the east coast, the pleasure is often in shorter waterfront stops. This makes the route feel varied without leaving you exhausted at every change of hotel.

    One evening with no organised activity is particularly welcome after the drive to or from the west coast. Pick up something simple to eat, check the next day’s weather and enjoy the place you chose to stay. The sound of the sea or a quiet harbour walk may become as memorable as a booked excursion.

    Travelling with children

    Families can build days around beaches, aquariums or museums, short rainforest walks and simple wildlife experiences. Ocean safety deserves extra attention because cold water, surf and logs can make a beach dangerous even when it looks calm.

    On Vancouver Island, children’s favourite moments may be watching the waves, examining driftwood or spotting wildlife from a safe distance. Choose shorter beach and forest walks rather than adding an ambitious hike after a long drive. Bring spare layers even when the forecast looks mild, and be clear about currents and surf conditions before anyone approaches the water.

    Travelling with older adults or limited mobility

    Many rainforest and coastal viewpoints have short access routes, but boardwalks can be wet and uneven. Choose ground-floor or lift-access rooms and ask tour operators about boarding conditions before marine excursions.

    A scenic day does not need a strenuous trail. Victoria’s waterfront and selected viewpoints offer easier options, while many Pacific Rim walks vary in surface and distance. Check the particular boardwalk or beach access you intend to use; sand, roots and wet steps can make an apparently short route much harder for someone with limited mobility.

    Food and meal planning

    Victoria offers the widest restaurant choice, while Pacific Rim and east-coast communities are strong for seafood, bakeries, cafés and locally produced food. Reserve popular summer dinners if eating at a specific restaurant matters to you.

    Restaurant choice becomes more limited as you move away from Victoria, especially if you arrive late after a drive. Have a lunch stop in mind before crossing the island, and check evening options near your accommodation on the west coast. Keeping a few easy supplies in the car can save a tired search for dinner.

    Budget: where the money really goes

    Accommodation in Pacific Rim is often the largest expense, followed by the rental car, ferries and wildlife tours. Staying three nights in one west-coast base is usually better value than splitting nearby towns into multiple one-night stays.

    The biggest expenses may be accommodation on the Pacific coast, a rental vehicle and specialist wildlife excursions. Compare what you genuinely want to do before booking several tours that overlap. Spending a little more for a convenient two-night base can be sensible if it prevents backtracking and leaves more time on the beaches or trails.

    Safety and practical preparation

    Respect cold-water conditions, wildlife distance rules and trail closures. Carry bear-aware habits in natural areas, follow local guidance and never approach marine or land animals for a photograph.

    Coastal conditions can change quickly. Treat surf warnings seriously, watch children near the water and stay back from unstable logs or exposed rocks. For forest walks or more remote outings, carry water, layers and a way to navigate without continuous reception. Tour operators and park staff are the right source for immediate conditions and closures.

    Mistakes that make this trip harder than it needs to be

    • Trying to drive the island from end to end in ten days.
    • Underestimating the Victoria–Pacific Rim travel day.
    • Booking key summer accommodation too late.
    • Treating wildlife sightings as guaranteed.
    • Ignoring ferry reservation and check-in requirements.
    • Assuming every beach is safe for swimming.

    Vancouver Island feels far larger when you stop at beaches, forests and cafés, which is exactly why a shorter geographic route creates a better holiday.

    If you have less time

    With seven days, use Victoria and Tofino/Ucluelet, with one overnight or transit stop only if needed. Skip the east-coast extension.

    If you have fewer than ten days, consider Victoria and the Pacific Rim only, or build a gentler trip around Victoria and the east coast. Trying to include Tofino, Campbell River and the far north in a short visit creates more driving than discovery. Make one part of the island your focus and enjoy it properly.

    If you have more time

    With fourteen days, add Comox Valley, Campbell River, Strathcona or the north, but keep multiple nights in each region rather than creating a chain of one-night stops.

    Additional days are best spent exploring more slowly from an existing base. You could devote another morning to Pacific Rim beaches, take a second wildlife outing if conditions cooperate or explore an east-coast community you passed too quickly. Driving farther north is worthwhile only if that region is itself a priority.

    What to book early and what can stay flexible

    Reserve summer Pacific Rim accommodation, vehicle ferries and any must-do wildlife tour. Keep beaches and forest walks flexible around weather.

    Secure accommodation for your key Pacific Rim nights and any ferry or specialised excursion that matters to the trip. Keep ordinary walks and beach visits flexible so you can respond to the weather. Before the cross-island drive, check current road conditions, and confirm boarding and arrival instructions for your actual ferry sailing.

    Useful official resource

    For current access, transport, seasonal opening information and visitor rules, check Tourism Vancouver Island before travel.

    Final planning checklist

    • Choose a south-and-central route rather than the whole island.
    • Reserve vehicle ferries in busy periods.
    • Book Pacific Rim lodging early.
    • Carry rain layers and respect ocean conditions.
    • Leave wildlife days flexible.
    • Keep the final ferry or flight connection generous.

    Final thoughts

    Vancouver Island is most satisfying when the distances are treated honestly. The island is not a single attraction but a sequence of coastal environments that need time to feel different from one another.

    Ten days is enough to combine a city, the wild Pacific coast and the gentler east side without spending the trip proving how far you can drive.

  • Southern California in 9 Days: San Diego, Joshua Tree and Palm Springs Without a Freeway Marathon

    Southern California in 9 Days: San Diego, Joshua Tree and Palm Springs Without a Freeway Marathon

    Southern California looks compact on a map, but traffic and climate make it a region where overplanning quickly destroys the trip. San Diego, Joshua Tree and Palm Springs already create three very different chapters: Pacific coast, high desert and mid-century resort city. Los Angeles is deliberately left for another trip so the itinerary never becomes a freeway exercise.

    This nine-day Southern California trip combines three very different settings: San Diego’s coast and neighbourhoods, the boulder-strewn desert of Joshua Tree, and Palm Springs’ relaxed architecture-and-pool atmosphere. It is aimed at travellers who would rather explore a few places properly than spend the week crossing the region on freeways. Summer desert heat needs special care, so the outdoor parts of the plan should always be flexible.

    Swap the beach and outdoor days in San Diego if the weather changes, and treat Joshua Tree differently from the coast. High desert heat may make an early start and a long midday break essential. Palm Springs is the place for a slower afternoon when the drive and park walks have caught up with you. That flexibility makes the nine days far more comfortable.

    Quick trip summary

    • San Diego is the first base and the route uses only 3 main travel blocks.
    • Keep at least one weather- or transport-flexible day.
    • Book only the genuinely capacity-limited experiences early.
    • Avoid adding another distant destination simply because it fits on a map.
    • Protect the final airport or ferry connection with extra margin.

    Why this route works

    San Diego deserves its own days, not just a quick beach stop before the desert. Spend time in Balboa Park and choose a coastline area that appeals to you, then head inland for Joshua Tree when you are ready for a change of scenery. Palm Springs makes a comfortable final stop with easier afternoons after desert walks. Each base serves a purpose, so there is no benefit in sleeping in a different town every night.

    The usual trap is adding Los Angeles because it looks close enough on a regional map. In reality, traffic can turn that detour into the longest day of the trip. Save Hollywood or other distant attractions for another visit and enjoy a proper afternoon in San Diego instead. The same restraint helps in Joshua Tree: several short trails and a sunset viewpoint are more satisfying than trying to see every road and rock formation in one day.

    A realistic itinerary at a glance

    DaysBaseMain focus
    1–4San DiegoBalboa Park, coast, neighbourhoods and food
    5–6Joshua Tree areaDesert landscapes, short hikes and night sky
    7–8Palm SpringsArchitecture, canyon/desert day and recovery
    9DeparturePalm Springs or San Diego onward

    Day-by-day plan

    Day 1: Arrival and orientation

    Arrive in San Diego and keep the first evening around the waterfront or your neighbourhood.

    Day 2: Main experience

    Use Balboa Park as the anchor, choosing one or two museums rather than trying to complete the entire park.

    San Diego Seaport Village Waterfront

    Day 3: Second focused day

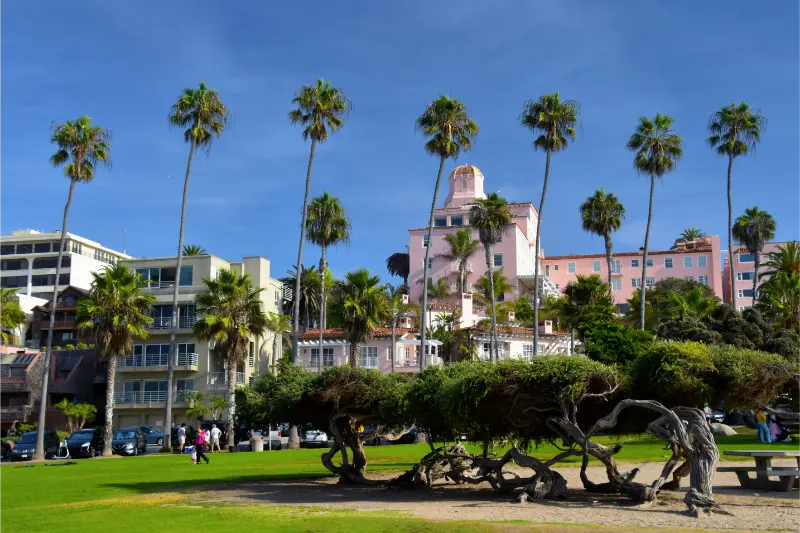
    Spend a coast day around La Jolla, Torrey Pines or another single shoreline area instead of zigzagging between beaches.

    Day 4: Flexible day

    Keep a flexible San Diego day for Coronado, Cabrillo, another neighbourhood or a slower food day.

    Day 5: Transfer day

    Drive to Joshua Tree after the worst commuter period and use sunset or one short loop only.

    Day 6: Full destination day

    Start Joshua Tree early, combine a few classic short trails and viewpoints, and take a long midday break in hot weather.

    Day 7: Flexible or recovery day

    Move to Palm Springs slowly and use the afternoon for architecture, pool time or downtown.

    Day 8: Departure planning

    Choose the aerial tramway, Indian Canyons, architecture or a spa according to weather and mobility.

    Day 9: Departure

    Depart from the airport that truly simplifies the route rather than saving a small fare and adding a dawn freeway crossing.

    Where to stay and how many hotel changes to make

    In San Diego, pick the neighbourhood for the evenings you want. Near Joshua Tree, choose the town by park entrance and dinner availability. In Palm Springs, central lodging makes the final days easier and more walkable.

    Choose accommodation for geography before decoration. A well-positioned room can save an hour every day and often matters more than a small difference in nightly rate.

    Before booking a San Diego hotel, check whether parking is included and how the location works for Balboa Park and the coastline you plan to visit. Around Joshua Tree, decide whether you prefer an early park start or restaurants and services within easy reach. In Palm Springs, a pool is appealing, but so is a location where you can walk out for dinner. Practical details matter more than a stylish photograph of the room.

    Transport: what is worth planning in advance

    Driving between the coast and Joshua Tree is manageable if you allow for Southern California traffic. Aim to reach your desert accommodation in daylight, especially if you are unfamiliar with the area. Inside the park, distances between sights are greater than they look and services are limited, so arrive with water and fuel. Avoid a long desert hike after a transfer day simply because the sun has not set yet.

    San Diego Petco Park Baseball Stadium

    Save tickets, hotel addresses and maps offline. The places where navigation matters most are often exactly where mobile coverage becomes unreliable.

    Food and daily rhythm

    Use San Diego for tacos, seafood and the widest restaurant choice. Desert meals can be simpler and earlier, with hydration and heat management taking priority after hikes.

    San Diego is a good place to seek out the food you enjoy, from neighbourhood tacos to a seafood lunch by the water. On the move towards Joshua Tree, treat lunch as a sensible stop along your route rather than another attraction. In Palm Springs, a relaxed dinner after the day’s heat may feel much better than a complicated evening drive. Build meals around where you will be, not around a list of restaurants scattered across the map.

    Do not make every meal another reservation. Mix destination restaurants with markets, bakeries, cafés and simple local places so food improves the trip instead of controlling it.

    Families, children and older travellers

    Families can mix beaches, museums and short desert trails. Older travellers can enjoy Joshua Tree mostly through scenic drives and short walks, then use Palm Springs as a lower-effort finish.

    For multigenerational travel, the right pace is the one at which the least mobile member still enjoys the day. That usually creates a better shared trip for everyone.

    When accessibility matters, ask precise questions about steps, trail surfaces, boat boarding, lifts, toilets and vehicle access rather than relying on a generic accessibility label.

    Budget: where the money really goes

    The rental car, accommodation and any major paid attraction will shape the budget more than the number of short walks you take. If you can spend more on one thing, choose a convenient base in the desert that avoids unnecessary driving at night. In San Diego, parking charges can change the cost of an otherwise attractive hotel. For Palm Springs, compare what you truly want from the stay before paying for resort extras you may barely use.

    Compare total trip cost rather than headline prices. Parking, transfers, fuel, luggage and guided excursions can erase an apparent saving.

    The best splurges usually remove friction: a central room, a direct transfer, a quality local guide or one extra night that prevents an exhausting move.

    Best time to go

    Spring and autumn are easiest for combining coast and desert. Summer can be pleasant on the coast but dangerously hot in Joshua Tree; winter is often comfortable inland with cold desert nights.

    Shoulder season often balances weather, crowds and prices well, but rural attractions and mountain or marine services may run less frequently.

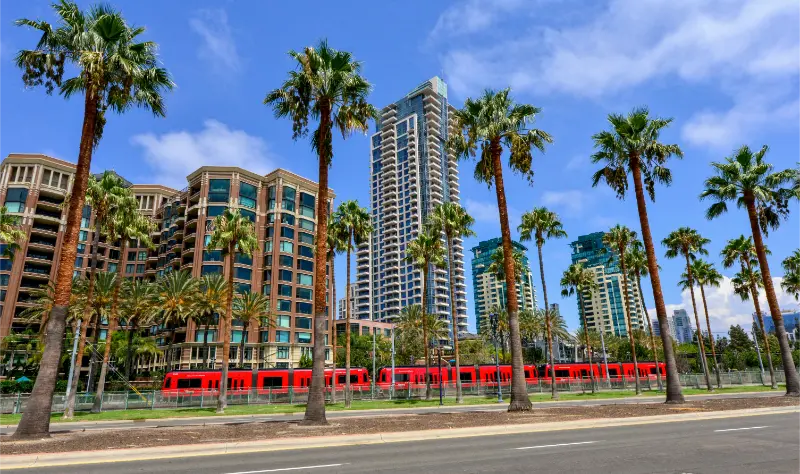
    San Diego Palm Trees And Downtown Towers

    Weather should change the order of the day. Keep lower-effort alternatives so wind, rain, heat or snow do not force you to waste the trip.

    Comfort, accessibility and realistic pacing

    Take desert conditions seriously. Joshua Tree is often best explored with early starts, plenty of drinking water and a long break from exposed trails when it is hot. Some paths are rocky even when short, so shoes and mobility matter. In San Diego, one substantial sightseeing activity and a slower coastline stop may be enough; trying to fill every afternoon can leave little energy for the rest of the road trip.

    Travel fatigue compounds. One difficult transfer can weaken the following two days, which is why this itinerary avoids one-night bases unless geography genuinely requires them.

    A free half-day is not wasted time. It is insurance for weather, delays, a tired child or a place you discover only after arriving.

    Small decisions that improve the trip

    Use the bases as anchors

    Once you check in, explore that region rather than repeatedly crossing back through places you already saw. A base should simplify the next two or three days.

    Protect the hardest day

    Do not place the longest hike, boat trip or road excursion immediately before the longest transfer. Leaving one easier block on either side makes the whole trip more resilient.

    Book the scarce things first

    High-demand accommodation, ferries, cave tours, park access and limited-capacity guides deserve early attention. Ordinary meals and minor attractions usually do not.

    What I would leave out on this length of trip

    Leave Los Angeles, Santa Barbara and the Pacific Coast Highway for another trip. Adding them to nine days would replace experience with traffic.

    If you have extra time, add nights before adding destinations. One additional night in the most interesting base usually produces more value than another one-night stop.

    Mistakes that make this trip harder than it needs to be

    • Crossing the metro area repeatedly at rush hour.
    • Visiting Joshua Tree only at hot midday.
    • Carrying too little water.
    • Adding Los Angeles because it looks close.
    • Booking rigid dinner times after outdoor days.
    • Choosing a departure airport that creates a huge final drive.

    How I would adapt the itinerary

    If you only have six or seven days, shorten the San Diego portion or choose between Joshua Tree and Palm Springs rather than making each stop a token overnight. With more time, add another full day in San Diego or explore a different part of the desert in cooler conditions. The route improves when you have time to enjoy each setting, not when you keep extending the list of places on the motorway.

    San Diego Palm Trees And Downtown Buildings

    Families may love Balboa Park’s variety, San Diego beaches and Joshua Tree’s unusual rock formations, but the desert is not a playground in high heat. Keep walks short and age-appropriate, check where restrooms and shaded breaks are available, and let someone skip an exposed trail if necessary. In Palm Springs, an easy afternoon by the pool can be a welcome part of the holiday rather than a failure to sightsee.

    Before booking

    • Check current entry, park, ferry or road requirements.
    • Reserve the accommodation or transport segment with the least capacity first.
    • Verify the final airport or ferry connection before booking the last hotel.
    • Download offline maps and save confirmations.
    • Keep travel insurance appropriate to the activities and season.

    Practical questions

    Is this itinerary too fast?

    For most first-time visitors it is moderate because hotel changes are limited. Remove one optional excursion if you want a genuinely slow holiday.

    Should I rent a car?

    Delay the rental car if your San Diego hotel and first days are easy without it. Once you move inland, a car becomes essential. Joshua Tree has limited services inside the park, so fuel, water and offline navigation should be handled before entry.

    What should I book first?

    Start with the hardest-to-replace item: peak-season hotel, inter-island ferry, limited park access, domestic flight or specialist guide. Everything else can be arranged around it.

    Final thoughts

    A successful road trip here is full of contrasts: ocean air in San Diego, the quiet and strange shapes of Joshua Tree, then an evening among the palms of Palm Springs. Enjoy those changes without trying to connect every major Southern California attraction in nine days. Leaving out a distant detour is often what gives the stops you have chosen enough time to become memorable.

    Before departure, review the route to your arrival and departure airports, expected traffic, park access and the weather forecast for the desert. Make sure your longest driving day has room for a meal and a break. Keep the San Diego days flexible enough to match your interests, and save the more demanding Joshua Tree walks for suitable conditions. Your itinerary should help you enjoy the journey, not make you chase it.

    How to keep the itinerary resilient

    Recheck weather and transport every evening, especially before ferries, remote roads, desert days, high-country hikes or domestic flights.

    If something moves, protect the final connection and the experiences you care about most. Optional attractions are easier to sacrifice than sleep, safety or an expensive ticket home.

  • Chicago in 5 Days: Architecture, Museums and Neighborhoods Without Spending the Trip Downtown

    Chicago in 5 Days: Architecture, Museums and Neighborhoods Without Spending the Trip Downtown

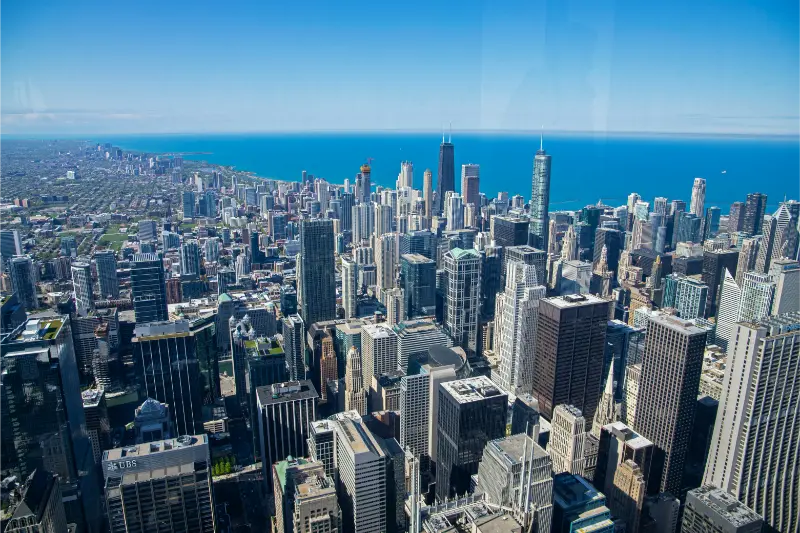
    Chicago is often planned as a downtown architecture trip with a deep-dish dinner attached. That misses the neighbourhoods, lakefront and cultural range that make the city worth more than a weekend.

    This five-day itinerary keeps one hotel and groups attractions by geography. It uses public transport, walking and only occasional rideshare rather than a rental car.

    The practical principle is simple: downtown is the anchor, not the entire trip. At least two half-days should move into neighbourhoods such as Wicker Park/Bucktown, Lincoln Park, Pilsen, Hyde Park or another area that matches your interests.

    Quick trip summary

    • One hotel for all 5 days.
    • Stay near an ‘L’ station and useful bus routes.
    • Use one major museum per day maximum.
    • Take an architecture cruise or walking tour early in the trip.
    • Give at least one full day to neighborhoods and lakefront.

    Why this route works

    Chicago’s downtown architecture is exceptional, but it makes more sense once you understand the lake, river and transit grid.

    Major museums can absorb most of a day, so stacking the Art Institute, Field Museum and Museum of Science and Industry together creates cultural fatigue.

    Neighbourhoods provide the food, parks and everyday atmosphere that prevent the city from feeling like a convention district.

    A realistic itinerary at a glance

    DaysBaseMain focus
    1Loop / RiverArchitecture and orientation
    2Museum Campus / lakefrontOne major museum and waterfront
    3North SideLincoln Park and neighborhoods
    4Hyde Park / South SideCulture, architecture and food
    5Flexible ChicagoSecond museum, neighborhoods or departure

    Day-by-day plan

    Day 1: Architecture and river

    Start with the Chicago River, Loop, Millennium Park and one architecture tour. Seeing the skyline from the water early helps the street grid make sense.

    Day 2: Museum and lakefront

    Choose the Art Institute or Museum Campus institutions according to interests, then use the lakefront rather than forcing another major museum.

    Chicago Theater Street View

    Day 3: North Side neighborhoods

    Use Lincoln Park, lakefront, Wrigleyville or Wicker Park/Bucktown in a coherent route. Choose one evening neighbourhood rather than crossing the city repeatedly.

    Day 4: Hyde Park and South Side culture

    Use the Museum of Science and Industry or University of Chicago/Hyde Park architecture and food, then return downtown without adding a far-north detour.

    Day 5: Flexible finale

    Use the museum, neighbourhood or shopping block you skipped. Keep the final hours close to the airport transit route if flying.

    Where to stay and how many hotel changes to make

    Loop/River North is easiest for first-time sightseeing, while West Loop or neighbourhood hotels can offer stronger dining atmosphere.

    The key factor is fast access to the ‘L’ and buses, not being next door to every attraction.

    Where you sleep should reduce friction rather than create another transfer. A well-connected room often adds more value than a cheaper property that forces repeated taxis, parking or long luggage walks.

    Read recent guest reviews for practical details that promotional photos rarely show: stairs, lift size, road noise, parking, breakfast hours and the final walk from a station, ferry or car park.

    Transport: what is worth planning in advance

    A rental car is unnecessary for this itinerary and creates parking costs.

    CTA trains/buses plus walking cover nearly everything; use rideshare selectively late at night or when carrying luggage.

    Measure every move door to door rather than by the headline timetable. Checkout, waiting, luggage and the final transfer can turn a short journey into half a day.

    Use inflexible tickets only when the saving is meaningful and the day is genuinely fixed. Weather-sensitive coast, mountain and marine plans benefit from flexibility.

    Food and daily rhythm

    Deep-dish pizza is one meal, not Chicago’s food identity. Mexican food in Pilsen, South Side traditions, modern West Loop dining and neighborhood bakeries all deserve consideration.

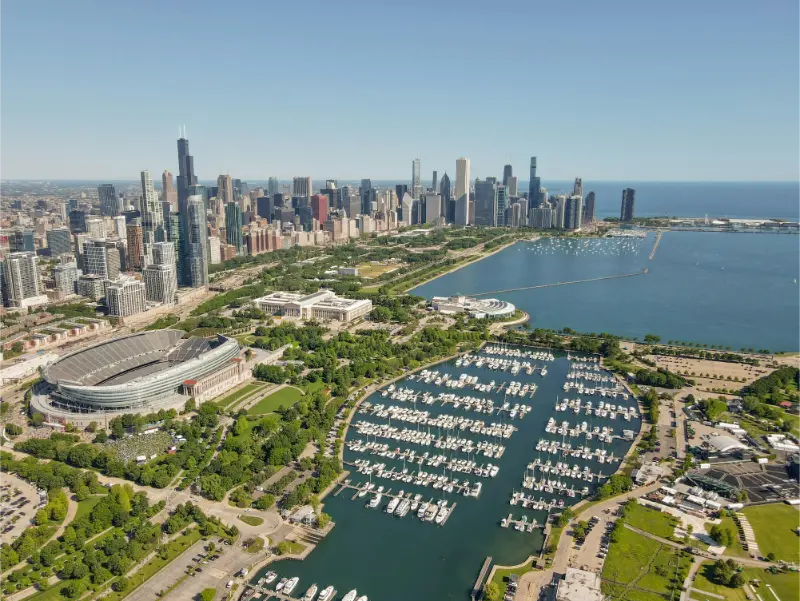
    Chicago Lakefront Marina And Skyline

    Keep one dinner spontaneous so the trip can follow whichever neighborhood you enjoy most.

    Use meals to control the rhythm of the day. A long regional lunch can be an experience and a recovery period after hiking, museums, heat or an early start.

    Do not make every meal another attraction. Mix destination restaurants with markets, bakeries, cafés and simple local places so food improves the trip instead of controlling it.

    Families, children and older travellers

    Parks, lakefront, boats and interactive museums make Chicago excellent for families.

    Older travellers should use buses or taxis strategically because museum campuses and waterfront walks can become longer than expected.

    For multigenerational travel, the useful pace is the one at which the least mobile member still enjoys the day. That normally produces a better shared trip for everyone.

    When accessibility matters, ask specific questions about steps, trail surfaces, boat boarding, lifts and vehicle access rather than relying on a generic accessibility label.

    Budget: where the money really goes

    Museums and architecture tours are the largest sightseeing costs, while public transit keeps transport manageable.

    Choose two or three paid highlights rather than buying a long attraction list simply because a pass exists.

    Compare total trip cost rather than headline prices. Parking, transfers, luggage and tours can erase an apparent saving.

    The most useful splurges usually remove friction: a central room, a direct transfer, a quality guide or one extra night that prevents an exhausting move.

    Best time to go

    Late spring and early autumn are excellent for walking; summer gives lakefront energy and major events.

    Winter can be severe but museums, architecture and food still make a strong city break if you plan indoor-heavy days.

    Shoulder season often balances weather, demand and prices well, but ferries, rural attractions and mountain services may run less frequently.

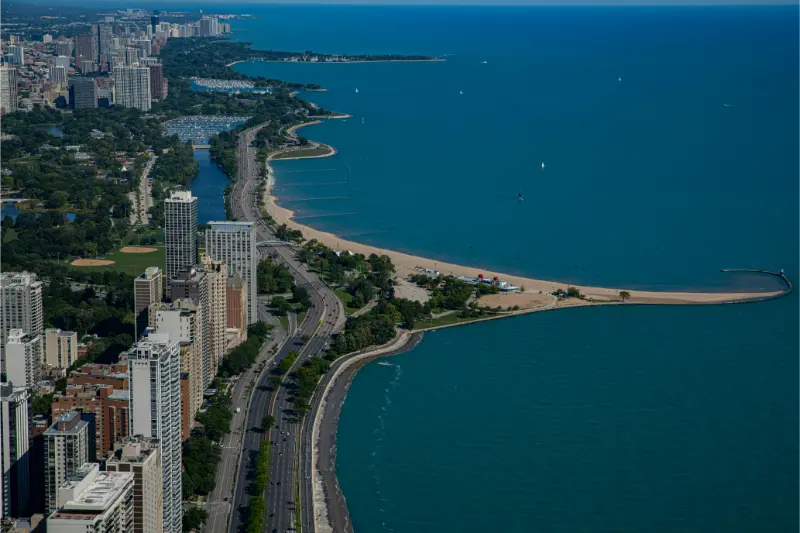
    Chicago Lakefront Beaches Aerial

    Heat, rain, wind and daylight should change the order of the day. Keep lower-effort alternatives for conditions that do not suit the original plan.

    Comfort, accessibility and realistic pacing

    Only one major cultural institution is assigned to each day.

    Neighbourhood days reduce the sense of standing in ticket lines from morning to evening.

    Travel fatigue compounds. One difficult transfer can reduce the quality of the following two days, which is why this itinerary avoids one-night bases unless geography genuinely requires them.

    A free half-day is not wasted time. It is insurance for weather, transport disruption, a tired child or a place you discover only after arriving.

    Small decisions that improve the trip

    Skip the rental car

    Transit is part of the solution.

    Take architecture early

    It improves the rest of the city experience.

    Choose museums selectively

    Chicago has too many to do well in five days.

    Leave downtown twice

    Neighbourhood life is essential.

    What I would leave out on this length of trip

    Leave Milwaukee and Lake Michigan road trips for another journey.

    Skip trying to visit every major museum in five days.

    Mistakes that make this trip harder than it needs to be

    • Staying far from transit to save a small amount.
    • Planning three museums in one day.
    • Using taxis for every short trip.
    • Eating only downtown chain food.
    • Ignoring lakefront weather.
    • Crossing the city for a dinner immediately before a flight.

    How I would adapt the itinerary

    With three days, focus on architecture, one museum and one neighbourhood day.

    With seven days, add more South/West Side culture or a day trip without changing hotels.

    Before booking

    • Choose a transit-friendly hotel.
    • Reserve high-demand architecture tours.
    • Pick museums before buying passes.
    • Pack for lake wind.
    • Use airport rail/transit where practical.

    Practical questions

    Do I need a car?

    No.

    Chicago Downtown Lakefront Aerial

    Which museum should I choose?

    Art Institute for art, Field for natural history, Museum of Science and Industry for large interactive exhibits.

    Is five days too long?

    No. It is enough to get beyond downtown without rushing.

    Final thoughts

    Chicago is at its best when architecture, lakefront and neighbourhoods are treated as equal parts of the trip.

    Five days with one hotel and public transport gives the city room to feel large without becoming exhausting.

    How to keep the itinerary resilient

    Keep Day 5 flexible for bad weather or the museum you enjoyed enough to extend.

    Use indoor neighbourhood food and museum blocks when lake weather turns unpleasant.

    Who this route suits best

    This itinerary works best for travellers who value depth over collecting places. It keeps hotel changes low, protects flexible time and assumes that a good meal, an unexpectedly interesting neighbourhood or a slower morning can be as valuable as another attraction. That approach is particularly useful for first-time visitors, couples, families and multigenerational groups.

    More energetic travellers can add a longer hike, an extra museum or a second excursion on flexible days. Travellers who prefer an easier pace can remove those extras and still keep the core journey intact. Before booking, identify the two or three experiences that would genuinely disappoint you to miss; those are the ones to reserve first.

    What to book early and what can wait

    Book the elements with genuinely limited capacity first: high-demand accommodation, park or protected-area access, popular trains, ferries or flights, and any guided experience central to the trip. Leave ordinary meals, minor attractions and weather-dependent activities more flexible whenever possible.

    One week before departure, check official transport or park information again. The evening before each important move, confirm departure points, opening status and the hotel address. That small routine catches many avoidable travel problems before they become expensive or tiring.
  • Portland Oregon in 4 Days: Neighbourhoods, Parks and Food Without Spending the Trip in a Rental Car

    Portland Oregon in 4 Days: Neighbourhoods, Parks and Food Without Spending the Trip in a Rental Car

    Portland is a city to discover neighbourhood by neighbourhood. Its cafés, independent shops, gardens and riverside paths are more interesting when you have time to wander than when you rush between a long list of sights. Over four days, you can see central Portland and explore beyond the river without needing to spend the whole visit behind the wheel.

    If this stop is part of a wider trip, compare the pacing with Columbia River Gorge in 5 Days: Waterfalls, Hood River and Scenic Drives Without Parking Stress. The broader itinerary helps with regional logistics; this guide focuses on what matters once you actually stay in Portland.

    Quick trip summary

    • Ideal stay: 4 days for a first visit.
    • Best planning rule: group each day geographically and protect one flexible half-day.
    • Best for: first-time visitors, couples, solo travellers, families, older travellers and mixed-age groups.
    • Main risk: adding distant excursions until the city itself becomes the least-seen part of the trip.

    Why 4 days works

    Portland has enough range to reward several days, but it does not need an exhausting schedule. The key is to separate the large, time-consuming experiences from neighbourhood time. A good first visit should include headline sights, one or two deeper cultural blocks, ordinary meals and enough unstructured walking to understand how the city fits together.

    Portland rewards four days because its appeal is spread across distinct neighbourhoods, gardens and food spots rather than a single sightseeing strip. Give downtown and the river one part of the trip, then take time for a different district or a park. You can experience the city’s character without turning every morning into a long drive.

    Where to stay in Portland

    AreaWho it suits
    Downtown / West EndBest for first-time visitors who want central transit, easy access to the river and a short trip to Washington Park.
    Pearl District / NorthwestGood for restaurants, galleries, walkability and quick access to Northwest 23rd and Forest Park approaches.
    Inner EastsideBest for travellers who care most about food, breweries, neighbourhood streets and a more local evening atmosphere.

    Look at your likely transit routes before choosing a Portland hotel. A base near useful MAX light-rail or bus connections can make it easier to visit the central waterfront, museums and neighbourhood restaurants. If your plans involve walking out for dinner, decide which streets you actually want to be near after dark.

    Portland Oregon Neon Sign At Dusk

    Portland’s hotel experience can change from block to block. Check recent comments about noise, traffic and nighttime surroundings, and ask about parking charges if you will have a car for part of the stay. A quiet room set back from a busy road may be worth more than a grander view you cannot sleep through.

    Getting there and getting around

    Portland can be visited without renting a car. MAX light rail, buses, streetcars, walking and cycling cover most city priorities, and the airport is linked to the urban transit network. Travel Portland specifically recommends public transport and notes that a rental car is not necessary for a typical city visit. If you add the Columbia River Gorge, treat that as a separate transport decision rather than keeping a car for all four days.

    Make one journey using transit before committing to taxis for the whole trip. MAX and buses cover useful parts of the city, but a route may still involve a walk or transfer. Check the last service for evenings out, and use a car only for an excursion that is genuinely awkward to reach without one.

    Portland day-by-day itinerary

    Day 1: downtown, the river and the Pearl District

    Begin with a simple orientation walk through downtown and toward the river, then continue into the Pearl District. Bookshops, cafés and galleries work well on arrival day because they are easy to shorten if the flight runs late. Finish with dinner nearby instead of crossing the city simply because one restaurant is famous online.

    Day 2: Washington Park and Northwest Portland

    Use the clearest part of the day for Washington Park. Choose the Japanese Garden, the International Rose Test Garden or another major stop rather than attempting every attraction in the park. Continue into Northwest Portland for an easier afternoon and evening. The point is to let one green district fill the day naturally.

    Day 3: east-side neighbourhoods and food

    Explore one or two east-side corridors such as Alberta, Mississippi, Hawthorne or Division rather than all of them. Food carts, independent shops and residential streets are part of the experience. If the weather is good, include a river crossing or waterfront section so the day is not only eating and shopping.

    Day 4: Forest Park or a carefully chosen Gorge extension

    Keep the final day flexible. Forest Park offers a nature day without leaving the metropolitan area. If the Columbia River Gorge is a priority, use the linked regional guide and check current permits, closures and transport before committing. Do not attempt a full Gorge road trip and a complete Portland sightseeing day at the same time.

    Portland Oregon Mount Hood Over City

    How to plan the pace

    A good Portland day might pair a morning in a garden or museum with an afternoon discovering cafés and shops in one district. You do not need a formal attraction at every turn. Leave an hour free for browsing a bookstore, sitting by the river or taking a detour that looks more interesting than the original plan.

    When planning across the Willamette River, decide whether it is worth returning to the opposite bank for another stop. The bridge crossing itself is simple; repeated crossings add up when you also have meals and transit waits. Keep each half-day on one side where practical, especially if travelling with children.

    What to book in advance

    Reserve popular gardens, special exhibitions or a restaurant you genuinely care about, but keep most food and neighbourhood time flexible. If you plan the Columbia River Gorge, check permit and parking rules for your exact date because access systems can change by season and year.

    Before paying for a sightseeing bundle, write down the Portland attractions you genuinely want to enter and check their individual admission arrangements. A pass is not a saving if you spend the trip racing between places to justify it. Parks, neighbourhood walks and much of the waterfront offer rewarding time without a paid ticket.

    Food and drink

    Portland’s food reputation is broad enough that a rigid restaurant list is unnecessary. Build meals around food-cart pods, bakeries, coffee, seasonal produce and one or two neighbourhood restaurants. The most efficient strategy is geographic: eat where you already are, then reserve only one dinner that is important enough to justify crossing town.

    Food is a strong reason to explore Portland’s neighbourhoods. Pick a lunch stop around the district you are already visiting, and make a special dinner a deliberate evening plan rather than a cross-city errand between sights. Food carts are convenient for groups with different tastes, but check the hours of the particular location.

    Best time to visit Portland

    Late spring through early autumn usually gives the easiest outdoor conditions, but summer heat and wildfire smoke can affect plans. Winter is wetter and darker yet works well for food, museums and neighbourhood cafés. Always check air quality and fire conditions before hiking or driving east in late summer and early autumn.

    Portland’s wet months suit museums, food stops and shorter walks with breaks; drier days give parks and riverside paths more appeal. If you are thinking about a trip into the Columbia River Gorge, allow weather and road conditions to influence which day you go. The best month depends on whether your priority is city life or outdoor scenery.

    Portland Oregon Downtown Street Sign

    Families, older travellers and accessibility

    For a family trip, choose a park or garden between indoor visits so younger travellers can move around. For older visitors, take transit past less interesting stretches and focus walking time on the destination itself. A good base near a reliable route makes it easier for someone to return to the hotel early without changing everybody’s plans.

    Check access separately for older buildings, hillside parks and gardens, especially if steps or steep paths are a problem. Some attractions have easier entrances than their most photographed approach suggests. Looking at the official visitor information before the day begins can save an unpleasant climb or a wasted trip across town.

    A realistic budget

    The daily cost in Portland depends heavily on whether you keep a car. Parking, hotel charges and occasional rides can outweigh the convenience of having it available for every small trip. Compare a transit-friendly base with renting a vehicle only for an outside-the-city day if your itinerary includes one.

    Build a little room into the budget for a spontaneous café stop, an admission that looks better in person or a ride home in the rain. You may discover that a free afternoon in a neighbourhood is your favourite part of the trip. Do not spend extra merely to fill an empty timeslot.

    Weather backup plan

    Keep an indoor option for the rainiest stretch of the day. Portland has plenty of museums, bookstores, cafés and places to linger without committing to a long outdoor walk. If the forecast improves, swap the order and enjoy the garden or waterfront when the light and weather are kinder.

    For outings beyond Portland, check conditions before leaving the city rather than assuming the forecast downtown applies to the hills or Gorge. Rain, wind or seasonal road restrictions can change an easy-looking excursion. If the trip would become unpleasant, enjoy another Portland neighbourhood instead of treating the distant stop as compulsory.

    Common mistakes to avoid

    • Renting a car for the whole stay without a specific need.
    • Trying to visit six neighbourhoods in one afternoon.
    • Treating the Columbia River Gorge as a quick add-on with no permit or parking check.
    • Crossing town repeatedly for restaurants instead of eating by neighbourhood.
    • Ignoring heat, wildfire smoke or heavy rain when planning outdoor days.

    Most itinerary problems come from the same source: trying to maximise quantity instead of usable travel time. The best version of Portland is not the plan with the most map pins. It is the one that keeps distances sensible, gives major places enough attention and leaves enough energy to enjoy the city after dinner.

    Portland Oregon City Skyline And Fall Trees

    Safety and practical habits

    Use normal urban precautions on transit and in busy nightlife areas, and do not leave visible luggage or valuables in a parked vehicle if you rent one for an excursion. Trail and weather conditions matter on outdoor days, so carry water, layers and offline directions when leaving the central grid.

    Save the route back to your hotel as well as the address, particularly if you plan to use public transport after dinner. Keep your phone charged and be attentive around traffic, bike lanes and busy crossings. As in any city, choose well-lit routes that feel comfortable rather than relying on sweeping claims about entire districts.

    Official information to check before you go

    For current events, transport changes, attraction information and visitor updates, use Travel Portland. Recheck any detail that affects a fixed reservation shortly before travel, especially opening days, seasonal access, tickets and major transport changes.

    How to adapt the itinerary

    With 2 or 3 days: keep the historic or central day, one specialist district and one outdoor or cultural priority. Remove the longest excursion rather than compressing every day.

    With five or six days: add a longer stretch in Washington Park, another neighbourhood or a single thoughtfully chosen excursion outside the city. The extra time is most valuable when you can linger instead of bouncing back across Portland for one more stop. Choose something different from what you have already seen.

    For a multigenerational group: agree on one outing everyone wants to share, then allow easy alternatives. Some may prefer a garden or museum while others spend longer on foot in a nearby district. Arrange a simple meeting point for lunch so nobody feels rushed through the part of the city they enjoy most.

    Final planning checklist

    • Confirm passport, visa, entry and transit requirements for your nationality.
    • Choose accommodation for location and transport convenience before room size.
    • Reserve only the attractions or events that genuinely control the day.
    • Save offline copies of tickets, hotel details and essential addresses.
    • Check the exact airport, railway station, ferry terminal or border crossing before arranging transfers.
    • Keep one flexible half-day for weather, fatigue or something discovered after arrival.
    • Recheck official opening information and local transport shortly before each fixed day.

    Final thoughts

    Portland is the sort of place where you might remember an afternoon browsing a bookshop or lingering over food as much as a famous view. Give those moments room alongside the gardens and neighbourhood walks. Four days will not cover every part of the city, but they can give you a good sense of how it lives.

  • Montréal in 4 Days: Old Montréal, Mount Royal and Neighbourhoods Without Living on the Metro

    Montréal in 4 Days: Old Montréal, Mount Royal and Neighbourhoods Without Living on the Metro

    Montréal rewards travellers who resist the urge to treat it as a checklist of isolated sights. The city makes more sense when you spend one day in and around Old Montréal, another around Mount Royal and the Plateau, and another following food, markets and neighbourhood life. Four days is enough to understand the contrast between historic streets, bilingual urban culture and large green spaces without spending half the trip underground.

    If this destination is part of a wider trip, compare the pacing with Eastern Canada in 12 Days. The city guide should add depth to that route rather than duplicate the same transfers.

    Quick trip summary

    Ideal stay 4 days for a first trip
    Best approach Group each day by geography and protect one flexible block
    Transport strategy Walk within districts; use public transport or taxis for cross-city moves
    Who it suits First-time visitors, couples, solo travellers, families and slower-paced travellers
    Most common mistake Adding too many distant attractions to the same day

    How to plan the trip before booking

    For Montréal, check the dates of any concert, festival or special exhibition you really want to see before choosing which day to spend in each neighbourhood. Most of the pleasure here comes from wandering, so leave Old Montréal, the Plateau and Mile End enough unscheduled time to explore their side streets and cafés.

    Build each day around a part of Montréal rather than a string of pins on a map. Old Montréal and the Old Port work naturally together; Mount Royal pairs well with the Plateau; and Jean-Talon Market invites a longer wander through Little Italy. You will see more by crossing the city less often.

    Where to stay: choose location before hotel style

    Base Why choose it
    Downtown Best for first-time visitors who want easy metro access, museums and a straightforward airport connection.
    Old Montréal Atmospheric and highly walkable, especially good for couples and travellers who value evening streets over nightlife.
    Plateau Mont-Royal A stronger neighbourhood feel, cafés and restaurants, with more daily walking and fewer big hotels.
    Mile End Excellent for food-focused travellers and a local rhythm, but less convenient for very early sightseeing starts.

    A room near a métro station can be worth more than an impressive view from an inconvenient address. Downtown is useful for museums and evening shows, while the Plateau offers a neighbourhood feel and Old Montréal puts you close to the historic streets. Think about where you will finish each night, especially if winter weather makes long walks less appealing.

    A realistic 4-day itinerary

    Day 1: Old Montréal and the river

    Start around Place d’Armes and Notre-Dame area, then walk the older street grid toward the river. Choose one substantial museum or historic interior rather than stacking several. Finish along the Old Port or with dinner nearby so the first day remains geographically compact.

    Day 2: Downtown, museums and Mount Royal

    Use the morning for the central cultural district or one major museum, then move toward Mount Royal when the light and weather are better. The climb is the main physical effort of the day, so avoid adding a distant evening reservation that forces another cross-city transfer.

    Day 3: Plateau, Mile End and food

    Spend the day in the Plateau and Mile End, where Montréal becomes less about monuments and more about streets, bakeries, delis, small shops, murals and parks. Build the route around two or three food stops rather than trying to sample every famous address.

    Day 4: Jean-Talon Market and a flexible final district

    Use Jean-Talon Market as the anchor, then choose Little Italy, the canal, a museum you skipped or a second neighbourhood according to weather and energy. Keep the final afternoon flexible so luggage, airport timing or a long lunch do not create stress.

    After Jean-Talon Market, resist the temptation to add another distant landmark. Browse the food stalls, walk through nearby Little Italy and stop for coffee if you feel like it. If there is still energy left, choose one neighbourhood you have enjoyed and return there rather than squeezing in a hurried last crossing of Montréal.

    Getting from the airport and handling arrival day

    Montréal–Trudeau airport is outside the central districts. Compare the airport bus, taxi or ride-hailing option against your hotel location and arrival hour; the cheapest route is not always the most comfortable after a long flight. Save the hotel address offline before leaving arrivals.

    The 747 airport bus connects Montréal–Trudeau Airport with the city, but check its current route and ticket conditions before landing. Once you have reached your accommodation, make the first evening simple: a nearby meal, perhaps a short stroll, and a clear idea of how to reach the métro the next morning.

    Getting around without wasting the day

    The metro is the backbone for longer urban moves, while many of the best districts are explored on foot once you arrive. Avoid jumping on the metro for every short distance: surface walking is part of the experience. A car is usually more burden than benefit for a city-only stay because parking and one-way streets add friction.

    Montréal’s métro covers many of the areas visitors use most, but the last stretch to a café, park or viewpoint may involve several blocks on foot. In winter, icy pavements can slow even short journeys; in summer, walking through a pleasant neighbourhood is often part of the experience. Compare the whole route, not just the time shown between stations.

    Best time to visit and how season changes the itinerary

    Late spring through early autumn makes parks, terraces and long neighbourhood walks easiest, while winter can be rewarding if you accept shorter outdoor blocks and use museums, cafés and the underground city strategically. Weather can change the value of Mount Royal or canal time, so keep one outdoor block movable.

    Montréal changes character dramatically through the year. Warm evenings are lovely for the Old Port and outdoor terraces; autumn brings colour to Mount Royal; winter makes museums, cafés and indoor stops especially welcome. Whatever the season, build the itinerary around the daylight and walking conditions you will actually have.

    What to book first

    Book the events that give your Montréal trip its shape: a particular performance, a popular exhibition or a guided experience with limited places. You do not need to reserve an ordinary walk through the Plateau or a visit to Jean-Talon Market. Those are best enjoyed when you can follow your curiosity.

    Check the official pages for any museum or event you have scheduled, especially on public holidays. Also look at STM service notices if a métro line is central to the day, and confirm the airport connection shortly before travelling. Montréal is easy to explore, but a closure can make an otherwise neat route awkward.

    Food strategy: eat well without crossing the city for every meal

    Montréal food is part of the itinerary rather than an evening add-on. Leave space for bagels, smoked meat, Québécois comfort food, bakeries and the city’s diverse immigrant cooking. Famous institutions can have queues; a good local alternative often produces a better day than crossing town only to wait.

    Montréal is a city where stopping to eat is part of sightseeing. Pick up something at a market, try a neighbourhood bakery or settle into a relaxed lunch instead of racing to the next attraction. With children or a mixed-age group, a warm, unhurried break can make the afternoon far more enjoyable.

    Travelling with children

    Families can combine the Old Port, parks, markets and one museum without turning every day into an educational programme. Build in playground or open-space time and keep one easy meal near the hotel for evenings when younger travellers have used their energy.

    For families, pair a museum or historic walk with somewhere children can move freely. The Old Port offers open space, while Mount Royal’s paths and lookouts can provide a change of pace when the weather cooperates. Keep journeys between stops short and remember that a snowy or rainy Montréal day calls for more indoor time.

    Travelling at a slower pace or as a senior

    For slower-paced travellers, stay close to a metro station and use transit to remove unrewarding distance before walking inside the district you actually want to experience. Mount Royal and cobbled historic streets can require more effort than a map suggests, so plan seating and shorter loops.

    There is no need to climb every street to enjoy Montréal. Use the métro to bridge longer distances and save walking for the Old Town lanes, the Plateau’s smaller streets or a section of Mount Royal that suits your energy. On colder days, plan a café or museum stop before fatigue becomes the main memory of the afternoon.

    Budget planning

    A Montréal budget is shaped as much by location as by admission prices. Compare hotels against nearby métro access, allow for airport transfers and decide which paid museums or performances genuinely interest you. Neighbourhood walks, markets and parks fill a surprising amount of time without turning every day into a chain of ticket purchases.

    Leave a little room in your Montréal spending plan for a taxi on an icy evening, a longer lunch or an unexpected concert ticket. A rigid budget can become uncomfortable when the weather changes or you discover a place worth lingering in. Choose the main expenses in advance, then keep the everyday decisions relaxed.

    Weather backup plan

    If rain interrupts a walk along the Old Port, move a museum or gallery visit forward and return to the waterfront later. In winter, icy conditions may make Mount Royal less inviting than planned. Keep one indoor option near each day’s main neighbourhood so a change in weather does not mean spending the afternoon in transit.

    Connectivity, payments and small practical details

    Before heading out in Montréal, save your accommodation address and the nearest métro station on your phone, along with tickets for any timed visit. An offline map is useful when you emerge from a station in an unfamiliar neighbourhood. In colder months, keep your phone warm and bring a power bank if you will be navigating all day.

    Cards are widely used around Montréal, but a little Canadian cash can still be handy at smaller stalls or for incidental expenses. You will not need to carry large amounts. Keep a separate payment card as a backup and check whether your bank charges extra for purchases made in Canada.

    What to pack

    Pack shoes you would happily wear on the Plateau’s pavements for several hours. In summer, bring light layers for changing temperatures; in winter, a proper coat, gloves and footwear with grip matter far more than another evening outfit. A compact umbrella is useful when you are moving between neighbourhoods rather than staying indoors.

    Common mistakes to avoid

    • Booking a hotel far from the metro because the map distance looks small.
    • Trying to combine Old Montréal, Mount Royal and Mile End in one sightseeing day.
    • Building the trip around restaurant queues instead of neighbourhoods.
    • Renting a car for a city-only stay without a specific regional excursion.
    • Saving all weather-dependent outdoor time for the final morning.

    Responsible travel and local etiquette

    Old Montréal’s streets and the Plateau’s colourful houses are real neighbourhoods, not open-air film sets. Keep residential doorways clear when taking photographs and give people space at busy markets. At places of remembrance or worship, follow the local guidance and take the time to understand what you are seeing.

    If your day includes Mount Royal or another green space, stay on the marked paths and let wildlife keep its distance. Feeding squirrels or birds may seem harmless, but it changes their behaviour and is best avoided. Enjoy the viewpoints without stepping through planted or protected areas for a different photo angle.

    If you have less or more time

    With two days, keep Old Montréal and a combined downtown/Mount Royal day. Three days adds Plateau and Mile End. With five days, add the canal, a deeper museum day or a carefully planned regional excursion, but do not sacrifice the neighbourhood time that makes Montréal distinctive.

    The Bank of Montreal’s columned façade on Place d’Armes in Old Montréal

    Safety and decision-making on the day

    Use the same awareness you would in any large city, especially around crowded festivals, stations and late-night entertainment areas. Keep valuables secure and check the last practical route back to your accommodation. In winter, slippery steps and pavements can be a more immediate nuisance than the usual city worries.

    Set a practical turnaround time for excursions and transfer days. A missed secondary sight is cheaper than a missed flight, an unsafe late journey or an exhausted final day.

    Useful official and planning resources

    Opening hours, transport schedules, fees, reservation procedures and access rules change more often than the basic geography. Recheck the official source shortly before departure.

    Final planning checklist

    • Confirm passport, visa, transit and health requirements for your nationality.
    • Reserve the attraction, tour or transport that controls the rest of the itinerary.
    • Save the accommodation address and first-day route offline.
    • Recheck weather, closures and transport notices before each critical day.
    • Keep at least one half-day that can absorb a delay or become simple rest.
    • Leave a generous buffer before flights and other costly connections.

    Four days in Montréal should leave you with more than photographs of its famous streets. Give Old Montréal its history, Mount Royal its breathing space and the Plateau and markets their everyday rhythm. If you find yourself hurrying to the métro again and again, remove a stop and enjoy the neighbourhood you are already in.

  • Northern California Coast in 9 Days: Mendocino, Eureka and the Redwoods Without Rushing Highway 101

    Northern California Coast in 9 Days: Mendocino, Eureka and the Redwoods Without Rushing Highway 101

    Northern California feels completely different from the classic San Francisco–Yosemite–Big Sur road trip. North of the Bay Area, the road narrows, the towns get smaller and redwood forest increasingly replaces big-city sightseeing.

    This nine-day route uses Mendocino/Fort Bragg, Eureka/Arcata and Crescent City or the northern redwoods as three bases. It avoids trying to drive the coast all the way to Oregon in one push.

    For Redwood National and State Parks, the National Park Service current-conditions page should be checked shortly before travel. In 2026, Tall Trees Trailhead still requires a reservation year-round, while vehicle access to Gold Bluffs Beach/Fern Canyon requires a permit from May 15 to September 15.

    Quick trip summary

    • 3 nights Mendocino/Fort Bragg, 2 nights Eureka/Arcata, 3 nights Crescent City/redwoods, Day 9 departure.
    • Do not estimate coastal road time by mileage alone.
    • Reserve Tall Trees or Fern Canyon access when your chosen day requires it.
    • Give the redwoods at least two full days.
    • Do not add Yosemite, Napa or Big Sur to the same nine-day trip.

    Why this route works

    Mendocino provides dramatic cliffs, smaller coastal towns and easy access to beaches and state parks without the longer redwood drives.

    Eureka and Arcata create a useful middle base for Victorian architecture, food, Humboldt Bay and the southern redwood parks.

    A northern base gives Jedediah Smith, Prairie Creek and coastal redwoods enough time without repeated two-hour commutes.

    A realistic itinerary at a glance

    DaysBaseMain focus
    1–3Mendocino / Fort BraggCliffs, beaches, headlands and local towns
    4–5Eureka / ArcataHumboldt Bay, Victorian architecture and southern redwoods
    6–8Crescent City / redwoodsPrairie Creek, Jedediah Smith, Fern Canyon/Tall Trees options
    9DepartureMedford/Eureka/Bay Area onward

    Day-by-day plan

    Day 1: Bay Area to Mendocino

    Treat the drive itself as the main activity. Stop at one or two viewpoints or small towns, then arrive with enough daylight for a headlands walk.

    Disneyland California

    Day 2: Mendocino coast

    Use Mendocino Headlands, Russian Gulch or another nearby state-park area and give the town time for galleries, cafés and a slow evening.

    Day 3: Fort Bragg and coastal nature

    Use Glass Beach only as a short stop, then prioritise MacKerricher, botanical gardens or a longer coastal walk. Do not make social-media landmarks the whole day.

    Day 4: Mendocino to Eureka

    This is a longer, slower drive than the map can suggest. Travel north through redwood country and make one meaningful forest stop before checking into Eureka or Arcata.

    Day 5: Humboldt and southern redwoods

    Use Humboldt Bay, Old Town Eureka, Arcata or Avenue of the Giants direction. Keep the day coherent rather than driving north and south repeatedly.

    Day 6: Eureka to northern redwoods

    Continue toward Prairie Creek/Crescent City, using Newton B. Drury Scenic Parkway or one short grove walk. Check current road and trail alerts before leaving.

    Day 7: Prairie Creek and Fern Canyon

    Use Prairie Creek, Elk Prairie and Fern Canyon only if access, weather and permits line up. Expect wet feet in Fern Canyon and do not build a tight schedule around the stream crossings.

    Day 8: Jedediah Smith or Tall Trees day

    Choose Stout Grove/Jedediah Smith or a permitted Tall Trees experience according to fitness and reservation status. One deep forest day is better than racing between distant groves.

    Day 9: Departure

    Continue toward Medford, Arcata/Eureka airport or begin the longer return south with enough time for coastal-road delays.

    Where to stay and how many hotel changes to make

    Mendocino is atmospheric but Fort Bragg offers more services; choose based on evening style rather than assuming one is universally better.

    Eureka is practical for food and history, Arcata for a smaller university-town feel, and Crescent City for quick access to Jedediah Smith.

    Disney California Adventure Pixar Pier Lagoon And Incredicoaster

    Choose accommodation for geography before décor. A well-positioned room can save an hour every day and often matters more than a small difference in nightly price.

    Read recent guest reviews for practical details that hotel pages rarely emphasise: stairs, parking, road noise, breakfast hours, heating or air conditioning, and the real walk from transport.

    Transport: what is worth planning in advance

    A car is essential, and Highway 1/101 travel should be planned in daylight because curves, fog, roadworks and wildlife can change the pace.

    Check Caltrans and NPS conditions before major park days; redwood roads and trailheads can close after storms or maintenance.

    Measure every move door to door rather than by the headline distance. Luggage, waiting, parking, road conditions, ferries or the final local connection can turn a short-looking transfer into half a day.

    Save hotel addresses, reservation confirmations and maps offline. The places where navigation matters most are often exactly where mobile coverage becomes weakest.

    Food and daily rhythm

    Seafood, bakeries, local breweries and farm-driven restaurants are the main coastal themes, but small towns can have early closing hours.

    Buy picnic supplies before long park days because trailhead dining is not part of the redwood experience.

    Use meals to shape the rhythm of the day. A long regional lunch can be both an experience and a recovery period after hiking, museums, heat or an early start.

    Do not make every meal another reservation. Mix destination restaurants with markets, bakeries, cafés and simple local places so food improves the itinerary instead of controlling it.

    Families, children and older travellers

    Short grove walks, tide pools and scenic drives work well for families.

    Older travellers can experience exceptional redwoods on mostly level grove trails without committing to long backcountry hikes.

    For multigenerational travel, the right pace is the one at which the least mobile member still enjoys the day. That usually creates a better shared trip for everyone.

    Disney California Adventure Pixar Pier Ferris Wheel Over Water

    When accessibility matters, ask precise questions about steps, trail surfaces, beach access, boat boarding, lifts, toilets and vehicle access rather than relying on a generic accessibility label.

    Budget: where the money really goes

    Coastal lodging is the biggest variable, especially in summer and holiday periods.

    Three multi-night bases reduce fuel and make it easier to spend selectively on a better room or guided nature experience.

    Compare total trip cost rather than headline room prices. Parking, transfers, fuel, tolls, ferries and guided activities can erase an apparent saving.

    The best splurges usually remove friction: a central room, a direct transfer, a good local guide or one extra night that prevents an exhausting move.

    Best time to go

    Late spring through early autumn gives the broadest road and trail access, but fog can persist in summer.

    Winter can be beautiful and quiet but storms, fallen trees and road damage make flexible planning essential.

    Shoulder season often balances weather, crowds and prices well, but rural attractions, boats, ferries, mountain services and seasonal restaurants may run reduced schedules.

    Weather should change the order of the day. Keep indoor or lower-effort alternatives so rain, heat, wind, smoke, snow or cloud does not force you to waste the trip.

    Comfort, accessibility and realistic pacing

    The itinerary progresses north in three clear blocks and never asks you to backtrack for a famous grove.

    Two full redwood days mean a permit or weather change does not destroy the forest section.

    Travel fatigue compounds. One difficult relocation can weaken the following two days, which is why this itinerary avoids one-night bases unless geography genuinely requires them.

    A free half-day is not wasted time. It is insurance for weather, traffic, a tired child or a place you discover only after arriving.

    Small decisions that improve the trip

    Use three bases

    The coast is too long for one hotel.

    Give redwoods two full days

    Forest travel is slower than attraction travel.

    Kern River Near Johnsondale California USA

    Check permits late

    Access rules and road conditions matter.

    Skip famous detours that add no depth

    The best experience is usually a quiet grove, not another photo stop.

    What I would leave out on this length of trip

    Leave Yosemite, Napa/Sonoma and Big Sur for the existing California itineraries.

    Skip driving all the way into Oregon simply to add another state line.

    Mistakes that make this trip harder than it needs to be

    • Judging drive time only by miles.
    • Missing permit requirements for a chosen trailhead.
    • Driving coastal roads tired after dark.
    • Trying to see every famous redwood grove.
    • Expecting reliable mobile service in every park area.
    • Returning to San Francisco under a tight same-day flight.

    How I would adapt the itinerary

    With six days, use Mendocino plus one redwoods base.

    With eleven days, add the southern Oregon coast or another northern California forest block with proper nights.

    Before booking

    • Check NPS alerts and permits.
    • Check Caltrans road conditions.
    • Pack rain layers even in summer.
    • Download offline maps.
    • Choose departure airport before fixing the northern base.

    Practical questions

    Do I need permits for the redwoods?

    Some specific access points do. Tall Trees Trailhead requires a reservation year-round, and Gold Bluffs Beach/Fern Canyon vehicle access is seasonally permitted.

    Mendocino or Fort Bragg?

    Mendocino for atmosphere and headlands; Fort Bragg for services and practical lodging.

    How many days for the redwoods?

    At least two full days in a nine-day coast trip.

    Final thoughts

    Northern California rewards travellers who accept that the road itself is part of the destination.

    Mendocino, Humboldt and the redwoods create nine days of cliffs, small towns and ancient forest without turning Highway 101 into a race.

    How to keep the itinerary resilient

    Keep Fern Canyon/Tall Trees choices flexible around permits, stream conditions and trail alerts.

    If a road closes, use the grove or coast nearest your current base rather than driving hours for a substitute.

  • Utah and Arizona in 10 Days: Zion, Bryce and Grand Canyon With Realistic National Park Driving

    Utah and Arizona in 10 Days: Zion, Bryce and Grand Canyon With Realistic National Park Driving

    The American Southwest encourages overplanning because Zion, Bryce Canyon, Grand Canyon, Arches, Canyonlands, Monument Valley and Page all look close when viewed at state scale. Ten days are better spent on three major parks than on a windshield tour of seven.

    This route uses Las Vegas as the practical gateway, then Zion, Bryce Canyon and the Grand Canyon South Rim. Page is optional as a transfer stop, not another mandatory two-night base, and Moab is deliberately left for a second road trip.

    For 2026, the National Park Service states that Zion Canyon shuttle service resumes March 7 and operates seasonally; no shuttle ticket or reservation is required, but park admission still applies. Bryce Canyon also publishes a 2026 seasonal shuttle schedule, so current NPS information should shape each park day rather than an old road-trip blog.

    Quick trip summary

    • 1 Las Vegas arrival night, 3 Zion-area nights, 2 Bryce nights, 3 Grand Canyon South Rim/Tusayan nights, Day 10 departure.
    • In 2026 Zion Canyon shuttle service is seasonal; check the exact NPS schedule for your dates.
    • Bryce Canyon shuttle operates seasonally in 2026 and can reduce parking stress.
    • Use the Grand Canyon South Rim for this route; do not build the itinerary around North Rim access without checking current NPS status.
    • Do not add Moab/Arches unless the trip becomes at least 13–14 days.

    Why this route works

    Three Zion nights let you use the shuttle system without making the first hike a race after driving from Las Vegas.

    Bryce needs less time than Zion but benefits from one sunrise/sunset plus one daylight trail/viewpoint day.

    The Grand Canyon deserves several nights because scale, heat, weather and shuttle logistics make a one-hour rim stop a poor finale.

    A realistic itinerary at a glance

    Days Base Main focus
    1 Las Vegas Arrival and car pickup/rest
    2–4 Springdale / Zion Canyon shuttle, trails and weather buffer
    5–6 Bryce Canyon area Amphitheatre viewpoints and one trail day
    7–9 Grand Canyon South Rim / Tusayan Rim, shuttle viewpoints and optional short hike
    10 Departure Las Vegas/Phoenix depending on flights

    Day-by-day plan

    Day 1: Las Vegas arrival

    Collect the car only if rested and keep the night simple. Do not begin a desert highway drive after a long-haul arrival just to save one hotel night.

    Day 2: Drive to Zion

    Travel to Springdale/Zion area and use a short visitor-centre or Pa’rus-style orientation walk. Learn the shuttle system before the main day.

    Day 3: Zion Canyon

    Use the 2026 shuttle when it is operating. The NPS says buses generally arrive every 5–10 minutes in the canyon during scheduled service, and a one-way ride to Temple of Sinawava takes about 45 minutes. Choose one major trail plus one short stop, not every shuttle station.

    Day 4: Zion flexible day

    Use a second trail, Kolob/other accessible area, e-bike-style valley option where legal, or a slow day. This is the weather/crowd buffer and protects the route if Day 3 was too hot or busy.

    Illustrated road trip through Zion, Bryce Canyon and the Grand Canyon South Rim

    Day 5: Zion to Bryce

    Drive to Bryce Canyon and stop selectively. Arrive with daylight for the amphitheatre rim or sunset, but do not start a long trail after the transfer.

    Day 6: Bryce Canyon

    Use the 2026 shuttle during its operating season to reduce parking pressure. Combine several viewpoints with one trail matched to altitude, heat/cold and fitness; Bryce sits much higher than Zion and can feel dramatically cooler.

    Day 7: Bryce to Grand Canyon South Rim

    Drive south, using Page only if it fits naturally. Avoid stacking Antelope Canyon, Horseshoe Bend and the entire drive unless you have timed entries and enough daylight.

    Day 8: Grand Canyon South Rim

    Use rim shuttles/viewpoints and walk a manageable section of the Rim Trail. The canyon’s scale does not require a strenuous below-rim hike to be meaningful.

    Day 9: Second Grand Canyon day

    Use sunrise, another rim sector, museum/geology interpretation or a short below-rim section only if weather, heat and fitness are appropriate. Turn around before exhaustion; uphill return is harder than the descent suggests.

    Day 10: Departure

    Drive to Las Vegas or Phoenix according to the chosen airport with a conservative buffer. Do not schedule a long canyon hike before the departure drive.

    Where to stay and how many hotel changes to make

    Springdale is the most convenient Zion base when shuttle season and walkability matter.

    At Bryce, staying near the park entrance reduces dawn/sunset driving.

    At the Grand Canyon, in-park lodging or Tusayan costs more but protects sunrise/sunset time and removes a long daily commute.

    On a multi-base trip, hotel location matters more than a small difference in nightly price. A room that removes repeated transfers usually adds more value than a prettier property in the wrong place.

    Read recent reviews for practical details that booking photos rarely show: stairs, lift size, road noise, parking access, breakfast hours and the final walk from transport.

    Transport: what is worth planning in advance

    A rental car is essential between parks, but inside Zion Canyon and some Bryce/Grand Canyon areas the shuttle systems can be more useful than driving.

    NPS rules, road closures, shuttle dates and trail conditions can change; recheck each park shortly before arrival.

    Fuel and food should be planned before long rural stretches, especially outside peak season.

    Measure every move door to door rather than by the published journey time. Checkout, terminal access, waiting, luggage and the final connection can turn a short transfer into half a day.

    Use inflexible tickets only when the saving is meaningful and the day is truly fixed. Weather-sensitive island, mountain and outdoor plans benefit from flexibility.

    Food and daily rhythm

    Park gateway towns can be expensive and busy; groceries/simple breakfasts help on early trail days.

    Hydration and electrolytes matter more than elaborate dining on hot hiking days.

    Use meals to control the rhythm of the day. A long regional lunch can be an experience and a recovery period, especially after hiking, museums, boat trips or early starts.

    Do not make every meal another attraction. Mix local specialties with simple food so that the destination, not the restaurant schedule, remains the centre of the trip.

    Families, children and older travellers

    Shuttles, rim trails and viewpoints make the route workable without demanding hikes.

    Older travellers should choose trail surfaces/altitude carefully; Bryce elevation and canyon heat can be significant.

    Never treat Angels Landing or a deep Grand Canyon hike as a family default; permits, conditions and individual ability matter.

    For multigenerational travel, the useful pace is the one at which the least mobile member still enjoys the day. That usually produces a better experience for everyone.

    Children often respond better to a change of format than to another famous sight: a beach after a museum, a ferry after a city walk, or wildlife after a road day.

    Budget: where the money really goes

    Park lodging and rental cars are the main fixed costs; food and guided activities vary widely.

    Paying more to stay near the parks often saves hours of driving and improves sunrise/sunset access.

    Compare total trip cost rather than headline prices. Parking, transfers, luggage, tours and time lost reaching a remote hotel can erase an apparent saving.

    The best splurges usually remove friction: a central room, a safe private transfer, a direct train or ferry, a guide where context matters or one extra night that prevents an exhausting move.

    Best time to go

    Spring and autumn can balance temperature and crowd levels, but high-elevation Bryce can still see cold/snow while the Grand Canyon interior is hot.

    Summer heat requires early starts and conservative hiking; winter brings snow/ice and reduced services in some areas.

    Shoulder season often balances weather, demand and room prices well, but ferries, mountain services and rural restaurants may operate less frequently.

    Heat, rain, wind, snow and daylight should change the order of a day. Use comfortable hours for exposed outdoor sights and keep lower-effort alternatives available.

    Comfort, accessibility and realistic pacing

    The route uses two full Zion days and two Grand Canyon days so no single hike has to carry the trip.

    Do not combine long drives with strenuous descents into canyons.

    Travel fatigue compounds. One difficult transfer can reduce the quality of the following two days, which is why this route avoids one-night bases unless geography genuinely requires them.

    A free half-day is not wasted time. It is insurance for weather, laundry, a delayed transfer, a tired child or a place you discover only after arrival.

    Small decisions that improve the trip

    Use only three major parks

    Zion, Bryce and Grand Canyon already provide distinct geology and hiking.

    Plan around 2026 shuttles

    Current NPS operations matter more than old blog maps.

    Stay close to parks

    Dawn and evening are worth more than a cheaper room an hour away.

    Leave Moab out

    Arches/Canyonlands deserve their own multi-day block.

    What I would leave out on this length of trip

    Leave Arches, Canyonlands and Capitol Reef for another Utah route.

    Skip the North Rim unless current NPS access is fully confirmed for your dates; the South Rim is the stable structure for this itinerary.

    Mistakes that make this trip harder than it needs to be

    • Trying to see five or six national parks in ten days.
    • Ignoring Zion shuttle operations.
    • Underestimating Bryce elevation and cold.
    • Descending too far into the Grand Canyon in summer heat.
    • Booking distant motels that add hours of daily driving.
    • Driving to a flight after a major hike.

    How I would adapt the itinerary

    With seven days, use Zion plus Grand Canyon or Zion plus Bryce.

    With fourteen days, add Page and Moab/Arches only with two or three proper nights.

    Before booking

    • Check each NPS park alert page.
    • Verify 2026 shuttle dates.
    • Reserve park lodging early.
    • Carry water/sun protection and cold layers for Bryce.
    • Protect the final airport drive.

    Practical questions

    Do I need reservations for Zion shuttle in 2026?

    NPS states no shuttle ticket or reservation is required, but park admission applies and service is seasonal.

    How many parks are realistic in ten days?

    Three major parks provide a much stronger trip than six brief stops.

    Should I hike below the Grand Canyon rim?

    Only to a distance you can safely climb back in the conditions; the Rim Trail and viewpoints are complete experiences too.

    Final thoughts

    The Southwest is a place where fewer parks can produce a much bigger experience.

    Zion, Bryce and the Grand Canyon fill ten days with distinct landscapes while leaving enough energy to hike safely and actually watch the light change.

  • Washington, DC in 5 Days: Smithsonian Museums, Monuments and Neighborhoods Without Museum Fatigue

    Washington, DC in 5 Days: Smithsonian Museums, Monuments and Neighborhoods Without Museum Fatigue

    Washington, DC is deceptively easy to overplan because many of its most famous museums and monuments are free. Free admission does not make a museum short, and the National Mall is much larger on foot than it appears on a map.

    This five-day itinerary uses one hotel and groups experiences by geography. It mixes museums, monuments and neighbourhoods so every day does not become six hours indoors followed by an exhausted walk past memorials.

    The Smithsonian confirms that admission to Smithsonian museums is generally free, but several locations still require free passes or tickets. In 2026 this includes the National Museum of African American History and Culture, the National Air and Space Museum in DC and the National Zoo. Always check the exact museum before the visit.

    Quick trip summary

    • One hotel for all 5 days.
    • Stay near Metro rather than trying to sleep beside every monument.
    • Plan one major Smithsonian museum per half-day or day.
    • Reserve free timed passes where required.
    • Use evenings for memorials and neighborhoods when temperatures are lower.

    Why this route works

    The Mall works best when divided into east, central and west clusters rather than walked end-to-end repeatedly.

    Smithsonian museums vary enormously in size; choosing fewer institutions lets you actually see collections instead of racing entrances.

    Neighbourhood time in places such as Georgetown, Dupont Circle, Shaw or Capitol Hill prevents the trip from feeling like a school excursion.

    A realistic itinerary at a glance

    DaysBaseMain focus
    1National Mall eastCapitol area, museums and orientation
    2Central MallSmithsonian museum and memorial evening
    3West Mall / monumentsLincoln, Vietnam, Korean, MLK/FDR area
    4Neighborhood DCGeorgetown, Dupont, Shaw or another district
    5FlexibleSecond major museum or final monuments

    Day-by-day plan

    Day 1: Orientation and eastern Mall

    Use the Capitol grounds, Library of Congress exterior/interior if planned, and one nearby museum. Do not walk to Lincoln Memorial and back on the same afternoon just because you can.

    Day 2: Major Smithsonian day

    Choose Air and Space, Natural History, American History or another priority museum. If visiting Air and Space, reserve the currently required free timed-entry pass.

    Day 3: Memorials and history

    Use the western memorials in one coherent walking loop, with breaks. Late afternoon and evening can be especially effective for atmosphere and heat.

    Washington DC White House North Side

    Day 4: Neighborhood day

    Move beyond the Mall: Georgetown waterfront, Dupont Circle, Shaw/U Street, Eastern Market/Capitol Hill or another area that matches your interests.

    Day 5: Flexible museum or cultural day

    Use the African American History and Culture Museum with the appropriate pass, National Gallery, another Smithsonian or the museum you skipped earlier. Keep the end close to the airport/rail route if departing.

    Where to stay and how many hotel changes to make

    Downtown, Penn Quarter, Capitol Hill and Dupont all work well when Metro access is strong. A slightly less central hotel beside a direct Metro line can outperform a more expensive room that still requires long walks.

    Avoid choosing a hotel only because it is ‘near the Mall’; the Mall itself spans a large area.

    Where you sleep should remove friction rather than create it. A well-connected room can save more time and energy than a cheaper property that requires repeated taxis, awkward luggage transfers or long walks at the start and end of every day.

    Read recent guest reviews for details that booking photos rarely reveal: steps, lift size, road noise, parking, breakfast hours and the true walking distance from a station, ferry terminal or attraction.

    Transport: what is worth planning in advance

    Metro, buses and walking remove the need for a rental car. Rideshare can be useful late or when museum fatigue sets in.

    Airport choice matters: Reagan National has the simplest Metro access, while Dulles is farther but connected by rail.

    Measure every move door to door rather than by the headline timetable. Checkout, waiting, luggage, station access and the final connection can turn a short journey into half a day.

    Use inflexible tickets only when the saving is meaningful and the day is genuinely fixed. Outdoor, island, marine and mountain plans are much easier when at least one component can move.

    Food and daily rhythm

    The Mall itself is not where you should plan every meal. Use Penn Quarter, Wharf, Georgetown, Shaw, Capitol Hill and other neighbourhoods for better variety.

    A museum café can be strategically useful when leaving and re-entering would waste an hour.

    Use meals to control the rhythm of the day. A long regional lunch can be both an experience and a recovery period after museums, hiking, heat or an early start.

    Washington DC White House From South Lawn

    Do not make every meal another attraction. Mix destination restaurants with bakeries, markets, cafés and simple local places so food improves the trip instead of controlling it.

    Families, children and older travellers

    Free museums are excellent for families, but children usually benefit from one major museum at a time rather than several enormous collections.

    Older travellers should use Metro and buses to reduce long Mall walks; memorials can be grouped into shorter loops.

    For multigenerational travel, the useful pace is the one at which the least mobile member still enjoys the day. That usually creates a better shared trip for everyone.

    When accessibility matters, ask specific questions about steps, trail surfaces, boat boarding, lifts and vehicle access instead of relying on a generic accessibility label.

    Budget: where the money really goes

    Many major sights are free, so accommodation and food dominate the budget.

    Do not buy an attraction pass automatically unless its paid attractions truly match your priorities.

    Compare total trip cost rather than headline prices. Parking, transfers, luggage, tours and time lost reaching remote accommodation can erase an apparent saving.

    The best splurges usually remove friction: a central room, a direct transfer, a quality guide or one extra night that prevents an exhausting move.

    Best time to go

    Spring and autumn are excellent but popular; summer can be hot and humid, making early museum starts and evening monuments valuable.

    Winter can be cold but is often easier for museum-heavy trips outside holiday periods.

    Shoulder season often balances weather, demand and prices well, but ferries, rural attractions and mountain services may run less frequently.

    Heat, rain, wind, snow and daylight should change the order of a day. Keep lower-effort alternatives for conditions that do not suit the original plan.

    Comfort, accessibility and realistic pacing

    The itinerary intentionally alternates indoor and outdoor days.

    One flexible final day absorbs pass availability, weather and museum fatigue.

    Travel fatigue compounds. One difficult transfer can reduce the quality of the following two days, which is why this itinerary avoids one-night bases unless geography genuinely requires them.

    A free half-day is not wasted time. It is insurance for weather, transport disruption, a tired child or a place you discover only after arriving.

    Small decisions that improve the trip

    Reserve only what truly requires it

    Passes should not control every hour.

    Use one museum at a time

    The Smithsonian is too large for completion.

    Leave the Mall

    Neighborhood DC adds food and everyday atmosphere.

    Washington DC Pennsylvania Avenue Downtown

    Walk monuments later

    Evenings can be cooler and more memorable.

    What I would leave out on this length of trip

    Leave Mount Vernon, Baltimore and several Virginia day trips for another visit.

    Skip trying to see every Smithsonian museum in five days.

    Mistakes that make this trip harder than it needs to be

    • Assuming free museums do not need tickets.
    • Walking the Mall end-to-end several times.
    • Scheduling three large museums in one day.
    • Eating every meal inside tourist zones.
    • Ignoring summer heat.
    • Leaving a distant neighbourhood under a tight airport transfer.

    How I would adapt the itinerary

    With three days, choose two museum blocks, one monument loop and one neighbourhood.

    With seven days, add Arlington, Mount Vernon or more neighbourhood time without changing hotels.

    Before booking

    • Check Smithsonian pass requirements.
    • Choose a Metro-friendly hotel.
    • Pack comfortable shoes.
    • Group memorials geographically.
    • Keep one day flexible.

    Practical questions

    Are Smithsonian museums free?

    Generally yes, but several locations require free passes or tickets, so check the current Smithsonian visitor page.

    Do I need a car?

    No.

    How many museums per day?

    One major museum plus a smaller cultural stop is a comfortable maximum for most visitors.

    Final thoughts

    Washington is a better trip when free admission is treated as permission to slow down rather than permission to overfill the day.

    Five days allow the Smithsonian, monuments and neighbourhoods to feel like one city rather than a list of institutions.

    How to keep the itinerary resilient

    Keep Day 5 open for any museum pass you could not secure earlier.

    Use indoor museums as the fallback when heat, rain or cold makes a long memorial walk unpleasant.

    Who this route suits best

    This itinerary works best for travellers who prefer depth over collecting places. It keeps hotel changes low, protects flexible time and assumes that a good meal, an unexpectedly interesting neighbourhood or a slower morning can be as valuable as another attraction. That approach works especially well for first-time visitors, couples, families and multigenerational groups.

    More energetic travellers can add a longer hike, another museum or a second excursion on flexible days. Travellers who prefer an easier pace can remove those extras and still keep the core journey intact. Before booking, identify the two or three experiences that would genuinely disappoint you to miss; those are the ones to reserve first.

  • Toronto in 4 Days: Downtown, Waterfront and Neighbourhoods Without Crossing the GTA for Every Stop

    Toronto in 4 Days: Downtown, Waterfront and Neighbourhoods Without Crossing the GTA for Every Stop

    Toronto can fill a four-day trip without ever sending you far beyond the city centre. The trick is to explore one area properly before moving on: a morning among the towers and waterfront, a museum day around the Annex, and time for the west-end streets where food and everyday life are as interesting as the landmarks. The islands make a fine fourth-day option when the weather cooperates.

    If you are travelling farther across the province, Ontario in 9 Days: Toronto, Niagara and Prince Edward County Without Changing Hotels Constantly helps you plan Toronto alongside Niagara and Prince Edward County. This city itinerary takes a closer look at the neighbourhoods and waterfront, so you can enjoy Toronto itself instead of treating it as a station between excursions.

    Quick trip summary

    • Recommended time: 4 days.
    • Best planning principle: group each day by geography and protect only the reservations that control access.
    • Best for: independent travellers, couples, families and slower-paced visitors who prefer a realistic rhythm.
    • Keep flexible: at least one half-day or one major activity that can move with weather, traffic or energy.
    • Book first: accommodation location, scarce transport and any timed entry that shapes the rest of the trip.

    Is Toronto the right trip for you?

    Toronto suits travellers who enjoy multicultural food, museums, neighbourhoods, architecture and waterfront space. Families benefit from major indoor attractions and parks, while repeat visitors can spend entire days away from the downtown landmarks. The main planning mistake is treating the wider Greater Toronto Area as if it were one compact city centre.

    Toronto works best when you let its neighbourhoods set the pace. If the Royal Ontario Museum is a must, give it a proper morning; if food and street life interest you more, save time for Kensington Market and the west end. The waterfront is another trip in itself. You do not have to squeeze all three into the same day.

    Where to stay: choose location before hotel style

    BaseWhy choose it
    Downtown / Financial DistrictBest for first-time access to major sights, Union Station and the waterfront, though evenings can feel more business-oriented on some blocks.
    Entertainment District / Queen WestUseful for restaurants, nightlife and central walking access; check event-night noise and rates.
    Yorkville / AnnexBetter for museums, neighbourhood feel and subway access while remaining close to central Toronto.

    Union Station is a useful reference point when choosing a hotel, particularly if you are arriving by train or planning an early departure. The Entertainment District can be convenient for central sights, while the Annex or Queen West may suit travellers who enjoy going out locally in the evening. Check the actual route from the nearest stop to the hotel; Toronto blocks can be longer than they look on a booking map.

    CN Tower And Toronto Skyline Ontario Canada At Sunrise

    A realistic 4-day itinerary

    Day 1: downtown core and waterfront

    Use Union Station, the central towers, markets and waterfront as one coherent zone. Choose one major viewpoint or attraction and leave room to walk rather than moving immediately to a distant neighbourhood.

    Day 2: museums, university and west-central neighbourhoods

    Build the day around the Royal Ontario Museum or another major collection, then continue through the Annex, Kensington Market or nearby districts according to interest. Keep the evening on the same side of downtown.

    Day 3: Queen West, neighbourhood food and local Toronto

    Explore Queen West, Ossington, Chinatown or another neighbourhood cluster. This is the day to make food and street life part of the itinerary instead of adding another large attraction.

    Day 4: Toronto Islands or flexible city day

    Use good weather for the ferry and islands, waterfront cycling or parks. In poor weather, keep an indoor alternative such as galleries, markets or another museum. Niagara Falls deserves its own substantial day and should not be squeezed into a few leftover hours.

    How to move around without wasting the day

    The subway and streetcar network handle most visitor routes, with walking useful inside each neighbourhood. Regional trains are valuable when the itinerary extends beyond the city. Driving downtown adds parking cost and traffic without much benefit. If the wider Ontario trip requires a car, collect it when leaving Toronto rather than during the city portion.

    The TTC map makes cross-town journeys seem straightforward, but a streetcar ride at rush hour can take longer than expected. Leave extra time for the ferry, a ticketed performance or a train from Union Station. Once you reach a district such as Kensington or the Annex, it is usually nicer to explore on foot than to keep hopping on transport for the next photo.

    Best time to visit

    Late spring and early autumn are excellent for walking and waterfront time. Summer brings festivals, heat and busy weekends, while winter is cold but supported by strong indoor attractions and transit. Weather near Lake Ontario can change quickly, so keep the island or waterfront-heavy day movable when possible.

    Toronto’s seasons give the same four-day trip a very different feel. On a bright day, take advantage of the waterfront or the islands; when rain or strong wind arrives, swap in a museum or a neighbourhood café. Keep the ferry day flexible and check service notices before setting off, rather than assuming a pleasant forecast guarantees smooth travel.

    What to book first

    Reserve accommodation first, then major ticketed attractions that matter to you and any special event driving demand. Ferry schedules, sports fixtures and festivals can affect the best order of days. Do not overbook restaurant times across different neighbourhoods; Toronto is more enjoyable when you can stay where the day develops naturally.

    Choose one or two experiences that you would be disappointed to miss and check whether they need advance tickets. A special exhibition, sports game or evening show may shape the day, but Kensington Market and Queen West are better enjoyed without appointments every hour. Make room for a slow lunch; eating well is part of the reason to visit Toronto.

    CN Tower Above Toronto Skyline Ontario Canada

    Food strategy: eat well without scheduling every meal

    Food is one of Toronto’s strongest reasons to explore by neighbourhood. Use Kensington, Chinatown, Koreatown, Ossington, Scarborough or other districts according to your interests rather than chasing a generic best-restaurants list. In a four-day trip, two or three neighbourhood food experiences are more realistic than travelling across the city for every famous dish.

    Toronto is full of places to eat, but the city is too large to cross for every recommendation you have saved. When you are visiting the Royal Ontario Museum, look for lunch nearby; on a Queen West day, eat around Ossington or Chinatown. If you are with children or older relatives, an early meal and a proper sit-down break can save the afternoon.

    Travelling with children

    With children, mix one substantial indoor visit with time where they can move about. An hour in a museum followed by a park or the waterfront often works better than a string of galleries. Check the weather before promising an island afternoon and plan a straightforward way back to the hotel when everyone has had enough.

    The Toronto Islands can be a lovely family outing, but allow time for the ferry and do not build an urgent evening appointment around the return. On a central day, break up museums with a walk beside the lake or a quieter public space. The best family memories may come from an unplanned stop for food or a view of the skyline.

    Travelling at a slower pace or as a senior

    If long walks are difficult, pick a hotel near a transit stop you will actually use. A day around the ROM and the Annex can be easier to manage than a route that jumps from one side of the city to another. Check entrances and lift availability at the places that matter, particularly if you use a wheelchair or walking aid.

    Use the subway or a taxi for the dull stretches, then save walking energy for places worth seeing closely. For example, explore the streets around Kensington Market at your own pace rather than approaching them after a tiring walk from the waterfront. There is no need for everyone in a group to follow the same route all afternoon; agree on a meeting place and reconnect for dinner.

    Budget: where the money really goes

    Accommodation can be expensive in Toronto, so look beyond the nightly room rate. A central hotel might remove several taxi rides, while a less expensive room near a convenient subway station could be equally practical. Budget separately for one big attraction, meals and any special event. If Niagara Falls is on your list, treat it as a proper excursion with its own transport costs.

    Before buying a city attraction pass, write down the places you genuinely intend to visit. If your four days focus on neighbourhoods, waterfront walks and one museum, separate tickets may make more sense. A pass becomes useful only when its included venues match your route; travelling across Toronto just to use another admission is not a saving.

    Gooderham Flatiron Building Toronto Ontario Canada

    Weather fallback plan

    Rain does not need to ruin a Toronto day. Keep the Royal Ontario Museum, a gallery or a market visit available as an alternative when the lakefront is unpleasant. If showers arrive while you are in the west end, stay in that area rather than rushing across town. You can return to the waterfront when the weather clears.

    Leave the last day open enough to recover something missed earlier. Good ferry conditions could make it your island day; persistent rain might call for a long museum visit and a good meal. With an early flight, however, do not plan a distant outing at all. A leisurely final morning near your hotel is a perfectly worthwhile end to the trip.

    Connectivity, cash and small practical details

    Save a copy of your accommodation address, the route from Union Station or the airport, and any tickets you need when data is unavailable. Toronto has plenty of mobile coverage, but batteries still run flat during long days of maps and photos. Check your final transit connection before staying late in an unfamiliar neighbourhood, especially if a regional train is involved.

    You will usually be able to pay by card in Toronto, yet carrying a spare payment method is sensible when moving between busy attractions and small food counters. Keep your most important documents off the phone as well, either in secure offline storage or a separate copy. You should be able to find the hotel and reach your next train even if your device stops working.

    What to pack

    Bring comfortable shoes, a weather layer suitable for the season and sun or rain protection for waterfront days. Winter requires serious cold-weather clothing, including footwear that handles slush. In summer, carry water and a light layer for heavily air-conditioned interiors.

    Pack for the time of year rather than the general idea of a Canadian city. Waterfront wind can make a mild day feel cooler; summer still calls for sun protection and water. Winter streets can be wet or slushy, so choose footwear accordingly. A small day bag is more useful than carrying an extra change of clothes around downtown.

    Common mistakes to avoid

    • Treating Niagara Falls as a quick side trip squeezed between Toronto attractions.
    • Renting a car for downtown sightseeing and spending time on parking.
    • Crossing the city several times in one day for restaurants or isolated attractions.
    • Fixing the islands to a poor-weather day with no fallback.
    • Assuming neighbourhoods in the wider GTA are close simply because they share the Toronto name in casual conversation.

    Responsible travel and local etiquette

    Kensington Market, Chinatown and the Annex are neighbourhoods where people live and work, not outdoor sets. Keep shop entrances clear, ask before photographing people and give busy pavements room to breathe. Supporting a family-run food shop can be more memorable than waiting for the same landmark photograph as everyone else.

    On the islands and along the waterfront, stick to signed paths and respect areas set aside for nature or local use. Crowded ferry queues are easier for everyone when people allow space for strollers and mobility aids. A little patience goes a long way in Toronto, where residents and visitors share many of the same transit routes and public spaces.

    Ontario Legislative Building Queens Park Toronto Canada

    If you have less or more time

    With two days, focus on downtown, waterfront, one museum and one neighbourhood. Three days adds the islands or a broader west-side day. With five or six days, add more neighbourhoods or Niagara as a properly planned separate day rather than reducing Toronto itself to a stopover.

    An extra day in Toronto is best spent going deeper rather than adding another famous name to the itinerary. Explore a district you only passed through, spend longer by the lake or plan Niagara as a separate outing if that is important to you. With less time, keep the downtown core and one neighbourhood you really want to understand.

    How to choose between similar experiences

    Choose the Toronto Islands for skyline views and a relaxed outdoor day; choose a museum-heavy day when weather is poor. Choose downtown for maximum convenience and the Annex or Queen West when evening neighbourhood character matters more. Niagara belongs in the wider Ontario itinerary, not automatically inside a short Toronto city break.

    If you are choosing between the Toronto Islands and another big museum, let the forecast decide. For a quieter day, the islands offer open space and skyline views; a museum gives you a focused indoor experience. Likewise, an evening in Queen West feels different from one around the central towers. Choose the atmosphere you want, not simply the attraction with the most reviews.

    Safety and decision-making on the day

    Busy stations, streetcars and festival crowds call for the usual care with bags and phones. Watch traffic at intersections, particularly when turning vehicles and streetcars share the road. If a ferry or regional service is disrupted, check the operator’s notice and adjust the plan. An extra hour of sightseeing is not worth getting stranded across the city.

    Before a trip to Niagara or any far-flung part of the Greater Toronto Area, decide when you need to start heading back. Train schedules, traffic and tired legs can turn a late return into an unpleasant evening. For a simple city day, leave room to stop when you find somewhere you like; no one is grading you on how many neighbourhoods you tick off.

    Useful official and planning resources

    Opening hours, transport schedules, fees, access rules and visitor procedures change more often than the basic geography. Recheck the sources below shortly before departure.

    Final planning checklist

    • Confirm passport, visa, transit and health requirements for your nationality.
    • Reserve the transport, permit or timed entry that controls the rest of the itinerary.
    • Check how luggage moves between airport, station, ferry, road transfer and accommodation.
    • Download offline maps and save key tickets outside your email app.
    • Recheck weather, road, sea, trail or attraction notices before each critical day.
    • Keep at least one half-day that can absorb a delay or become simple rest.
    • Leave a generous buffer before international flights and other costly connections.

    Four days can give you a satisfying feel for Toronto: a central first day, a museum and nearby streets, a neighbourhood-led day and some time by the lake. Book the experiences that truly matter, then let the city surprise you a little. A long lunch or a second walk through a favourite area is not time wasted; it is often the point of travelling.