Author: admin

  • Traveling in the Rainy Season: Storm Warnings, Flexible Plans and Safer Holidays

    Traveling in the Rainy Season: Storm Warnings, Flexible Plans and Safer Holidays

    A holiday during the rainy season is not automatically a holiday ruined. Tropical downpours can transform landscapes, fill waterfalls and change the rhythm of a destination in memorable ways. But the same travel window may also bring flooding, rough seas, landslides or severe tropical storms. The challenge is to separate ordinary seasonal rain from hazards that require a different itinerary or no trip at all. This guide shows how to research local patterns, build sensible flexibility and respond to official warnings.

    Rainy season and cyclone season are different ideas

    ‘Rainy season’ describes a recurring period when precipitation is more common in a region. It does not tell you whether rain falls briefly each afternoon or lasts for days. Tropical cyclone seasons refer to periods when storms may form in particular ocean basins; actual risks vary by exact location and year. An inland capital, a small offshore island and a mountain village can experience the same broad season very differently.

    Begin with the destination’s national meteorological service, not a global chart that paints an entire continent one color. Check historical rainfall, local terrain, flooding patterns and season-specific transport disruptions. Remember that a calendar does not predict a specific storm weeks in advance. If severe weather is possible, research evacuation advice and communication channels before paying for nonrefundable experiences.

    Start with the hazards that matter to your route

    A beach holiday may be affected by waves, rip currents and canceled boat trips even when the sky is bright. A mountainous road trip may face landslides or washed-out bridges after intense rainfall. Urban flooding can close underpasses and transit stations. Nature tours may be suspended to protect visitors and trails. Identify which activities are the most exposed instead of treating weather as a single number on a forecast app.

    Boston City Street In Rain

    For every base, ask three questions: How will we arrive? How will we leave if the main road or ferry stops? What safe indoor options are available? If the route depends on one narrow road, one weekly flight or several open-water transfers, weather resilience deserves more weight than hotel price. Families and travelers with mobility needs may require extra time to move during disruptions.

    Check official forecasts and alerts as your trip approaches

    Reliable severe-weather information comes from national meteorological and emergency-management agencies. In the Atlantic and eastern Pacific, the US National Hurricane Center provides hurricane preparedness information and official forecast products. Other ocean regions have their own agencies; do not assume an American forecast covers the whole world. Follow local government evacuation orders and instructions even when a booking company says its tours are still running.

    Use at least two communication methods when possible: a local emergency-alert system and a verified official website or radio source. A hotel reception can help explain local routes, but an informal assurance is not a substitute for a government warning. Be wary of dramatic social-media videos with no date or location. Confirm whether an alert refers to your district, a distant region or a different storm.

    Decide when to avoid a destination entirely

    Some travelers can accept occasional rain; others cannot safely manage flooded streets, isolated roads or unpredictable boat service. Avoid high-risk itineraries during periods when you cannot absorb cancellations or evacuations. A remote island with limited medical facilities may be unsuitable for someone who needs reliable access to care. A hiking trip that requires dangerous river crossings should be rescheduled rather than treated as an adventurous test.

    Do not assume that the absence of a named cyclone means conditions are safe. Dangerous rainfall and flash floods can occur outside major storms. Equally, do not cancel a whole continent on the basis of one weather headline. Evaluate the actual destination, dates, exposure and official advice. If warnings recommend not traveling, take them seriously; no holiday photograph is worth putting yourself, rescuers or residents at risk.
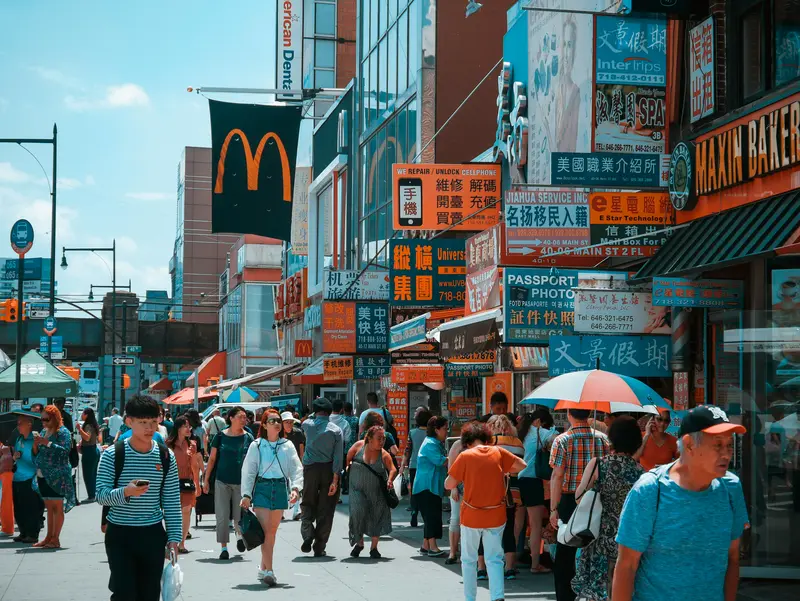
    Times Square Tourists And Umbrellas In Rain

    Build the itinerary around flexible days

    A rigid daily schedule is particularly fragile in wet seasons. Keep a small set of must-do activities and several substitutes within reach of your accommodation. Visit museums, covered markets or cooking classes during rainy hours when the facilities are safely operating. Reserve outdoor excursions for periods with favorable local forecasts, and ask operators about cancellation and rescheduling conditions before paying.

    If a ferry to an island is essential, place it early enough in the trip to allow a weather buffer before your international flight home. Avoid separate tickets with a final ferry arrival only hours before departure. For rural road trips, choose fewer bases, stay longer and allow time for detours. A slower route often delivers a better holiday than a photograph-heavy plan that depends on every bridge staying open.

    Choose accommodation with safety and access in mind

    A seafront bungalow may look irresistible online, but location deserves scrutiny during storm-prone months. Investigate whether the property is in a known flood zone, how it communicates emergencies and whether access roads are reliable. A high floor may reduce one type of inconvenience but create difficulties if power fails and elevators stop. Travelers with mobility needs should ask about evacuation support and alternative access routes.

    A staffed property with a clear emergency plan can be a practical choice, especially for families or people unfamiliar with the region. Check whether the hotel has backup power, potable water arrangements and a way to contact guests during disruptions; do not assume any property has these systems. If authorities order evacuation, follow the designated plan rather than remaining to protect a prepaid booking.

    Understand what travel insurance may and may not cover

    Weather-related cancellation is not automatically reimbursed. Policies may distinguish between trip cancellation, interruption, delay, missed departures and evacuation, with exclusions for known events or travel against official advice. Buying insurance after a storm has been named may be too late to obtain certain protections. Compare policies before booking and keep written copies of terms relevant to your exact trip.

    Do not confuse voluntary changes because the forecast looks wet with cancellations caused by covered events. Airlines, hotels and tour operators each have separate change rules. During serious disruption, keep receipts, official alerts, cancellation messages and evidence of attempts to contact providers. Contact your insurer through verified channels before committing to unusual expenses whenever practical.

    New York Times Square Night Rickshaw In Rain

    Pack for moisture without overpacking

    A compact rain shell, quick-drying layers and footwear with reliable grip are usually more useful than carrying several heavy outfits. Protect passports, electronics and important papers inside suitable waterproof pouches, while keeping them accessible. Use dry bags where relevant for boat transfers, but remember that no bag replaces safe weather decisions. A small torch or flashlight, power bank and offline route information can help during short interruptions.

    Pack basic medicines, any prescribed treatment and appropriate child supplies according to local entry and airline rules. In mosquito-prone regions, check destination-specific prevention advice from an authoritative travel-health source. Do not assume that rain makes sun protection unnecessary; UV exposure remains possible between showers. Keep a dry set of socks and clothes available for long transfers.

    Families, older visitors and travelers with disabilities

    A wet-weather itinerary with children works better when indoor spaces are genuine activities rather than emergency punishment. Choose a museum, aquarium or workshop that everyone would enjoy anyway, and avoid long exposed queues. For a baby or toddler, consider safe shelter, feeding spaces and the ability to return easily to the hotel. Children should never be allowed to play in floodwater, which can conceal hazards and contamination.

    Older adults and travelers with reduced mobility need a plan for slippery streets, disrupted public transport and possible lift outages. Ask a hotel or transport provider about accessible alternatives before severe weather arrives. If your group includes someone dependent on electric medical equipment, review safe backup arrangements with the relevant professional. The itinerary should be built around everyone’s actual needs, not around an average traveler who can sprint through a storm.

    When rain can actually improve the trip

    Outside dangerous conditions, seasonal showers can provide quieter landscapes, greener scenery and interesting local traditions. A short tropical downpour may be the perfect moment for a long lunch; a cloudy morning can make a historic city pleasant to walk. Avoid promising that wet-season travel is always inexpensive or empty, because school holidays and regional festivals may bring high demand.
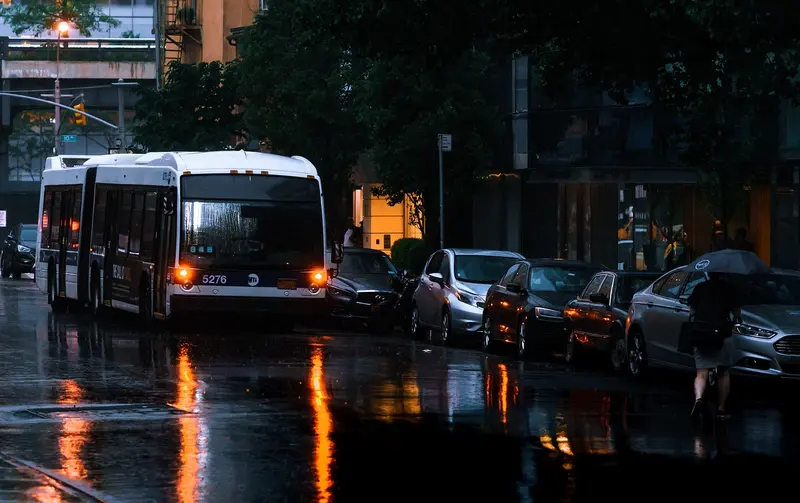
    New York Public Bus In Rain On City Street

    Respect environmental restrictions even when trails appear tempting. Heavy rain can make paths fragile and riverbanks unstable; walking through closed areas damages habitats and creates rescue risks. Take inspiration from residents’ everyday pace instead of challenging the weather to obey your timetable. The best experiences can involve adjusting a plan thoughtfully rather than fighting a climate pattern.

    What to do when an official storm warning appears

    First, identify the alert area and expected impacts. Second, follow local emergency instructions, including evacuation where directed. Third, secure travel documents, essential medicines, phone power and emergency contacts. Fourth, notify your accommodation and airline or other operator through authenticated channels when safe to do so. Fifth, avoid flooded roads, beaches with dangerous surf and unnecessary travel during the warning period.

    Do not drive through floodwater: depth and current are difficult to judge and road surfaces may be damaged beneath it. Avoid filming hazardous scenes or moving into restricted areas to collect social-media content. If the situation requires sheltering, choose the official safe location or guidance from local authorities. Once the immediate danger passes, check that transport networks and attractions have actually reopened before resuming the itinerary.

    Weather-planning table

    Destination situation Main concern Planning response
    Island hopping Ferries canceled by rough seas Extra night near departure airport
    Mountain village Road closures and landslides Fewer bases and alternative roads
    Tropical city Flooded streets Nearby indoor options and alerts
    Beach resort Dangerous surf Verify beach warnings and safe transport
    Rural wildlife trip Trails and river crossings unsafe Ranger-led decisions and postponement

    Frequently asked questions

    Is the rainy season a bad time to travel?

    Not necessarily. The experience depends on rainfall pattern, local infrastructure, trip purpose and tolerance for flexibility. Severe-weather risks must be assessed separately.

    Can I rely on a weather app weeks in advance?

    Long-range forecasts are uncertain and cannot guarantee conditions for a specific day. Use historical climate for planning and official short-range warnings nearer travel.

    Will insurance cover a canceled excursion because of rain?

    Only if your policy or the tour operator’s conditions provide a relevant benefit. Routine rain and serious covered disruptions are often treated differently.

    Further reading

    Pair this guide with travel insurance explained, shoulder-season travel planning, driving abroad and traveling in extreme heat. Always defer to the destination’s official meteorological service.

  • Southern California in 9 Days: San Diego, Joshua Tree and Palm Springs Without a Freeway Marathon

    Southern California in 9 Days: San Diego, Joshua Tree and Palm Springs Without a Freeway Marathon

    Southern California looks compact on a map, but traffic and climate make it a region where overplanning quickly destroys the trip. San Diego, Joshua Tree and Palm Springs already create three very different chapters: Pacific coast, high desert and mid-century resort city. Los Angeles is deliberately left for another trip so the itinerary never becomes a freeway exercise.

    This itinerary is designed for travellers who want useful decisions rather than a checklist. The route deliberately limits hotel changes, keeps the longest transfers separate from the hardest activity days and leaves room for weather, transport delays and ordinary travel fatigue.

    The day-by-day order is a framework, not a rule. Outdoor and marine days should move when conditions are poor, while museums, neighbourhoods and food-focused blocks make reliable alternatives.

    Quick trip summary

    • San Diego is the first base and the route uses only 3 main travel blocks.
    • Keep at least one weather- or transport-flexible day.
    • Book only the genuinely capacity-limited experiences early.
    • Avoid adding another distant destination simply because it fits on a map.
    • Protect the final airport or ferry connection with extra margin.

    Why this route works

    The route works because each base has a distinct purpose. You are not moving hotels merely to save a few kilometres; every relocation changes the type of experience and earns the packing time.

    It also avoids the common mistake of attaching a famous but distant place to an already full itinerary. On a short trip, removing one destination often improves every remaining day.

    A realistic itinerary at a glance

    DaysBaseMain focus
    1–4San DiegoBalboa Park, coast, neighbourhoods and food
    5–6Joshua Tree areaDesert landscapes, short hikes and night sky
    7–8Palm SpringsArchitecture, canyon/desert day and recovery
    9DeparturePalm Springs or San Diego onward

    Day-by-day plan

    Day 1: Arrival and orientation

    Arrive in San Diego and keep the first evening around the waterfront or your neighbourhood.

    Day 2: Main experience

    Use Balboa Park as the anchor, choosing one or two museums rather than trying to complete the entire park.

    San Diego Seaport Village Waterfront

    Day 3: Second focused day

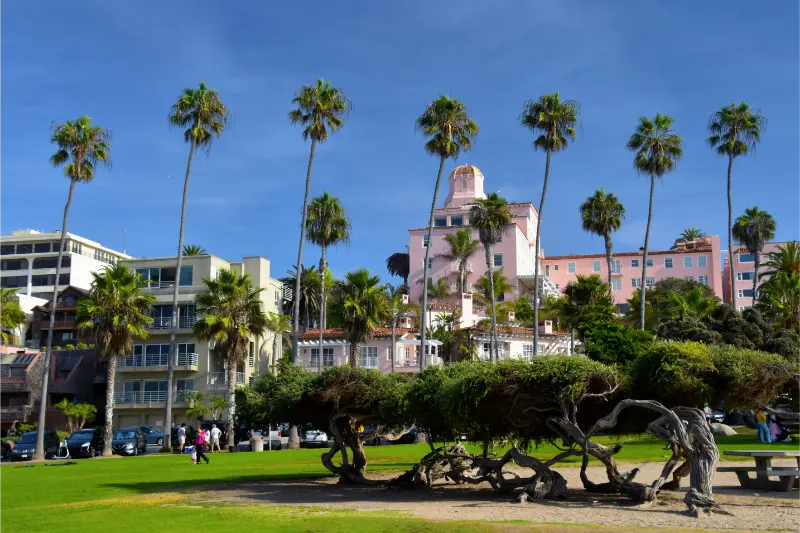
    Spend a coast day around La Jolla, Torrey Pines or another single shoreline area instead of zigzagging between beaches.

    Day 4: Flexible day

    Keep a flexible San Diego day for Coronado, Cabrillo, another neighbourhood or a slower food day.

    Day 5: Transfer day

    Drive to Joshua Tree after the worst commuter period and use sunset or one short loop only.

    Day 6: Full destination day

    Start Joshua Tree early, combine a few classic short trails and viewpoints, and take a long midday break in hot weather.

    Day 7: Flexible or recovery day

    Move to Palm Springs slowly and use the afternoon for architecture, pool time or downtown.

    Day 8: Departure planning

    Choose the aerial tramway, Indian Canyons, architecture or a spa according to weather and mobility.

    Day 9: Departure

    Depart from the airport that truly simplifies the route rather than saving a small fare and adding a dawn freeway crossing.

    Where to stay and how many hotel changes to make

    In San Diego, pick the neighbourhood for the evenings you want. Near Joshua Tree, choose the town by park entrance and dinner availability. In Palm Springs, central lodging makes the final days easier and more walkable.

    Choose accommodation for geography before decoration. A well-positioned room can save an hour every day and often matters more than a small difference in nightly rate.

    Read recent guest reviews for practical details that hotel pages rarely emphasise: stairs, parking, road noise, breakfast hours, room temperature and the real walk from a station, ferry terminal or car park.

    Transport: what is worth planning in advance

    Measure every move door to door rather than by the headline journey time. Luggage, waiting, parking, ferry check-in and the final transfer can turn a short trip into half a day.

    San Diego Petco Park Baseball Stadium

    Save tickets, hotel addresses and maps offline. The places where navigation matters most are often exactly where mobile coverage becomes unreliable.

    Food and daily rhythm

    Use San Diego for tacos, seafood and the widest restaurant choice. Desert meals can be simpler and earlier, with hydration and heat management taking priority after hikes.

    Use meals to shape the rhythm of the day. A long regional lunch can be both an experience and a recovery period after hiking, museums, heat or an early start.

    Do not make every meal another reservation. Mix destination restaurants with markets, bakeries, cafés and simple local places so food improves the trip instead of controlling it.

    Families, children and older travellers

    Families can mix beaches, museums and short desert trails. Older travellers can enjoy Joshua Tree mostly through scenic drives and short walks, then use Palm Springs as a lower-effort finish.

    For multigenerational travel, the right pace is the one at which the least mobile member still enjoys the day. That usually creates a better shared trip for everyone.

    When accessibility matters, ask precise questions about steps, trail surfaces, boat boarding, lifts, toilets and vehicle access rather than relying on a generic accessibility label.

    Budget: where the money really goes

    The largest costs are usually accommodation, intercity transport and one or two signature experiences. Spend where logistics improve; save on ordinary meals and attractions that do not matter to you.

    Compare total trip cost rather than headline prices. Parking, transfers, fuel, luggage and guided excursions can erase an apparent saving.

    The best splurges usually remove friction: a central room, a direct transfer, a quality local guide or one extra night that prevents an exhausting move.

    Best time to go

    Spring and autumn are easiest for combining coast and desert. Summer can be pleasant on the coast but dangerously hot in Joshua Tree; winter is often comfortable inland with cold desert nights.

    Shoulder season often balances weather, crowds and prices well, but rural attractions and mountain or marine services may run less frequently.

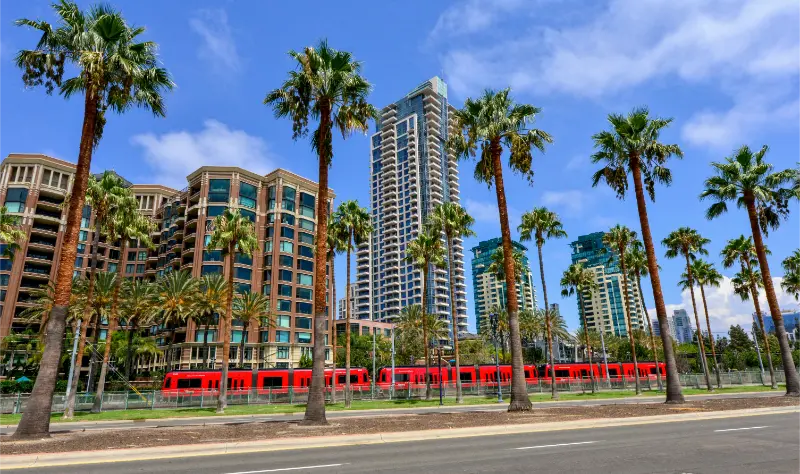
    San Diego Palm Trees And Downtown Towers

    Weather should change the order of the day. Keep lower-effort alternatives so wind, rain, heat or snow do not force you to waste the trip.

    Comfort, accessibility and realistic pacing

    This route assumes one main experience per day, one secondary activity and enough open time to recover. Travellers who prefer a slower pace can remove the secondary activity without damaging the itinerary.

    Travel fatigue compounds. One difficult transfer can weaken the following two days, which is why this itinerary avoids one-night bases unless geography genuinely requires them.

    A free half-day is not wasted time. It is insurance for weather, delays, a tired child or a place you discover only after arriving.

    Small decisions that improve the trip

    Use the bases as anchors

    Once you check in, explore that region rather than repeatedly crossing back through places you already saw. A base should simplify the next two or three days.

    Protect the hardest day

    Do not place the longest hike, boat trip or road excursion immediately before the longest transfer. Leaving one easier block on either side makes the whole trip more resilient.

    Book the scarce things first

    High-demand accommodation, ferries, cave tours, park access and limited-capacity guides deserve early attention. Ordinary meals and minor attractions usually do not.

    What I would leave out on this length of trip

    Leave Los Angeles, Santa Barbara and the Pacific Coast Highway for another trip. Adding them to nine days would replace experience with traffic.

    If you have extra time, add nights before adding destinations. One additional night in the most interesting base usually produces more value than another one-night stop.

    Mistakes that make this trip harder than it needs to be

    • Crossing the metro area repeatedly at rush hour.
    • Visiting Joshua Tree only at hot midday.
    • Carrying too little water.
    • Adding Los Angeles because it looks close.
    • Booking rigid dinner times after outdoor days.
    • Choosing a departure airport that creates a huge final drive.

    How I would adapt the itinerary

    With two or three fewer days, remove the most distant secondary base rather than shortening every stop. With two or three extra days, extend the strongest base and add one carefully chosen excursion.

    San Diego Palm Trees And Downtown Buildings

    For families or travellers who prefer a gentler pace, keep mornings active and afternoons open. For more energetic travellers, flexible days can absorb a longer hike, another museum or an additional boat trip.

    Before booking

    • Check current entry, park, ferry or road requirements.
    • Reserve the accommodation or transport segment with the least capacity first.
    • Verify the final airport or ferry connection before booking the last hotel.
    • Download offline maps and save confirmations.
    • Keep travel insurance appropriate to the activities and season.

    Practical questions

    Is this itinerary too fast?

    For most first-time visitors it is moderate because hotel changes are limited. Remove one optional excursion if you want a genuinely slow holiday.

    Should I rent a car?

    Delay the rental car if your San Diego hotel and first days are easy without it. Once you move inland, a car becomes essential. Joshua Tree has limited services inside the park, so fuel, water and offline navigation should be handled before entry.

    What should I book first?

    Start with the hardest-to-replace item: peak-season hotel, inter-island ferry, limited park access, domestic flight or specialist guide. Everything else can be arranged around it.

    Final thoughts

    The strongest version of this trip is not the one that includes the most names. It is the one where each base feels different, travel days remain manageable and the final days still have enough energy for spontaneous discoveries.

    Use this route as a decision framework: keep the core, remove anything that creates disproportionate travel and leave at least one block flexible enough to absorb the reality of the destination.

    How to keep the itinerary resilient

    Recheck weather and transport every evening, especially before ferries, remote roads, desert days, high-country hikes or domestic flights.

    If something moves, protect the final connection and the experiences you care about most. Optional attractions are easier to sacrifice than sleep, safety or an expensive ticket home.

  • Chicago in 5 Days: Architecture, Museums and Neighborhoods Without Spending the Trip Downtown

    Chicago in 5 Days: Architecture, Museums and Neighborhoods Without Spending the Trip Downtown

    Chicago is often planned as a downtown architecture trip with a deep-dish dinner attached. That misses the neighbourhoods, lakefront and cultural range that make the city worth more than a weekend.

    This five-day itinerary keeps one hotel and groups attractions by geography. It uses public transport, walking and only occasional rideshare rather than a rental car.

    The practical principle is simple: downtown is the anchor, not the entire trip. At least two half-days should move into neighbourhoods such as Wicker Park/Bucktown, Lincoln Park, Pilsen, Hyde Park or another area that matches your interests.

    Quick trip summary

    • One hotel for all 5 days.
    • Stay near an ‘L’ station and useful bus routes.
    • Use one major museum per day maximum.
    • Take an architecture cruise or walking tour early in the trip.
    • Give at least one full day to neighborhoods and lakefront.

    Why this route works

    Chicago’s downtown architecture is exceptional, but it makes more sense once you understand the lake, river and transit grid.

    Major museums can absorb most of a day, so stacking the Art Institute, Field Museum and Museum of Science and Industry together creates cultural fatigue.

    Neighbourhoods provide the food, parks and everyday atmosphere that prevent the city from feeling like a convention district.

    A realistic itinerary at a glance

    DaysBaseMain focus
    1Loop / RiverArchitecture and orientation
    2Museum Campus / lakefrontOne major museum and waterfront
    3North SideLincoln Park and neighborhoods
    4Hyde Park / South SideCulture, architecture and food
    5Flexible ChicagoSecond museum, neighborhoods or departure

    Day-by-day plan

    Day 1: Architecture and river

    Start with the Chicago River, Loop, Millennium Park and one architecture tour. Seeing the skyline from the water early helps the street grid make sense.

    Day 2: Museum and lakefront

    Choose the Art Institute or Museum Campus institutions according to interests, then use the lakefront rather than forcing another major museum.

    Chicago Theater Street View

    Day 3: North Side neighborhoods

    Use Lincoln Park, lakefront, Wrigleyville or Wicker Park/Bucktown in a coherent route. Choose one evening neighbourhood rather than crossing the city repeatedly.

    Day 4: Hyde Park and South Side culture

    Use the Museum of Science and Industry or University of Chicago/Hyde Park architecture and food, then return downtown without adding a far-north detour.

    Day 5: Flexible finale

    Use the museum, neighbourhood or shopping block you skipped. Keep the final hours close to the airport transit route if flying.

    Where to stay and how many hotel changes to make

    Loop/River North is easiest for first-time sightseeing, while West Loop or neighbourhood hotels can offer stronger dining atmosphere.

    The key factor is fast access to the ‘L’ and buses, not being next door to every attraction.

    Where you sleep should reduce friction rather than create another transfer. A well-connected room often adds more value than a cheaper property that forces repeated taxis, parking or long luggage walks.

    Read recent guest reviews for practical details that promotional photos rarely show: stairs, lift size, road noise, parking, breakfast hours and the final walk from a station, ferry or car park.

    Transport: what is worth planning in advance

    A rental car is unnecessary for this itinerary and creates parking costs.

    CTA trains/buses plus walking cover nearly everything; use rideshare selectively late at night or when carrying luggage.

    Measure every move door to door rather than by the headline timetable. Checkout, waiting, luggage and the final transfer can turn a short journey into half a day.

    Use inflexible tickets only when the saving is meaningful and the day is genuinely fixed. Weather-sensitive coast, mountain and marine plans benefit from flexibility.

    Food and daily rhythm

    Deep-dish pizza is one meal, not Chicago’s food identity. Mexican food in Pilsen, South Side traditions, modern West Loop dining and neighborhood bakeries all deserve consideration.

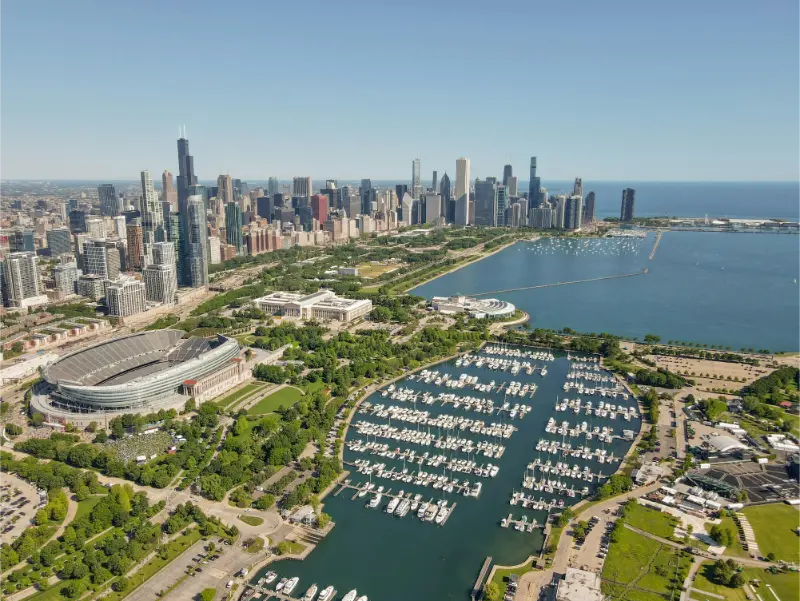
    Chicago Lakefront Marina And Skyline

    Keep one dinner spontaneous so the trip can follow whichever neighborhood you enjoy most.

    Use meals to control the rhythm of the day. A long regional lunch can be an experience and a recovery period after hiking, museums, heat or an early start.

    Do not make every meal another attraction. Mix destination restaurants with markets, bakeries, cafés and simple local places so food improves the trip instead of controlling it.

    Families, children and older travellers

    Parks, lakefront, boats and interactive museums make Chicago excellent for families.

    Older travellers should use buses or taxis strategically because museum campuses and waterfront walks can become longer than expected.

    For multigenerational travel, the useful pace is the one at which the least mobile member still enjoys the day. That normally produces a better shared trip for everyone.

    When accessibility matters, ask specific questions about steps, trail surfaces, boat boarding, lifts and vehicle access rather than relying on a generic accessibility label.

    Budget: where the money really goes

    Museums and architecture tours are the largest sightseeing costs, while public transit keeps transport manageable.

    Choose two or three paid highlights rather than buying a long attraction list simply because a pass exists.

    Compare total trip cost rather than headline prices. Parking, transfers, luggage and tours can erase an apparent saving.

    The most useful splurges usually remove friction: a central room, a direct transfer, a quality guide or one extra night that prevents an exhausting move.

    Best time to go

    Late spring and early autumn are excellent for walking; summer gives lakefront energy and major events.

    Winter can be severe but museums, architecture and food still make a strong city break if you plan indoor-heavy days.

    Shoulder season often balances weather, demand and prices well, but ferries, rural attractions and mountain services may run less frequently.

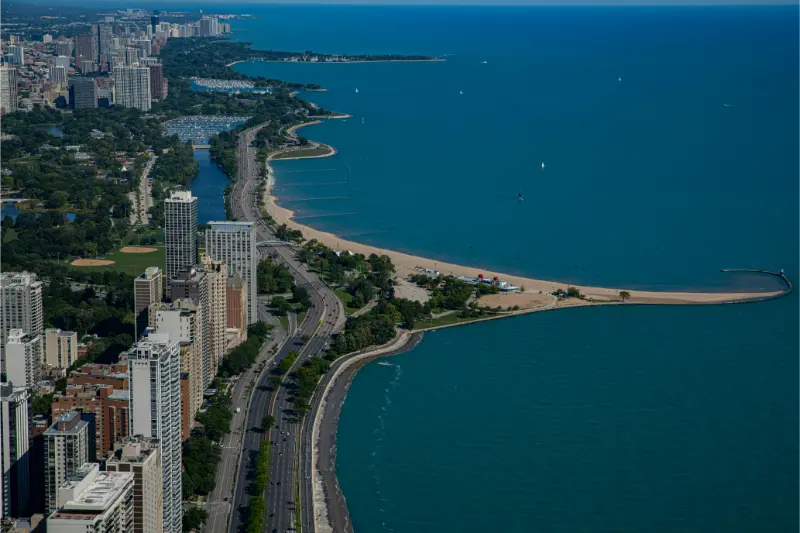
    Chicago Lakefront Beaches Aerial

    Heat, rain, wind and daylight should change the order of the day. Keep lower-effort alternatives for conditions that do not suit the original plan.

    Comfort, accessibility and realistic pacing

    Only one major cultural institution is assigned to each day.

    Neighbourhood days reduce the sense of standing in ticket lines from morning to evening.

    Travel fatigue compounds. One difficult transfer can reduce the quality of the following two days, which is why this itinerary avoids one-night bases unless geography genuinely requires them.

    A free half-day is not wasted time. It is insurance for weather, transport disruption, a tired child or a place you discover only after arriving.

    Small decisions that improve the trip

    Skip the rental car

    Transit is part of the solution.

    Take architecture early

    It improves the rest of the city experience.

    Choose museums selectively

    Chicago has too many to do well in five days.

    Leave downtown twice

    Neighbourhood life is essential.

    What I would leave out on this length of trip

    Leave Milwaukee and Lake Michigan road trips for another journey.

    Skip trying to visit every major museum in five days.

    Mistakes that make this trip harder than it needs to be

    • Staying far from transit to save a small amount.
    • Planning three museums in one day.
    • Using taxis for every short trip.
    • Eating only downtown chain food.
    • Ignoring lakefront weather.
    • Crossing the city for a dinner immediately before a flight.

    How I would adapt the itinerary

    With three days, focus on architecture, one museum and one neighbourhood day.

    With seven days, add more South/West Side culture or a day trip without changing hotels.

    Before booking

    • Choose a transit-friendly hotel.
    • Reserve high-demand architecture tours.
    • Pick museums before buying passes.
    • Pack for lake wind.
    • Use airport rail/transit where practical.

    Practical questions

    Do I need a car?

    No.

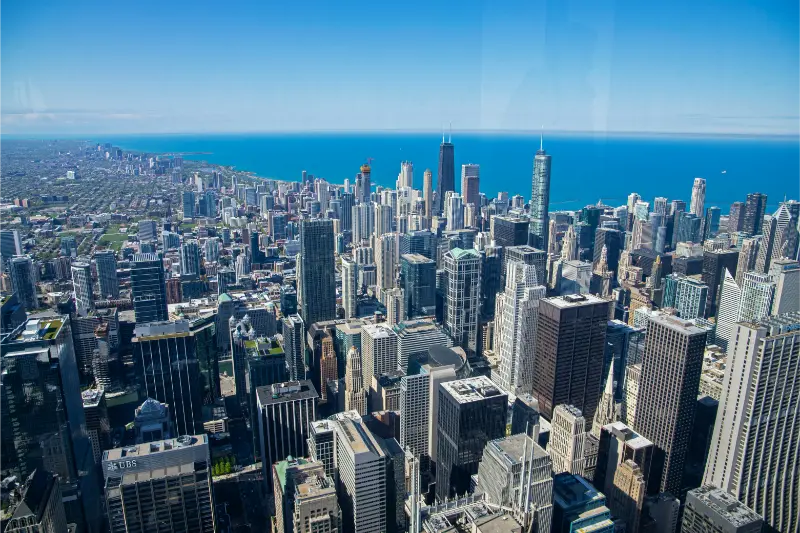
    Chicago Downtown Lakefront Aerial

    Which museum should I choose?

    Art Institute for art, Field for natural history, Museum of Science and Industry for large interactive exhibits.

    Is five days too long?

    No. It is enough to get beyond downtown without rushing.

    Final thoughts

    Chicago is at its best when architecture, lakefront and neighbourhoods are treated as equal parts of the trip.

    Five days with one hotel and public transport gives the city room to feel large without becoming exhausting.

    How to keep the itinerary resilient

    Keep Day 5 flexible for bad weather or the museum you enjoyed enough to extend.

    Use indoor neighbourhood food and museum blocks when lake weather turns unpleasant.

    Who this route suits best

    This itinerary works best for travellers who value depth over collecting places. It keeps hotel changes low, protects flexible time and assumes that a good meal, an unexpectedly interesting neighbourhood or a slower morning can be as valuable as another attraction. That approach is particularly useful for first-time visitors, couples, families and multigenerational groups.

    More energetic travellers can add a longer hike, an extra museum or a second excursion on flexible days. Travellers who prefer an easier pace can remove those extras and still keep the core journey intact. Before booking, identify the two or three experiences that would genuinely disappoint you to miss; those are the ones to reserve first.

    What to book early and what can wait

    Book the elements with genuinely limited capacity first: high-demand accommodation, park or protected-area access, popular trains, ferries or flights, and any guided experience central to the trip. Leave ordinary meals, minor attractions and weather-dependent activities more flexible whenever possible.

    One week before departure, check official transport or park information again. The evening before each important move, confirm departure points, opening status and the hotel address. That small routine catches many avoidable travel problems before they become expensive or tiring.

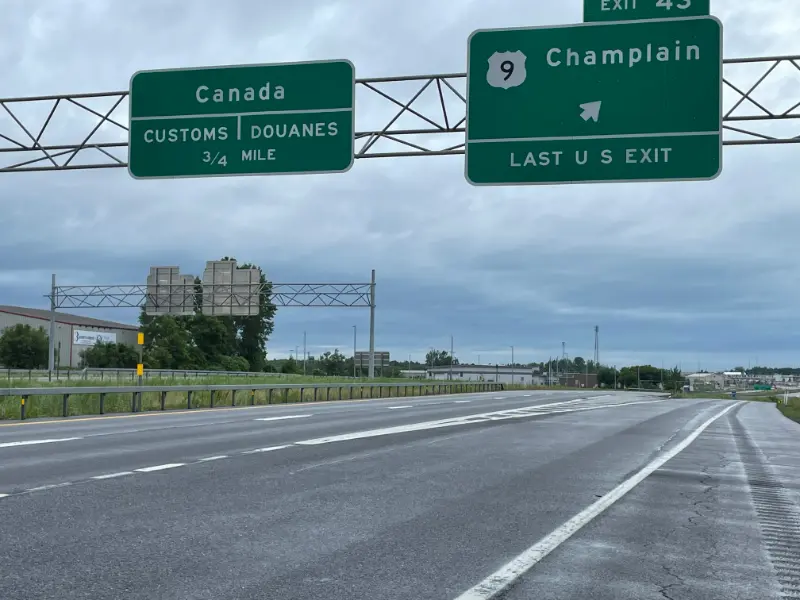
  • Crossing Borders With a Rental Car: Documents, Fees and Road Trip Planning

    Crossing Borders With a Rental Car: Documents, Fees and Road Trip Planning

    The freedom of collecting a rental car in one country and exploring the next can make a road trip memorable, but an international border is not merely another turn on a navigation screen. Rental contracts, vehicle registration, insurance territory, road tolls, environmental restrictions and driver documents all need checking. A car may be legal to drive in both countries yet prohibited from crossing under the rental agreement. Even when a border has no visible checkpoint, the contract still matters. This guide shows how to plan a cross-border rental with realistic routes, written permission, transparent costs and thoughtful alternatives for travellers who would rather avoid a stressful driving day.

    Establish whether the rental company allows the exact route

    Begin with the actual country sequence, not simply the starting and ending cities. A vehicle collected in one country and returned there after visiting two neighbours creates different contractual questions from a one-way drop-off abroad. Rental brands operate through different local franchise or corporate arrangements; permission from a company’s general website is not always approval for a specific office or vehicle category. Name every planned border at booking and ask which destinations, transit countries and ferry routes are permitted. Make sure the response is recorded in the booking conditions or a written confirmation that the collecting branch will honour.

    Some operators prohibit taking premium cars, certain electric vehicles or particular categories into specific countries. Others permit travel but charge a cross-border fee or require additional equipment and paperwork. A border may also divide the operating areas of roadside-assistance providers. If you discover an exclusion only after picking up the keys, you may face the choice of changing the itinerary or breaching the contract. Neither is pleasant while a family waits in a crowded rental hall. Resolve restrictions before paying for non-refundable accommodation across the border.

    Understand insurance territory and financial responsibility

    Basic third-party liability coverage and optional damage protection are different things. Even where compulsory liability insurance applies across a regional area, the rental company’s additional damage waiver, theft cover and roadside-assistance arrangements may have their own territorial restrictions. Ask how the excess changes outside the pickup country, whether glass and tyres are covered, and what happens after a breakdown beyond the permitted border. The European Commission’s Your Europe guidance specifically advises customers to tell the rental firm before taking a hired vehicle into another country so that documents and cover can be arranged.

    Do not assume that a credit card’s rental-car benefit replaces the supplier’s required insurance or satisfies local law. Such benefits often have country, duration, vehicle-category and claim-procedure conditions. Keep the rental contract, emergency phone numbers, insurance certificate and any border permission accessible offline. When travelling outside a regional common insurance area, ask whether a Green Card or equivalent proof is required and who provides it. If an accident occurs, prioritise everyone’s safety and use local emergency services, then follow the documented rental and insurance reporting procedures.

    Check licences, age rules and authorisation documents

    The driver must hold a licence legally recognised at the destination, and some countries require an international driving permit in addition to a valid home licence. An international permit is generally a translation or supporting document, not a replacement licence. Check official information for every country, not just the location where the keys are issued. Rental companies may impose additional age, licence-holding-period or extra-driver rules that go beyond local legal minimums. If two adults will share the driving, both may need to be named and present during collection.

    Border officials or traffic police may request original travel documents, proof of permission to use the vehicle and evidence of insurance. Keep passports or accepted travel documents ready and do not leave them unsecured inside the car during stops. Requirements for minors, assistance animals or non-resident drivers can be separate from vehicle rules. If the journey leaves and re-enters a customs territory, there may be more complex temporary importation or vehicle-registration questions. The cheapest booking is not a bargain if the car and driver paperwork are unsuitable for the planned route.

    One-way international returns and hidden costs

    Returning a vehicle in a different country may trigger a high international one-way fee because the supplier must reposition it or manage separate fleet arrangements. The price can dwarf the advertised daily rental rate. A more economical route may be to return the vehicle before crossing and continue by train, or to make a loop back to the original office. Compare the complete calculation: vehicle rate, border permission, optional cover, one-way fee, tolls, fuel or electricity, parking, accommodation and time. Check whether the pickup and return stations close early on Sundays or public holidays.

    Avoid confusing airport rental taxes with charges for entering another state or country. Ask the supplier to provide a line-item final quote. At return, photograph the vehicle and obtain any available signed condition report. Fuel-policy misunderstandings become more complicated when prices and currencies change. If a full-to-full policy applies, keep proof of the last authorised fuel stop. For electric cars, verify that return battery requirements and charging cards remain practical across the planned territory; a cable supplied at pickup does not guarantee access to every public charging network.

    Know tolls, vignettes and environmental-zone restrictions

    Road charging systems differ: some motorways have staffed toll booths, others require advance vignettes, and some use electronic plate recognition. A car fitted with one country’s electronic toll device may not be enrolled in the next country’s programme. Ask which vignettes are already included in the rental and how cross-border charges will be billed. In some countries you must register before driving on the road; in others you pay after passage. Use official toll operator websites to avoid overpaying through unnecessary intermediaries.

    Low-emission zones, city-centre permits, congestion charges and winter-equipment rules can cause problems even on a route without a formal border inspection. A registration plate may need an exemption or permit before entering a restricted urban area. Check whether the rental vehicle has compliant tyres, warning equipment or other legally required items for the season. Do not trust a general navigation app to understand every local regulation. Build your itinerary around routes where you can verify requirements rather than taking a shortcut through an unfamiliar restricted district.

    Plan realistic border crossing time

    Within some regional travel areas, land borders can feel routine; elsewhere, crossing may involve lengthy queues, passport checks, customs declarations or temporary closures. Check whether your particular nationality has permission to enter each country and whether the vehicle may accompany you. Transit rules may differ from the ultimate destination. Add time for border controls and rest breaks instead of using an optimistic driving-time estimate as a guaranteed arrival time. If crossing a border on a ferry, separately verify the rental company’s ferry permission and the operator’s vehicle check-in rules.

    A humane schedule matters. A family with children needs regular food and toilet breaks, and a traveller with mobility needs may need to identify accessible rest stops in advance. On a long summer drive, avoiding the busiest crossing period can be more valuable than leaving before dawn with everyone exhausted. Keep the tank or battery comfortably above minimum before reaching an isolated crossing. Download offline maps and a copy of the written rental approval. Mobile service may change providers at the border, and navigation can be unreliable precisely when local signage matters most.

    What to do if the rental car breaks down abroad

    Pull over only where it is lawful and safe, switch on the appropriate warning signals and follow local safety guidance. For motorways, moving occupants to a protected area when safely possible takes priority over searching for a repair number on the shoulder. Call emergency services when the situation warrants it, then the provider’s designated assistance line. Ask whether assistance may come across the border or whether the operator will arrange a transfer to an authorised workshop. Do not allow an unofficial repair without understanding the rental terms, especially if doing so could void the damage waiver.

    Keep proof of the incident, photographs when safe, reference numbers and receipts. If the rental company offers a replacement car, confirm in writing that the new vehicle has the same cross-border permission. Do not automatically drive it into a neighbouring country simply because the original booking allowed that route. If a long delay affects hotels or activities, contact providers early and keep a timeline of written responses. A calm plan focuses on safety and documentation before compensation questions; coverage depends on the actual contract and relevant law.

    A better itinerary for different travellers

    For first-time international drivers, a loop with one or two carefully chosen borders is more manageable than a five-country sprint. Spend more nights in fewer places, park outside difficult historic centres and use local public transport for crowded city visits. Families can plan a midday break near a park or service area. Older travellers may prefer daylight driving and pre-booked accessible accommodation with parking close to the entrance. Travellers who cannot comfortably use standard vehicle seats should verify appropriate restraints and vehicle dimensions long before collection.

    A cross-border rental is not always the best mobility solution. Train travel can avoid traffic restrictions and parking charges; short local rentals on either side of the border may work better than paying a high international return fee. Consider access to rural villages and luggage needs rather than choosing a car by habit. If using a rental car does not substantially improve the holiday, reducing the number of driving days may create more time for sightseeing, meals and conversations with local people.

    Booking checklist and mistakes to avoid

    Write a route containing every country of travel, vehicle collection and return location, and any ferry. Confirm operator permission and territorial insurance in writing. Verify all driver documents and age requirements, add cross-border and one-way fees to the quote, and save the local breakdown line. Check toll registration, environmental zones, seasonal tyres and border schedules. Photograph the car at pickup and return. These steps are much easier to complete at home than while negotiating a change at a busy foreign rental desk.

    The most damaging mistake is treating a rental agreement as though it grants unlimited international travel. Other recurring mistakes include relying only on mandatory liability cover, leaving a second driver undeclared, assuming toll equipment works across borders, and planning arrival immediately before an inflexible event. Separate the questions “Can I legally drive here?” and “Does my specific rental agreement allow this car here?” Both must be answered before the journey is genuinely ready.

    Frequently asked questions

    Can I take any European rental car across an EU border?

    No. The European Union has regional driving and consumer rules, but vehicle rental restrictions depend on the supplier, office, car and countries involved. Ask the company before booking, secure written permission and check insurance and roadside cover. Even a border without routine checks does not erase the agreement.

    Is third-party insurance enough?

    It is a separate question from optional vehicle damage protection, theft coverage or roadside assistance. Check contractual territory and exclusions for all components. If the trip involves a country outside the normal insurance area, ask about additional certificates or arrangements. Do not infer that a credit card automatically fills every gap.

    Is an international driving permit always required?

    No. Recognition of licences differs by issuing country and destination. Some foreign drivers need a permit or translation; others do not. Consult official driving authorities and the rental supplier for every country on the route. Carry your valid licence in any case.

    Can I return the car in another country?

    Sometimes, but only where the particular company and branch support it. International one-way fees can be considerable and available vehicle classes may be limited. Compare the written total against returning the car to its original location or using trains for the border segment.

    What if the contract does not allow one of my planned countries?

    Change the route, supplier or transport mode before crossing. Ask whether written supplementary permission is possible and what it costs; do not rely on informal verbal assurances. Driving into an excluded country can leave you with substantial contractual and financial exposure.

    The decision that makes a cross-border road trip worthwhile

    A good international rental itinerary treats roads as connections between experiences, not as a challenge to collect as many border signs as possible. Secure permission, understand the costs, leave schedule margins and be prepared to travel without the car where that makes more sense. When the legal and logistical details are settled, you can enjoy the landscapes, market towns and small places that are the real reason for taking the road.

    Quick planning table

    What to check Recommended action
    Cross-border authorisation List every destination and obtain written supplier consent
    Cover and paperwork Check damage waiver, assistance and vehicle documentation
    Road charges Verify vignettes, toll devices and low-emission zones
    Return plan Compare original-location return against international one-way fees

    Official resources and further reading

    Regulations, access and operating conditions may change. Check the relevant official source and provider for the exact destination and dates.

  • Busan in 5 Days: Beaches, Markets and Temples Without Crossing the City for Every Photo Stop

    Busan in 5 Days: Beaches, Markets and Temples Without Crossing the City for Every Photo Stop

    Busan Busan is much larger and more spread out than its coastal postcard suggests. Haeundae, Gwangalli, Nampo, Gamcheon and the eastern temples sit in different parts of a long metropolitan area, so a good itinerary is mainly an exercise in geography. Five days gives you enough time to enjoy the coast, markets and neighbourhoods without spending every morning and evening on a cross-city subway ride.

    If this destination is part of a wider trip, compare the pacing with South Korea in 10 Days: Seoul, Gyeongju and Busan Without Changing Hotels Every Night. The city guide adds local depth; the wider itinerary is better for deciding how this stop fits into the rest of the journey.

    Quick trip summary

    Ideal stay 5 days for a first trip
    Best approach Group each day by geography and keep one flexible block
    Transport strategy Use the fastest reliable mode for long moves, then explore locally on foot
    Who it suits First-time visitors, couples, solo travellers, families and slower-paced travellers
    Most common mistake Adding distant attractions because they look close on a map

    How to plan the trip before booking

    Before booking, separate the trip into three kinds of decisions: fixed reservations, neighbourhood choices and flexible time. Fixed items are the experiences that genuinely sell out or control the rest of the day. Neighbourhood choices determine where you sleep and how much time you spend in transit. Flexible time protects the itinerary when weather, traffic, queues or tiredness change the original plan.

    A useful city itinerary should not feel full on paper. It should still work after a late breakfast, a museum that takes longer than expected or one cancelled transfer. Aim for one major anchor, one secondary experience and a free block most days.

    Where to stay: choose location before hotel style

    Base Why choose it
    Seomyeon Best all-round transport base for first-time visitors who want easier access to both eastern beaches and western markets.
    Haeundae Ideal for beach atmosphere, seaside walks and eastern attractions, but far from Nampo and Gamcheon.
    Gwangalli Good for evening bridge views, restaurants and a more relaxed beachfront feel.
    Nampo / Jung-gu Excellent for Jagalchi, BIFF Square and western sights, especially if food markets are a priority.

    A beautiful room is not automatically a useful base. Map the first activity of the morning, the likely dinner area and the departure route. If the hotel creates two unnecessary transfers every day, the hidden cost is time and energy as well as money.

    A realistic 5-day itinerary

    Day 1: Nampo, Jagalchi and central markets

    Begin with the western core around Jagalchi, BIFF Square and nearby markets. Add Yongdusan or another central viewpoint if visibility is good, then spend the evening eating in the same area. Do not combine this with Haeundae simply because both are famous; the transfer is longer than the map suggests.

    Day 2: Gamcheon and western neighbourhoods

    Visit Gamcheon early enough to walk its steep lanes before the busiest period, then pair it with other western or central districts. Treat the neighbourhood respectfully as a lived-in area. Return to Nampo or Seomyeon for dinner rather than adding a distant beach sunset after a full day on hills.

    Day 3: Haeundae and the eastern coast

    Move east for Haeundae, coastal walks and one nearby attraction. Choose the beach, Dongbaek area, scenic train or coastal route according to weather and mobility; trying every attraction along the shoreline can create more queueing than scenery. Stay for dinner in Haeundae.

    Day 4: Haedong Yonggungsa and Gijang side

    Use an early start for Haedong Yonggungsa and continue with selected coastal stops in the Gijang direction. Bus and taxi combinations may be more practical than forcing subway-only routing. Check sea conditions and weather if your plan includes exposed viewpoints.

    Day 5: Gwangalli, museum or flexible recovery day

    Keep the final day more local. Visit a museum, spa or café district, then spend the evening at Gwangalli when the bridge lights become part of the atmosphere. If rain disrupted a coastal day earlier, this is the buffer that lets you move that experience without damaging the entire itinerary.

    Getting from the airport or station and handling arrival day

    Most visitors arrive at Busan Station by high-speed rail or at Gimhae International Airport. The airport light rail connects into the metro network, but the final journey to Haeundae can be substantial. Choose your accommodation location before deciding whether public transport or a taxi is best on arrival. From Busan Station, subway and taxis connect to the main visitor districts.

    Arrival day should carry less risk than the rest of the trip. Keep the first reservation easy to cancel, learn the route back to the hotel before staying out late and avoid building the day around a connection you cannot control.

    Getting around without wasting the day

    Busan has an extensive metro and bus system, but distances are significant. Group attractions by east, west and central zones. Taxis can be cost-effective for small groups when they eliminate multiple transfers, especially around temples or hillside areas. Use navigation apps that work reliably in Korea and save Korean place names when possible.

    When comparing two routes, include walking to the station, waiting, transfers and the final approach. The route with fewer changes is often better for families, luggage, older travellers and anyone visiting in difficult weather.

    Best time to visit and how the season changes the itinerary

    Spring and autumn are excellent for walking and coastal views. Summer is humid and beach-oriented, with higher crowd levels and the possibility of heavy rain or storms. Winter can be cold and windy but clear. Coastal weather may differ from inland conditions, so keep exposed walks flexible.

    Season also changes hotel prices, daylight, event calendars and how tiring outdoor sightseeing feels. If your dates are fixed, adapt the daily rhythm rather than forcing an itinerary designed for another month.

    What to book first

    Book first what is difficult to replace: timed monuments, limited-capacity tours, high-demand museums, special performances or transport that determines the rest of the route. Leave ordinary neighbourhood walks, most meals and flexible museums open unless a specific reservation matters to you.

    Recheck opening days, reservation procedures, local transport notices and access rules shortly before departure. These operational details change faster than the overall logic of a good itinerary, so the official source should win over an old screenshot or saved social post.

    Food strategy: eat well without crossing the city for every meal

    Busan is a strong food destination for seafood, soups, noodles and market eating. Jagalchi is famous but should not be your only reference point. Try local specialties in the district you are already visiting and ask prices before ordering high-value seafood. Build one unhurried market meal into the itinerary rather than grazing continuously while sightseeing.

    For a multi-age group, a reliable breakfast and an easy lunch often matter more than one additional attraction. Use meals as genuine rest and part of the travel experience rather than another task to complete quickly.

    Travelling with children

    Beaches, cable or scenic transport, aquariums and markets can create a varied family trip, but the city’s scale makes late-day transfers tiring. Gamcheon has steep stairs and traffic on narrow lanes. Keep one beach or park block each day where children can move without needing to follow a museum pace.

    With children, reduce transitions before reducing the highlights. Alternate one structured indoor visit with something that allows movement, and always know where the easy route back to the hotel is before starting a long afternoon.

    Travelling at a slower pace or as a senior

    Choose a base near a major metro interchange and use taxis selectively for steep or poorly connected attractions. Gamcheon and some coastal trails include stairs and inclines, so plan alternatives. Haeundae and Gwangalli provide flatter promenades for easier walking days.

    Slower travel often improves a city itinerary because it forces better geographic choices. Use transport to remove unrewarding distance, then spend walking energy on the streets, museums, viewpoints and markets that actually define the destination.

    Budget planning

    Build the budget in layers: accommodation, arrival/departure transport, local transport, fixed attractions, food and a reserve for spontaneous choices. The cheapest hotel is not necessarily the cheapest trip if it creates two extra rides every day. Likewise, a pass is valuable only when its transport zones and included attractions match the itinerary you will really follow.

    Keep a separate allowance for weather-driven changes. A taxi during heavy rain, a last-minute indoor attraction or a different ferry can protect a travel day without feeling like a budget failure.

    Weather backup plan

    Every multi-day trip needs at least one movable block. Put the most weather-sensitive viewpoint, boat, beach, mountain or outdoor experience in that block and decide its exact day after checking the short-range forecast. Indoor museums, markets and neighbourhood food can usually move in the opposite direction.

    Do not read only the temperature. Wind, visibility, rain intensity, humidity and daylight can change the quality of an experience much more than a few degrees.

    Connectivity, payments and small practical details

    Download an offline map before arrival, save the hotel address in the local language when useful and keep screenshots or offline copies of critical tickets. An eSIM or local data plan can simplify live transport information, but do not depend on a phone battery for every part of the day.

    Cards are common in many visitor areas, but keep a small backup payment method and check whether local transport uses contactless bank cards, a dedicated card or paper tickets. Smaller businesses may not follow the same payment habits as major hotels.

    What to pack

    Comfortable shoes, a small day bag, sun protection and weather layers matter more than extra outfits. Add any medication you may need during the day and a refillable bottle where practical. Pack for the conditions you will actually walk through, including air-conditioning, rain and evening temperature changes.

    Common mistakes to avoid

    • Booking a hotel based only on beach views without considering how often you plan to visit Nampo or western Busan.
    • Putting Haeundae, Gamcheon and Jagalchi on the same day.
    • Assuming every coastal attraction is directly beside a metro station.
    • Underestimating summer humidity, rain and the effect of wind on exposed coastal routes.
    • Treating Gamcheon as a theme park rather than a residential neighbourhood.

    Responsible travel and local etiquette

    Treat residential streets, markets, places of worship, memorial sites and working neighbourhoods as real parts of the city rather than scenery. Follow local instructions, keep entrances and pavements passable, ask before photographing people in sensitive settings and spend with local businesses when it fits naturally.

    In natural settings, stay within marked routes and respect closures even when another visitor appears to ignore them. Access rules often protect both visitors and the place itself.

    If you have less or more time

    With three days, choose one western day, one eastern beach day and one central/flexible day. Four days adds Gamcheon or the eastern temple corridor comfortably. With six days, slow down the coast and add another neighbourhood or spa day instead of increasing the number of long-distance day trips.

    Safety and decision-making on the day

    Use ordinary urban awareness: keep valuables controlled in crowded places, use clearly identified transport, avoid displaying a phone unnecessarily near traffic and follow current local advice about specific streets or transport hubs. Safety conditions can differ by neighbourhood and time of day, so hotel staff and official notices are more useful than blanket claims that an entire city is either “safe” or “unsafe”.

    Set a practical turnaround time for excursions and departure days. Missing a secondary attraction is cheaper than missing a flight, travelling exhausted late at night or forcing a route after conditions have changed.

    Useful official and planning resources

    Opening hours, fees, transport schedules and access rules change more often than the basic geography. Recheck the official source shortly before departure.

    Final planning checklist

    • Confirm passport, visa, transit and health requirements for your nationality.
    • Reserve the attraction, tour or transport that controls the rest of the itinerary.
    • Save your accommodation address and first-day route offline.
    • Recheck weather, closures and transport notices before each critical day.
    • Keep at least one half-day that can absorb a delay or become simple rest.
    • Leave a generous buffer before flights and other costly connections.

    A strong trip to Busan should feel as though you understood how the place fits together, not merely that you collected its famous names. Protect the fixed reservations that matter, group the rest by geography and remove anything that creates more transit than experience.

  • Portland Oregon in 4 Days: Neighbourhoods, Parks and Food Without Spending the Trip in a Rental Car

    Portland Oregon in 4 Days: Neighbourhoods, Parks and Food Without Spending the Trip in a Rental Car

    Portland deserves enough time to feel like a destination rather than a box between two more famous places. Portland is most enjoyable when the trip is built around neighbourhoods rather than a checklist of scattered attractions. The city’s food culture, parks, independent shops, river crossings and east-side districts reward slow movement. Four days are enough for a strong first visit if you avoid turning the city break into four separate road trips through Oregon.

    If this stop is part of a wider trip, compare the pacing with Columbia River Gorge in 5 Days: Waterfalls, Hood River and Scenic Drives Without Parking Stress. The broader itinerary helps with regional logistics; this guide focuses on what matters once you actually stay in Portland.

    Quick trip summary

    • Ideal stay: 4 days for a first visit.
    • Best planning rule: group each day geographically and protect one flexible half-day.
    • Best for: first-time visitors, couples, solo travellers, families, older travellers and mixed-age groups.
    • Main risk: adding distant excursions until the city itself becomes the least-seen part of the trip.

    Why 4 days works

    Portland has enough range to reward several days, but it does not need an exhausting schedule. The key is to separate the large, time-consuming experiences from neighbourhood time. A good first visit should include headline sights, one or two deeper cultural blocks, ordinary meals and enough unstructured walking to understand how the city fits together.

    The itinerary below deliberately avoids putting a major attraction in every available slot. Queues, transit, weather, meal breaks and simple fatigue are part of travel. A plan that looks slightly under-filled at home often feels exactly right on the ground.

    Where to stay in Portland

    AreaWho it suits
    Downtown / West EndBest for first-time visitors who want central transit, easy access to the river and a short trip to Washington Park.
    Pearl District / NorthwestGood for restaurants, galleries, walkability and quick access to Northwest 23rd and Forest Park approaches.
    Inner EastsideBest for travellers who care most about food, breweries, neighbourhood streets and a more local evening atmosphere.

    For a first visit, choose the district that shortens your most frequent journeys. A larger or cheaper room far from the places you care about can be a false saving once repeated transfers are included. Open the route from the hotel to your first morning stop, likely dinner area and departure station before booking.

    Portland Oregon Neon Sign At Dusk

    If noise matters, do not assume “central” means one thing. A room facing nightlife can feel completely different from a hotel two blocks away. Families and older travellers should also check lifts, steps, station exits and the final walk from public transport rather than relying only on the property’s distance from the centre.

    Getting there and getting around

    Portland can be visited without renting a car. MAX light rail, buses, streetcars, walking and cycling cover most city priorities, and the airport is linked to the urban transit network. Travel Portland specifically recommends public transport and notes that a rental car is not necessary for a typical city visit. If you add the Columbia River Gorge, treat that as a separate transport decision rather than keeping a car for all four days.

    Plan journeys door to door. Add the walk to the station, waiting, platform changes and the final connection. The most efficient itinerary usually has fewer transfers, not the highest number of attractions.

    Portland day-by-day itinerary

    Day 1: downtown, the river and the Pearl District

    Begin with a simple orientation walk through downtown and toward the river, then continue into the Pearl District. Bookshops, cafés and galleries work well on arrival day because they are easy to shorten if the flight runs late. Finish with dinner nearby instead of crossing the city simply because one restaurant is famous online.

    Day 2: Washington Park and Northwest Portland

    Use the clearest part of the day for Washington Park. Choose the Japanese Garden, the International Rose Test Garden or another major stop rather than attempting every attraction in the park. Continue into Northwest Portland for an easier afternoon and evening. The point is to let one green district fill the day naturally.

    Day 3: east-side neighbourhoods and food

    Explore one or two east-side corridors such as Alberta, Mississippi, Hawthorne or Division rather than all of them. Food carts, independent shops and residential streets are part of the experience. If the weather is good, include a river crossing or waterfront section so the day is not only eating and shopping.

    Day 4: Forest Park or a carefully chosen Gorge extension

    Keep the final day flexible. Forest Park offers a nature day without leaving the metropolitan area. If the Columbia River Gorge is a priority, use the linked regional guide and check current permits, closures and transport before committing. Do not attempt a full Gorge road trip and a complete Portland sightseeing day at the same time.

    Portland Oregon Mount Hood Over City

    How to plan the pace

    A useful four-day city break has one clear priority per half-day, not a reservation every ninety minutes. Start with the experience that would be hardest to move, then add nearby streets, food and smaller sights around it. The result may look less ambitious on paper, but it survives delays, weather and fatigue far better than an itinerary that depends on perfect timing.

    Count transport door to door. A twenty-minute metro ride can become forty minutes after the walk to the station, waiting, transfers and the final walk. The same rule applies to airports, ferries and day trips. If a journey requires luggage, check-in or border procedures, treat it as a real travel block rather than invisible time.

    What to book in advance

    Reserve popular gardens, special exhibitions or a restaurant you genuinely care about, but keep most food and neighbourhood time flexible. If you plan the Columbia River Gorge, check permit and parking rules for your exact date because access systems can change by season and year.

    Before buying a city pass, list the attractions you would genuinely enter and the transport you would genuinely use. Passes are valuable only when they match the itinerary. Check current inclusions on the official website, because an old blog comparison can become inaccurate after one museum or transport rule changes.

    Food and drink

    Portland’s food reputation is broad enough that a rigid restaurant list is unnecessary. Build meals around food-cart pods, bakeries, coffee, seasonal produce and one or two neighbourhood restaurants. The most efficient strategy is geographic: eat where you already are, then reserve only one dinner that is important enough to justify crossing town.

    Build meals into the geography of the day. One destination restaurant is reasonable; three long cross-city food journeys are usually not. Families and mixed-age groups should carry water and a small snack so a delayed lunch does not force everyone into the first convenient option. Travellers with allergies or dietary restrictions should prepare translated wording before arrival where useful.

    Best time to visit Portland

    Late spring through early autumn usually gives the easiest outdoor conditions, but summer heat and wildfire smoke can affect plans. Winter is wetter and darker yet works well for food, museums and neighbourhood cafés. Always check air quality and fire conditions before hiking or driving east in late summer and early autumn.

    There is no single best month for every traveller. The right period depends on whether your priorities are long outdoor days, festivals, museums, food, lower prices or specific seasonal landscapes. Check public holidays and major local events because one weekend can behave very differently from the week before it.

    Portland Oregon Downtown Street Sign

    Families, older travellers and accessibility

    The same geography that makes an itinerary efficient also makes it friendlier for children and older travellers. Put the main attraction in the first half of the day, eat before everyone becomes tired and keep the late afternoon optional. A midday break is not wasted time if it protects the evening.

    Accessibility must be checked attraction by attraction. Historic paving, stairs, steep streets, long station corridors, crowded entrances and older buildings can matter more than a distance shown on a map. If step-free access, wheelchair space, hearing support or a particular lift is essential, use the venue’s current accessibility information and contact the operator directly when necessary.

    A realistic budget

    Accommodation location is usually the most important budget decision after flights. A cheaper room that adds two long transfers every day can cost more in transport and usable holiday time than a better-located hotel. Budget for local transport, one or two paid priorities each day, food and a contingency margin rather than trying to predict every coffee.

    Keep a small daily buffer for normal travel friction: lockers, local taxes, luggage storage, an occasional taxi, replacement transit tickets, extra drinks or an indoor stop during bad weather. These costs are ordinary. They become stressful only when the trip has been planned with no margin.

    Weather backup plan

    Keep at least one indoor-heavy half-day movable. Museums, markets, cafés, galleries and long lunches are part of a resilient itinerary, not consolation prizes. Use the clearest forecast for viewpoints, parks, coastlines or exposed walks and move indoor culture to the weaker weather rather than forcing the original order.

    For any waterfront, mountain, long outdoor day or excursion, check conditions again on the morning itself. Visibility, heat, wind and transport can change quickly. A strong backup plan is often more valuable than squeezing one extra attraction into the schedule.

    Common mistakes to avoid

    • Renting a car for the whole stay without a specific need.
    • Trying to visit six neighbourhoods in one afternoon.
    • Treating the Columbia River Gorge as a quick add-on with no permit or parking check.
    • Crossing town repeatedly for restaurants instead of eating by neighbourhood.
    • Ignoring heat, wildfire smoke or heavy rain when planning outdoor days.

    Most itinerary problems come from the same source: trying to maximise quantity instead of usable travel time. The best version of Portland is not the plan with the most map pins. It is the one that keeps distances sensible, gives major places enough attention and leaves enough energy to enjoy the city after dinner.

    Portland Oregon City Skyline And Fall Trees

    Safety and practical habits

    Use normal urban precautions on transit and in busy nightlife areas, and do not leave visible luggage or valuables in a parked vehicle if you rent one for an excursion. Trail and weather conditions matter on outdoor days, so carry water, layers and offline directions when leaving the central grid.

    Save essential addresses and tickets offline, keep a charging option for the phone and store a backup payment method separately from the main wallet. Entry rules, health guidance, local regulations and transport procedures can change, so check official government information for your nationality before departure when those details affect the trip.

    Official information to check before you go

    For current events, transport changes, attraction information and visitor updates, use Travel Portland. Recheck any detail that affects a fixed reservation shortly before travel, especially opening days, seasonal access, tickets and major transport changes.

    How to adapt the itinerary

    With 2 or 3 days: keep the historic or central day, one specialist district and one outdoor or cultural priority. Remove the longest excursion rather than compressing every day.

    With 5 or 6 days: add a genuinely different neighbourhood, a slower museum day or one regional excursion. More time should make the trip calmer, not simply increase the number of check-outs and transfers.

    For a multigenerational group: agree on one shared priority each day and allow people to split for specialist interests. It is often better for one person to visit a niche museum while another rests than for the whole group to become tired together.

    Final planning checklist

    • Confirm passport, visa, entry and transit requirements for your nationality.
    • Choose accommodation for location and transport convenience before room size.
    • Reserve only the attractions or events that genuinely control the day.
    • Save offline copies of tickets, hotel details and essential addresses.
    • Check the exact airport, railway station, ferry terminal or border crossing before arranging transfers.
    • Keep one flexible half-day for weather, fatigue or something discovered after arrival.
    • Recheck official opening information and local transport shortly before each fixed day.

    Final thoughts

    Portland becomes much more rewarding when the itinerary has enough structure to remove friction but not so much structure that every delay feels like failure. Four days give a first-time visitor room for the essential places, food, neighbourhoods and one or two deeper experiences without racing across the destination. Keep the geography sensible, protect the experiences that matter most and let the rest of the trip breathe.

  • Jodhpur in 4 Days: Mehrangarh Fort, Blue City and Markets Without Rushing Rajasthan

    Jodhpur in 4 Days: Mehrangarh Fort, Blue City and Markets Without Rushing Rajasthan

    If this stop is part of a wider journey, use India’s Golden Triangle in 10 Days: Delhi, Agra and Jaipur for the broader planning decisions and this guide for the destination-level details.

    Quick trip summary

    • Ideal stay: 4 days for a first visit.
    • Best approach: one major experience per half-day, with at least one flexible block for weather, fatigue or transport changes.
    • Good for: first-time visitors, couples, families, senior travellers and independent travellers who prefer a realistic pace.
    • Main planning risk: treating map distance as if transfers, queues, terrain, heat and meals took no time.

    Is this the right trip for you?

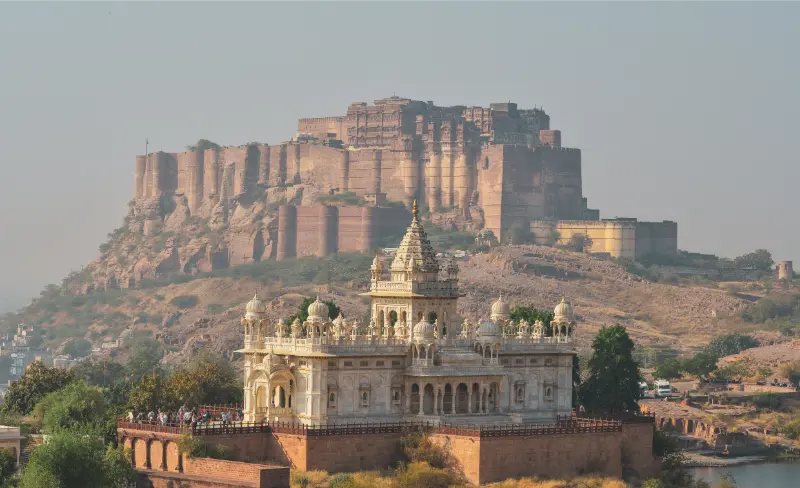
    Jodhpur is one of Rajasthan’s most satisfying cities when you give it enough time to move beyond the famous blue-house photographs. Mehrangarh Fort dominates the skyline, the old city compresses markets, temples and lanes into a dense walkable core, and the wider urban area adds palaces, gardens and access to the desert landscape. Four days lets you absorb the fort properly, explore the old city at different times of day and add one excursion without turning Rajasthan into a sequence of long transfers.

    Jodhpur rewards a little patience. You can see Mehrangarh Fort from much of the city, but the pleasure of staying longer is discovering the streets below it: small workshops, quiet courtyards and the bustle around the Clock Tower. Make the fort your big first-day visit, then give the old neighbourhoods their own unhurried morning.

    Where to stay

    AreaWhy choose it
    Clock Tower / old city edgeBest for atmosphere, markets and easy access to the Blue City; expect noise, narrow lanes and limited vehicle access.
    RatanadaA practical middle ground with hotels, restaurants and easier road access while remaining reasonably close to the old city.
    PaotaUseful for transport connections and travellers who value straightforward taxis over heritage ambience.
    Palace / Circuit House sideQuieter, more spacious and often more comfortable for families or senior travellers, but you will use taxis more often.

    Staying close to the Clock Tower puts markets and old-city walks within easy reach, but it can also mean lively streets and late-night noise. A hotel outside the narrow lanes may be easier for taxis and luggage. Compare the actual approach to the property, not just the rooftop view of Mehrangarh in the photographs.

    Ask your hotel where a car or auto-rickshaw can stop. Some guesthouses sit up steep lanes that are charming with a camera and less charming with heavy bags in the heat. If you are arriving late, arrange the final pickup or walking directions before you set off, ideally with a map you can use offline.

    How to get there

    Jodhpur has rail and air connections with major Indian cities, and trains are often the most useful choice on a Rajasthan itinerary. Road transfers from Jaipur, Udaipur or Jaisalmer can also work, but distances are long enough that an apparently simple route consumes much of a day. Arrive with the exact hotel access point saved offline because vehicles may not reach every old-city lane.

    Whether you arrive at Jodhpur Junction or the airport, keep the first afternoon simple. Go straight to the hotel, drink some water and get your bearings before setting out. A short visit to Sardar Market is a better first-day plan than racing to the fort after a delayed train or a long road journey.

    Getting around

    Auto-rickshaws and app-based or hotel-arranged cars handle most longer trips, while the old city is best explored on foot in short sections. Do not plan to cross Jodhpur repeatedly in midday traffic. Group Mehrangarh, Jaswant Thada and the nearby blue neighbourhoods together, then use a separate day for Umaid Bhawan Palace, Mandore or a village excursion.

    Jaswant Thada Marble Cenotaph Staircase Jodhpur

    Walking is the best way to appreciate the old lanes, though the slopes, traffic and uneven surfaces can make even a short distance tiring. Use an auto-rickshaw for the less interesting stretches and agree on the fare or booking method in advance. For Umaid Bhawan and Mandore, plan a vehicle instead of trying to connect everything on foot.

    A realistic itinerary

    Build your first two days around the old city and the fort, starting outside before the afternoon heat gathers. Keep Umaid Bhawan and Mandore for a separate outing, and decide on the final-day excursion once you know how much energy you have. Exact opening arrangements can change, so check them before fixing a driver or guide.

    Day 1 – Mehrangarh Fort and Jaswant Thada

    Start early at Mehrangarh before the strongest heat. Give the fort several hours for courtyards, galleries, ramparts and city views rather than treating it as a photo stop. Continue to Jaswant Thada and then descend gradually toward the old city. Finish near the Clock Tower and Sardar Market when the streets become livelier in the late afternoon.

    Day 2 – Blue City lanes and old Jodhpur

    Use the morning for a guided or self-guided walk through selected blue neighbourhoods, temples and old lanes. The colour is only one part of the experience; look for water systems, domestic architecture and everyday street life. Keep the route compact, stop for lunch and return to the market area later rather than walking through the hottest hours.

    Day 3 – Umaid Bhawan, Mandore and a slower evening

    Visit the museum section of Umaid Bhawan Palace, then continue to Mandore Gardens for cenotaphs and a different layer of Marwar history. This is a taxi day rather than a walking day. Return before evening traffic becomes difficult and leave the last hours for a rooftop meal with a fort view.

    Day 4 – Bishnoi villages or Osian

    Choose one excursion. A reputable Bishnoi village experience can focus on craft traditions, rural landscapes and local communities; Osian offers temple architecture and a desert-edge setting. Avoid squeezing both into the same day unless transport is private and the purpose is clear. Return to Jodhpur with enough daylight margin for road delays.

    If you choose Osian, the temples deserve time on their own; if you choose a Bishnoi village visit, make sure the operator explains who you will meet and how the visit benefits the hosts. Either outing involves travel beyond the city. Keep the evening free rather than promising yourself another long market walk immediately afterwards.

    How many days do you really need?

    With only three days, I would keep Mehrangarh, the old city and either Umaid Bhawan or Mandore, leaving the desert-edge outing for another trip. Five days allow a more leisurely pace: linger in a blue neighbourhood, return to a favourite café or spend an afternoon with a local guide instead of adding distant stops for the sake of it.

    Four days feel comfortable in Jodhpur because the main experiences are varied, not because there is a perfect four-day checklist. You can devote a morning to the fort, another to the blue lanes and still have room for palaces or gardens. If you are crossing Rajasthan quickly, shorten the excursion day before trimming the time spent in the city itself.

    Best time to visit

    October to March is the most comfortable period for extended walking and fort visits. April to June can be extremely hot, requiring very early starts and long midday breaks. The monsoon changes the atmosphere but can bring humidity and transport disruption, so flexible planning matters more than an ambitious daily schedule.

    For long walks through the old city, the cooler months are easier than the height of summer. If your dates overlap with a festival or holiday, expect a different rhythm around markets, hotels and transport. In the hotter months, plan early mornings and genuine afternoon breaks; carrying more water will not make a midday climb feel pleasant.

    Mehrangarh Fort And Blue City Jodhpur At Night

    What deserves advance booking?

    Reserve a well-reviewed hotel early in peak winter months and around major festivals. Mehrangarh itself is usually straightforward to visit, but specialist heritage walks, village experiences and private drivers are better arranged in advance if they are central to the trip. Train seats on popular Rajasthan routes should not be left until the last moment.

    Reserve the parts that are difficult to arrange at short notice: a sought-after heritage hotel, a specialist guide or a trusted driver for Osian or a village visit. You can usually leave ordinary market walks and rooftop meals more flexible. It is much nicer to change the order of your days than to rush through the best part of town to meet a booking.

    Food and drink

    Jodhpur is a good place to explore Marwari flavours, from savoury snacks to sweets. Try local specialities gradually rather than making every meal heavy, especially in hot weather. Busy established shops are often a better bet for snacks than choosing purely by social-media popularity. Rooftop restaurants provide views, but quality varies, so recent reviews matter.

    Stop for a proper lunch when the old lanes are at their hottest. Jodhpur’s savoury snacks and sweets are part of the visit, but you do not need to sample everything in one sitting. Choose places with a steady turnover of customers, carry drinking water and let dinner be an easy end to the day rather than another journey across town.

    Families, senior travellers and mixed-age groups

    Families should reduce midday walking and choose a hotel with reliable air-conditioning and easy vehicle access. The fort can fascinate children but involves uneven surfaces and stairs. Senior travellers will usually enjoy Jodhpur more with a driver for the dispersed sights and a carefully selected old-city walk rather than trying to cover every lane on foot.

    Mehrangarh is spectacular, yet its stairs and exposed spaces can wear people out faster than expected. For families or a group with different walking abilities, agree on the galleries you most want to see and allow time to sit. One person can explore an extra courtyard while the others enjoy the view without having to keep up.

    Accessibility

    Historic Jodhpur is not a place to judge by the word ‘central’ on a hotel listing. Lanes may be steep or uneven, vehicle access can end before your door and parts of the fort involve steps. If step-free access matters, ask both the hotel and each attraction about the exact route, including the drop-off point and accessible toilets.

    Budget: where to spend and where to save

    Jodhpur can be good value, but transport and heritage-hotel upgrades change the budget quickly. Spend on location, a knowledgeable guide for one historic walk and reliable transport for an excursion. Save by keeping at least one full day centred on the old city, where many experiences are close together.

    The cheapest room is not always the least expensive base if every outing needs a long taxi ride. On the other hand, paying extra for a fort view is worth it only if you will enjoy being there. Set aside some budget for a knowledgeable local guide or a reliable excursion vehicle, then balance the rest with inexpensive old-city days.

    Safety and practical awareness

    Heat, traffic and uneven surfaces are more common problems than dramatic security issues. Use normal precautions with valuables in markets, agree fares or use reputable transport, and be cautious with food and water according to your usual travel-health practices. Respect photography restrictions and ask before photographing people closely.

    Keep your train details, accommodation address and the number of your driver available without mobile data. In crowded market lanes, carry only what you need and keep valuables close without becoming anxious about every interaction. Before travelling through Rajasthan, check the latest entry, health and transport advice from official sources rather than relying on an old itinerary.

    One day trip or regional extension

    Osian works well for temple architecture and a desert-edge landscape, while a carefully chosen Bishnoi village visit offers a different cultural focus. If Jaisalmer is already part of your route, do not add an expensive generic ‘desert experience’ in Jodhpur simply to duplicate what you will do later.

    Osian and a Bishnoi village experience offer different reasons to leave Jodhpur. One is mainly about temples and the desert-edge landscape; the other should centre on respectful encounters with local people and crafts. Pick the experience you genuinely want and ask about travel time from your hotel, not an optimistic distance measured from the edge of the city.

    Mehrangarh Fort Above Blue City Jodhpur At Dusk

    How to handle bad weather or extreme heat

    When Jodhpur is very hot, do not try to rescue the day by walking faster. Visit the fort or the older streets early, then spend the middle hours somewhere shaded or air-conditioned. A late-afternoon return to the market can be lovely. If rain interrupts an outing, check road conditions before committing to a trip outside the city.

    Solo travel

    Travelling alone makes the old city easy to explore at your own speed. Stay somewhere with a clear arrival route, particularly if your train comes in after dark, and consider a well-reviewed guide for the first walk through the smaller lanes. For longer outings, arrange transport with a reliable operator rather than improvising the return late in the day.

    Evenings and nightlife

    One evening, choose a rooftop where you can watch the fort change colour as the light fades. On another, wander around the Clock Tower while the shops are still busy and stop when something catches your eye. There is no need to schedule a performance or expensive dinner every night; Jodhpur is interesting enough at street level.

    Photography without turning the trip into a photo shoot

    The blue houses are people’s homes, not a purpose-built backdrop. Early light is beautiful in the lanes beneath Mehrangarh, but keep doorways clear and ask before pointing a camera into a courtyard or at someone working. The fort also gives sweeping views that tell the story of the city without asking residents to pose for strangers.

    Shopping and souvenirs

    The markets are good places to look at textiles, spices and small craftwork, but do not buy the first object labelled ‘traditional’ without asking who made it. Compare quality and prices calmly, especially for pieces that will be hard to pack. If you are considering antiques or animal-derived materials, check what you can legally take home first.

    What to pack

    Bring shoes with a reliable grip for the fort and the uneven old streets. A sun hat, refillable water bottle and light layers will be more useful than an elaborate outfit planned for photographs. Modest clothing helps at temples, and a small bag is easier to manage than a backpack that catches on people in crowded market lanes.

    Common planning mistakes

    A common Jodhpur mistake is expecting to visit the fort, wander the blue city, shop at Sardar Market and cross town to a palace in one uninterrupted day. The midday heat and old-city traffic make that tiring. Another mistake is booking an atmospheric guesthouse without checking how you will actually reach its entrance with luggage.

    Keep one afternoon loose. If the fort takes longer than planned, or you find a workshop you want to spend time in, you can drop an optional market circuit without sacrificing the whole trip. That freedom is especially valuable in Jodhpur, where the best moments often happen when you are no longer looking at the next stop on the map.

    Practical habits that make the trip easier

    • Save offline maps and the exact names of stations, terminals, hotel entrances and meeting points.
    • Carry a small amount of local cash even when cards are widely accepted.
    • Check the last practical return option before starting a day trip.
    • Download tickets and booking confirmations before leaving reliable Wi-Fi.
    • Separate one payment card from your main wallet and keep backup contact details offline.
    • Recheck weather, transport notices and opening hours on the morning of any fixed excursion.

    Official information to check before you go

    Opening days, transport, weather-sensitive access and event schedules can change. Recheck the details that control fixed reservations shortly before travel, especially during public holidays, major festivals or severe weather.

    Final planning checklist

    • Confirm passport, visa, entry and transit requirements for your nationality.
    • Choose accommodation by the journeys you will repeat, not by price alone.
    • Reserve only the attractions or excursions that genuinely control the day.
    • Save offline copies of tickets, hotel details, insurance information and essential addresses.
    • Check the exact airport, station, bus terminal, ferry pier or pickup point before arranging transfers.
    • Keep one flexible half-day for weather, fatigue or something discovered after arrival.
    • Recheck official opening information and local transport shortly before each fixed day.

    Final thoughts

    Jodhpur stays in the memory for more than its skyline. The view from Mehrangarh is remarkable, but so are the smaller details: a doorway in the blue lanes, the noise of the market and a relaxed dinner as the fort lights come on. Four days give you the chance to notice those things rather than racing between landmarks.

  • Traveling Abroad for Major Sporting Events: Tickets, Hotels and Match-Day Plans

    Traveling Abroad for Major Sporting Events: Tickets, Hotels and Match-Day Plans

    An international sporting event can transform a city. Streets fill with supporters, public transport becomes busier and venues create an atmosphere that ordinary sightseeing rarely matches. Whether you are watching football, tennis, athletics, rugby or a major multi-sport competition, the event itself is only part of the journey. Tickets, accommodation, schedules, venue rules and the route home require early attention. This guide helps first-time fan travelers and experienced tourists plan a sports-focused holiday without letting logistics overwhelm the excitement.

    Quick planning reference

    DecisionWhat to checkUseful action
    TicketOfficial seller, seat and ticket termsAvoid unverified resale
    ScheduleFixture changes and match-day gatesKeep a spare day
    TransportRoad closures and last servicesBook a realistic exit route

    Start with the official competition schedule

    Use the governing organization, host venue and authorized ticket seller to verify event dates. Fixtures, start times and stadium assignments can change, especially when tournaments progress or weather affects play. Do not book nonrefundable flights based solely on a social media graphic or a speculative draw. Understand whether you are purchasing a ticket for a specific team, session, day or knockout round. Different sports sell admission in very different ways, so a ‘day ticket’ might not cover every match on the grounds.

    For major events, use official sites such as the competition organizer, federation or host city visitor office. The Olympics and UEFA websites are examples of primary entry points for their respective events, but authorized sellers and rules are event-specific. Read the exact calendar and ticket conditions before committing. Build flexibility into accommodation if the sporting program can shift.

    Buy genuine tickets and understand your seat

    Unofficial resale markets can expose travelers to invalid tickets, excessive prices or scams. Follow the event’s official purchasing, exchange or authorized resale process. Confirm whether tickets are mobile-only, tied to a named attendee or require an identity check. A screenshot may not function as a ticket when access depends on a dynamic barcode. If you buy several seats, check whether they are actually together and whether children require their own admission.

    Review the stadium or arena seating map. A cheaper upper-level seat may involve many stairs, while a seat near the action may have limited views or be exposed to sun and rain. For wheelchair users and people requiring accessible seating, use the event’s dedicated booking process and ask about companion tickets and the precise entrance. Never assume an ordinary ticket can simply be exchanged for an accessible space on arrival.

    Choose accommodation around transport, not just distance

    Hotels near stadiums may be expensive or inconvenient when roads close for security. An accommodation near a reliable transit line can be better than one that appears close in a straight line but requires a complicated walk. Check the route back after the event. Some stations may operate crowd-control systems, temporary one-way exits or altered timetables. Look for official match-day transport plans as they become available, and do not rely entirely on ride-hailing immediately after a sold-out event.

    Sports tourists often arrive during unusually high-demand periods. Compare cancellation terms and beware of listings that are far from the venue despite marketing themselves as ‘event accommodation.’ Use a realistic total budget that includes higher room rates, airport transfers and meals. Traveling with children or older relatives may justify a quieter neighborhood with good transport rather than a busy nightlife district close to fan zones.

    Atlanta Braves Baseball Stadium

    Learn the stadium rules before match day

    Venue policies can restrict bag sizes, liquids, cameras, umbrellas, flags or external food. Rules may change between competitions in the same building. Read the official spectator information shortly before attending and avoid arriving with items that must be discarded. Security checks can be slow, particularly for high-profile games. Allow time for queues, identity checks and finding the correct entrance. A seat assignment does not necessarily identify the nearest exterior gate.

    International events may have specific behavior policies concerning banners, chants and prohibited symbols. Respect local law and the event’s code of conduct. Supporters can create a wonderful atmosphere without harassing other spectators or opposing fans. If traveling with a group, agree on a meeting point outside the venue in case phone networks become congested after the final whistle or ceremony.

    Make a realistic match-day timetable

    Begin with breakfast and a look at official transport updates. Travel to the venue district earlier than the minimum entry time if the event attracts major crowds, leaving room for a meal and a relaxed walk. Do not schedule a distant museum reservation shortly before kickoff or immediately after a late match. Queueing, security and the return journey often take longer than expected. A flexible day helps you enjoy the city rather than checking your watch constantly.

    Save the route to your accommodation offline and identify the last normal public transport service. Some organizers provide additional trains or shuttles, but these must be verified for the specific event. If the match ends late, plan a safe return that does not depend on improvising a ride in a huge crowd. Wear comfortable footwear and prepare for weather if the venue is outdoors.
    Include fan zones and cultural activities thoughtfully

    Official fan zones may offer screenings, food or entertainment, but they have capacity limits, security rules and opening hours. Some areas are free; others require tickets or registration. Do not assume an event village operates every day of a tournament. Check age restrictions and accessibility before bringing children. Crowds may be overwhelming for travelers with sensory sensitivities, so a quieter café or smaller community gathering can be a better alternative.

    A sport-focused holiday becomes more interesting when it includes the destination itself. Pair an event with a local history museum, public park, food market or neighborhood walk. Learn about the city’s sporting heritage without spending every hour at merchandise shops. If your chosen athlete or team loses early, you should still have a trip worth remembering.

    Keep families, seniors and accessibility in mind

    Children may enjoy the excitement but become tired during long waits and noisy celebrations. Bring suitable ear protection if advised, locate toilets and identify the venue’s rules for children’s items. Older travelers may prefer daytime sessions and seats with manageable stairs. Visitors with visual or hearing needs should research commentary services, captioning, hearing loops or accessible information where offered. Facilities vary greatly by venue, so do not rely on another stadium’s accessibility description.

    For wheelchair users, confirm arrival routes, drop-off points, accessible entrances and where assistance can be requested. A complex after-event crowd can be more challenging than the event itself. Ask whether the usual lifts and transport services will operate during crowd controls. A trip is more inclusive when every member of the group can participate comfortably rather than being expected to endure an unsuitable arrangement.

    Travel responsibly among large crowds

    Keep valuables secure, use established ticket channels and avoid sharing ticket barcodes publicly. Petty theft and scams can increase around crowded transport and unofficial merchandise stalls. Be thoughtful about alcohol, particularly when navigating an unfamiliar city late at night. Follow police and steward instructions, and leave an area if tensions develop. Avoid wearing symbols or engaging in behavior that violates local rules or puts you at risk.

    Denver Coors Field Baseball Stadium

    Respect residents living near a stadium. Blocked doorways, litter and noise can turn a festive event into a burden for the surrounding neighborhood. Choose local businesses that welcome visitors and dispose of waste responsibly. An excellent supporter experience includes consideration for the people who will still live there after the tournament ends.

    Build a budget with contingency space

    A sports holiday’s real price is the ticket plus flights, accommodation, local transport, meals and any additional event sessions. Merchandise and hospitality upgrades can add substantial cost without improving the core experience for everyone. Set a maximum budget before buying event tickets. If you plan to attend several sessions, consider rest days and the cost of getting between venues. Multi-city tournaments need particular care: a future round may be hosted far from your first location.

    Travel insurance should be reviewed for relevant interruption and cancellation terms. Ordinary policies may not reimburse a ticket simply because your team is eliminated or the weather is disappointing. Check the event organizer’s ticket transfer, resale and refund policies separately from travel cover. Book flexible travel when competition scheduling makes plans uncertain.

    A practical three-day sports city break

    Arrive on day one, settle into your accommodation and explore the event neighborhood in daylight. Verify the venue route and enjoy a nearby cultural attraction. Day two is the main event, with generous time for security, meals and transport. Keep the evening after the game free, especially if it may finish late. Day three can include local sightseeing or an additional match if tickets and energy allow, before a relaxed departure. This plan avoids placing travel connections too close to the event.

    For families, agree on a meeting point and a simple emergency contact routine. For solo travelers, consider a reputable organized supporter experience without sacrificing your freedom to leave when you want. For groups, discuss budgets and interests in advance; not everyone must attend every session. Good planning makes space for shared excitement without creating avoidable stress.

    Frequently asked questions

    Where should I buy event tickets?

    Use the competition’s official channels or its explicitly authorized resale and ticketing partners. Check naming and mobile-entry requirements before purchasing.

    Will kick-off or session times ever change?

    Yes, depending on the sport and competition. Monitor the official schedule and avoid tightly coupled nonrefundable travel arrangements.

    Is it better to stay next to the stadium?

    Not necessarily. A hotel near a dependable transit route and amenities may be more comfortable, especially with event-related road closures.

    Are major sporting events suitable for children?

    Often, with careful choices about session length, noise, seating, crowding and venue age rules. Check child tickets and facilities in advance.

    Can I use a normal seat ticket if I need wheelchair access?

    Do not assume so. Contact the event’s accessibility ticket team and confirm the correct category, entrance and companion policy before buying.

    The best international sports trips capture the atmosphere while leaving enough time to enjoy the host destination. Verify the details, protect your budget and treat match day as a highlight rather than the only reason the journey matters.

    Official and specialist references

    Rules and availability may change. Check current official destination and provider information before booking or making health-related decisions.

  • Montréal in 4 Days: Old Montréal, Mount Royal and Neighbourhoods Without Living on the Metro

    Montréal in 4 Days: Old Montréal, Mount Royal and Neighbourhoods Without Living on the Metro

    Montréal rewards travellers who resist the urge to treat it as a checklist of isolated sights. The city makes more sense when you spend one day in and around Old Montréal, another around Mount Royal and the Plateau, and another following food, markets and neighbourhood life. Four days is enough to understand the contrast between historic streets, bilingual urban culture and large green spaces without spending half the trip underground.

    If this destination is part of a wider trip, compare the pacing with Eastern Canada in 12 Days. The city guide should add depth to that route rather than duplicate the same transfers.

    Quick trip summary

    Ideal stay 4 days for a first trip
    Best approach Group each day by geography and protect one flexible block
    Transport strategy Walk within districts; use public transport or taxis for cross-city moves
    Who it suits First-time visitors, couples, solo travellers, families and slower-paced travellers
    Most common mistake Adding too many distant attractions to the same day

    How to plan the trip before booking

    Start by fixing the parts of the itinerary that are difficult to replace: timed monuments, limited-capacity experiences, major performances or transport that controls the rest of the trip. Everything else should remain flexible enough to move when weather, queues or simple tiredness change the day.

    The most useful question is not “How many attractions can fit?” but “Which part of the city should this day belong to?” Grouping stops by geography usually saves more time than any transport trick. It also creates room for spontaneous meals, neighbourhood streets and the unexpected places that often become the strongest memories.

    Where to stay: choose location before hotel style

    Base Why choose it
    Downtown Best for first-time visitors who want easy metro access, museums and a straightforward airport connection.
    Old Montréal Atmospheric and highly walkable, especially good for couples and travellers who value evening streets over nightlife.
    Plateau Mont-Royal A stronger neighbourhood feel, cafés and restaurants, with more daily walking and fewer big hotels.
    Mile End Excellent for food-focused travellers and a local rhythm, but less convenient for very early sightseeing starts.

    A beautiful room is not automatically a good base. Map the first activity of the morning, the likely dinner area and the departure route. If the hotel creates two unnecessary transfers every day, the hidden cost is time as well as money.

    A realistic 4-day itinerary

    Day 1: Old Montréal and the river

    Start around Place d’Armes and Notre-Dame area, then walk the older street grid toward the river. Choose one substantial museum or historic interior rather than stacking several. Finish along the Old Port or with dinner nearby so the first day remains geographically compact.

    Day 2: Downtown, museums and Mount Royal

    Use the morning for the central cultural district or one major museum, then move toward Mount Royal when the light and weather are better. The climb is the main physical effort of the day, so avoid adding a distant evening reservation that forces another cross-city transfer.

    Day 3: Plateau, Mile End and food

    Spend the day in the Plateau and Mile End, where Montréal becomes less about monuments and more about streets, bakeries, delis, small shops, murals and parks. Build the route around two or three food stops rather than trying to sample every famous address.

    Day 4: Jean-Talon Market and a flexible final district

    Use Jean-Talon Market as the anchor, then choose Little Italy, the canal, a museum you skipped or a second neighbourhood according to weather and energy. Keep the final afternoon flexible so luggage, airport timing or a long lunch do not create stress.

    Keep the second half of the day lighter than the first whenever possible. A useful itinerary leaves room for a delayed start, a longer meal, weather or the simple discovery that one neighbourhood deserves another hour.

    Getting from the airport and handling arrival day

    Montréal–Trudeau airport is outside the central districts. Compare the airport bus, taxi or ride-hailing option against your hotel location and arrival hour; the cheapest route is not always the most comfortable after a long flight. Save the hotel address offline before leaving arrivals.

    Arrival day should carry less risk than the other days. Keep the first reservation easy to cancel, buy water and any transport card you need, and learn the route back to the hotel before staying out late.

    Getting around without wasting the day

    The metro is the backbone for longer urban moves, while many of the best districts are explored on foot once you arrive. Avoid jumping on the metro for every short distance: surface walking is part of the experience. A car is usually more burden than benefit for a city-only stay because parking and one-way streets add friction.

    When comparing two routes, include walking to the station, waiting, transfers and the final approach. A route with fewer changes is often better for families, luggage, older travellers and anyone visiting in difficult weather.

    Best time to visit and how season changes the itinerary

    Late spring through early autumn makes parks, terraces and long neighbourhood walks easiest, while winter can be rewarding if you accept shorter outdoor blocks and use museums, cafés and the underground city strategically. Weather can change the value of Mount Royal or canal time, so keep one outdoor block movable.

    Season also changes hotel prices, daylight, event calendars and how tiring outdoor sightseeing feels. If your dates are fixed, adapt the daily rhythm instead of forcing an itinerary designed for another month.

    What to book first

    Reserve only the experiences where availability genuinely matters. Timed museums, high-demand monuments, a special show, protected natural areas and limited tours deserve priority. Ordinary neighbourhood walks, markets and most meals are better left flexible unless there is one restaurant you care about deeply.

    Recheck opening days, transport works, reservation rules and local closures shortly before departure. These details change faster than the basic shape of a good itinerary, and a five-minute check on an official source can prevent a wasted cross-city journey.

    Food strategy: eat well without crossing the city for every meal

    Montréal food is part of the itinerary rather than an evening add-on. Leave space for bagels, smoked meat, Québécois comfort food, bakeries and the city’s diverse immigrant cooking. Famous institutions can have queues; a good local alternative often produces a better day than crossing town only to wait.

    For a multi-age group, a reliable breakfast and an easy lunch often matter more than one additional attraction. Use meals as genuine rest rather than another item to complete quickly.

    Travelling with children

    Families can combine the Old Port, parks, markets and one museum without turning every day into an educational programme. Build in playground or open-space time and keep one easy meal near the hotel for evenings when younger travellers have used their energy.

    With children, reduce transitions before reducing the highlights. Alternate one structured indoor visit with something that allows movement: a park, waterfront, market, short ride or open square. Keep toilets, drinking water, snacks and an easy route back to the hotel in mind before starting a long afternoon.

    Travelling at a slower pace or as a senior

    For slower-paced travellers, stay close to a metro station and use transit to remove unrewarding distance before walking inside the district you actually want to experience. Mount Royal and cobbled historic streets can require more effort than a map suggests, so plan seating and shorter loops.

    Slower travel usually improves a city itinerary because it forces better geographic choices. Use transport to remove unrewarding distance, then spend walking energy on the streets, museums, viewpoints and markets that actually define the destination.

    Budget planning

    The largest differences in a short city budget usually come from hotel location, airport transfers, major admissions, restaurant choices and repeated taxi use. A slightly more expensive hotel can be better value if it removes two long transfers every day. Compare the total trip cost rather than the room rate alone.

    Keep a small daily reserve for an easier taxi, an unexpected admission, extra water, a spontaneous meal or a weather-driven change. A budget works better when it protects the trip from small problems instead of allocating every available amount in advance.

    Weather backup plan

    Keep at least one indoor or low-commitment block movable. The best backup fits the same part of the city, so a sudden shower, heat wave or poor visibility does not force a completely new transport plan. Outdoor viewpoints, beaches and long walks should be placed where they can move by half a day if necessary.

    Connectivity, payments and small practical details

    Save the hotel address, key tickets, passport or identity details, insurance information and the next important transfer outside your email app. Offline access matters when the network is weak or the battery is low. Carry a small power bank and keep a backup payment method separate from the main wallet.

    Do not assume every small business accepts the same payment methods as major hotels. Carrying a modest amount of local cash can be useful even in destinations where cards are common, while large amounts of cash create unnecessary risk.

    What to pack

    Comfortable shoes, weather protection and a small day bag matter more than extra outfits on a short city trip. Add any medication you may need during the day, a refillable bottle where practical and one layer for strong air-conditioning or cooler evenings. Pack for the conditions you will actually walk through, not only the climate average.

    Common mistakes to avoid

    • Booking a hotel far from the metro because the map distance looks small.
    • Trying to combine Old Montréal, Mount Royal and Mile End in one sightseeing day.
    • Building the trip around restaurant queues instead of neighbourhoods.
    • Renting a car for a city-only stay without a specific regional excursion.
    • Saving all weather-dependent outdoor time for the final morning.

    Responsible travel and local etiquette

    Treat residential streets, places of worship, markets and memorial spaces as working parts of the destination rather than scenery. Follow staff instructions, keep entrances and pavements passable, ask before photographing people in sensitive settings and spend with local businesses when it fits naturally.

    In natural or wildlife settings, distance and local rules matter more than the photograph. Do not feed animals, cross barriers or pressure guides to break access rules for a closer view.

    If you have less or more time

    With two days, keep Old Montréal and a combined downtown/Mount Royal day. Three days adds Plateau and Mile End. With five days, add the canal, a deeper museum day or a carefully planned regional excursion, but do not sacrifice the neighbourhood time that makes Montréal distinctive.

    The Bank of Montreal’s columned façade on Place d’Armes in Old Montréal

    Safety and decision-making on the day

    Use ordinary urban awareness: keep phones and wallets controlled in crowded areas, use clearly identified transport and avoid walking while distracted at complicated crossings. The most useful safety advice is current and local, so follow official notices, hotel guidance and attraction staff when conditions change.

    Set a practical turnaround time for excursions and transfer days. A missed secondary sight is cheaper than a missed flight, an unsafe late journey or an exhausted final day.

    Useful official and planning resources

    Opening hours, transport schedules, fees, reservation procedures and access rules change more often than the basic geography. Recheck the official source shortly before departure.

    Final planning checklist

    • Confirm passport, visa, transit and health requirements for your nationality.
    • Reserve the attraction, tour or transport that controls the rest of the itinerary.
    • Save the accommodation address and first-day route offline.
    • Recheck weather, closures and transport notices before each critical day.
    • Keep at least one half-day that can absorb a delay or become simple rest.
    • Leave a generous buffer before flights and other costly connections.

    A successful city break should feel as though you understood how the place fits together, not merely that you collected its famous names. Protect the fixed reservations that matter, group the rest by geography and remove anything that creates more transit than experience.

  • Northern California Coast in 9 Days: Mendocino, Eureka and the Redwoods Without Rushing Highway 101

    Northern California Coast in 9 Days: Mendocino, Eureka and the Redwoods Without Rushing Highway 101

    Northern California feels completely different from the classic San Francisco–Yosemite–Big Sur road trip. North of the Bay Area, the road narrows, the towns get smaller and redwood forest increasingly replaces big-city sightseeing.

    This nine-day route uses Mendocino/Fort Bragg, Eureka/Arcata and Crescent City or the northern redwoods as three bases. It avoids trying to drive the coast all the way to Oregon in one push.

    For Redwood National and State Parks, the National Park Service current-conditions page should be checked shortly before travel. In 2026, Tall Trees Trailhead still requires a reservation year-round, while vehicle access to Gold Bluffs Beach/Fern Canyon requires a permit from May 15 to September 15.

    Quick trip summary

    • 3 nights Mendocino/Fort Bragg, 2 nights Eureka/Arcata, 3 nights Crescent City/redwoods, Day 9 departure.
    • Do not estimate coastal road time by mileage alone.
    • Reserve Tall Trees or Fern Canyon access when your chosen day requires it.
    • Give the redwoods at least two full days.
    • Do not add Yosemite, Napa or Big Sur to the same nine-day trip.

    Why this route works

    Mendocino provides dramatic cliffs, smaller coastal towns and easy access to beaches and state parks without the longer redwood drives.

    Eureka and Arcata create a useful middle base for Victorian architecture, food, Humboldt Bay and the southern redwood parks.

    A northern base gives Jedediah Smith, Prairie Creek and coastal redwoods enough time without repeated two-hour commutes.

    A realistic itinerary at a glance

    DaysBaseMain focus
    1–3Mendocino / Fort BraggCliffs, beaches, headlands and local towns
    4–5Eureka / ArcataHumboldt Bay, Victorian architecture and southern redwoods
    6–8Crescent City / redwoodsPrairie Creek, Jedediah Smith, Fern Canyon/Tall Trees options
    9DepartureMedford/Eureka/Bay Area onward

    Day-by-day plan

    Day 1: Bay Area to Mendocino

    Treat the drive itself as the main activity. Stop at one or two viewpoints or small towns, then arrive with enough daylight for a headlands walk.

    Disneyland California

    Day 2: Mendocino coast

    Use Mendocino Headlands, Russian Gulch or another nearby state-park area and give the town time for galleries, cafés and a slow evening.

    Day 3: Fort Bragg and coastal nature

    Use Glass Beach only as a short stop, then prioritise MacKerricher, botanical gardens or a longer coastal walk. Do not make social-media landmarks the whole day.

    Day 4: Mendocino to Eureka

    This is a longer, slower drive than the map can suggest. Travel north through redwood country and make one meaningful forest stop before checking into Eureka or Arcata.

    Day 5: Humboldt and southern redwoods

    Use Humboldt Bay, Old Town Eureka, Arcata or Avenue of the Giants direction. Keep the day coherent rather than driving north and south repeatedly.

    Day 6: Eureka to northern redwoods

    Continue toward Prairie Creek/Crescent City, using Newton B. Drury Scenic Parkway or one short grove walk. Check current road and trail alerts before leaving.

    Day 7: Prairie Creek and Fern Canyon

    Use Prairie Creek, Elk Prairie and Fern Canyon only if access, weather and permits line up. Expect wet feet in Fern Canyon and do not build a tight schedule around the stream crossings.

    Day 8: Jedediah Smith or Tall Trees day

    Choose Stout Grove/Jedediah Smith or a permitted Tall Trees experience according to fitness and reservation status. One deep forest day is better than racing between distant groves.

    Day 9: Departure

    Continue toward Medford, Arcata/Eureka airport or begin the longer return south with enough time for coastal-road delays.

    Where to stay and how many hotel changes to make

    Mendocino is atmospheric but Fort Bragg offers more services; choose based on evening style rather than assuming one is universally better.

    Eureka is practical for food and history, Arcata for a smaller university-town feel, and Crescent City for quick access to Jedediah Smith.

    Disney California Adventure Pixar Pier Lagoon And Incredicoaster

    Choose accommodation for geography before décor. A well-positioned room can save an hour every day and often matters more than a small difference in nightly price.

    Read recent guest reviews for practical details that hotel pages rarely emphasise: stairs, parking, road noise, breakfast hours, heating or air conditioning, and the real walk from transport.

    Transport: what is worth planning in advance

    A car is essential, and Highway 1/101 travel should be planned in daylight because curves, fog, roadworks and wildlife can change the pace.

    Check Caltrans and NPS conditions before major park days; redwood roads and trailheads can close after storms or maintenance.

    Measure every move door to door rather than by the headline distance. Luggage, waiting, parking, road conditions, ferries or the final local connection can turn a short-looking transfer into half a day.

    Save hotel addresses, reservation confirmations and maps offline. The places where navigation matters most are often exactly where mobile coverage becomes weakest.

    Food and daily rhythm

    Seafood, bakeries, local breweries and farm-driven restaurants are the main coastal themes, but small towns can have early closing hours.

    Buy picnic supplies before long park days because trailhead dining is not part of the redwood experience.

    Use meals to shape the rhythm of the day. A long regional lunch can be both an experience and a recovery period after hiking, museums, heat or an early start.

    Do not make every meal another reservation. Mix destination restaurants with markets, bakeries, cafés and simple local places so food improves the itinerary instead of controlling it.

    Families, children and older travellers

    Short grove walks, tide pools and scenic drives work well for families.

    Older travellers can experience exceptional redwoods on mostly level grove trails without committing to long backcountry hikes.

    For multigenerational travel, the right pace is the one at which the least mobile member still enjoys the day. That usually creates a better shared trip for everyone.

    Disney California Adventure Pixar Pier Ferris Wheel Over Water

    When accessibility matters, ask precise questions about steps, trail surfaces, beach access, boat boarding, lifts, toilets and vehicle access rather than relying on a generic accessibility label.

    Budget: where the money really goes

    Coastal lodging is the biggest variable, especially in summer and holiday periods.

    Three multi-night bases reduce fuel and make it easier to spend selectively on a better room or guided nature experience.

    Compare total trip cost rather than headline room prices. Parking, transfers, fuel, tolls, ferries and guided activities can erase an apparent saving.

    The best splurges usually remove friction: a central room, a direct transfer, a good local guide or one extra night that prevents an exhausting move.

    Best time to go

    Late spring through early autumn gives the broadest road and trail access, but fog can persist in summer.

    Winter can be beautiful and quiet but storms, fallen trees and road damage make flexible planning essential.

    Shoulder season often balances weather, crowds and prices well, but rural attractions, boats, ferries, mountain services and seasonal restaurants may run reduced schedules.

    Weather should change the order of the day. Keep indoor or lower-effort alternatives so rain, heat, wind, smoke, snow or cloud does not force you to waste the trip.

    Comfort, accessibility and realistic pacing

    The itinerary progresses north in three clear blocks and never asks you to backtrack for a famous grove.

    Two full redwood days mean a permit or weather change does not destroy the forest section.

    Travel fatigue compounds. One difficult relocation can weaken the following two days, which is why this itinerary avoids one-night bases unless geography genuinely requires them.

    A free half-day is not wasted time. It is insurance for weather, traffic, a tired child or a place you discover only after arriving.

    Small decisions that improve the trip

    Use three bases

    The coast is too long for one hotel.

    Give redwoods two full days

    Forest travel is slower than attraction travel.

    Kern River Near Johnsondale California USA

    Check permits late

    Access rules and road conditions matter.

    Skip famous detours that add no depth

    The best experience is usually a quiet grove, not another photo stop.

    What I would leave out on this length of trip

    Leave Yosemite, Napa/Sonoma and Big Sur for the existing California itineraries.

    Skip driving all the way into Oregon simply to add another state line.

    Mistakes that make this trip harder than it needs to be

    • Judging drive time only by miles.
    • Missing permit requirements for a chosen trailhead.
    • Driving coastal roads tired after dark.
    • Trying to see every famous redwood grove.
    • Expecting reliable mobile service in every park area.
    • Returning to San Francisco under a tight same-day flight.

    How I would adapt the itinerary

    With six days, use Mendocino plus one redwoods base.

    With eleven days, add the southern Oregon coast or another northern California forest block with proper nights.

    Before booking

    • Check NPS alerts and permits.
    • Check Caltrans road conditions.
    • Pack rain layers even in summer.
    • Download offline maps.
    • Choose departure airport before fixing the northern base.

    Practical questions

    Do I need permits for the redwoods?

    Some specific access points do. Tall Trees Trailhead requires a reservation year-round, and Gold Bluffs Beach/Fern Canyon vehicle access is seasonally permitted.

    Mendocino or Fort Bragg?

    Mendocino for atmosphere and headlands; Fort Bragg for services and practical lodging.

    How many days for the redwoods?

    At least two full days in a nine-day coast trip.

    Final thoughts

    Northern California rewards travellers who accept that the road itself is part of the destination.

    Mendocino, Humboldt and the redwoods create nine days of cliffs, small towns and ancient forest without turning Highway 101 into a race.

    How to keep the itinerary resilient

    Keep Fern Canyon/Tall Trees choices flexible around permits, stream conditions and trail alerts.

    If a road closes, use the grove or coast nearest your current base rather than driving hours for a substitute.