Author: admin

  • Airport Lounges, Sleep Pods and Day Rooms: Making Long Layovers More Comfortable

    Airport Lounges, Sleep Pods and Day Rooms: Making Long Layovers More Comfortable

    A long airport connection can be a useful breathing space or an exhausting stretch of bright lights, announcements and uncomfortable seats. Airport lounges, paid day rooms and sleeping pods promise relief, but they differ dramatically in price, opening hours, facilities and location. The right option depends on the length of the stop, the terminal, security rules, luggage arrangements and how much rest the traveler truly needs. Before paying for a premium lounge, work out whether a quiet public seating area, an airport hotel or simply an efficient transfer would serve the trip better.

    At a glance

    • Calculate usable time after transfer and boarding margins.
    • Confirm whether a facility is airside or landside.
    • Check guest rules, facilities, accessibility and total cost.

    Start with the real amount of usable layover time

    The scheduled gap between flights is not the time available for relaxation. Subtract disembarkation, immigration if required, baggage collection and recheck, movement between terminals, security screening and the margin needed to reach the next boarding gate. An apparent five-hour connection can leave only two comfortable hours, particularly if tickets were booked separately or a terminal transfer is lengthy. Airport construction, night closures and international border controls can change the calculation.

    If your flights are on one protected ticket, the airline may have specific arrangements for disruptions, but you still need to understand the transfer procedure. Separate tickets can require entering the country and checking in again, potentially subject to entry requirements. Do not pay for a lounge on the assumption that you can reach it airside. Research the exact terminal and concourse you will be using, because two lounges at the same airport may sit on opposite sides of passport control.

    Know what an airport lounge usually offers

    Lounges may provide seating, drinks, light meals, Wi-Fi, charging points, toilets and workspaces. Some include showers, quiet rooms or family areas. Others are essentially busy dining rooms with an entry fee. Food may be buffet-style or ordered separately; alcohol, showers and premium services sometimes cost extra. Check whether entry is restricted to a particular airline, class of ticket, loyalty status or paid lounge program. A card promising 'worldwide lounge access' does not necessarily include every airport or terminal.

    Many operators limit entry to a number of hours before departure, and access can be denied when the lounge is full. Advance booking may reduce uncertainty but does not always guarantee a particular seat or shower slot. Read the terms on guests and children: a family of four may face a much higher total charge than the headline single-adult price suggests. For a traveler who only wants twenty minutes of quiet, the value may be poor.

    Compare lounge access with a terminal hotel

    An airport hotel can be better for a long overnight stop because it offers a private bed, bathroom and predictable noise level. Check whether the hotel is inside the secure transit zone or outside the terminal. A landside property may require border entry, a shuttle journey and another security screening. If you cannot lawfully enter the country, an attractive airport hotel outside immigration may be completely unusable. Confirm this with official airport and immigration information before booking.

    Day-use hotel rooms can work for a daytime layover when there is enough time to travel there and back. Compare check-in windows, shuttle frequency, luggage storage and cancellation conditions. A very early departure can make a nearby airport hotel worth the price for a family or an older traveler who sleeps poorly in public spaces. Conversely, a short connection may be safer and less tiring if everyone stays near the departure gate rather than trying to maximize paid amenities.

    Understand sleep pods and capsule facilities

    Sleeping pods and capsule cabins range from small enclosed seats to compact rooms with beds, ventilation and controlled lighting. Some offer hourly bookings; others charge for blocks of time. Verify exact dimensions, privacy, toilets, showers and whether personal luggage fits securely. A pod that suits one adult may not accommodate a parent with a baby or a traveler who needs room for mobility equipment. Some facilities are unsuitable for children or have explicit age restrictions.

    Pods are not a substitute for a hotel in every circumstance. Announcements, terminal noise and limited temperature control may still affect rest, and staff may require identification or payment cards. Check whether the unit is staffed around the clock and how late arrival affects the reservation. If the airport is closed to overnight passengers, a facility shown on a terminal map may not be accessible throughout the night. Never assume that a sleeping pod can legally or practically serve as overnight accommodation without checking the operator's rules.

    Evaluate shower, food and charging options honestly

    After a long-haul flight, a shower and a clean change of clothes can be more refreshing than unlimited snacks. Some lounges have complimentary showers; others require booking or an additional fee. If you are considering a lounge only for its shower, compare the cost with any standalone shower facilities at the airport. Bring travel-size toiletries and keep essential clothing available in cabin baggage, while observing liquid restrictions on subsequent security checks.

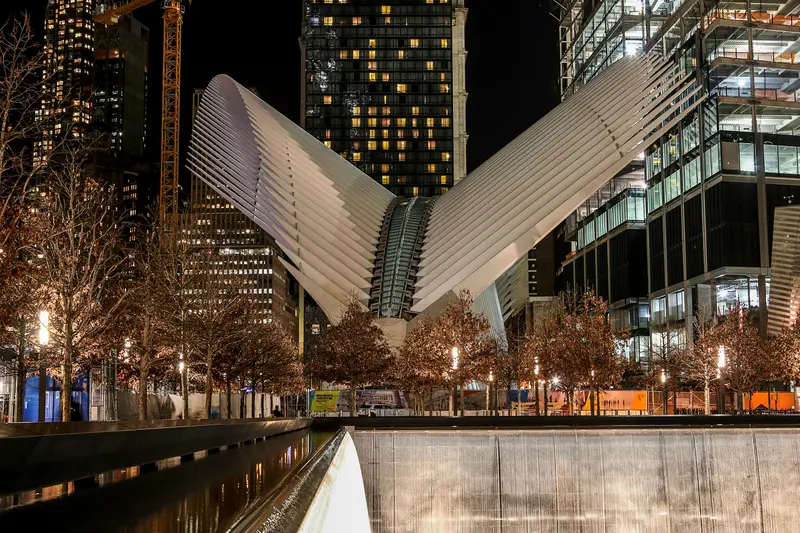
    Newark Liberty International Airport Aerial Terminal View

    Charging access matters for travelers using phones for boarding passes, payment and directions. Carry the appropriate charger and cable, and avoid relying on a single USB port in a crowded lounge. Read airport guidance before connecting unfamiliar devices to shared stations. Food quality and availability also vary: a lounge's promised 'light refreshments' may not meet a family meal requirement or the needs of someone with a serious food allergy. Ask about ingredients rather than assuming buffet labels are comprehensive.

    Check how families and children can use the space

    A lounge may look peaceful in photographs but contain areas with no space for a stroller, few child-friendly foods or rules limiting children to particular sections. Ask whether children count as full-price guests and whether infants are admitted without charge. Check for family rooms, baby-changing facilities, quiet zones and any practical restrictions on sleeping. Young children may be more comfortable with freedom to move in a public play area than being asked to sit quietly in an expensive lounge for three hours.

    For teenagers, charging, internet and a place to sit may be sufficient. A multigenerational group might prefer seating near toilets and departure information screens. Build in movement breaks and allow time to reach the gate before boarding. A lounge visit should reduce stress, not create a new deadline when staff suddenly announce that access is ending or the family must rush to another terminal.

    Consider accessibility and sensory comfort

    A venue described as accessible should be checked for its actual route, lift availability, seating layout, door widths and accessible bathroom facilities. Travelers using wheelchairs or mobility scooters may need to know whether equipment can remain nearby and whether a separate assistance service will escort them to boarding. The airport lounge generally does not replace prearranged assistance with the airline or airport. Ask how the lounge communicates gate changes and whether announcements are accessible to those with hearing impairments.

    For travelers sensitive to noise, light or crowds, a paid lounge is not guaranteed to be quieter than the main terminal. Some are busy at peak hours and use televisions or music throughout the space. Look for verified quiet areas, sensory rooms or less crowded gate zones; official airport accessibility resources may be more informative than lounge marketing. Choose the option that reduces actual discomfort rather than assuming a premium price equals better accessibility.

    Work out the cost per useful hour

    Divide the total price for everyone by the number of hours you will realistically use the service. Include any food, shower or guest charges that are not part of the basic entrance. For example, a hypothetical lounge visit costing 45 currency units for ninety minutes is a different proposition from the same cost for four peaceful hours. If a family can buy a proper meal and spend comfortable time in a public area for less, lounge access may not add much value.

    Check whether your ticket class, credit card or loyalty membership already provides entry and what fees apply to guests. Do not assume benefits remain unchanged from a card advertisement you saw months earlier. Some memberships count visits annually, restrict partner lounges or charge after a free allowance. Review cancellation rules before buying access for a connection that may change because of operational disruptions.

    A practical plan for short, medium and overnight stops

    For a connection under three hours, prioritize a secure, predictable transfer and avoid unnecessary purchases. For a four-to-six-hour connection, consider a lounge only after confirming terminal location, available time and entry conditions; a comfortable public space may be sufficient. For a truly overnight or very long connection, compare transit-zone sleep facilities, airport hotels and any visa requirements in detail. Allow a generous margin before your onward boarding time.

    If the arrival flight is delayed, revisit the plan rather than clinging to a nonrefundable lounge reservation. Keep water, essential medicines and a small rest kit readily accessible. Use the airport's official information channel for live gate and terminal updates. The best layover decision is rarely the fanciest facility; it is the one that leaves travelers rested, informed and ready to continue safely.

    Frequently asked questions

    Can I access any lounge with a premium credit card? No. Check the specific program, terminal, guest rules and operating hours.

    Are sleeping pods available overnight? Sometimes, but individual facility and airport access rules differ.

    Does a transit hotel require a visa? It depends on whether the hotel is airside, your citizenship, itinerary and local entry rules.

    Will a lounge help a traveler with sensory sensitivities? Possibly, but confirm noise, lighting and crowding; official quiet or sensory spaces may work better.

    Is a lounge worth it for a short connection? Often not once walking, screening and boarding time are subtracted.

    Planning checklist

    FocusWhat to confirmWhen
    TimeActual time after formalitiesBefore purchase
    LocationTerminal, airside or landsideBefore paying
    AccessEligibility, guests and facilitiesBefore booking
    RestComfort and onward-boarding marginDuring layover

    Official resources and further reading

    Check the latest local rules, opening conditions and applicable safety requirements with the operator or authority before travel.


  • Exploring Street Food and Local Markets Abroad: What to Eat and How to Stay Well

    Exploring Street Food and Local Markets Abroad: What to Eat and How to Stay Well

    Markets and street-food stalls often reveal more about a destination than a formal restaurant menu. You can watch a cook prepare a regional specialty, hear neighbors discussing what to buy and discover ingredients unfamiliar at home. Yet choosing what to eat while traveling raises genuine questions about hygiene, allergies, water quality and stomach upsets. A rewarding food-focused holiday combines curiosity with sensible precautions. The aim is not to avoid every unfamiliar dish, but to explore with attention to how food is prepared, stored and served.

    Start with local curiosity, not a checklist of famous dishes

    Before visiting a market, find out what food is seasonal and which specialties people associate with that region. The best discovery may be an ordinary breakfast, a small bakery or a weekday produce stall rather than the snack promoted by every tourism video. Ask a hotel employee or local guide where residents shop, while remembering that recommendations reflect individual tastes. Learn a few food words in the local language and write down any ingredients you cannot eat.

    Plan food experiences around the rest of the day. A market that opens before sunrise may be most enjoyable when followed by a slower afternoon. A busy night market can be tiring for young children or anyone sensitive to noise and crowds. Older travelers may appreciate a route with seating and accessible toilets. Your itinerary should include the pleasure of stopping, sitting down and observing, not simply trying to consume as many different items as possible.

    Understand the difference between lively and hygienic

    A long queue may indicate popularity, but it does not prove that food is safe. Notice whether the vendor handles money and food with clean practices, whether ingredients are protected from insects and heat, and whether cooked food is kept appropriately hot. A clean cooking surface and frequent preparation can be encouraging, but no single visual test guarantees safety. The local reputation of a stall matters, yet foodborne infections can occur in any setting, including expensive restaurants.

    The CDC Yellow Book food and water precautions advises particular care where sanitation or food hygiene is inadequate or uncertain. Fully cooked food served hot is generally a safer choice than food held at room temperature. Raw or undercooked animal products, unpasteurized dairy and produce washed in unsafe water can carry greater risks. Apply the guidance to the circumstances without treating every street vendor or culture as inherently unsafe.

    Assorted Restaurant Dishes With Bowls Of Food

    Choose foods that are prepared and served thoughtfully

    Watching a cook make a dish can help you see the preparation process. Choose fresh servings rather than ingredients that have been sitting unrefrigerated in the heat. In places where hygiene is uncertain, piping-hot cooked foods and fruits you can peel yourself are often practical options. Avoid assuming that sauces, ice, cut fruit or drinks diluted with water are safe just because a main dish was cooked thoroughly. Food left in the sun for hours deserves caution even if it smells normal.

    For families, introduce unfamiliar foods gradually. A child’s appetite may disappear in hot weather or when meals are served much later than usual. Bring a familiar snack so hunger does not force a rushed choice. Anyone with a sensitive stomach can start with a simple meal and enjoy the aromas and atmosphere without eating everything. It is perfectly possible to have a meaningful market visit while making a selective, informed food choice.

    Pay attention to drinking water and ice

    Tap water can be perfectly safe in some cities and unsuitable for drinking in others. Check current, destination-specific public-health information rather than relying on assumptions about a country’s income level or restaurant appearance. Where water is not reliably safe, use appropriately treated water or factory-sealed bottled water for drinking and, when recommended, for brushing teeth and preparing food. Ice may have been made with water of uncertain quality; in some settings it is wiser to skip it.

    Remember that boiling addresses many infectious hazards but does not remove chemical contamination. Ordinary travel filters vary in what pathogens they can remove and may not make untreated water safe by themselves. For more precise methods, consult the CDC water disinfection guidance. If a toddler needs formula, be especially attentive to official infant-feeding guidance and the quality of water and preparation equipment. Hydration matters, but choosing unsafe water is not an acceptable shortcut.

    Manage food allergies without gambling on translation

    A traveler’s allergy can make a seemingly simple snack difficult to judge. Recipes differ among regions and vendors; sauces may contain peanuts, sesame, fish, shellfish, milk, eggs or other allergens that are not visible. Cross-contact can occur when utensils or cooking oil are shared. Carry a clear written translation of your allergens and the seriousness of the reaction, but do not rely on an app or a verbal ‘no problem’ response as proof of safety.

    Ask about ingredients and preparation with enough time for the vendor to explain. If communication remains unclear, choose a safer option rather than asking someone to guess. Follow your personal emergency plan, carry prescribed medication including epinephrine where indicated, and know how to contact local emergency services. An allergy-focused traveler may prefer a food tour with advance communication and restaurants able to discuss ingredients, although no tour can promise zero risk. See the guide to traveling with food allergies for more detailed planning.

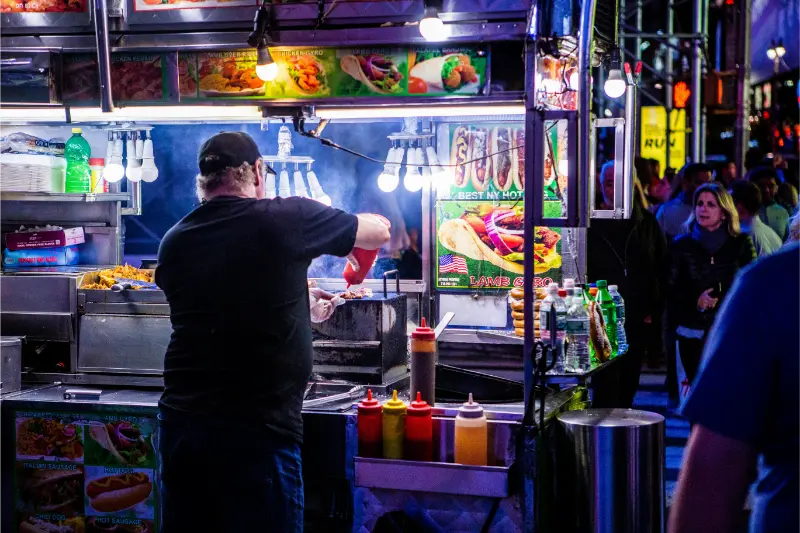
    New York Street Food Cart Vendor

    Explore markets respectfully

    Markets are workplaces before they are tourist attractions. Do not touch produce unnecessarily, block narrow aisles for photographs or ask vendors to pose without permission. Some sellers welcome conversation; others are busy serving residents. Observe local bargaining customs and posted prices. If buying small amounts, be considerate of queues. Learn a simple greeting and thank-you phrase. A respectful conversation about a regional spice or cooking method may become a richer memory than a photograph of a crowded stall.

    Avoid posting images of identifiable people, especially children, without permission. Some markets prohibit photography or filming entirely. Pay promptly using the accepted method; small cash may be useful in places where card terminals are rare. Take reusable bags where practical and avoid leaving litter. If sampling unfamiliar produce, ask how it should be washed, peeled or cooked. Buy only what you can reasonably consume, particularly when accommodation has limited refrigeration.

    Decide whether a food tour adds value

    A knowledgeable local food guide can explain history, ingredients, migration influences and social customs that a quick snack cannot reveal. They may introduce smaller neighborhoods or family-run businesses you would otherwise miss. Before paying, ask how many stops are included, the walking distance, group size, accessibility, duration and food-allergy procedures. Check whether the operator compensates vendors fairly and whether the tasting portions amount to a meal or only a few bites.

    A food tour is less appealing if it rushes through markets, treats sellers as props or substitutes bulk souvenirs for useful interpretation. Compare prices against the experiences provided, not only the number of dishes. Families may need a shorter route with toilet stops, while older travelers may appreciate comfortable seating. If you prefer spontaneous exploration, a self-guided morning at two or three markets can be just as rewarding, provided you follow local rules and food-safety precautions.

    Build a flexible market day

    Start with a morning market when vendors are active and produce is fresh. Walk the surrounding streets, learn what is seasonal and choose one prepared breakfast or snack that suits your needs. Leave time for a museum or shaded break at midday. In the afternoon, visit a bakery or sit-down restaurant where you can learn more about a dish you encountered. An evening night market can be a short optional outing rather than an obligation to stay until closing.

    Balance tasting with normal meals and hydration. A food itinerary filled entirely with small snacks can leave someone unsatisfied or unwell. For travelers with children, include familiar food options. For anyone who tires easily, pick a market with nearby transport and seating. Research opening days carefully: some wholesale markets welcome visitors only during limited hours, and religious holidays can change schedules completely.

    Street Food Vendor In Manhattan New York

    What to do if stomach symptoms develop

    Mild digestive discomfort may resolve with rest and suitable fluids, but foodborne illness can also cause serious dehydration or require medical care. Seek professional advice promptly for severe symptoms, blood in stool, persistent fever, marked dehydration or symptoms in vulnerable travelers, including small children and older adults. Do not assume all diarrhea can be treated with leftover antibiotics or over-the-counter medicines; appropriateness varies and some treatments are unsuitable for certain conditions.

    Have travel insurance details and the address of a reliable medical facility available before an emergency. Practice handwashing with soap and safe water, especially before eating and after bathroom use. Alcohol-based sanitizer can help when handwashing is unavailable, but it does not replace it for all pathogens or visibly dirty hands. If someone is ill, do not force a strenuous sightseeing day. The schedule should serve the people traveling, not the other way around.

    A practical market-food decision table

    Question Reassuring sign Reason to pause
    Cooking Food freshly cooked and served hot Cooked food standing for a long time
    Water Confirmed safe source Uncertain ice or water supply
    Ingredients Clear explanation possible Allergy answers vague or inconsistent
    Storage Appropriate hot or cold holding Perishables left warm outdoors
    Atmosphere Room to eat and wash hands Crowding prevents basic hygiene

    Keep the experience affordable and meaningful

    A busy market offers many ways to spend money quickly. Decide on a small tasting budget, compare portion sizes and leave space for one meal worth sitting down for. You do not need to buy every famous snack to understand a city. Visit markets as part of a broader itinerary that includes neighborhood life, public spaces and historical places. Supporting local sellers matters, but so does choosing businesses that respect workers and hygienic practices.

    For context, read traveling where you do not speak the language, travel money and local payments and cultural etiquette. A delicious travel memory usually comes from slowing down enough to understand the people and traditions behind the meal.

    Frequently asked questions

    Is food from street stalls always risky?

    No, but risks vary with preparation, storage, water quality and local conditions. Use credible destination health advice and favor freshly cooked, properly handled foods when hygiene is uncertain.

    Can a busy queue guarantee that a vendor is safe?

    No. Popularity is not evidence of suitable food temperatures, clean water or allergen controls. Observe preparation and use the same caution that you would apply in a restaurant.

    How should I approach food when traveling with a toddler?

    Keep regular meal and hydration needs in mind, choose foods appropriate for the child’s age, and pay particular attention to safe water, proper cooking and hand hygiene. Ask a pediatric clinician for any destination-specific concerns.

    Is an organized market tour better than exploring alone?

    It can offer cultural context and introductions, but only if the guide is reputable and the pace works for you. Independent visits may be more relaxed and economical. Choose according to your interests and practical needs.

  • Toronto in 4 Days: Downtown, Waterfront and Neighbourhoods Without Crossing the GTA for Every Stop

    Toronto in 4 Days: Downtown, Waterfront and Neighbourhoods Without Crossing the GTA for Every Stop

    Toronto deserves a trip built around geography and real travel time rather than a checklist. Toronto is easy to underestimate because its central grid looks simple. The challenge is scale: neighbourhoods, museums, waterfront areas and outer attractions can be far enough apart that a day disappears into transit. Four days works well when downtown sights are grouped and one full day is reserved for neighbourhoods or the islands rather than constant cross-city movement.

    If this destination is part of a longer journey, compare the pacing with Ontario in 9 Days: Toronto, Niagara and Prince Edward County Without Changing Hotels Constantly. The useful planning rule is to protect the experiences that are difficult to replace, then leave ordinary meals, neighbourhood walks and secondary attractions flexible. A city break usually becomes less enjoyable when every hour is reserved. Door-to-door travel time, queues, weather, luggage, meal stops and fatigue are part of the itinerary even when they do not appear on a map.

    Quick trip summary

    • Recommended time: 4 days.
    • Best planning principle: group each day by geography and protect only the reservations that control access.
    • Best for: independent travellers, couples, families and slower-paced visitors who prefer a realistic rhythm.
    • Keep flexible: at least one half-day or one major activity that can move with weather, traffic or energy.
    • Book first: accommodation location, scarce transport and any timed entry that shapes the rest of the trip.

    Is Toronto the right trip for you?

    Toronto suits travellers who enjoy multicultural food, museums, neighbourhoods, architecture and waterfront space. Families benefit from major indoor attractions and parks, while repeat visitors can spend entire days away from the downtown landmarks. The main planning mistake is treating the wider Greater Toronto Area as if it were one compact city centre.

    The practical test is to decide what would make you genuinely disappointed if you missed it, then build the trip around those one or two priorities. Everything else should earn its place by fitting the same area of the day. This becomes even more important when travelling with children, older relatives or anyone who values a slower rhythm.

    Where to stay: choose location before hotel style

    BaseWhy choose it
    Downtown / Financial DistrictBest for first-time access to major sights, Union Station and the waterfront, though evenings can feel more business-oriented on some blocks.
    Entertainment District / Queen WestUseful for restaurants, nightlife and central walking access; check event-night noise and rates.
    Yorkville / AnnexBetter for museums, neighbourhood feel and subway access while remaining close to central Toronto.

    A more attractive room is not always a better travel decision. Before booking, map the first activity of the morning, the likely dinner area and the departure route. If the hotel adds two unnecessary transfers every day, the hidden cost is time as well as money. Also check stairs, lift access, street noise and the final luggage route rather than relying only on the neighbourhood name.

    CN Tower And Toronto Skyline Ontario Canada At Sunrise

    A realistic 4-day itinerary

    Day 1: downtown core and waterfront

    Use Union Station, the central towers, markets and waterfront as one coherent zone. Choose one major viewpoint or attraction and leave room to walk rather than moving immediately to a distant neighbourhood.

    Day 2: museums, university and west-central neighbourhoods

    Build the day around the Royal Ontario Museum or another major collection, then continue through the Annex, Kensington Market or nearby districts according to interest. Keep the evening on the same side of downtown.

    Day 3: Queen West, neighbourhood food and local Toronto

    Explore Queen West, Ossington, Chinatown or another neighbourhood cluster. This is the day to make food and street life part of the itinerary instead of adding another large attraction.

    Day 4: Toronto Islands or flexible city day

    Use good weather for the ferry and islands, waterfront cycling or parks. In poor weather, keep an indoor alternative such as galleries, markets or another museum. Niagara Falls deserves its own substantial day and should not be squeezed into a few leftover hours.

    How to move around without wasting the day

    The subway and streetcar network handle most visitor routes, with walking useful inside each neighbourhood. Regional trains are valuable when the itinerary extends beyond the city. Driving downtown adds parking cost and traffic without much benefit. If the wider Ontario trip requires a car, collect it when leaving Toronto rather than during the city portion.

    Do not judge a journey only by kilometres. A short distance can include traffic, security, station corridors, boat boarding, parking, luggage handling or a long final walk. For every important transfer, think in door-to-door time and keep a margin before anything expensive or difficult to replace.

    Best time to visit

    Late spring and early autumn are excellent for walking and waterfront time. Summer brings festivals, heat and busy weekends, while winter is cold but supported by strong indoor attractions and transit. Weather near Lake Ontario can change quickly, so keep the island or waterfront-heavy day movable when possible.

    Seasonal advice should guide the style of the trip, not become a promise. Check the local forecast and official closure, transport or safety notices again shortly before each weather-sensitive day. If one experience depends heavily on good conditions, keep it movable instead of sacrificing the rest of the itinerary to a fixed booking.

    What to book first

    Reserve accommodation first, then major ticketed attractions that matter to you and any special event driving demand. Ferry schedules, sports fixtures and festivals can affect the best order of days. Do not overbook restaurant times across different neighbourhoods; Toronto is more enjoyable when you can stay where the day develops naturally.

    The useful planning rule is to protect the experiences that are difficult to replace, then leave ordinary meals, neighbourhood walks and secondary attractions flexible. A city break usually becomes less enjoyable when every hour is reserved. Door-to-door travel time, queues, weather, luggage, meal stops and fatigue are part of the itinerary even when they do not appear on a map.

    CN Tower Above Toronto Skyline Ontario Canada

    Food strategy: eat well without scheduling every meal

    Food is one of Toronto’s strongest reasons to explore by neighbourhood. Use Kensington, Chinatown, Koreatown, Ossington, Scarborough or other districts according to your interests rather than chasing a generic best-restaurants list. In a four-day trip, two or three neighbourhood food experiences are more realistic than travelling across the city for every famous dish.

    For a multi-age group, a reliable breakfast and an easy lunch often matter more than one additional attraction. Keep water accessible, avoid waiting until everyone is exhausted to look for food and use meal stops as genuine rest rather than another item to complete quickly.

    Travelling with children

    For families, the best day is rarely the day with the most attractions. Alternate one focused cultural stop with outdoor time, food and a simple activity that does not require quiet concentration. Keep toilets, water and an easy route back to the hotel in mind before starting a long afternoon. A child-friendly plan should change the rhythm of the day rather than simply adding one children’s attraction to an adult schedule.

    Choose one activity each day that allows movement and does not depend on perfect behaviour: a park, ferry, market, viewpoint, waterfront or short ride can reset the group after a museum or historic interior. Keep the most demanding attraction early in the day when attention and energy are usually higher.

    Travelling at a slower pace or as a senior

    For older travellers or anyone who prefers a slower pace, reduce transitions before removing the highlights. A central base, one direct transfer and a shorter walking route can preserve the most memorable parts of the trip far better than trying to keep the same checklist with longer rest breaks. Check lifts, stairs, cobbles and seating at accommodation and major attractions before booking.

    Use public transport, taxis or boats to remove the least interesting walking rather than replacing the whole experience with vehicle transfers. The goal is to preserve the best streets, viewpoints and neighbourhoods while cutting out the tiring connections between them.

    Budget: where the money really goes

    Compare the total cost of a day rather than the price of one ticket. A cheaper hotel can become expensive after repeated taxis and long transfers, while a well-located room can reduce both transport costs and fatigue. Build the budget around accommodation, the few major paid attractions you genuinely value, food, local transport and one contingency reserve instead of trying to estimate every coffee in advance.

    City passes and transport passes only save money when they match the itinerary you would choose anyway. Do not add attractions simply to justify a pass. Compare the normal cost of your actual plan, then decide whether a bundled product improves convenience as well as price.

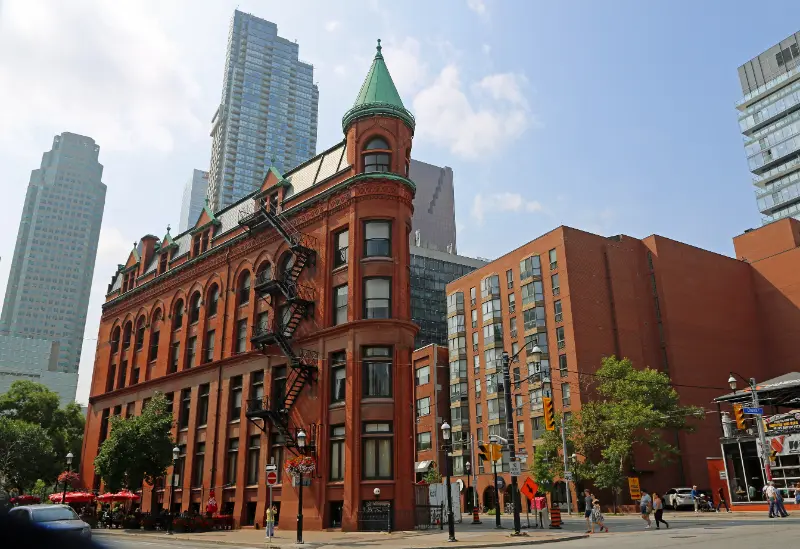
    Gooderham Flatiron Building Toronto Ontario Canada

    Weather fallback plan

    A useful weather fallback is not a random list of indoor attractions. It is one realistic substitute that fits the same area and does not damage the following day. Keep at least one museum, market, neighbourhood or café block movable, and recheck local forecasts shortly before each outdoor-heavy day. Climate averages are useful for packing, but they cannot promise the conditions on your dates.

    A flexible final day is especially useful because it can absorb an attraction missed earlier, become a rest block or take advantage of unexpectedly good conditions. This is more valuable than scheduling four equally rigid days and hoping every forecast and transport connection behaves perfectly.

    Connectivity, cash and small practical details

    Save the hotel address, tickets, passport or identity details, insurance information and the next transfer outside your email app. Offline access matters most when the network is weak, the battery is low or you are trying to solve a delay. Carry a small power bank, keep medication in your day bag and confirm the final public-transport service before a late evening far from the hotel.

    Use cards, cash and digital tickets according to local practice, but keep at least one backup payment method separate from the main wallet. Do not let a phone become the only copy of every booking, address and document needed to continue the trip.

    What to pack

    Bring comfortable shoes, a weather layer suitable for the season and sun or rain protection for waterfront days. Winter requires serious cold-weather clothing, including footwear that handles slush. In summer, carry water and a light layer for heavily air-conditioned interiors.

    A small day bag should hold water, medication, sun or rain protection and the layer you are most likely to need. The goal is not to carry everything; it is to avoid having the useful items locked in a suitcase when conditions change.

    Common mistakes to avoid

    • Treating Niagara Falls as a quick side trip squeezed between Toronto attractions.
    • Renting a car for downtown sightseeing and spending time on parking.
    • Crossing the city several times in one day for restaurants or isolated attractions.
    • Fixing the islands to a poor-weather day with no fallback.
    • Assuming neighbourhoods in the wider GTA are close simply because they share the Toronto name in casual conversation.

    Responsible travel and local etiquette

    Treat the destination as a real place rather than a stage built for visitors. Follow staff instructions, keep residential areas passable, use bins and public transport normally, and spend with businesses that add genuine local value. In religious, memorial or residential spaces, adapt to the setting instead of expecting the setting to adapt to sightseeing.

    Popular destinations function better when visitors spread some spending beyond the most photographed streets, avoid blocking narrow passages and respect the purpose of religious, memorial and residential spaces. Small decisions about timing and behaviour often improve the experience for the traveller as well.

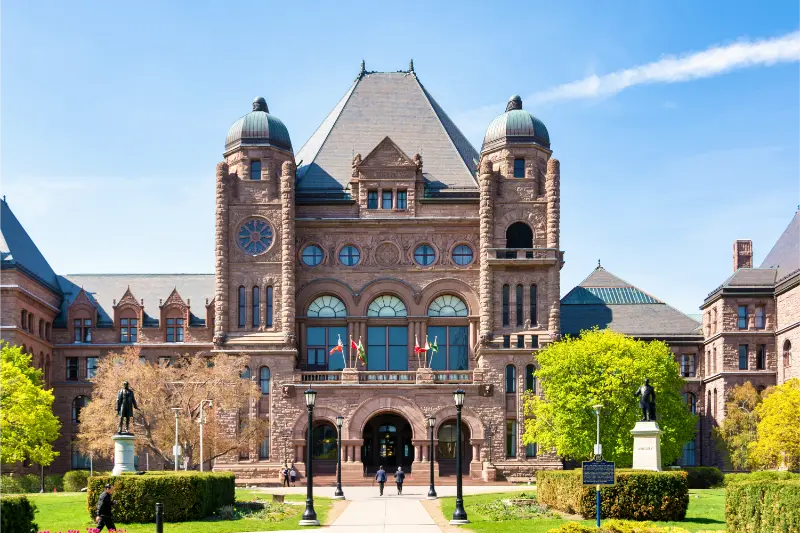
    Ontario Legislative Building Queens Park Toronto Canada

    If you have less or more time

    With two days, focus on downtown, waterfront, one museum and one neighbourhood. Three days adds the islands or a broader west-side day. With five or six days, add more neighbourhoods or Niagara as a properly planned separate day rather than reducing Toronto itself to a stopover.

    Extra days are most useful when they reduce pressure. Before adding another distant stop, ask whether the trip improves more by staying in the same place, repeating a favourite neighbourhood, waiting for better weather or enjoying a slow morning without watching the clock.

    How to choose between similar experiences

    Choose the Toronto Islands for skyline views and a relaxed outdoor day; choose a museum-heavy day when weather is poor. Choose downtown for maximum convenience and the Annex or Queen West when evening neighbourhood character matters more. Niagara belongs in the wider Ontario itinerary, not automatically inside a short Toronto city break.

    When two options offer a similar experience, choose the one that fits the geography and energy of the day. The extra hour of transfer rarely creates an extra hour of enjoyment, especially in heat, traffic, rough water or after a long museum morning.

    Safety and decision-making on the day

    The most useful safety habit is situational awareness rather than anxiety. Keep valuables controlled in crowded transport and tourist zones, use official or clearly identified transport, and avoid walking while focused on a phone at road crossings. Local warnings, attraction staff and transport operators have more value than an itinerary written months earlier, so change the plan when conditions deteriorate.

    Set a practical turnaround time for long walks, excursions and transfer days. When conditions deteriorate, change the plan rather than trying to complete the original checklist. A missed secondary sight is cheaper than a missed flight, unsafe walk or exhausted final day.

    Useful official and planning resources

    Opening hours, transport schedules, fees, access rules and visitor procedures change more often than the basic geography. Recheck the sources below shortly before departure.

    Final planning checklist

    • Confirm passport, visa, transit and health requirements for your nationality.
    • Reserve the transport, permit or timed entry that controls the rest of the itinerary.
    • Check how luggage moves between airport, station, ferry, road transfer and accommodation.
    • Download offline maps and save key tickets outside your email app.
    • Recheck weather, road, sea, trail or attraction notices before each critical day.
    • Keep at least one half-day that can absorb a delay or become simple rest.
    • Leave a generous buffer before international flights and other costly connections.

    A good city break should feel as though you understood how the place fits together, not merely that you collected its famous names. Keep the fixed reservations that matter, group the rest by geography and remove anything that creates more transit than experience. The result is usually more memorable than the most ambitious version of the same trip.

  • Vancouver Island in 9 Days: Victoria, Tofino and Cowichan Without Driving to the Far North

    Vancouver Island in 9 Days: Victoria, Tofino and Cowichan Without Driving to the Far North

    Vancouver Island is much larger than many first-time visitors expect. Victoria and Tofino look close on a provincial map, but mountain roads, ferry logistics and scenic stops turn the island into a real road trip rather than a city break.

    This nine-day route uses Victoria, Tofino/Ucluelet and one central/southeast island base such as Cowichan or Nanaimo. It deliberately leaves Campbell River and the far north for another trip.

    The planning principle is simple: do not arrive by ferry or long-haul flight and immediately drive across the island. Give Victoria real time, make the west-coast transfer its own day and keep Pacific weather flexible.

    Quick trip summary

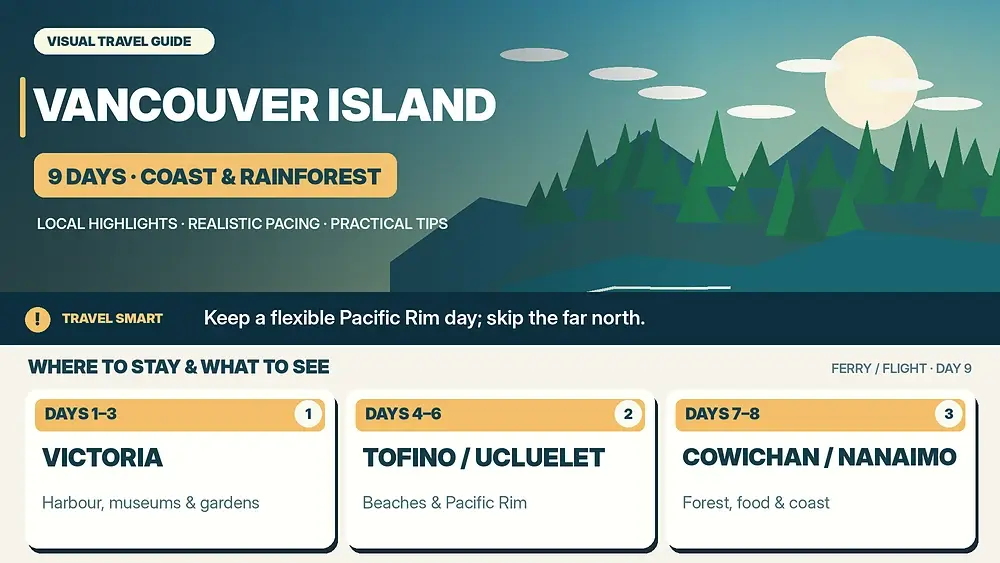
    • 3 nights Victoria, 3 nights Tofino/Ucluelet, 2 nights Cowichan/Nanaimo, Day 9 departure.
    • Rent a car after Victoria unless arrival logistics require one.
    • Treat the drive to Tofino as a real travel day.
    • Keep one Pacific Rim day flexible.
    • Do not add the far north.

    Why this route works

    Victoria is a complete city destination and the easiest place to recover from ferry or flight travel.

    Tofino/Ucluelet is the dramatic Pacific section, but weather and road time make three nights a sensible minimum.

    A central/southeast final base breaks the return journey and removes the temptation to drive directly from Tofino to a flight.

    A realistic itinerary at a glance

    Days Base Main focus
    1–3 Victoria Harbour, museums and city/garden day
    4–6 Tofino / Ucluelet Pacific Rim, beaches, rainforest and wildlife
    7–8 Cowichan / Nanaimo Forest, food, coast and return positioning
    9 Departure Ferry or airport

    Day-by-day plan

    Day 1: Victoria arrival

    Stay near the harbour or a walkable district and keep the first day to orientation, dinner and waterfront time.

    Day 2: Victoria properly

    Use heritage, museums, harbour and neighbourhoods. Avoid using the city only as a sleeping place before Tofino.

    Day 3: Garden or local coast day

    Choose Butchart Gardens, a whale/wildlife trip with a reputable operator, or another peninsula outing.

    Day 4: Drive to Tofino/Ucluelet

    Make the west-coast crossing the main event. Stop for food and one forest/scenic break rather than filling every hour.

    Day 5: Pacific Rim day

    Use Long Beach and rainforest trails at a comfortable pace. Waterproof clothing matters more than chasing a perfect forecast.

    Day 6: Wildlife, surf or flexible nature day

    Choose a guided wildlife/boat outing, surf lesson, another trail or a slow day.

    Day 7: Tofino to Cowichan/Nanaimo

    Drive east and stop selectively. A central island night removes departure stress.

    Day 8: Cowichan/Nanaimo area

    Use forests, food/wine, cultural experiences or a slower waterfront day.

    Day 9: Departure

    Continue to the ferry or airport with enough margin for traffic and check-in.

    Where to stay and how many hotel changes to make

    Victoria’s Inner Harbour is useful for a car-light start; in Tofino/Ucluelet choose walkable town access or a beach resort deliberately; the last base should simplify departure.

    For Vancouver Island, location matters more than a small difference in nightly rate. A hotel that removes repeated transfers usually adds more value than a prettier property in the wrong part of the route.

    Illustrated Vancouver Island route through Victoria, the Pacific Rim and Cowichan or Nanaimo

    Read recent guest reviews for practical details that booking photos rarely show: stairs, lift size, road noise, parking access, breakfast hours and the final walk from transport.

    Transport: what is worth planning in advance

    A rental car is highly useful outside Victoria, but the west-coast road is a real mountain/forest drive, not a casual city commute.

    Measure every move door to door rather than by the headline timetable. Checkout, terminal access, waiting, luggage and the final connection can turn a short journey into half a day.

    Use inflexible tickets only when the saving is meaningful and the day is genuinely fixed. Weather-sensitive coast, mountain, wildlife and boat plans benefit from flexibility.

    Food and daily rhythm

    Victoria has the broadest dining while Tofino/Ucluelet highlights seafood and seasonal west-coast food; book popular dinners early in peak season.

    Use meals to control the rhythm of the day. A long regional lunch can be an experience and a recovery period, especially after hiking, museums, wildlife outings or early starts.

    Do not make every meal another attraction. Mix local specialties with simple food so that the destination, not the restaurant schedule, remains the centre of the trip.

    Families, children and older travellers

    Beaches, forests, ferries and wildlife give children excellent variety. Older travellers should ask about boat boarding, trail surfaces and long drive tolerance.

    For multigenerational travel, the useful pace is the one at which the least mobile member still enjoys the day. That normally produces a better shared trip for everyone.

    When accessibility matters, ask specific questions about steps, trail surfaces, boat boarding, lift dimensions and vehicle access rather than relying on a generic label.

    Budget: where the money really goes

    Rental cars, peak-summer Tofino lodging and wildlife tours are the biggest variables.

    Compare total trip cost rather than headline prices. Parking, transfers, luggage, park transport, tours and time lost reaching a remote hotel can erase an apparent saving.

    Keep a contingency rather than allocating every day to the last euro or dollar. Weather, a changed ferry, a taxi or an extra night can appear even on a carefully planned journey.

    Best time to go

    Summer is easiest for daylight and broad services; spring and autumn bring lower crowds and more variable Pacific weather.

    Shoulder season often balances weather, demand and room prices well, but ferries, mountain services, wildlife excursions and rural restaurants may run less frequently.

    Heat, rain, snow, wind and daylight should change the order of your day. Use the most comfortable hours for exposed outdoor sights and keep lower-effort alternatives available.

    Comfort, accessibility and realistic pacing

    The west-coast transfer is isolated as its own day, and the final central-island stay reduces departure stress.

    Travel fatigue compounds. One difficult transfer can reduce the quality of the following two days, which is why this itinerary avoids one-night bases unless geography genuinely requires them.

    A free half-day is not wasted time. It is insurance for weather, laundry, a delayed service, a tired child or a place you discover only after arriving.

    Small decisions that improve the trip

    Give Victoria three nights

    It is worth a real city stay.

    Stay three nights on the west coast

    Weather and boat plans need space.

    Break the return journey

    A central island night makes the final day calmer.

    What I would leave out on this length of trip

    Leave Campbell River, Telegraph Cove and the far north for another trip.

    Skip changing between Tofino and Ucluelet hotels.

    Mistakes that make this trip harder than it needs to be

    • Driving to Tofino immediately after a long travel day.
    • Giving the west coast one night.
    • Booking every marine activity with no backup.
    • Underestimating driving distances.
    • Choosing a remote hotel without dinner planning.
    • Driving from Tofino directly to a tight ferry or flight.

    How I would adapt the itinerary

    With six days, use Victoria plus Tofino/Ucluelet only.

    With twelve days, add Campbell River or the north with proper multi-night time.

    Before booking

    • Reserve peak-season west-coast lodging.
    • Review ferry and road status.
    • Pack waterproof layers.
    • Choose reputable wildlife operators.
    • Protect the final departure connection.

    Practical questions

    Do I need a car?

    Not for central Victoria, but yes for a flexible west-coast road trip.

    Tofino or Ucluelet?

    Tofino has more visitor services; Ucluelet is quieter and also excellent.

    Is nine days enough?

    Yes for the south and west coast, not the whole island.

    Final thoughts

    Vancouver Island is best understood as a large island with several travel regions, not a quick extension of Vancouver city.

    Victoria, the Pacific Rim and one central return base create a nine-day journey with city, rainforest and ocean without a punishing loop.

    How to keep this itinerary resilient

    Keep Day 6 flexible so a cancelled boat or heavy rain can be absorbed without losing the west-coast experience.

    Check the live ferry and road situation before the final drive, especially on peak summer weekends.

    Who this route suits best

    This route is designed for travellers who prefer depth over collecting places. It keeps hotel changes low, protects flexible time and assumes that a good meal, an unexpectedly interesting neighbourhood or a slower morning can be as valuable as another attraction. That makes it particularly suitable for first-time visitors, couples, families and multigenerational groups.

    More energetic travellers can add a longer hike, an extra museum or a second excursion on the flexible days. Travellers who prefer an easier pace can remove those extras and still keep the core journey intact. Before booking, identify the two or three experiences that would genuinely disappoint you to miss; those are the ones to reserve or protect first.

    What to book early and what can wait

    Book the elements with genuinely limited capacity first: high-demand accommodation, protected-area access, popular trains or ferries, and any guided experience that is central to the trip. Leave ordinary meals, minor attractions and weather-dependent outdoor activities more flexible whenever possible. This prevents the itinerary from becoming a chain of reservations that forces you to ignore how the destination actually feels on the day.

    One week before departure, check the official transport or park information again. The evening before each major move, confirm departure points, opening status and the hotel address. That small routine catches most avoidable travel problems before they become expensive or tiring.

  • Colombia in 10 Days: Bogotá, Medellín and Cartagena With Flights That Actually Save Time

    Colombia in 10 Days: Bogotá, Medellín and Cartagena With Flights That Actually Save Time

    Colombia is large enough that a ten-day trip needs a clear transport strategy. Bogotá, Medellín and Cartagena form a classic first-time triangle because each feels different, and short domestic flights can save entire days compared with overland travel. The route only works, however, if you accept that airport time is part of the trip.

    Bogotá brings altitude, museums and Andean weather; Medellín adds spring-like temperatures and a valley city shaped by public transport and neighbourhood change; Cartagena shifts the trip to Caribbean heat and colonial streets. Three bases are enough.

    Travellers who want nature more than cities might prefer our Costa Rica itinerary or Peru itinerary. Colombia’s first-trip strength is the contrast between urban regions.

    Quick trip summary

    • Use 3 nights Bogotá, 3 nights Medellín and 3 nights Cartagena.
    • Fly the long intercity legs; road journeys are much slower than map distance suggests.
    • Give Bogotá an easy first day because of altitude.
    • In Cartagena, plan around heat: early morning and evening outside, slower midday.
    • Choose neighbourhoods carefully and use current local safety advice rather than relying on old reputations.

    Why this city triangle is realistic

    Each city offers a distinct climate and travel style, so the flights buy genuine variety rather than moving you between similar places. Bogotá and Medellín are separated by mountains; Cartagena sits on the Caribbean coast.

    The route also gives you a natural energy curve: cooler Bogotá for culture, Medellín for mixed city/outdoor days, then Cartagena for a slower finish.

    The official Colombia Travel site can help with current destination information. For neighbourhood-level safety and transport choices, use recent local guidance because conditions can change.

    A realistic itinerary at a glance

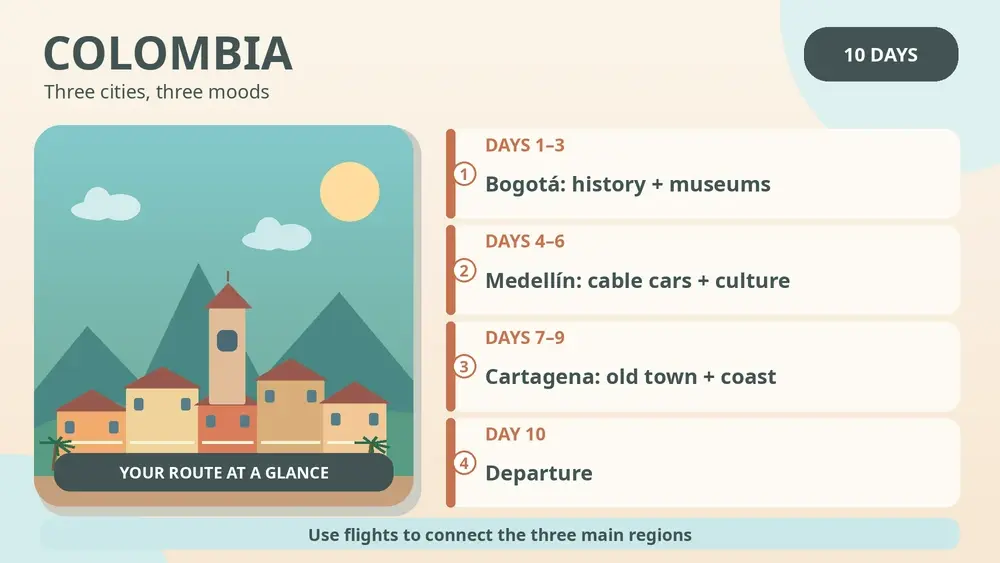
    DaysBaseMain focus
    1–3BogotáLa Candelaria, museums and one viewpoint/neighbourhood day
    4–6MedellínCity, cable cars and one regional excursion
    7–9CartagenaWalled city, Getsemaní and optional islands
    10DepartureFly home or connect onward

    Day-by-day plan

    Day 1: Bogotá arrival

    Bogotá sits at high elevation, so use arrival day for a short walk, an early meal and sleep. Staying in a neighbourhood with restaurants nearby reduces the need for late transport after a long flight.

    Day 2: Historic Bogotá

    Explore La Candelaria and choose one major museum such as the Gold Museum rather than trying to see every collection. Weather can shift quickly, so carry a light waterproof layer.

    If you go to Monserrate, treat visibility as weather-dependent and avoid forcing the climb if altitude affects you.

    Day 3: Bogotá beyond the historic core

    Use the day for a food experience, Chapinero/Zona G, Usaquén or another neighbourhood according to your interests. This is also your buffer if Day 2 weather was poor.

    Day 4: Fly to Medellín

    A morning or midday flight works well. The airport is outside the central valley, so include the ground transfer in your planning.

    After check-in, keep the first Medellín evening near your base.

    Day 5: Medellín city day

    Use the metro/cable-car system to understand the geography and visit one or two areas in depth. Guided context can be especially valuable in places where visitors are interested in the city’s social transformation.

    Avoid “dark tourism” experiences that reduce complex communities to crime stories. Choose guides who centre residents and present-day life.

    Day 6: Day trip or slower city day

    Guatapé is a popular full day, but the drive and climb can be tiring. Choose it if colourful towns and reservoir views appeal to you; otherwise spend more time in Medellín’s museums, gardens and neighbourhoods.

    Day 7: Fly to Cartagena

    Arrive and adapt to the heat. Walk the walled city after the strongest sun has eased, then have dinner nearby.

    Cartagena is compact but humid, and the climate changes how far you want to walk.

    Day 8: Walled city and Getsemaní

    Start early, return to the hotel or a shaded lunch at midday, then go out again in late afternoon. This split-day rhythm is more comfortable than pushing through the heat.

    Take your time with streets, balconies, churches and plazas instead of turning the old city into a photo scavenger hunt.

    Day 9: Islands or a slow Cartagena day

    Choose a reputable boat trip if beaches are important. Sea conditions, transfer logistics and beach-club expectations vary, so understand exactly what the package includes.

    If you are tired of transfers, stay in Cartagena. A slow final day can be more satisfying than another early pickup.

    Day 10: Departure

    Allow traffic and airport time. If connecting internationally on separate tickets, build more margin than the airline minimum.

    Where to stay and how many hotel changes to make

    In Bogotá, Chapinero/Zona G, Parque 93 and parts of La Candelaria offer very different evenings; choose based on your activities and current local advice.

    In Medellín, El Poblado is convenient for first-timers but not the only option. Laureles offers a flatter, more residential feel.

    Illustrated itinerary linking Bogotá, Medellín and Cartagena

    In Cartagena, sleeping inside the walled city or Getsemaní makes evening walks easy, while Bocagrande offers modern hotels and a different atmosphere.

    Transport: what is worth booking in advance

    Domestic flights are worth using, but airport transfers are not trivial. Bogotá traffic and Medellín’s out-of-town airport can turn a “one-hour flight” into half a day.

    Use app-based or authorised transport according to current local practice, especially at night and with luggage. If your itinerary adds protected natural areas later, verify rules through Colombia National Natural Parks rather than assuming city-tour advice applies nationwide.

    Do not rent a car for this three-city route. It adds parking, security and navigation issues without improving the main transfers.

    Food and daily rhythm

    Each city has a different food scene. Bogotá is strong for contemporary Colombian cooking and markets; Medellín for Antioquian traditions and modern restaurants; Cartagena for Caribbean seafood and tropical flavours.

    In Cartagena tourist zones, menu prices can vary widely. Check prices before ordering and be cautious with unsolicited beach services or add-ons.

    Families, children and older travellers

    Families should keep Bogotá’s first day light because altitude affects adults and children unpredictably. Medellín’s parks and cable cars can break up museum time.

    Older travellers may prefer Laureles in Medellín for flatter streets and should use taxis strategically in Bogotá. Cartagena’s heat makes midday rest especially valuable.

    A hotel pool in Cartagena is not a frivolous upgrade for a multigenerational group—it can be the difference between an enjoyable afternoon and heat fatigue.

    Budget: where the money really goes

    Domestic flights are often reasonably priced when booked ahead, but checked bags and seat fees can change the total. Compare the complete fare.

    Cartagena is usually the most expensive stop for accommodation and tourism services. Bogotá and Medellín offer broader price ranges.

    Budget for airport transfers in all three cities. They are part of the transport cost, not a minor extra.

    Best time to go

    Colombia’s seasons are driven more by altitude and rainfall than by a simple four-season pattern. Bogotá can be cool and wet while Cartagena is hot on the same day.

    Pack for multiple climates: light layers and rain protection for Bogotá, warmer conditions in Medellín, breathable clothing and strong sun protection for Cartagena.

    Holiday periods can raise domestic-flight prices and crowd coastal destinations.

    Three cities, three different ways to plan a day

    Bogotá works best when you group museums and historic streets, then use a separate day for northern neighbourhoods or a food experience. Medellín is more linear because the metro and cable-car network can shape the day, but hills still make short map distances deceptive. Cartagena is the opposite: distances are small, yet heat and humidity make the timing of those kilometres more important than the number.

    That means the same daily schedule should not be copied across all three stops. In Bogotá, start a little later if you are still adapting to altitude. In Medellín, use the morning for a neighbourhood or excursion and the afternoon for a museum or garden. In Cartagena, start early, retreat during the strongest heat and return outside near sunset. Adapting the clock is one of the simplest ways to make the trip feel less tiring.

    It is also worth deciding how much guided context you want. Bogotá and Medellín both have histories that are easy to misunderstand through headlines alone. A strong local guide can add value, but choose experiences that explain communities rather than turning poverty, conflict or crime into spectacle. The quality of the interpretation matters more than the number of stops on the tour.

    Mistakes that make this trip harder than it needs to be

    • Taking buses between all three cities to save money on a ten-day trip.
    • Planning a heavy Bogotá day immediately after a long-haul flight.
    • Choosing Medellín experiences that sensationalise violence rather than explain the city.
    • Walking Cartagena through the hottest midday hours every day.
    • Booking an island trip without checking what is included.
    • Using neighbourhood advice from many years ago as if cities do not change.

    How I would adapt the itinerary

    With seven days, choose Bogotá plus Medellín or Medellín plus Cartagena. With fourteen, add the coffee region or a slower Caribbean stop rather than extending every city equally.

    Travellers who dislike airports should focus on one region—Bogotá plus the coffee zone, or Cartagena plus nearby Caribbean destinations—rather than forcing the classic triangle.

    Before booking the trip

    • Check recent neighbourhood and transport guidance before departure.
    • Compare domestic airfares including bags.
    • Plan for three different climates.
    • Use a midday-rest strategy in Cartagena.
    • Protect separate-ticket international connections with extra time.

    Ten days in Colombia can show remarkable variety, but only because flights replace very long road journeys. Once you accept the airport time and keep the city days geographically simple, the route feels far more spacious than it looks on paper.

  • Fukuoka in 4 Days: Hakata, Yatai and Waterfront Without Rushing Through Kyushu

    Fukuoka in 4 Days: Hakata, Yatai and Waterfront Without Rushing Through Kyushu

    Fukuoka Fukuoka works beautifully as both a city break and the gateway to Kyushu, but those two roles can compete. Travellers who rush straight from airport to shinkansen miss one of Japan’s easiest large cities for food, neighbourhood walking and waterfront time. Four days lets you understand Hakata and Tenjin, eat at a yatai without making it the only evening plan, explore Ohori and the old-town side, and still keep one flexible half-day for the coast or a nearby excursion.

    If this destination is part of a wider trip, compare the pacing with Kyushu in 10 Days by Train: Fukuoka, Nagasaki, Kumamoto and Kagoshima Without Renting a Car. This city guide adds local depth; the wider itinerary is better for deciding how the stop fits into the rest of the journey.

    Quick trip summary

    Ideal stay4 days for a first trip
    Best approachGroup each day by geography and keep one flexible block for weather, energy or closures
    Transport strategyUse the most predictable transport for long moves, then explore each district locally
    Who it suitsFirst-time visitors, couples, solo travellers, families and slower-paced travellers
    Most common mistakeAdding another distant attraction because it looks close on a map

    How to plan the trip before booking

    Start by separating the itinerary into fixed reservations, weather-sensitive experiences and flexible neighbourhood time. Fixed reservations should be the things that can genuinely sell out or determine the rest of the day. Weather-sensitive blocks should stay movable until the forecast becomes useful. Everything else should be grouped geographically so that a late breakfast, a long museum visit or an unexpected queue does not break the schedule.

    A good 4-day trip does not look completely full on paper. Most days need one main anchor, one secondary experience and enough open time for a meal, rest, shopping, a viewpoint or something you discover after arrival. That unused space is not wasted time; it is what allows the itinerary to survive real travel.

    Where to stay: choose location before hotel style

    BaseWhy choose it
    Hakata StationBest for rail-heavy itineraries, airport access and early departures around Kyushu.
    TenjinExcellent for shopping, dining and nightlife, with strong subway connections and a more urban evening atmosphere.
    Nakasu-KawabataCentral between Hakata and Tenjin, useful for river walks, yatai access and cultural sights.
    Ohori / RopponmatsuQuieter and greener, good for repeat visitors, families and travellers who value park access over station convenience.

    A beautiful room is not automatically a useful base. Map the first activity of the morning, the likely dinner area and the route you will use on departure day. If the hotel creates two unnecessary transfers every day, the hidden cost is time and energy as well as money. For a short trip, location usually matters more than a larger room several kilometres away.

    A realistic 4-day itinerary

    Day 1: Hakata Old Town and a gentle first evening

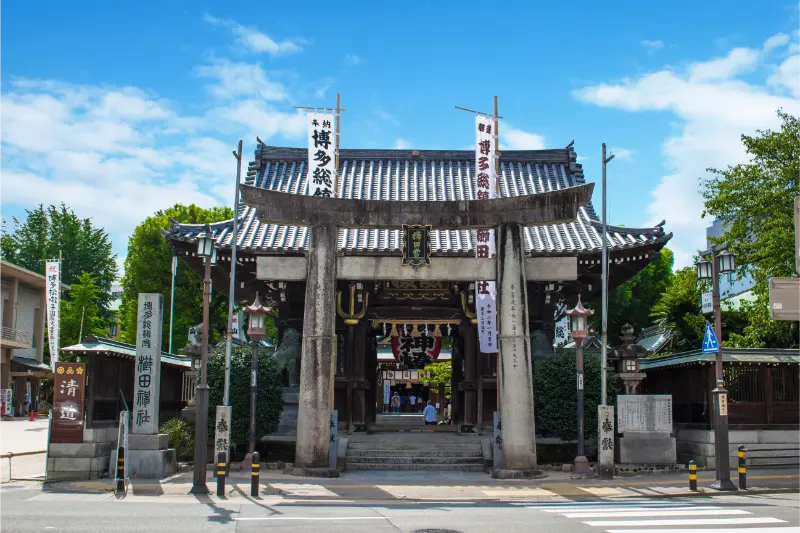
    Start near Hakata with temples, traditional streets and an unhurried orientation. Fukuoka Airport is unusually close to the centre, but that convenience is not a reason to overfill arrival day. Move toward Nakasu or Tenjin in the evening and choose one yatai area, remembering that stalls are small, weather-dependent and not the only place to eat well.

    Day 2: Ohori Park, castle ruins and art

    Spend the morning around Ohori Park and the adjacent castle-ruins area. Add the Fukuoka Art Museum or another cultural stop if it matches your interests, then continue through Ropponmatsu or back toward Tenjin. This day works particularly well after a late food-focused evening because it requires fewer complicated transfers.

    Day 3: Momochi waterfront, city museum and western districts

    Use public transport toward Momochi for the waterfront and Fukuoka City Museum. Depending on season and energy, continue farther west or return through Tenjin for shopping and food. Avoid turning the day into a long chain of isolated photo stops: the value is in seeing how a compact Japanese city meets the coast.

    Day 4: Itoshima, Dazaifu or a flexible city day

    Choose one half- or full-day extension. Dazaifu offers major shrine and cultural interest, while Itoshima suits travellers prioritising coast and cafés. If your wider Kyushu itinerary already contains multiple transfers, stay in Fukuoka instead and use the day for markets, neighbourhood food and anything weather displaced.

    Getting from the airport or station and handling arrival day

    Fukuoka Airport is close to central districts and connected by subway, making arrival simpler than in many large cities. International and domestic terminal arrangements differ, so check your actual route rather than assuming the same station or shuttle flow. Hakata Station is the key rail hub for shinkansen and Kyushu connections.

    Arrival day should carry less risk than the rest of the trip. Keep the first reservation easy to cancel, know how you will reach the hotel before landing and save the address offline. If a flight or train is delayed, skip a secondary sight instead of beginning the trip by rushing across an unfamiliar city with luggage.

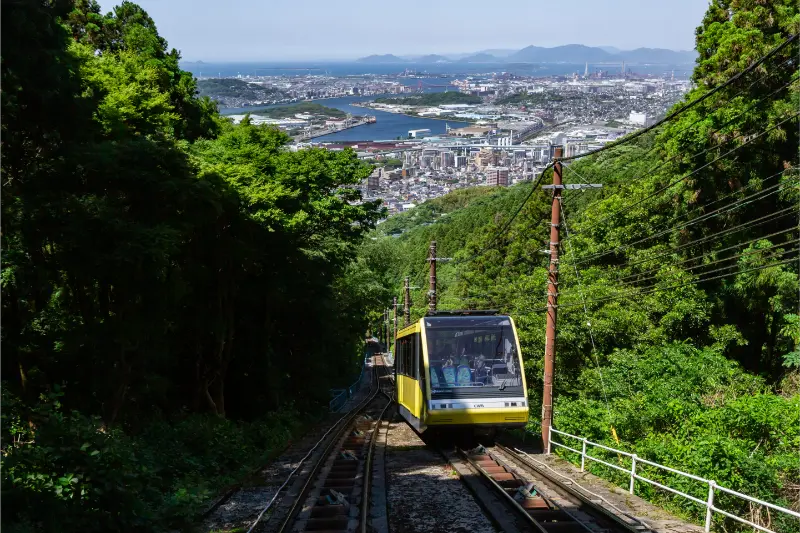
    Mount Sarakura Yellow Cable Car Overlooking Kitakyushu Fukuoka Japan

    Getting around without wasting the day

    Subway, buses and walking cover most city sightseeing. Because the centre is compact, do not buy a pass automatically; compare the actual rides in your itinerary. Taxis can be useful for families or late evenings, but most first-time visitors do not need a rental car unless continuing into rural Kyushu.

    When comparing two routes, include the walk to the stop, waiting time, transfers and the final approach. The route with fewer changes is often better for families, luggage, older travellers and anyone visiting in difficult weather. Use transport to remove unrewarding distance, then spend walking energy on streets, viewpoints, markets and museums that actually define Fukuoka.

    Best time to visit and how the season changes the itinerary

    Spring and autumn are comfortable for walking, summer is hot and humid with festival energy, and winter is generally milder than northern Japan but still cool. Rain can affect outdoor food stalls and coastal plans, so keep the yatai evening and excursion flexible.

    Season changes more than temperature. It affects daylight, hotel prices, operating hours, event calendars and how tiring a normal sightseeing day feels. If your dates are fixed, adapt the daily rhythm rather than forcing an itinerary designed for another month.

    What to book first

    Reserve only the parts that genuinely control the itinerary: a high-demand attraction, a limited-capacity excursion, a special transport product or a restaurant that is central to the trip. Avoid pre-booking every hour. The more fixed reservations you add, the harder it becomes to react to weather, tiredness or a neighbourhood you unexpectedly want to explore for longer.

    Recheck opening days, reservation procedures, transport notices and access rules shortly before departure. These operational details change faster than the basic geography of a good itinerary. When an official source conflicts with an old screenshot, saved social post or outdated blog, use the current official information.

    Food strategy: eat well without crossing the city for every meal

    Fukuoka’s food culture deserves deliberate time: Hakata ramen, motsunabe, gomasaba where appropriate, yakitori and yatai all have a place. Yatai are social and atmospheric but small; groups may need patience. Use them as one experience, not as proof that every dinner must happen outdoors.

    For a multi-age group, a reliable breakfast and an easy lunch often matter more than one additional attraction. Use meals as genuine rest and part of the travel experience. A restaurant that is ten minutes from where you already are can be a better choice than a famous address that requires forty minutes of extra transport each way.

    Travelling with children

    The compact centre, short airport transfer and parks make Fukuoka family-friendly. Use Ohori Park and waterfront areas between more structured cultural stops. Yatai seating can be tight for very young children, so keep an ordinary restaurant alternative nearby.

    With children, reduce transitions before reducing the highlights. Alternate one structured visit with something that allows movement, and always know the easiest route back to the hotel before starting a long afternoon. A flexible snack and rest stop can protect the whole day better than another timed ticket.

    Travelling at a slower pace or as a senior

    Choose a base near a subway station or Hakata Station and use transport to remove long summer walks. Ohori and the central districts can be explored at a slow pace with frequent seating. Avoid building the final day around a distant excursion if an early train or flight follows.

    Slower travel often improves a destination itinerary because it forces better geographic choices. Use lifts, public transport, taxis or door-to-door transfers to remove unrewarding distance, then spend walking energy where the surroundings are worth noticing. Keep a seated break in the middle of any day with significant climbing, heat or museum time.

    Budget planning

    Build the budget in layers: accommodation, arrival and departure transport, local movement, fixed attractions or excursions, food and a reserve for spontaneous changes. The cheapest hotel is not always the cheapest trip if it creates two extra rides every day. Likewise, a city or transport pass is worthwhile only when its zones and included attractions match the itinerary you will actually follow.

    Keep a separate allowance for weather-driven changes. A taxi during heavy rain, a last-minute indoor attraction, a shuttle or a different departure can protect a travel day without representing a planning failure. Saving money is useful; sacrificing the main experience to avoid a modest practical cost often is not.

    Weather backup plan

    Rainy or very hot periods are a good reason to move museums, shopping arcades and food experiences forward. If an outdoor stall area is uncomfortable, eat indoors and return another evening. Coastal and island options should be treated as weather-sensitive rather than fixed promises.

    Nanzoin Temple Reclining Buddha Fukuoka Prefecture Japan

    Do not read only the temperature. Wind, visibility, rain intensity, humidity, sea state, snow and daylight can change the quality of an experience much more than a few degrees. The best itineraries have at least one outdoor block that can trade places with an indoor or neighbourhood day.

    Connectivity, payments and small practical details

    Download an offline map before arrival, save the accommodation address and keep screenshots or offline copies of critical tickets. A local data plan or eSIM can simplify live transport information where available, but do not depend on a phone battery for every part of the day. Carry a small power bank on long excursion days if navigation and tickets are digital.

    Payment habits differ by destination and smaller businesses may work differently from hotels. Keep a backup payment method and a modest amount of local currency when useful. Check whether transport uses contactless bank cards, a dedicated travel card, app tickets or paper validation rather than assuming the system matches another city.

    Accessibility and mobility planning

    Accessibility can vary greatly between modern transport, historic streets, older hotels and individual attractions. If step-free access is important, verify the exact station exit, hotel entrance and attraction route instead of relying on a general claim that a city is accessible. Historic centres may have cobbles, steep lanes or narrow pavements even when major museums provide lifts.

    Travellers using wheelchairs, mobility aids or strollers should build in more time for transfers and keep an alternative route for the most important day. A hotel near the right transport line can remove more difficulty than any sightseeing pass.

    What to pack

    Comfortable walking shoes, a small day bag, sun protection and weather layers matter more than extra outfits. Add any medication you may need during the day and a refillable bottle where practical. Pack for the conditions at the destination rather than the temperature outside your hotel, and keep a light layer for strongly air-conditioned vehicles or indoor spaces.

    Common mistakes to avoid

    • Leaving Fukuoka immediately because it looks like only a transport hub.
    • Treating yatai as the only authentic way to eat in the city.
    • Buying transport passes before counting the rides you will actually take.
    • Adding both Dazaifu and Itoshima to one short day without considering travel time.
    • Scheduling a late food crawl before an early shinkansen departure.

    Responsible travel and local etiquette

    Treat residential streets, markets, places of worship, memorial sites and working neighbourhoods as real parts of a community rather than scenery. Follow local instructions, keep entrances and pavements passable, ask before photographing people in sensitive settings and spend with local businesses when it fits naturally. Clothing, photography and behaviour expectations can change between religious, cultural and recreational spaces.

    In natural settings, stay within marked routes and respect closures even when another visitor appears to ignore them. Access rules often protect both visitors and the place itself. Wildlife should never be approached for a photograph, and weather or safety closures are not an invitation to find an unofficial route around a barrier.

    If you have less or more time

    With one day less, remove the most distant excursion or the day with the most transport rather than compressing every highlight. With one or two extra days, add neighbourhood depth, a slower museum block or a nearby excursion that offers something genuinely different. Extra time is most valuable when it lowers daily pressure, not when it simply adds another checklist.

    Safety and decision-making on the day

    Use ordinary situational awareness: keep valuables controlled in crowded places, use clearly identified transport and follow current local advice about specific streets, weather or transport hubs. Safety conditions can differ by neighbourhood and time of day, so official notices and recent local guidance are more useful than blanket claims that an entire destination is either “safe” or “unsafe”.

    Set a practical turnaround time for excursions and departure days. Missing a secondary attraction is cheaper than missing a flight, travelling exhausted late at night or forcing a route after conditions have changed. When a plan stops making sense, simplify it rather than trying to recover every item on the original list.

    Useful official and planning resources

    Opening hours, fees, transport schedules and access rules change more often than the overall itinerary. Recheck the official source shortly before departure.

    Final planning checklist

    • Confirm passport, visa, transit and health requirements for your nationality.
    • Reserve the attraction, tour or transport that controls the rest of the itinerary.
    • Save your accommodation address and first-day route offline.
    • Recheck weather, closures and transport notices before each critical day.
    • Keep at least one half-day that can absorb a delay or become simple rest.
    • Leave a generous buffer before flights and other costly connections.

    A strong trip to Fukuoka should feel as though you understood how the place fits together, not merely that you collected its famous names. Protect the reservations that matter, group the rest by geography and remove anything that creates more transit than experience.

  • Paying Abroad Without Unnecessary Fees: Cards, Cash, ATMs and Exchange Rates

    Paying Abroad Without Unnecessary Fees: Cards, Cash, ATMs and Exchange Rates

    A holiday budget can look reasonable at home and quietly grow more expensive abroad. The cause is not always inflation or overspending: exchange-rate markups, ATM charges, cash withdrawal fees and card conversion choices can add small costs to nearly every transaction. Different destinations also have different payment habits. A contactless card may be accepted at a capital city’s transit gate but not at a rural market, small guesthouse or local bus. The sensible approach is to carry more than one way to pay, understand the costs before departure and know how to recognize the currency choice offered on an ATM screen. This guide is designed for both first-time international travelers and experienced visitors who would rather use their money on the trip itself.

    Payment methodImportant limitation
    Debit card at ATMIssuer fee, cash limit and operator surcharge
    Credit card for purchasesForeign transaction fee and deposit rules
    CashTheft risk and need for small notes
    Backup cardStore independently from main wallet

    Learn the local currency before buying anything

    Start with the official currency of each destination and check whether tourists regularly use another currency in particular situations. An advertised price in dollars or euros is not necessarily the final amount charged to your account. Learn a rough mental exchange-rate reference using an established financial source, then refresh it before travel. Avoid memorizing a precise rate because market rates move; a workable estimate is enough to spot a price that is unexpectedly high. Look at typical costs for airport transport, local meals, transit tickets and small purchases. This helps you estimate an initial cash withdrawal without carrying more money than needed. For multi-country trips, note whether each border crossing involves a new currency, whether old banknotes can be exchanged and whether a small amount of local cash is necessary immediately after arrival.
    Understand what your card may charge

    Card costs have several layers. Your bank may apply a foreign transaction fee to purchases in another currency. Its exchange rate may differ from the reference rate you saw online. If you withdraw cash, the issuer may charge a cash withdrawal fee and possibly interest when a credit card is treated as a cash advance. An ATM operator can also add its own service charge. Check the card agreement or ask the issuer for the exact fee schedule, ideally with an example in a foreign currency. Do not assume that a card marketed for travel is fee-free in every situation: promotional limits, monthly withdrawal allowances and excluded currencies can apply. When two cards are available, compare their actual total cost rather than selecting the one with the most attractive name.

    Illustration of a traveler paying by card at an outdoor café

    Choose local currency when offered conversion

    At an ATM or card terminal you may see a question such as “Pay in your home currency?” This is usually a dynamic currency conversion offer, often called DCC. The provider offers to calculate the charge in your card’s billing currency using a rate and markup shown on the screen. In many situations declining the conversion and choosing the merchant’s local currency produces a better outcome because your card network and issuer handle the exchange instead. However, compare the actual terms of your card; the sensible choice depends on the full costs. The important point is that accepting DCC is optional, and the rate and added fees should be disclosed. Visa’s guidance explains that the merchant or ATM should not select the option for you. Keep the receipt when a terminal’s final amount differs from what you approved.

    Make ATMs work for you, not against you

    Withdraw cash from a reputable machine associated with a bank when practical, preferably during branch opening hours and in a place where you feel comfortable. Inspect the card slot and keypad for obvious tampering, cover your PIN and avoid people who offer unsolicited help. Confirm the operator fee before proceeding; cancelling and trying another machine may be worthwhile. Some ATMs display withdrawal limits lower than those your own bank allows, so plan accordingly. A few larger withdrawals can reduce fixed fees, but carrying all your holiday money in cash creates a different risk. For most travelers, withdrawing a manageable amount for several days is a reasonable compromise. Avoid using a credit card for cash unless you understand its cash-advance rules. Keep the card and cash separate when possible so one misplaced wallet does not eliminate both.

    Carry a backup that truly is independent

    Two cards from the same bank are helpful, but a bankwide outage or fraud block can still affect both. When possible, bring another payment method from a different issuer and network, and store it separately. A small emergency cash reserve can cover a taxi, pharmacy purchase or first night’s essentials if electronic payments fail. Do not make that reserve so large that losing it would ruin the trip. Keep the bank’s international support number outside your wallet and ensure you can sign in securely from another device. If you use mobile banking, check whether your security system requires SMS messages to a number that may not receive service abroad. Tell your bank about travel if its current fraud-prevention process recommends it, but do not assume a travel notification prevents every block.

    Airport exchange desks and change at the counter

    An airport currency exchange kiosk is convenient but may offer a rate or fee structure that is poor value. Compare the amount of local cash you receive after all commissions with the amount you would receive at a reputable city exchange service or ATM. Beware signs advertising “zero commission” when the cost is hidden in the exchange-rate spread. Always count money at the counter and take a receipt. Check the notes for damage and learn which denominations are practical for small purchases. In some destinations, paying a driver with a very large note may be difficult even when the fare is modest. If you need cash immediately upon landing, you can exchange just enough for the first transfer rather than committing the entire budget to the first counter you see.

    Plan payments for local transport and small businesses

    Before arrival, find out whether the airport train or bus accepts cards, requires a dedicated transit card or takes only cash. This detail matters at night, when staffed desks may be closed. Small businesses often prefer cash because payment terminals cost money or network service is unreliable. Respect clearly posted payment preferences and avoid assuming every seller will accept a contactless phone. For a family or group, one person paying all shared expenses can simplify the moment but make settlement awkward afterward. Agree who pays for hotels, tickets and daily meals, then track expenses in a simple shared note. For older travelers or people who need more time at a counter, preparing the expected amount before boarding or entering a queue can make transactions calmer and more comfortable.

    Protect yourself from overcharging and card misuse

    Read the amount on the terminal before tapping, especially when the screen is turned away from you. Where possible, keep the card in view instead of handing it to a stranger who walks off with it. Use established ticket sellers and official transport apps when available. Be cautious with unsolicited QR codes, payment links sent by messaging apps or last-minute requests to transfer a reservation deposit to an individual’s account. A real accommodation may communicate through a booking platform, but payment instructions that change unexpectedly are a reason to verify through a known number. Activate transaction alerts and review charges during the trip. If an unauthorized payment appears, contact the issuer promptly and follow its dispute process; take screenshots of suspicious messages and retain booking records.

    Watch out for deposit holds

    Hotels and car rental companies may place a temporary authorization hold on a payment card in addition to charging the final amount. The hold reduces your available balance or credit even if it is later released. Ask how much will be preauthorized, whether the amount is per room or reservation, and how the company handles a card that is not in the driver’s or guest’s name. A debit card with a low balance may be particularly awkward when a hold blocks money needed for the rest of the journey. Rental desks can have strict credit-card, age and deposit conditions that are separate from the prepaid reservation. Read them before booking. Keep enough uncommitted funds for meals and onward transport while deposits remain pending.

    Build a realistic cash-and-card mix

    For a short city break, one main card, one backup and a modest sum of cash may be sufficient. A village-based trip, remote trek or island journey may require more local cash and advance research on ATM locations. For a family, spreading emergency money among responsible adults protects against a lost bag or phone. For a long international journey, tracking what currencies you have left can prevent carrying pockets full of unusable coins. If you have accessibility needs, identify ATMs and bank branches with step-free access, suitable keypad height or other usable facilities before cash runs out. Avoid traveling with the entire emergency fund in one bag, and do not display large amounts of cash in crowded locations.

    Solve problems methodically

    If an ATM keeps your card, note the machine’s identification, address and operator, then call your bank and the machine owner using independently verified contact details. If a charge is duplicated, save the receipt and follow the card issuer’s dispute process. If your wallet is stolen, suspend cards immediately, obtain a police report if advised and contact your insurer if relevant. Banks may offer emergency cash or card replacement in certain circumstances, but delivery times and services vary by location. For a card that suddenly declines, test the alternative card before trying repeated transactions that could increase fraud flags. The best response is a calm backup plan developed at home, not an improvisation outside a closed bank late at night.

    The day-before financial checklist

    Check your cards’ expiration dates and foreign fee policies. Set transaction alerts, verify your daily withdrawal limit and make sure you can access your financial accounts safely while away. Save a current conversion reference and the bank’s support number. Decide how you will pay for the airport transfer and first meal, including a fallback if the card reader fails. Divide cards and emergency cash between secure places. Finally, remember a simple instruction at the payment terminal: inspect the amount and understand the conversion option before agreeing. A few practical safeguards protect both your holiday budget and your ability to keep traveling if something goes wrong.

    Frequently asked questions

    Is it always cheaper to choose local currency at the terminal?

    Often it avoids the merchant’s dynamic conversion markup, but check your own card’s fees and compare any displayed rates. Never accept an unexplained conversion automatically.

    Should I exchange all my money before leaving home?

    Usually there is little reason to exchange an entire holiday budget at once. The best mix depends on destination payment habits, exchange options and personal safety.

    Is a credit card or debit card better abroad?

    Both can be useful. Credit cards may work better for certain deposits, while debit cards may be convenient for ATM withdrawals. Fees and protections depend on the issuer.

    Official resource

  • Banff in 5 Days: Town, Lake Louise and Mountain Trails Without Chasing Every Viewpoint

    Banff in 5 Days: Town, Lake Louise and Mountain Trails Without Chasing Every Viewpoint

    Banff Banff becomes less enjoyable when every sunrise is assigned to a different famous lake and every afternoon to another long drive. Five days is enough to combine Banff town, Lake Louise, Moraine Lake in season, a canyon or lake corridor and one flexible hiking day without turning the national park into a sequence of parking problems. The most important planning decisions are transport reservations, weather and choosing which landscapes matter most to you rather than trying to reproduce every photograph you have seen.

    If this destination is part of a wider trip, compare the pacing with Canadian Rockies in 7 Days: Banff, Icefields Parkway and Jasper at a Realistic Pace. The city guide adds local depth; the wider itinerary is better for deciding how this stop fits into the rest of the journey.

    Quick trip summary

    Ideal stay5 days for a first trip
    Best approachGroup each day by geography and keep one flexible block for weather or energy
    Transport strategyUse public transport or transfers for long moves, then explore each district locally
    Who it suitsFirst-time visitors, couples, solo travellers, families and slower-paced travellers
    Most common mistakeAdding another distant attraction because it looks close on a map

    How to plan the trip before booking

    Start by separating the itinerary into fixed reservations, weather-sensitive experiences and flexible neighbourhood time. Fixed reservations should be the things that can genuinely sell out or determine the rest of the day. Weather-sensitive blocks should stay movable until the forecast becomes useful. Everything else should be grouped geographically so that a late breakfast, a long museum visit or an unexpected queue does not break the schedule.

    A good multi-day trip does not look completely full on paper. Most days need one main anchor, one secondary experience and enough open time for a meal, rest, shopping, a viewpoint or something you discover after arrival. That unused space is not wasted time; it is what allows the itinerary to survive real travel.

    Where to stay: choose location before hotel style

    BaseWhy choose it
    Downtown BanffBest for first-time visitors who want restaurants, Roam Transit and evening walks without driving after every activity.
    Banff Avenue north / UptownStill convenient but often a little quieter, with straightforward access to shuttles and town services.
    Tunnel Mountain areaGood for cabins, views and a more residential feel, though some travellers will use transit or drive into the centre.
    CanmoreOutside Banff National Park but often better value and useful for longer stays; allow extra travel time for park days and check transit options.

    A beautiful room is not automatically a useful base. Map the first activity of the morning, the likely dinner area and the route you will use on departure day. If the hotel creates two unnecessary transfers every day, the hidden cost is time and energy as well as money. For a short trip, location usually matters more than a larger room several kilometres away.

    A realistic 5-day itinerary

    Day 1: Banff town, Bow River and a gentle first viewpoint

    Use the first day to understand the town and recover from the journey. Walk the Bow River, Bow Falls or easy nearby trails, then choose one viewpoint such as the gondola only if weather is clear and energy is good. Buy or confirm your park pass and learn the local transit stops. Do not drive to Lake Louise simply because you arrived before hotel check-in; save the most logistically constrained places for a planned day.

    Day 2: Lake Louise and Moraine Lake with reserved transport

    In the 2026 season, Parks Canada requires reservations for its Lake Louise and Moraine Lake shuttles, and Moraine Lake Road remains closed to personal vehicles. Use the official shuttle or another authorised transport option. Combining the two lakes in one planned day can reduce duplicate transfers. Choose a short walk at one lake rather than demanding major hikes at both. Carry layers because mountain weather can change quickly even when Banff town is warm.

    Banff Springs Hotel Surrounded By Mountains

    Day 3: Johnston Canyon and Lake Minnewanka corridor

    Visit Johnston Canyon early or use current transit where available to reduce parking pressure. Decide in advance how far you want to hike; the lower and upper falls are enough for many visitors, while longer routes require more time and fitness. Pair the day with Lake Minnewanka, Two Jack Lake or a quieter town afternoon rather than driving to the Icefields Parkway as well. Geographic discipline is what keeps Banff from becoming a windshield holiday.

    Day 4: Your best hike, chosen for conditions and ability

    Choose one trail according to current closures, wildlife notices, weather and your actual fitness. Options range from gentle lakeside walks to demanding alpine hikes. Check Parks Canada trail information shortly before leaving and carry the equipment appropriate to the route. Start early for popular trailheads, but do not force a summit when smoke, storms, snow or fatigue make the day poor. A shorter safe hike is a successful mountain day.

    Day 5: weather buffer, hot springs or a final scenic day

    Keep the final full day deliberately flexible. Use it for the activity displaced by weather, a quieter lake, Banff Upper Hot Springs if operating, museums, shopping or a second modest walk. This buffer is valuable because mountain plans fail for reasons that cannot be solved months in advance. If you are driving onward, leave enough daylight and energy for the next road rather than treating departure morning as one more sunrise mission.

    Getting from the airport or station and handling arrival day

    Most international visitors reach Banff through Calgary and continue by shuttle, bus or rental car. A car adds flexibility for some corridors but is not required for every major sight, especially with Roam Transit and seasonal shuttles. If driving, remember that a national park pass is separate from transport reservations. In winter, road and vehicle requirements need additional attention. Build the arrival day around the transfer rather than a timed mountain attraction.

    Arrival day should carry less risk than the rest of the trip. Keep the first reservation easy to cancel, know how you will reach the hotel before landing and save the address offline. If a flight or train is delayed, skip a secondary sight instead of beginning the trip by rushing across an unfamiliar city with luggage.

    Getting around without wasting the day

    Banff now requires more transport planning than a simple rental-car itinerary suggests. Roam Transit serves many popular locations, and Parks Canada shuttles are central to Lake Louise and Moraine Lake access. For 2026, Moraine Lake Road is closed to personal vehicles year-round and regular Parks Canada shuttle reservations are required. Parking at Lake Louise is limited and not a dependable strategy. Reserve the constrained transport first, then build hiking and meals around it.

    When comparing two routes, include the walk to the stop, waiting time, transfers and the final approach. The route with fewer changes is often better for families, luggage, older travellers and anyone visiting in difficult weather. Use transport to remove unrewarding distance, then spend walking energy on the streets, viewpoints, markets and museums that actually define the destination.

    Best time to visit and how the season changes the itinerary

    Summer offers the broadest hiking access and lake colours, but it is also the busiest period. Shoulder seasons can be beautiful yet bring snow or trail closures at elevation. Winter turns Banff into a snow destination with very different road, clothing and daylight requirements. Wildfire smoke can affect summer visibility and air quality. Use current Parks Canada information shortly before each day because conditions can change far faster than hotel reservations.

    Season changes more than temperature. It affects daylight, hotel prices, operating hours, event calendars, sea or trail conditions and how tiring a normal sightseeing day feels. If your dates are fixed, adapt the daily rhythm rather than forcing an itinerary designed for another month.

    What to book first

    Book accommodation early in peak periods and treat Lake Louise/Moraine Lake transport as a priority. Parks Canada states that 2026 shuttle reservations open in advance, with additional seats released two days before departure. Reserve only the hikes, tours or gondola times that truly need fixed access. Too many timed bookings remove the flexibility that mountain weather demands.

    Banff Springs Hotel Lit At Night

    Recheck opening days, reservation procedures, transport notices and access rules shortly before departure. These operational details change faster than the basic geography of a good itinerary. When an official source conflicts with an old screenshot, saved social post or outdated blog, use the current official information.

    Food strategy: eat well without crossing the city for every meal

    Banff has a wide restaurant range, but popular dinner times can fill in peak season and prices reflect the resort setting. Buy trail snacks and breakfast supplies before early starts. For Lake Louise or shuttle days, carry enough food and water to avoid relying on one crowded café. If staying in Canmore, dinner there can reduce cost and add variety, but do not underestimate the energy needed to commute back after a long hiking day.

    For a multi-age group, a reliable breakfast and an easy lunch often matter more than one additional attraction. Use meals as genuine rest and part of the travel experience. A restaurant that is ten minutes from where you already are can be a better choice than a famous address that requires forty minutes of extra transport each way.

    Travelling with children

    Families should prioritise transport certainty and shorter trails with clear turnaround points. Lake Louise and Moraine Lake are easier when shuttle times are organised before the trip. Johnston Canyon can be appealing but becomes crowded, so early timing helps. Wildlife should always be observed from a safe distance; never approach animals for photographs. Build one low-effort afternoon into the trip because five consecutive mountain days can overwhelm younger travellers.

    With children, reduce transitions before reducing the highlights. Alternate one structured visit with something that allows movement, and always know the easiest route back to the hotel before starting a long afternoon. A flexible snack and rest stop can protect the whole day better than another timed ticket.

    Travelling at a slower pace or as a senior

    Transit and shuttles can reduce parking stress, but boarding, waiting and uneven trail surfaces still matter. Choose accommodation near a transit stop and select viewpoints that do not require steep hiking. Parks Canada provides accessible shuttle options for Lake Louise and Moraine Lake; check current procedures before travel. Mountain weather and altitude can increase fatigue, so one major outdoor block per day is often enough.
    Slower travel often improves a destination itinerary because it forces better geographic choices. Use lifts, public transport, taxis or door-to-door transfers to remove unrewarding distance, then spend walking energy where the surroundings are worth noticing. Keep a seated break in the middle of any day with significant climbing or heat.

    Budget planning

    Build the budget in layers: accommodation, arrival and departure transport, local movement, fixed attractions or excursions, food and a reserve for spontaneous changes. The cheapest hotel is not always the cheapest trip if it creates two extra rides every day. Likewise, a city or transport pass is worthwhile only when its zones and included attractions match the itinerary you will actually follow.

    Keep a separate allowance for weather-driven changes. A taxi during heavy rain, a last-minute indoor attraction, a shuttle or a different departure can protect a travel day without representing a planning failure. Saving money is useful; sacrificing the main experience to avoid a modest practical cost often is not.

    Weather backup plan

    The itinerary should be built around movable outdoor blocks. Thunderstorms, snow at elevation, smoke or low cloud can change the best trail within hours. Use the flexible fifth day to rescue a key lake or hike rather than forcing it in poor conditions. Carry layers and rain protection even in summer. If air-quality advisories are poor, reduce strenuous activity and follow official health guidance.

    Do not read only the temperature. Wind, visibility, rain intensity, humidity, sea state, snow and daylight can change the quality of an experience much more than a few degrees. The best itineraries have at least one outdoor block that can trade places with an indoor or neighbourhood day.

    Cascade Ponds And Mount Rundle Banff National Park Canada

    Connectivity, payments and small practical details

    Download an offline map before arrival, save the accommodation address and keep screenshots or offline copies of critical tickets. A local data plan or eSIM can simplify live transport information, but do not depend on a phone battery for every part of the day. Carry a small power bank on long excursion days if navigation and tickets are digital.

    Cards are widely accepted in many visitor areas, but payment habits differ by destination and smaller businesses may work differently from hotels. Keep a backup payment method and a modest amount of local currency when useful. Check whether transport uses contactless bank cards, a dedicated travel card, app tickets or paper validation rather than assuming the system matches another city.

    What to pack

    Comfortable walking shoes, a small day bag, sun protection and weather layers matter more than extra outfits. Add any medication you may need during the day and a refillable bottle where practical. For mountain, coast or desert days, pack for the conditions at the destination rather than the temperature outside your hotel. A light layer can be useful even in warm places because vehicles and indoor spaces may be strongly air-conditioned.

    Common mistakes to avoid

    • Planning to drive a private vehicle to Moraine Lake despite the year-round road restriction.
    • Assuming parking at Lake Louise will be available without a transport backup.
    • Scheduling a famous viewpoint for every sunrise and exhausting the group by day three.
    • Ignoring wildlife closures, bear-safety guidance or changing trail conditions.
    • Using the final travel day for a remote hike with no delay buffer.

    Responsible travel and local etiquette

    Treat residential streets, markets, places of worship, memorial sites and working neighbourhoods as real parts of a community rather than scenery. Follow local instructions, keep entrances and pavements passable, ask before photographing people in sensitive settings and spend with local businesses when it fits naturally. Clothing, photography and behaviour expectations can change between religious, cultural and recreational spaces.

    In natural settings, stay within marked routes and respect closures even when another visitor appears to ignore them. Access rules often protect both visitors and the place itself. Wildlife should never be approached for a photograph, and weather or safety closures are not an invitation to find an unofficial route around a barrier.

    If you have less or more time

    With three days, focus on Banff town, one Lake Louise/Moraine Lake day and one canyon or hiking day. Four days adds breathing room. With six or seven days, continue toward the Icefields Parkway or Jasper only if the wider road itinerary is realistic; otherwise spend the extra time on fewer hikes with better weather flexibility.

    Safety and decision-making on the day

    Use ordinary situational awareness: keep valuables controlled in crowded places, use clearly identified transport and follow current local advice about specific streets, weather or transport hubs. Safety conditions can differ by neighbourhood and time of day, so official notices and recent local guidance are more useful than blanket claims that an entire destination is either “safe” or “unsafe”.

    Set a practical turnaround time for excursions and departure days. Missing a secondary attraction is cheaper than missing a flight, travelling exhausted late at night or forcing a route after conditions have changed. When a plan stops making sense, simplify it rather than trying to recover every item on the original list.

    Useful official and planning resources

    Opening hours, fees, transport schedules and access rules change more often than the overall itinerary. Recheck the official source shortly before departure.

    Final planning checklist

    • Confirm passport, visa, transit and health requirements for your nationality.
    • Reserve the attraction, tour or transport that controls the rest of the itinerary.
    • Save your accommodation address and first-day route offline.
    • Recheck weather, closures and transport notices before each critical day.
    • Keep at least one half-day that can absorb a delay or become simple rest.
    • Leave a generous buffer before flights and other costly connections.

    A strong trip to Banff should feel as though you understood how the place fits together, not merely that you collected its famous names. Protect the reservations that matter, group the rest by geography and remove anything that creates more transit than experience.

  • Nevada in 8 Days: Las Vegas, Valley of Fire and Great Basin Beyond the Strip

    Nevada in 8 Days: Las Vegas, Valley of Fire and Great Basin Beyond the Strip

    Nevada is much larger and more varied than a Las Vegas weekend suggests. This route begins with three city nights, uses Valley of Fire as the transition into rural Nevada and then gives Great Basin National Park three nights. Reno and Lake Tahoe are left out because the north-south distances would make an eight-day trip mostly windshield time.

    This itinerary is designed for travellers who want useful decisions rather than a checklist. The route deliberately limits hotel changes, keeps the longest transfers separate from the hardest activity days and leaves room for weather, transport delays and ordinary travel fatigue.

    The day-by-day order is a framework, not a rule. Outdoor and marine days should move when conditions are poor, while museums, neighbourhoods and food-focused blocks make reliable alternatives.

    Quick trip summary

    • Las Vegas is the first base and the route uses only 3 main travel blocks.
    • Keep at least one weather- or transport-flexible day.
    • Book only the genuinely capacity-limited experiences early.
    • Avoid adding another distant destination simply because it fits on a map.
    • Protect the final airport or ferry connection with extra margin.

    Why this route works

    The route works because each base has a distinct purpose. You are not moving hotels merely to save a few kilometres; every relocation changes the type of experience and earns the packing time.

    It also avoids the common mistake of attaching a famous but distant place to an already full itinerary. On a short trip, removing one destination often improves every remaining day.

    A realistic itinerary at a glance

    DaysBaseMain focus
    1–3Las VegasMuseums, food, neighbourhoods and one nearby desert day
    4Valley of Fire / transitionRed rock and road transition
    5–7Baker / Great BasinCaves, bristlecones, high country and dark skies
    8DepartureLas Vegas or onward road trip

    Day-by-day plan

    Day 1: Arrival and orientation

    Arrive in Las Vegas and keep the first night simple rather than stacking shows after a flight.

    Day 2: Main experience

    Use one city-history or museum block, downtown or the Arts District, then choose one evening show or restaurant.

    Day 3: Second focused day

    Keep a flexible Las Vegas day for Red Rock Canyon, a pool, another museum or a slower neighbourhood.

    Day 4: Flexible day

    Collect the car and visit Valley of Fire in cooler hours, then position for the eastward drive.

    Day 5: Transfer day

    Drive to Baker/Great Basin in daylight, refuelling early and treating the road as the main activity.

    Day 6: Full destination day

    Use the scenic road when open and choose a bristlecone or high-country hike suited to altitude and snow.

    Day 7: Flexible or recovery day

    Reserve a cave tour if it matters, then keep the rest of the day for another walk or dark-sky time.

    Day 8: Departure planning

    Depart west or continue the road trip without attaching a strenuous hike to a long drive.

    Where to stay and how many hotel changes to make

    Las Vegas lodging should be compared on total cost including resort and parking fees. Around Great Basin, availability and park proximity matter more than hotel style.

    Choose accommodation for geography before decoration. A well-positioned room can save an hour every day and often matters more than a small difference in nightly rate.

    Read recent guest reviews for practical details that hotel pages rarely emphasise: stairs, parking, road noise, breakfast hours, room temperature and the real walk from a station, ferry terminal or car park.

    Transport: what is worth planning in advance

    Measure every move door to door rather than by the headline journey time. Luggage, waiting, parking, ferry check-in and the final transfer can turn a short trip into half a day.

    Save tickets, hotel addresses and maps offline. The places where navigation matters most are often exactly where mobile coverage becomes unreliable.

    Food and daily rhythm

    Las Vegas offers extraordinary variety, while eastern Nevada is much simpler. Buy trail food and breakfast supplies before the most remote section.

    Use meals to shape the rhythm of the day. A long regional lunch can be both an experience and a recovery period after hiking, museums, heat or an early start.

    Do not make every meal another reservation. Mix destination restaurants with markets, bakeries, cafés and simple local places so food improves the trip instead of controlling it.

    Families, children and older travellers

    Valley of Fire short walks, caves and scenic roads work for families. Older travellers can enjoy Great Basin through viewpoints and shorter trails while stronger hikers go higher.

    For multigenerational travel, the right pace is the one at which the least mobile member still enjoys the day. That usually creates a better shared trip for everyone.

    Las Vegas Nevada Skyline After Dark

    When accessibility matters, ask precise questions about steps, trail surfaces, boat boarding, lifts, toilets and vehicle access rather than relying on a generic accessibility label.

    Budget: where the money really goes

    The largest costs are usually accommodation, intercity transport and one or two signature experiences. Spend where logistics improve; save on ordinary meals and attractions that do not matter to you.

    Compare total trip cost rather than headline prices. Parking, transfers, fuel, luggage and guided excursions can erase an apparent saving.

    The best splurges usually remove friction: a central room, a direct transfer, a quality local guide or one extra night that prevents an exhausting move.

    Best time to go

    Southern Nevada is easiest in cooler months, while Great Basin high country is most accessible in summer. Spring and autumn can create the odd combination of desert heat and mountain snow.

    Shoulder season often balances weather, crowds and prices well, but rural attractions and mountain or marine services may run less frequently.

    Weather should change the order of the day. Keep lower-effort alternatives so wind, rain, heat or snow do not force you to waste the trip.

    Comfort, accessibility and realistic pacing

    This route assumes one main experience per day, one secondary activity and enough open time to recover. Travellers who prefer a slower pace can remove the secondary activity without damaging the itinerary.

    Travel fatigue compounds. One difficult transfer can weaken the following two days, which is why this itinerary avoids one-night bases unless geography genuinely requires them.

    A free half-day is not wasted time. It is insurance for weather, delays, a tired child or a place you discover only after arriving.

    Small decisions that improve the trip

    Use the bases as anchors

    Once you check in, explore that region rather than repeatedly crossing back through places you already saw. A base should simplify the next two or three days.

    Protect the hardest day

    Do not place the longest hike, boat trip or road excursion immediately before the longest transfer. Leaving one easier block on either side makes the whole trip more resilient.

    Book the scarce things first

    High-demand accommodation, ferries, cave tours, park access and limited-capacity guides deserve early attention. Ordinary meals and minor attractions usually do not.

    What I would leave out on this length of trip

    Leave Reno, Lake Tahoe and Death Valley for separate trips unless one replaces Great Basin. Nevada distances punish add-on thinking.

    If you have extra time, add nights before adding destinations. One additional night in the most interesting base usually produces more value than another one-night stop.

    Mistakes that make this trip harder than it needs to be

    • Assuming sparse cities mean short distances.
    • Driving remote roads with low fuel.
    • Walking Valley of Fire at peak summer midday.
    • Planning high trails without checking snow.
    • Ignoring Las Vegas resort fees.
    • Driving long remote sections after a hard hike.

    How I would adapt the itinerary

    With two or three fewer days, remove the most distant secondary base rather than shortening every stop. With two or three extra days, extend the strongest base and add one carefully chosen excursion.

    For families or travellers who prefer a gentler pace, keep mornings active and afternoons open. For more energetic travellers, flexible days can absorb a longer hike, another museum or an additional boat trip.

    Before booking

    • Check current entry, park, ferry or road requirements.
    • Reserve the accommodation or transport segment with the least capacity first.
    • Verify the final airport or ferry connection before booking the last hotel.
    • Download offline maps and save confirmations.
    • Keep travel insurance appropriate to the activities and season.

    Practical questions

    Is this itinerary too fast?

    For most first-time visitors it is moderate because hotel changes are limited. Remove one optional excursion if you want a genuinely slow holiday.

    Should I rent a car?

    A car is essential after Las Vegas. Rural Nevada requires fuel margin, water, offline maps and a realistic daylight driving plan. High-elevation access at Great Basin can be seasonal even when Las Vegas is warm.

    What should I book first?

    Start with the hardest-to-replace item: peak-season hotel, inter-island ferry, limited park access, domestic flight or specialist guide. Everything else can be arranged around it.

    Final thoughts

    The strongest version of this trip is not the one that includes the most names. It is the one where each base feels different, travel days remain manageable and the final days still have enough energy for spontaneous discoveries.

    Use this route as a decision framework: keep the core, remove anything that creates disproportionate travel and leave at least one block flexible enough to absorb the reality of the destination.

    How to keep the itinerary resilient

    Recheck weather and transport every evening, especially before ferries, remote roads, desert days, high-country hikes or domestic flights.

    If something moves, protect the final connection and the experiences you care about most. Optional attractions are easier to sacrifice than sleep, safety or an expensive ticket home.

  • Visiting Historic Cemeteries and Memorial Gardens: Respectful Heritage Travel

    Visiting Historic Cemeteries and Memorial Gardens: Respectful Heritage Travel

    Historic cemeteries can reveal the language, art, architecture and social history of a city in unusually personal ways. Elaborate stone monuments, modest family plots, changing religious traditions and memorial gardens tell stories that conventional museums sometimes leave out. These places are also active spaces of mourning, worship and remembrance. A visitor may be interested in history or photography, while someone nearby is attending a recent burial or tending a loved one’s grave. Responsible cemetery tourism begins with that distinction. This guide explains how to choose publicly accessible heritage sites, understand their context, visit respectfully and explore without disturbing monuments, families or sensitive records.

    Understand the difference between heritage and a place of mourning

    Some well-known cemeteries offer official walking tours, museums, visitor maps and historic interpretation. Others are primarily working burial grounds with very limited public access. The presence of a famous grave does not turn the whole place into a tourist attraction. Check the site’s own visitor policy, permitted hours and restrictions before arriving. Opening times may vary for religious observances or ceremonies. Some places allow independent exploration but not commercial guiding, filming or group visits. Treat local instructions as more authoritative than old guidebook descriptions or social media recommendations.

    A respectful approach acknowledges that the cemetery’s significance is not limited to the people whose names are already famous. Workers, migrants, children, soldiers and overlooked communities may have stories expressed through ordinary grave markers. Walking with curiosity rather than seeking a list of celebrity graves can make the visit more meaningful. It also helps avoid treating private family memorials as props. If mourners or funeral staff are present, keep your distance and do not follow them to photograph or identify a burial location.

    Choose an appropriate site and learn its history

    Begin with municipal heritage offices, cemetery trusts, preservation organisations or museum resources. Look for official information about sections open to visitors, historical periods, walking routes and accessible entrances. A cemetery with a dedicated visitor centre may be easier to understand than a large site with no signage. Some memorial gardens commemorate disasters, epidemics or political violence; they require particular sensitivity and should not be selected merely because their architecture appears dramatic. Read enough background to understand whose memories the site preserves and whose perspectives might be absent.

    Humayun’s Tomb seen from its landscaped gardens in Delhi

    Different burial traditions use different symbols, layouts and practices. The meaning of an inscription, carving or offering may not be obvious. Avoid guessing or repeating sensational stories about individuals based on a photograph. Interpretive panels and local historians can provide context, but historical claims may still be debated. If researching family ancestry, use established archives and official records rather than asking strangers to reveal private information. The aim is understanding, not collecting intimate details about living families.

    Follow rules for photography and publication

    Policies differ widely. Some sites permit casual photography but restrict tripods, commercial shoots, drones or images during ceremonies. Others prohibit photography in particular sacred sections. Always check. A camera pointed at an old monument may seem harmless, but a person grieving nearby has a reasonable expectation of privacy and dignity. Do not photograph mourners without consent or treat the presence of an accessible public path as permission for intrusive close-ups. Be especially careful before posting legible recent memorial details with identifying information.

    A thoughtful image can show a landscape, architectural style or stone-carving tradition without exposing someone’s private moment. Use paths to frame a composition instead of stepping between graves for a better angle. Never move flowers or offerings, adjust objects or touch a monument to improve the shot. The National Park Service’s cemetery conservation resources emphasise preserving historic markers with minimal intervention; the same principle applies to ordinary visitors. A respectful photograph should leave the setting exactly as it was found.

    Protect fragile monuments and the landscape

    Older stone markers can be unstable, weathered or damaged by seemingly minor contact. Do not climb, lean on, sit on or rub inscriptions. Do not attempt to clean a gravestone, remove moss or trace lettering with chalk or wax. Conservation requires trained judgement; well-intentioned cleaning can harm delicate stone. Follow designated paths and avoid walking across burial plots. Low fencing, uneven ground and worn steps often indicate areas where extra caution is needed. Report a dangerous leaning marker to the site authority rather than trying to straighten it yourself.

    Plants, trees and insects form part of the cemetery landscape, but do not collect seeds or flowers unless explicitly allowed. Leave offerings and decorations untouched, even if they look abandoned. Some sites maintain conservation zones or protected habitats that should not be disturbed. Dispose of litter appropriately and keep food away from the graves. A visitor’s role is to observe and learn, not to undertake restoration or rearrange the environment. If the site offers authorised volunteer opportunities, follow the organiser’s training and supervision requirements instead of acting independently.

    India Gate War Memorial New Delhi With Canopy

    Visiting with children and teenagers

    Historic cemeteries can be an educational stop for older children who are interested in history, art or family stories. Explain the purpose of the place in age-appropriate language before entering: it is somewhere people remember the dead, so quiet voices and respectful movement are expected. Do not let children climb memorials, play chase among graves or remove small objects. For very young children, choose a short route and be willing to leave if the setting becomes uncomfortable. There is no requirement to expose children to disturbing details in order to make a cultural visit worthwhile.

    Teenagers may engage with architectural symbolism, migration history or a discussion about how public memory changes over time. Invite questions without forcing a single interpretation of religious or historical beliefs. If a child has recently experienced bereavement, a cemetery visit could have personal significance or feel upsetting. Allow them to opt out. Pair the visit with an appropriate museum or heritage walk if the group wants more context. The aim is not to make mourning entertaining but to understand how communities honour people and preserve their stories.

    Accessibility and physical comfort

    Historic sites may contain cobbles, steep paths, gravel, narrow gates and sections without step-free access. A cemetery that appears flat on a map may be physically demanding because of uneven surfaces. Ask the operator about accessible entrances, transport stops, seating, toilets and the length of the suggested route. Mobility scooters and wheelchairs may not be able to reach every historic section; an official accessible path or digital interpretation can still provide a worthwhile visit. Choose a shorter circuit rather than attempting every row in difficult conditions.

    For visitors with low vision, tactile or audio information may be limited, and fragile monuments should not be touched without permission. Large-print maps, guided interpretation or clear verbal descriptions can improve access. People who find quiet commemorative spaces emotionally challenging should feel free to shorten the visit. Older travellers may prefer a morning tour before the ground becomes hot or crowded. As with any historic attraction, comfort is not a distraction from learning: it helps people remain attentive and respectful.

    Guided tours, personal research and local experts

    An authorised heritage guide can explain changes in design, the history of different communities and the conservation challenges of a cemetery. Before booking, check whether the tour is officially permitted, how large the group will be and whether the guide understands sensitive areas. A specialist historical walk may cost more than self-guided exploration but offer better context. Some municipal sites provide free maps or visitor information. Even if a tour includes a cemetery, its general city-walk ticket does not necessarily grant access to restricted sections.

    September 11 Memorial Reflecting Pools New York

    For ancestry research, contact an archive or cemetery office in advance and ask about searching burial registers. Public records may be incomplete, and people with similar names are easily confused. Avoid publishing personal information about living relatives without consent. A family researcher who identifies a plot should follow the same visiting boundaries as everyone else. Do not disturb inscriptions or surrounding graves to obtain a photograph. Historical interest and family connection can coexist with restraint and compassion.

    Memorial gardens need particular sensitivity

    Memorial gardens may commemorate lives lost through war, persecution, disaster or other collective tragedy. Their design can deliberately invite silence and reflection. Read the visitor guidance before planning a group visit, and do not bring loud entertainment, inappropriate costumes or staged photographic poses. Commercial filming may require permission. Symbols, flowers and notes left by visitors can be part of ongoing remembrance. Never move them to create a tidy image. Some sites ask visitors not to bring food or to follow a particular route through the memorial.

    An informative visit can include a museum, testimony centre or educational programme that presents the historical context. Distinguish verifiable facts from commemorative interpretation and avoid turning complex events into simplistic social media captions. Many memorials have strong significance for descendants and communities who still face the consequences of the history being remembered. Respectful tourism allows space for their voices and does not assume every visitor comes for the same reason.

    Practical planning, costs and timing

    Many public cemeteries have no admission charge, while official tours, museums or heritage exhibitions may be ticketed. Some historic grounds have seasonal hours or restrict entry during ceremonies. Budget for transport and allow a realistic amount of walking time. Large sites can take hours to cross, so prioritise a small route connected to your interests. Check whether parking is permitted or public transport offers a more appropriate entrance. Save the official map offline if mobile reception is unreliable among large stone structures or wooded sections.

    Weather affects safety. Rain makes smooth historic stone, steps and leaves slippery; strong wind can create hazards around trees or fragile structures. The National Park Service’s preservation safety guidance highlights risks such as unstable monuments and damaged vegetation. Do not enter cordoned sections after storms. Bring water and respectful clothing appropriate to local customs. If a visit becomes emotionally difficult, there is no obligation to complete the planned route. A meaningful experience may last only twenty minutes.

    September 11 Memorial At Night Manhattan

    Frequently asked questions

    Is it appropriate to visit a cemetery as a tourist?

    Yes, when the site welcomes visitors and the visit is respectful. Many historic cemeteries preserve important art and community history, while others are active, private or restricted. Follow the operator’s rules, respect mourners and avoid treating graves as props.

    Can I photograph old gravestones?

    Sometimes, but permissions vary by cemetery and section. Check the local rules, avoid photographing private ceremonies or mourners and never move objects to improve a picture. Be cautious about publishing identifiable details of recent graves or living relatives.

    Can I clean a historic gravestone to read the inscription?

    No, not without specific authorisation and appropriate conservation expertise. Cleaning or rubbing can damage fragile materials. Consult the cemetery authority or preservation specialists if you are researching an inscription. Observation and documentation from an authorised path are safer options.

    Are historic cemeteries wheelchair accessible?

    Some offer accessible routes, but paths, slopes and surface conditions vary. Confirm entrances, accessible toilets and the specific sections you hope to visit. A suitable guided route or digital interpretation may be more practical than attempting every historic pathway.

    Is a memorial garden the same as a public park?

    Not necessarily. Many memorial gardens are designed for quiet remembrance and impose rules on photography, food, group activities or entry. Treat the site according to its commemorative purpose rather than applying ordinary recreation-park expectations.

    Leave the place as you found it

    Choose a legitimate visiting route, learn enough history to understand the site, and keep your behaviour considerate of the people whose lives are remembered there. Resist intrusive photographs, do not touch or clean monuments and make space for active ceremonies. A thoughtful visit to a historic cemetery can deepen an understanding of the city while preserving the dignity that makes the place meaningful in the first place.

    Quick planning table

    What to checkRecommended action
    Public accessCheck authorised paths, opening times and ceremonies
    PhotographyRespect restrictions and the privacy of mourners
    Historic markersNever climb, clean, move or rub fragile gravestones
    Meaning and contextUse official archives or responsible local interpretation

    Official resources and further reading

    Regulations, access and operating conditions may change. Check the relevant official source and provider for the exact destination and dates.