Author: admin

  • York in 4 Days: Minster, City Walls and Viking History Without Turning the Trip Into a Museum Marathon

    York in 4 Days: Minster, City Walls and Viking History Without Turning the Trip Into a Museum Marathon

    York makes an easy stop on a longer trip through northern England. If you’re arriving by train, give the city a few days of its own rather than trying to squeeze the Minster, the walls and the museums into a single afternoon.

    Quick trip summary

    • Ideal stay: 4 days for a first visit.
    • Best approach: group each day by geography and keep one block flexible.
    • Good for: first-time visitors, couples, families, senior travellers and independent travellers.
    • Main planning risk: overloading short distances with too many timed attractions.

    Is this the right trip for you?

    York is compact enough to explore mostly on foot, but its layers of Roman, Viking, medieval and railway history make it easy to overfill a short break. Four days gives you time for York Minster, the city walls, the Shambles, the National Railway Museum and JORVIK without treating every historic doorway as another timed attraction.

    Part of York’s appeal is how quickly the scene changes: one minute you’re beside a medieval church, the next you’re passing a small shop or heading down to the river. Plan one big visit in the morning and leave the afternoon loose enough to enjoy those smaller discoveries.

    Where to stay

    AreaWhy choose it
    Minster QuarterBest for a first visit, early access to York Minster and atmospheric evening walks.
    MicklegateA little calmer, still central, and useful for the railway station.
    Fossgate / WalmgateStrong choice for independent restaurants, pubs and a more local evening atmosphere.
    BoothamQuieter streets just north of the walls, with easy walking access to the centre.

    For a first stay, look around the historic centre or within an easy walk of York station. A room outside the walls can be good value, but check the walk back after dinner and whether you’ll need a bus every morning. If stairs are a concern, ask about the lift before booking; older buildings aren’t always straightforward.

    How to get there

    York has no major commercial airport of its own, so most international visitors arrive by train after flying into London, Manchester or another UK gateway. York railway station is just outside the historic walls and is one of the easiest arrival points for a car-free city break.

    York station is close to the centre, so you may be able to walk straight to your hotel. With a heavy suitcase, though, cobbled streets and a long day of travel can make a short taxi ride worthwhile. Drop your bags first and save timed tickets for the following morning.

    Getting around

    Walk for most central sightseeing. The medieval core is compact, but cobbles, stairs on wall sections and busy pedestrian streets can slow the pace. Local buses are useful for outer attractions and park-and-ride services can be smarter than bringing a car into the centre.

    Inside the walls, walking is usually the simplest way to get around. Don’t assume every route is quick: the Shambles can be crowded, some streets are uneven, and the city-wall walk involves steps. If you’re heading to an outlying attraction, compare the bus journey with a taxi rather than trying to do everything on foot.

    A realistic 4-day itinerary

    The four days below are arranged so you don’t keep retracing your steps. Book any must-see entry at the Minster or JORVIK around the time you want to visit, then let the riverside walks and smaller museums fit around those plans. York is far more enjoyable when you’re not checking the clock at every corner.

    Day 1 – Minster, Shambles and the medieval core

    Start with York Minster and allow enough time for the interior rather than treating it as a quick photo stop. Continue through the lanes around Stonegate and the Shambles, then walk toward Clifford’s Tower and the riverside. Finish with an unhurried evening in Fossgate or Walmgate.

    Day 2 – City walls, railway history and riverside York

    Walk a substantial section of the city walls in the morning while your legs are fresh. Continue to the National Railway Museum, then return along the Ouse. If the weather is poor, reverse the order and use the museum as the main morning block.

    Day 3 – Viking York and smaller museums

    Use the morning for JORVIK Viking Centre or another major history attraction, then choose one smaller museum or historic house rather than trying to visit all of them. Leave time for a café, market browsing and the quieter streets north of the Minster.

    Day 4 – North Yorkshire extension or a slower city day

    Take a day trip toward the North York Moors, Whitby or Castle Howard if transport and weather line up. Otherwise keep the final day in York for gardens, the Chocolate Story, independent shops and anything you deliberately skipped earlier.

    If you choose Whitby or the North York Moors on day four, make that the focus of the day. It’s tempting to add another museum back in York that evening, but the journey and a proper meal already take time. A relaxed walk after dinner is a better finish than one more rushed ticket.

    Best time to visit

    Late spring and early autumn combine long enough daylight with more comfortable walking conditions. Summer is lively but busy, while winter can be atmospheric around seasonal events; rain is possible year-round, so keep at least one museum block movable.

    Spring and early autumn are lovely for walking the walls, but the practical details matter more than a forecast average. Check the dates of school holidays and big events, especially if you’re hoping for a quiet weekend or a particular hotel. In winter, shorter days make it sensible to put the outdoor sights earlier.

    Food and meal planning

    York works well for a mix of traditional pubs, bakeries, modern British cooking and casual market food. Do not schedule every meal around a famous address: the centre is compact enough to browse, but popular weekend restaurants can still require reservations.

    Eat where you happen to be exploring. Around the Shambles and the market you’ll find quick lunches; Fossgate and Walmgate offer plenty of choices for a more leisurely evening. If there’s a restaurant you particularly want to try on a Saturday, reserve it. The rest of the time, leave room to choose as you go.

    One day trip or regional extension

    North York Moors National Park and Whitby create a strong contrast to the compact historic city. Castle Howard is another classic option. Choose one extension and confirm transport before committing, because rural timetables can turn a simple-looking day trip into a long day.

    Whitby, Castle Howard and the North York Moors offer very different days out, so pick the one that interests you most. Look at the actual train, bus or driving route before committing: travelling to a rural stop and getting back isn’t always as simple as the distance suggests. A full day in York is also a perfectly good choice.

    How many days do you really need?

    Four days lets you spend real time in the Minster, explore the old streets, visit JORVIK and enjoy the Railway Museum without losing the pleasure of wandering. If you only have a weekend, stay in York and skip the excursion. With an extra day, choose a trip into the countryside rather than cramming more sights into the city centre.

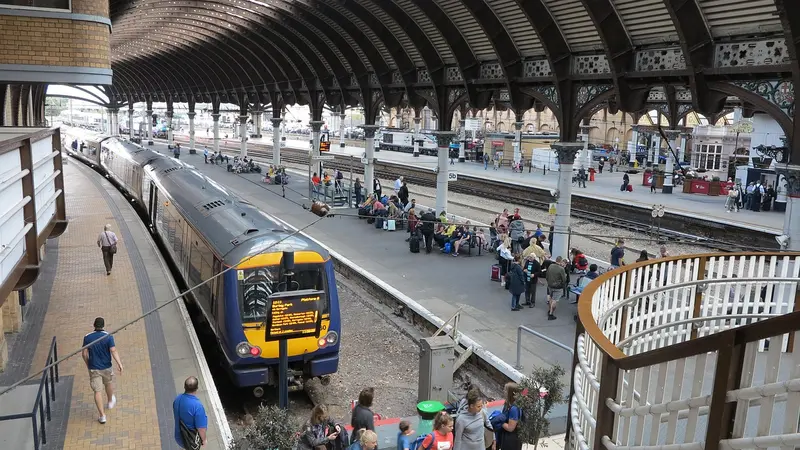
    Historic York Railway Station Facade England

    York Minster deserves more than a passing glance, and the Railway Museum can easily fill a morning. Treat each as the main event of that part of the day. Add a riverside stroll or a café afterwards, not another timed entry that forces you to leave just as something catches your attention.

    For families with children

    For children, York’s mix of old walls, Viking stories and trains is easier to enjoy in small doses. Pair JORVIK or the Railway Museum with time outdoors by the river or in a park. The Shambles can be busy for pushchairs, so allow for slower walking and check family facilities before planning a long museum morning.

    Give older children a say in the plan: they might prefer Viking history, the Railway Museum or a walk along the walls. Choosing one favourite stop can make a history-heavy weekend feel more like their trip too. If rain sets in, swap an exposed walk for an indoor visit rather than insisting on the original order.

    For senior travellers and slower-paced trips

    You can see York’s major sights without walking every section of the walls. Choose a hotel close to the places you most want to visit, allow time to sit down between attractions and use a taxi when your legs have had enough. The city is compact, but its stone streets can be tiring over a full day.

    The city walls are memorable, but their steps and uneven sections won’t suit everyone. You can still enjoy York’s historic character from street level, including views around the gates and the river. Before buying tickets for older buildings, check whether there are lifts, resting places and an entrance that works for your needs.

    Accessibility

    York’s medieval buildings weren’t designed with modern access in mind. The Minster, museums and other venues have different arrangements, so check the accessibility information for each one rather than assuming that a central location means easy access. Ask about toilets, seating and alternative entrances if those details will affect your visit.

    In York, the approach to a hotel matters almost as much as the room. Ask whether you can reach reception without steps, whether a lift serves your floor and how far the hotel is from a taxi drop-off point. A charming old townhouse may be lovely for some visitors but awkward with a wheelchair or heavy luggage.

    Budget and booking strategy

    A well-placed hotel can save daily bus or taxi fares, particularly on a short break. Put your money towards the Minster, any timed experience you really want and a comfortable base. You can keep other costs down with casual lunches and free wandering through the centre instead of paying to enter every historic building.

    Book the visits that would genuinely disappoint you to miss, especially if you’re travelling at a busy time. Leave the smaller museums and city-wall walks for whichever day has the best weather. Check the terms before choosing a non-refundable ticket; a little flexibility is useful in a city where rain can change the mood of a day.

    Safety and practical awareness

    York is a welcoming place to explore, though the busiest shopping streets and attractions are worth the usual care with bags and phones. At night, stick to familiar, well-lit routes back to your accommodation. If you’re using a car, don’t leave luggage on display while you stop for sightseeing.

    Before leaving, check whether the rail route into York is affected by engineering work or disruption. It’s also worth looking at the official visitor information for changes to attractions and city events. Those two checks will save more frustration than trying to plan every spare minute in advance.

    How to handle bad weather or extreme heat

    Rain doesn’t have to spoil a day in York. Make the Railway Museum, JORVIK or another indoor visit your fallback, and save the city walls for a clearer spell. On a cold day, take a longer lunch between walks. Wet cobbles and exposed wall sections are much less pleasant when you’re hurrying.

    Solo travel

    York is particularly easy to enjoy on your own: the centre is walkable, cafés are plentiful and a guided history walk can be a friendly way to learn more about the city. Stay somewhere with a simple route back from the centre. Keep your hotel address and a map available offline for late returns.

    Evenings and nightlife

    After the daytime crowds thin, York has a quieter side. Have dinner around Fossgate or Walmgate, enjoy a traditional pub or take a short riverside stroll if conditions are good. You don’t need to book an evening activity every night; the city is atmospheric enough to reward an unplanned wander.

    Photography without turning the trip into a photo shoot

    The Shambles is striking in photographs, but it’s also a working street, so avoid stopping in doorways when it’s crowded. The Minster looks beautiful in the softer light around morning and evening, while the walls give broader views over the rooftops. Follow photography rules inside churches and museums.

    Shopping and souvenirs

    The market and independent shops around the old streets are better places to browse than a last-minute souvenir stand by the station. York has plenty of food gifts and locally made items, but choose something you’ll actually want to take home. If you’re travelling abroad afterwards, check what food you’re allowed to carry.

    What to pack

    Bring shoes you can comfortably wear on stone streets for hours, plus a light waterproof layer even if the forecast looks fair. A warm extra layer is handy by the river or on the walls. Keep your day bag small: crowded lanes and museum rooms aren’t much fun with bulky luggage.

    Common planning mistakes

    • Choosing accommodation by headline price without checking the repeated daily journey.
    • Booking major attractions on arrival day with no margin for delays.
    • Crossing the city several times because sights were listed by fame rather than geography.
    • Assuming a short map distance means an easy walk regardless of hills, heat, cobbles or queues.
    • Keeping every day full and leaving no space for weather or fatigue.
    • Adding a day trip that duplicates a destination already scheduled later in the wider journey.

    Practical habits that make the trip easier

    • Save offline maps and the exact name of your hotel, station, terminal and meeting points.
    • Download tickets and confirmations before leaving reliable Wi-Fi.
    • Check the last practical return option before starting any excursion.
    • Carry a small amount of local cash even where cards are widely accepted.
    • Recheck opening hours and transport notices on the morning of any fixed reservation.
    • Keep one half-day flexible so a delay does not damage the rest of the trip.

    Final planning checklist

    • Confirm entry, transit and insurance requirements relevant to your nationality.
    • Choose accommodation by location, noise, access and transport as well as price.
    • Reserve only the attractions or excursions that genuinely control the day.
    • Keep offline copies of tickets, hotel details and important contact information.
    • Check the exact station, airport terminal, parking area or pickup point before travel.
    • Leave enough time for meals and unscheduled stops.
    • Recheck official information shortly before departure.

    Final thoughts

    The best part of a York break may be the hour you didn’t plan: a lane you hadn’t noticed, a bookshop or a quiet stretch of river. See the Minster, the walls and the history that brought you here, then allow the city to surprise you. Four days gives you the luxury of doing both.

    Official information to check before you go

    Opening days, transport, weather-sensitive access and event schedules can change. Recheck the details that control fixed reservations shortly before travel, especially during public holidays, major festivals or severe weather.


  • New England in 10 Days: Boston, Vermont, White Mountains and Acadia Without a Daily Hotel Change

    New England in 10 Days: Boston, Vermont, White Mountains and Acadia Without a Daily Hotel Change

    New England looks compact by American standards, which is why fall itineraries often become Boston, Vermont, White Mountains, Acadia and southern New England in a week. The mileage may fit, but the experience becomes a series of checkouts.

    This ten-day route uses Boston, Vermont, New Hampshire’s White Mountains and Bar Harbor/Acadia. It deliberately leaves southern New England and Cape Cod for another trip.

    The regional 2026 foliage guide recommends booking autumn lodging early, especially in Vermont, New Hampshire and Maine. At Acadia, the NPS requires Cadillac Summit Road vehicle reservations from May 20 through October 25, 2026.

    Quick trip summary

    • 2 nights Boston, 2 Vermont, 2 White Mountains, 3 Bar Harbor/Acadia, Day 10 departure.
    • Collect the rental car when leaving Boston.
    • Do not assume exact peak foliage dates.
    • Book fall lodging early.
    • Reserve Cadillac Summit Road if it matters to your 2026 plan.

    Why this route works

    Boston gives history and food without parking stress before the road trip begins.

    Vermont and the White Mountains provide two different inland landscapes; each deserves a multi-night base.

    Acadia is far enough east that three nights are needed to justify the drive and preserve a weather buffer.

    A realistic itinerary at a glance

    DaysBaseMain focus
    1–2BostonHistory, neighbourhoods and food
    3–4VermontSmall towns, scenic roads and hikes
    5–6White MountainsKancamagus region and mountain scenery
    7–9Bar Harbor / AcadiaCoast, park loops and weather buffer
    10DepartureBangor/Boston onward travel

    Day-by-day plan

    Day 1: Boston arrival

    Stay car-free and use the Freedom Trail area, waterfront or a neighbourhood meal according to arrival time.

    Day 2: Boston properly

    Choose history, museums, Cambridge or another neighbourhood cluster. Do not rent the road-trip car yet.

    Day 3: Boston to Vermont

    Collect the car and drive toward Woodstock, Stowe or another chosen base, using one town stop rather than crossing the whole state.

    Boston Zakim Bridge And Downtown At Night

    Day 4: Vermont foliage and town day

    Choose a scenic loop, short hike, farm or food stop and one village. Let current foliage reports influence direction.

    Day 5: Vermont to White Mountains

    Drive east and settle around North Conway, Lincoln or another practical base.

    Day 6: White Mountains

    Use the Kancamagus region, Franconia Notch or a focused hike. Fall traffic can be significant, so start early.

    Day 7: White Mountains to Bar Harbor

    This is the longest move; stop for lunch and one Maine town only.

    Day 8: Acadia main day

    Use Park Loop Road, Ocean Path, Jordan Pond or another cluster. If Cadillac Summit Road matters, follow the current reservation process.

    Day 9: Acadia weather buffer

    Use another trail, carriage roads, Schoodic or Bar Harbor according to conditions.

    Day 10: Departure

    Fly from Bangor when practical or begin the longer return to Boston with a proper buffer.

    Where to stay and how many hotel changes to make

    Boston should be central enough to remain car-free; in Vermont and New Hampshire choose one base rather than a sequence of inns; Bar Harbor is the easiest first Acadia base.

    For New England, location matters more than a small difference in nightly rate. A hotel that removes repeated transfers usually adds more value than a prettier property in the wrong part of the route.

    Read recent guest reviews for practical details that booking photos rarely show: stairs, lift size, road noise, parking access, breakfast hours and the final walk from transport.

    Transport: what is worth planning in advance

    A rental car is necessary once you leave Boston, but fall weekend traffic can make short scenic roads much slower than expected.

    Measure every move door to door rather than by the headline timetable. Checkout, terminal access, waiting, luggage and the final connection can turn a short journey into half a day.

    Use inflexible tickets only when the saving is meaningful and the day is genuinely fixed. Weather-sensitive coast, mountain, wildlife and boat plans benefit from flexibility.

    Boston Waterfront Skyline At Night

    Food and daily rhythm

    Boston offers broad dining while rural New England rewards bakeries, diners, farm shops and earlier dinner planning.

    Use meals to control the rhythm of the day. A long regional lunch can be an experience and a recovery period, especially after hiking, museums, wildlife outings or early starts.

    Do not make every meal another attraction. Mix local specialties with simple food so that the destination, not the restaurant schedule, remains the centre of the trip.

    Families, children and older travellers

    Short hikes, covered bridges, lakes and Acadia’s coast create variety. Older travellers can use scenic drives and carriage roads instead of long mountain hikes.

    For multigenerational travel, the useful pace is the one at which the least mobile member still enjoys the day. That normally produces a better shared trip for everyone.

    When accessibility matters, ask specific questions about steps, trail surfaces, boat boarding, lift dimensions and vehicle access rather than relying on a generic label.

    Budget: where the money really goes

    Autumn lodging can rise sharply in Vermont, New Hampshire and Bar Harbor. A Bangor departure or one-way car fee can be worth it if it saves a full return-driving day.

    Compare total trip cost rather than headline prices. Parking, transfers, luggage, park transport, tours and time lost reaching a remote hotel can erase an apparent saving.

    Keep a contingency rather than allocating every day to the last euro or dollar. Weather, a changed ferry, a taxi or an extra night can appear even on a carefully planned journey.

    Best time to go

    Fall color timing varies every year by latitude, elevation and weather; use current reports once the trip starts.

    Shoulder season often balances weather, demand and room prices well, but ferries, mountain services, wildlife excursions and rural restaurants may run less frequently.

    Boston Waterfront Financial District At Night

    Heat, rain, snow, wind and daylight should change the order of your day. Use the most comfortable hours for exposed outdoor sights and keep lower-effort alternatives available.

    Comfort, accessibility and realistic pacing

    The route has four bases in ten days but none is a one-night stop. The longest drive lands you in Acadia for three nights.

    Travel fatigue compounds. One difficult transfer can reduce the quality of the following two days, which is why this itinerary avoids one-night bases unless geography genuinely requires them.

    A free half-day is not wasted time. It is insurance for weather, laundry, a delayed service, a tired child or a place you discover only after arriving.

    Small decisions that improve the trip

    Do not chase exact foliage dates blindly

    Use current reports.

    Rent after Boston

    Urban parking is unnecessary.

    Give Acadia three nights

    Coastal weather deserves a buffer.

    What I would leave out on this length of trip

    Leave Cape Cod, Newport and the Berkshires for a southern New England trip.

    Skip trying to include all six New England states in ten days.

    Mistakes that make this trip harder than it needs to be

    • Changing inns every night.
    • Assuming peak foliage is the same week every year.
    • Ignoring Cadillac reservations.
    • Driving scenic roads only at midday on peak weekends.
    • Underestimating White Mountains-to-Acadia time.
    • Driving Acadia-to-Boston directly under an international flight.

    How I would adapt the itinerary

    With seven days, use Boston, White Mountains and Acadia or Boston, Vermont and White Mountains.

    With two weeks, add the Berkshires or coastal Maine south of Acadia.

    Before booking

    • Book autumn lodging early.
    • Check current foliage reports.
    • Reserve Cadillac Summit Road if desired.
    • Collect the car after Boston.
    • Protect the final flight.

    Practical questions

    When is peak foliage?

    There is no fixed date.

    Do I need a reservation for Acadia?

    General park entry is separate, but Cadillac Summit Road uses a seasonal vehicle reservation system.

    Is ten days enough?

    Yes for this northern route, not for all New England.

    Boston Subway Train At Station

    Final thoughts

    New England’s fall road trip becomes much better when foliage is treated as a landscape to live in rather than a color checklist.

    Boston, Vermont, the White Mountains and Acadia create a ten-day route with history, mountains and coast while preserving multi-night bases.

    How to keep this itinerary resilient

    Keep Day 9 uncommitted until you know which Acadia day has the best weather.

    In foliage season, plan alternate scenic roads because traffic and color can be better somewhere other than the famous route you originally saved.

    Who this route suits best

    This route is designed for travellers who prefer depth over collecting places. It keeps hotel changes low, protects flexible time and assumes that a good meal, an unexpectedly interesting neighbourhood or a slower morning can be as valuable as another attraction. That makes it particularly suitable for first-time visitors, couples, families and multigenerational groups.

    More energetic travellers can add a longer hike, an extra museum or a second excursion on the flexible days. Travellers who prefer an easier pace can remove those extras and still keep the core journey intact. Before booking, identify the two or three experiences that would genuinely disappoint you to miss; those are the ones to reserve or protect first.

    What to book early and what can wait

    Book the elements with genuinely limited capacity first: high-demand accommodation, protected-area access, popular trains or ferries, and any guided experience that is central to the trip. Leave ordinary meals, minor attractions and weather-dependent outdoor activities more flexible whenever possible. This prevents the itinerary from becoming a chain of reservations that forces you to ignore how the destination actually feels on the day.

    One week before departure, check the official transport or park information again. The evening before each major move, confirm departure points, opening status and the hotel address. That small routine catches most avoidable travel problems before they become expensive or tiring.

  • Airport Layovers and Connecting Flights: How Much Time Is Enough and What to Do If You Miss One

    Airport Layovers and Connecting Flights: How Much Time Is Enough and What to Do If You Miss One

    A one-hour connection can be effortless at a compact airport and nearly impossible at a vast hub with border checks. The advertised schedule does not reveal how long it takes to leave the aircraft, change terminals, pass security, reach the gate or help a child use the bathroom. The best layover is therefore not simply the shortest one. It is the connection that leaves a realistic path through every required step, even when the day does not go exactly to plan.

    At a glance

    Learn how to evaluate a connection by ticket type, terminal, immigration, luggage, accessibility needs and backup transport.

    What to check before booking
    Decision What matters
    Ticket Single booking or separate self-transfer
    Airport Gate, security, immigration and baggage
    Buffer Personal needs and fallback flights

    Travelers should also distinguish between flights sold as a single protected itinerary and self-transfers pieced together from separate tickets. Both can work, but the responsibilities and financial risks may differ. This guide focuses on decisions you can make before purchasing rather than inventing a universal safe connection time. Pair it with our airfare booking strategy to compare genuinely useful itineraries, not just headline fares.

    Understand the difference between one ticket and two

    On a single ticket, airlines or their partners generally calculate connections against applicable minimum connection times, and disrupted onward segments may be eligible for rebooking under the ticket terms and applicable law. However, those minimums are operational thresholds, not comfort guarantees. An itinerary can be technically bookable while feeling unreasonably tight for a traveler who walks slowly or needs assistance.

    Separate tickets create a different problem: the second airline may see you as a no-show if you arrive late, even when the first flight was delayed. You may need to enter the country, collect luggage, move to departures and check in again. Some third-party travel sites advertise “self-transfer” itineraries, occasionally with their own limited guarantee. Read who provides any protection and what conditions apply. Never assume that the entire route is covered just because one website collected the payment.

    Calculate the connection door to door

    Start with the scheduled landing time, but remember that landing is not the same as reaching a gate. Add taxiing, deplaning, walking or shuttle transfer, security screening, possible immigration, baggage reclaim and any fresh baggage drop. Finally allow for the next flight’s boarding or gate-closing deadline, which precedes departure.

    Use the airport’s official terminal map and the operating airline’s instructions, not a generic travel-time estimate. At large hubs, trains between terminals or remote bus gates can add uncertainty. A worked scenario: a 90-minute layover may leave only 35–45 usable minutes after deplaning and before the next gate closes; the exact arithmetic varies. The aim is to expose hidden steps, not promise that a particular number of minutes will always succeed.

    Check the actual operating airlines and terminals

    Codeshare labels can be misleading: the carrier shown on the booking may not operate the aircraft. Confirm the operating airline for every segment, its usual terminal and baggage agreement with the other carrier. Terminal assignments can change, so use them to plan, not to build an inflexible minute-by-minute sprint.

    Ask whether airside transfer is available and whether you must pass immigration or security again. Even remaining in one airport does not mean there is a continuous sterile connection path. When tickets involve low-cost airlines, check whether through-checking baggage is possible. If it is not, a comfortable connection may require several hours and legal permission to enter the transit country.

    Treat immigration and transit visas as real constraints

    Nationality determines whether you can transit a country without entering, whether an airside transit visa is required, and whether you can pass through immigration if plans change. Different passports within one family can create different requirements. Your airline may deny boarding at the first airport if documents for the connection are insufficient.

    Refer to the transit country’s immigration authority and the IATA Travel Centre for itinerary-specific checks. Our passport, visa and transit checklist explains how to map each traveler’s requirements. If a self-transfer depends on entering a country where you cannot legally enter, find another routing. A bargain is not a bargain when it cannot be completed.

    Decide what happens to checked luggage

    On some linked itineraries, bags are tagged to the final destination; on others, customs or airline arrangements require collection at a connection point. Ask at check-in and read the actual baggage tag. Do not rely on what happened on a different trip or another route. Oversized sports equipment, strollers and mobility devices can have additional handling requirements.

    If collecting bags, include immigration, carousel delays, customs and a second check-in deadline. Missing the baggage drop is possible even when you reach the departure terminal before boarding. Keep medication, essential documentation, chargers and a modest overnight kit in cabin baggage within the permitted allowance. Our carry-on system can help build that small resilience without overpacking.

    Allow more time for particular travelers

    Families with babies may need feeding, nappy changes and access to a suitable restroom. Travelers using mobility assistance need confirmed transfers, not a hope that help appears automatically. Older travelers may prefer an itinerary with fewer long corridors and a calmer pace. A passenger with sensory sensitivities might value a quiet place to reset between crowded gates.

    Ask the airline or airport what assistance is available and when it must be requested. Do not expect extra connection time to solve all accessibility barriers: step-free routes, equipment handling and escort continuity must be verified separately. Compare two-hour and four-hour itineraries by fatigue, meal options and overnight risk rather than treating extra airport time as wasted holiday time. See our accessible travel guide for verification questions.

    Use longer layovers intelligently

    A generous connection can be comfortable if the airport provides seating, drinking water, food, family rooms, quiet spaces or a pay-per-use lounge. Study opening hours for overnight layovers. Some terminals restrict access after midnight and some services operate only during the day. A long wait becomes less attractive if food outlets close and no resting area is available.

    Do not plan a sightseeing detour merely because the map places the city nearby. Count round-trip transport, immigration queues, security screening and your margin before boarding. Check whether you legally may leave the airport. If the city visit feels rushed, stay airside and enjoy a calmer journey. You can still stretch, eat properly and avoid arriving exhausted.

    Know the procedure when an inbound flight runs late

    Once you know a missed connection is likely, check your airline app, monitor gate information and speak with staff through official channels. On a protected booking, ask about rebooking and the airline’s available assistance. Do not pay a stranger who approaches you offering an unauthorized “priority transfer” or emergency ticket. Save the original reservation, boarding passes and disruption messages.

    If you used separate tickets, contact the onward airline before departure to learn whether changes remain possible. A travel insurance policy may cover certain missed connections, but definitions, minimum connection requirements and covered causes vary. Our flight-delay and cancellation guide explains why refund, re-routing, duty of care and additional cash compensation are different questions.

    Build a fallback before departure

    Check whether the destination has later flights that day or a practical next-morning route. Know the cost and location of an airport hotel, and carry enough accessible funds for basic meals or a short stay. Do not make irreplaceable event bookings immediately after a complicated arrival. This matters especially for cruises, guided expeditions or long-distance rail departures that will not wait.

    Illustration of a traveler with luggage in a departure terminal

    Share the full route with someone at home and keep airline booking references offline. If you have checked luggage, ask where it will be sent after a rebooking. For international travel, immigration requirements may affect any proposed reroute via a different country. A backup is most useful when it has been checked for legality and practicality rather than merely imagined.

    Use a simple pre-booking comparison

    Compare routes using five criteria: elapsed journey time, legal transit requirements, terminal changes, checked-baggage handling and protection when disruption occurs. Then add human factors: walking distance, assistance, fatigue, children’s routines and the timing of arrival. A fare saving that demands a risky connection and possible hotel expense may not be a saving at all.

    For an itinerary with a critical appointment or a fixed sailing time, prioritize a non-stop or earlier-arrival flight when practical. For leisurely travel, a carefully chosen extended layover can become a pleasant break. The right connection is the one that supports the whole holiday, including what happens if the incoming aircraft is late.

    Frequently asked questions

    Is a 60-minute layover always too short?

    No, but it may be extremely tight depending on terminal layout, border procedures, airline rules and your personal needs. Check the precise routing and gate-closing deadline. A published minimum connection time is not a guarantee of a comfortable transfer.

    Will checked luggage automatically follow me?

    Not always. Ticket type, agreements between carriers and local customs procedures determine the process. Ask for the bag’s final tagged destination at check-in and confirm whether you must reclaim it in transit.

    Can I leave the airport during a long layover?

    Only if your documents permit entry and you have enough time for transport, immigration, security and boarding. Check actual service frequency, border rules and the airline’s gate closing time before considering the excursion.

    Will an airline pay if I miss a connection?

    It depends on whether segments are protected on one booking, the cause of disruption, the contract and the relevant passenger-rights law. Keep records and contact the airline; separate tickets often leave more risk with the traveler.

  • Nagoya in 4 Days: Castle, Industry and Local Food Without Treating It as a Train Change

    Nagoya in 4 Days: Castle, Industry and Local Food Without Treating It as a Train Change

    Nagoya Nagoya is one of Japan’s largest cities yet many rail travellers experience it only as a station name between Tokyo and Kyoto. Four days reveals a city with major industrial heritage, strong food traditions, accessible museums and a practical urban layout. It is particularly useful for travellers who enjoy understanding how modern Japan works, not only visiting preserved historic districts.

    If this destination is part of a wider trip, compare the pacing with Japan Beyond Tokyo in 10 Days: Kyoto, Nara, Hiroshima and Osaka Without Constant Packing. This city guide adds local depth; the wider itinerary is better for deciding how the stop fits into the rest of the journey.

    Quick trip summary

    Ideal stay4 days for a first trip
    Best approachGroup each day by geography and keep one flexible block for weather, energy or closures
    Transport strategyUse the most predictable transport for long moves, then explore each district locally
    Who it suitsFirst-time visitors, couples, solo travellers, families and slower-paced travellers
    Most common mistakeAdding another distant attraction because it looks close on a map

    How to plan the trip before booking

    Start by separating the itinerary into fixed reservations, weather-sensitive experiences and flexible neighbourhood time. Fixed reservations should be the things that can genuinely sell out or determine the rest of the day. Weather-sensitive blocks should stay movable until the forecast becomes useful. Everything else should be grouped geographically so that a late breakfast, a long museum visit or an unexpected queue does not break the schedule.

    A good 4-day trip does not look completely full on paper. Most days need one main anchor, one secondary experience and enough open time for a meal, rest, shopping, a viewpoint or something you discover after arrival. That unused space is not wasted time; it is what allows the itinerary to survive real travel.

    Where to stay: choose location before hotel style

    BaseWhy choose it
    Nagoya StationThe easiest base for shinkansen arrivals, airport connections and day trips.
    SakaeBest for nightlife, shopping and central urban energy, with strong subway connections.
    FushimiA useful middle ground between station and Sakae, with museums and restaurants nearby.
    KanayamaA transport-focused alternative with good rail links, useful when airport or regional trains matter more than central nightlife.

    A beautiful room is not automatically a useful base. Map the first activity of the morning, the likely dinner area and the route you will use on departure day. If the hotel creates two unnecessary transfers every day, the hidden cost is time and energy as well as money. For a short trip, location usually matters more than a larger room several kilometres away.

    A realistic 4-day itinerary

    Day 1: Nagoya Station, central orientation and Sakae

    Settle around the station, then use subway or a manageable walk toward Fushimi and Sakae. See the city as a functioning metropolitan centre rather than racing immediately to a day trip. An evening around Sakae introduces local food and makes the transport system familiar before the more structured museum days.

    Day 2: Nagoya Castle area and cultural museums

    Use the morning for the castle precinct and nearby historic or cultural sites, checking current access because restoration and building-access conditions can change. Continue to a museum that genuinely interests you rather than assuming every castle-related stop is essential. Finish with a meal built around Nagoya specialties.

    Day 3: Toyota industrial heritage and western city

    Reserve a substantial block for the Toyota Commemorative Museum of Industry and Technology or another industrial/transport museum. These sites explain a side of Japan that many itineraries skip. Pair the visit with the station area or Noritake Garden rather than crossing the city repeatedly.

    Nagoya TV Tower Mirrored By Oasis 21 Japan At Night

    Day 4: Atsuta, Osu and flexible neighbourhood time

    Visit Atsuta Jingu early, then move toward Osu for shopping streets, temples and a more informal atmosphere. If you have already seen enough urban sights, use part of the day for a nearby excursion such as Inuyama, but only if it adds something not already covered elsewhere in your Japan route.

    Getting from the airport or station and handling arrival day

    Nagoya Station is a major shinkansen and regional rail hub. Chubu Centrair International Airport connects by rail and other transport, but exact services and stopping patterns should be checked for your arrival time. The station complex is large, so save the hotel exit and route before arrival rather than relying on visual memory after a long journey.

    Arrival day should carry less risk than the rest of the trip. Keep the first reservation easy to cancel, know how you will reach the hotel before landing and save the address offline. If a flight or train is delayed, skip a secondary sight instead of beginning the trip by rushing across an unfamiliar city with luggage.

    Getting around without wasting the day

    Subway and rail are the backbone of a short visit. Buses fill specific gaps, but most visitors can group attractions by line and avoid complex transfers. Day passes can be useful on transit-heavy days, though they should be evaluated against your actual route.

    When comparing two routes, include the walk to the stop, waiting time, transfers and the final approach. The route with fewer changes is often better for families, luggage, older travellers and anyone visiting in difficult weather. Use transport to remove unrewarding distance, then spend walking energy on streets, viewpoints, markets and museums that actually define Nagoya.

    Best time to visit and how the season changes the itinerary

    Spring and autumn are comfortable for walking, summer is hot and humid, and winter is generally cool and drier. Indoor museums make Nagoya relatively resilient in poor weather, while shrine and castle grounds are better in comfortable conditions.

    Season changes more than temperature. It affects daylight, hotel prices, operating hours, event calendars and how tiring a normal sightseeing day feels. If your dates are fixed, adapt the daily rhythm rather than forcing an itinerary designed for another month.

    What to book first

    Reserve only the parts that genuinely control the itinerary: a high-demand attraction, a limited-capacity excursion, a special transport product or a restaurant that is central to the trip. Avoid pre-booking every hour. The more fixed reservations you add, the harder it becomes to react to weather, tiredness or a neighbourhood you unexpectedly want to explore for longer.

    Recheck opening days, reservation procedures, transport notices and access rules shortly before departure. These operational details change faster than the basic geography of a good itinerary. When an official source conflicts with an old screenshot, saved social post or outdated blog, use the current official information.

    Food strategy: eat well without crossing the city for every meal

    Nagoya has a distinctive food identity: hitsumabushi, miso katsu, tebasaki, kishimen and morning café culture are common starting points. Spread specialties across several meals rather than trying to eat a checklist in one evening. Station complexes are useful for food, but neighbourhood restaurants give the city more texture.

    For a multi-age group, a reliable breakfast and an easy lunch often matter more than one additional attraction. Use meals as genuine rest and part of the travel experience. A restaurant that is ten minutes from where you already are can be a better choice than a famous address that requires forty minutes of extra transport each way.

    Nagoya TV Tower Hisaya Odori Park In Daylight Japan

    Travelling with children

    Industrial and transport museums can work especially well for school-age children. Balance them with Osu or open shrine grounds rather than scheduling several formal museums consecutively. The station is enormous, so agree on a meeting point when travelling as a group.

    With children, reduce transitions before reducing the highlights. Alternate one structured visit with something that allows movement, and always know the easiest route back to the hotel before starting a long afternoon. A flexible snack and rest stop can protect the whole day better than another timed ticket.

    Travelling at a slower pace or as a senior

    Stay near a station with straightforward lift access and use subway connections instead of long surface walks in summer. Large museum campuses can involve more standing than expected, so keep the following block easy. Nagoya is a good city for slower travel because many major experiences are indoors and well connected.

    Slower travel often improves a destination itinerary because it forces better geographic choices. Use lifts, public transport, taxis or door-to-door transfers to remove unrewarding distance, then spend walking energy where the surroundings are worth noticing. Keep a seated break in the middle of any day with significant climbing, heat or museum time.

    Budget planning

    Build the budget in layers: accommodation, arrival and departure transport, local movement, fixed attractions or excursions, food and a reserve for spontaneous changes. The cheapest hotel is not always the cheapest trip if it creates two extra rides every day. Likewise, a city or transport pass is worthwhile only when its zones and included attractions match the itinerary you will actually follow.

    Keep a separate allowance for weather-driven changes. A taxi during heavy rain, a last-minute indoor attraction, a shuttle or a different departure can protect a travel day without representing a planning failure. Saving money is useful; sacrificing the main experience to avoid a modest practical cost often is not.

    Weather backup plan

    Rain is a good time for industrial museums, shopping complexes and food-focused exploration. Move Atsuta or other outdoor grounds to a drier window. In extreme summer heat, start outside earlier and use air-conditioned museums through the afternoon.

    Do not read only the temperature. Wind, visibility, rain intensity, humidity, sea state, snow and daylight can change the quality of an experience much more than a few degrees. The best itineraries have at least one outdoor block that can trade places with an indoor or neighbourhood day.

    Connectivity, payments and small practical details

    Download an offline map before arrival, save the accommodation address and keep screenshots or offline copies of critical tickets. A local data plan or eSIM can simplify live transport information where available, but do not depend on a phone battery for every part of the day. Carry a small power bank on long excursion days if navigation and tickets are digital.

    Payment habits differ by destination and smaller businesses may work differently from hotels. Keep a backup payment method and a modest amount of local currency when useful. Check whether transport uses contactless bank cards, a dedicated travel card, app tickets or paper validation rather than assuming the system matches another city.

    Accessibility and mobility planning

    Accessibility can vary greatly between modern transport, historic streets, older hotels and individual attractions. If step-free access is important, verify the exact station exit, hotel entrance and attraction route instead of relying on a general claim that a city is accessible. Historic centres may have cobbles, steep lanes or narrow pavements even when major museums provide lifts.

    Nagoya TV Tower Above City Street

    Travellers using wheelchairs, mobility aids or strollers should build in more time for transfers and keep an alternative route for the most important day. A hotel near the right transport line can remove more difficulty than any sightseeing pass.

    What to pack

    Comfortable walking shoes, a small day bag, sun protection and weather layers matter more than extra outfits. Add any medication you may need during the day and a refillable bottle where practical. Pack for the conditions at the destination rather than the temperature outside your hotel, and keep a light layer for strongly air-conditioned vehicles or indoor spaces.

    Common mistakes to avoid

    • Treating Nagoya only as a transfer between Tokyo and Kyoto.
    • Assuming all areas of Nagoya Castle have unchanged access during restoration work.
    • Crossing between distant museums without grouping by transit line.
    • Eating only inside the station and concluding the city lacks neighbourhood character.
    • Adding a distant day trip when the wider Japan itinerary already changes hotels frequently.

    Responsible travel and local etiquette

    Treat residential streets, markets, places of worship, memorial sites and working neighbourhoods as real parts of a community rather than scenery. Follow local instructions, keep entrances and pavements passable, ask before photographing people in sensitive settings and spend with local businesses when it fits naturally. Clothing, photography and behaviour expectations can change between religious, cultural and recreational spaces.

    In natural settings, stay within marked routes and respect closures even when another visitor appears to ignore them. Access rules often protect both visitors and the place itself. Wildlife should never be approached for a photograph, and weather or safety closures are not an invitation to find an unofficial route around a barrier.

    If you have less or more time

    With one day less, remove the most distant excursion or the day with the most transport rather than compressing every highlight. With one or two extra days, add neighbourhood depth, a slower museum block or a nearby excursion that offers something genuinely different. Extra time is most valuable when it lowers daily pressure, not when it simply adds another checklist.

    Safety and decision-making on the day

    Use ordinary situational awareness: keep valuables controlled in crowded places, use clearly identified transport and follow current local advice about specific streets, weather or transport hubs. Safety conditions can differ by neighbourhood and time of day, so official notices and recent local guidance are more useful than blanket claims that an entire destination is either “safe” or “unsafe”.

    Set a practical turnaround time for excursions and departure days. Missing a secondary attraction is cheaper than missing a flight, travelling exhausted late at night or forcing a route after conditions have changed. When a plan stops making sense, simplify it rather than trying to recover every item on the original list.

    Useful official and planning resources

    Opening hours, fees, transport schedules and access rules change more often than the overall itinerary. Recheck the official source shortly before departure.

    Final planning checklist

    • Confirm passport, visa, transit and health requirements for your nationality.
    • Reserve the attraction, tour or transport that controls the rest of the itinerary.
    • Save your accommodation address and first-day route offline.
    • Recheck weather, closures and transport notices before each critical day.
    • Keep at least one half-day that can absorb a delay or become simple rest.
    • Leave a generous buffer before flights and other costly connections.

    A strong trip to Nagoya should feel as though you understood how the place fits together, not merely that you collected its famous names. Protect the reservations that matter, group the rest by geography and remove anything that creates more transit than experience.

  • Airport Security Screening Abroad: Liquids, Electronics, Medicines and Family Essentials

    Airport Security Screening Abroad: Liquids, Electronics, Medicines and Family Essentials

    Airport security is easier when travelers understand why a bag might be stopped and what to prepare before joining the line. Screening rules differ by country, airport, equipment and sometimes terminal. New scanners in one building do not guarantee the same procedure on the return journey. Families with formula, people carrying medication, visitors with mobility aids and anyone flying with many electronics need a flexible packing system rather than a universal online checklist. The security officer and the rules applied at the checkpoint govern what can pass through. Plan for the more restrictive sensible scenario, check official departure-airport instructions and keep a little time for questions without treating the process as a test you can fail by asking for help.

    At a glance

    • Check exact conditions before booking, rather than relying on a universal rule.
    • Choose arrangements that work for the ages, abilities and interests of your group.
    • Keep a practical alternative in case prices, weather or access change.

    Why airport security rules are not identical worldwide

    An airport may require passengers to remove laptops and liquid bags, while another permits these items to stay inside carry-on bags when approved scanners are operating. Governments and local regulators decide screening requirements; equipment upgrades happen gradually. Transfer passengers may be screened again after an international connection even when their original departure followed different rules. The permitted cabin bag itself is a separate issue decided largely by the airline and ticket type.

    Use the airport and security authority websites for the place from which you depart, and check your connecting and return airports too. Be especially cautious about older videos showing that liquids can be left in bags at a named airport, because a temporary technical restriction or changed rule can reverse that advice. If instructions conflict, arrive ready to present containers and devices separately. The best luggage arrangement supports both types of screening rather than depending on one specific procedure.

    Liquids, gels, creams and aerosols

    Common restrictions at many checkpoints limit containers of cabin liquids to 100 milliliters each inside a transparent resealable bag of about one liter. Local rules may differ, and medicines or baby-related items can receive exceptions under specified procedures. Importantly, a half-full 200-milliliter bottle may still exceed the container-size rule; it is not enough that the contents look small. Shampoo, toothpaste, sunscreen, liquid makeup, jams and certain foods may all be treated as liquids or gels.

    Pack travel-sized products together in an easy-to-remove pouch and leave full-size toiletries in checked baggage where allowed. Do not decant medication into anonymous containers if labels are useful for identifying it. Check sprays for hazardous-material restrictions, which are separate from volume limits. An empty refillable water bottle often simplifies the trip: carry it empty through screening and fill it after the checkpoint wherever safe drinking water is available.

    Baby formula, breast milk and children’s food

    Passengers traveling with babies may need formula, expressed milk, sterilized water, puree, cooling packs or medically necessary food. In many places these items have screening arrangements beyond the standard small-liquids allowance, but exact quantities and handling rules differ. Check the authority responsible for departure and allow extra time. Declare the items before screening and keep them together, with labeling that allows staff to understand what they are. Ask about alternative inspection if opening a medically important item would be unsuitable.

    Pack enough for the journey plus a sensible disruption margin rather than assuming every airport shop sells the correct brand. Bottles and feeding supplies should be accessible without opening the entire suitcase. If traveling with a child who uses a special diet, bring supporting documentation where useful and confirm any transit-airport restrictions. Food carried through screening may also face separate customs or biosecurity requirements on arrival; passing security does not automatically make an item lawful to import.

    Medicines and medical devices

    Keep essential medicines in cabin baggage whenever the carrier and security rules permit, so treatment does not depend on a checked suitcase arriving. Original packaging, a copy of the prescription and a clinician’s letter can help explain unusual quantities, injectable items or equipment. Check destination-country rules for controlled medications independently of airport screening. A medicine may be accepted through a checkpoint but restricted by the destination’s import laws.

    For a CPAP machine, insulin supplies or other medical device, contact the airline and the screening authority ahead of time about batteries, separate trays, handling and possible additional screening. Do not disconnect critical equipment or discard required supplies solely because another traveler describes that as normal. If staff request inspection, calmly explain the functional need and follow the published process for assistance or private screening where available.

    Laptops, cameras and power banks

    Airport screening and airline dangerous-goods rules are two different systems. A tablet might pass through an X-ray machine in the cabin bag while a loose lithium battery is subject to special rules about where it can travel. Spare lithium batteries and power banks generally belong in carry-on luggage rather than checked baggage, subject to watt-hour limits and operator approval where needed. Check the device label for capacity and do not conceal a damaged or swollen battery in a suitcase.

    Keep computers, cameras and cables arranged so an officer can inspect them without tipping out clothes or medication. If a carry-on is unexpectedly placed in the hold at the gate, remove restricted batteries and other items that must remain in the cabin first, in accordance with crew instructions. Carry a charging cable and offline copies of bookings but do not rely on internet access at the checkpoint. Security rules change faster than advice in an old packing video.

    Shoes, jackets, belts and pockets

    Plan a predictable sequence before reaching the trays. Empty coins, keys and metal objects into a zip pocket inside the bag instead of placing them loose in plastic bins. Wear shoes that are easy to remove when required but suitable for a long walk through the terminal. A light jacket can also help with the variable temperature inside airports. Body scanners or metal detectors may flag harmless objects and lead to additional checks; it is better to allow time than to become frustrated with staff.

    Some travelers may request assistance or alternative screening arrangements for a disability, prosthesis or religious clothing. Policies differ by authority, so consult the official accessibility and security guidance in advance. Explain your needs directly and without unnecessary personal details. Never assume another passenger’s experience applies to you; individual screening decisions can differ even within one airport.

    Strollers, wheelchairs and mobility aids

    A stroller may be X-rayed, hand-inspected or otherwise screened depending on its size and equipment available. Remove bags and loose accessories so they do not get lost. A wheelchair or mobility aid may require a different procedure and should not be dismantled without understanding its safe handling. Explain any fragile control, battery or component to staff and request an accessible screening route if available.

    Leave enough time to reassemble the stroller, fasten straps and gather children’s belongings after the checkpoint. A second adult can help by watching the child while the other collects the trays. Travelers alone with a baby can ask staff for practical assistance. Carry a small bag with nappies, wipes, essential medicine and a change of clothes that remains accessible even if the stroller is checked at the gate.

    Duty-free liquids and connecting flights

    Duty-free liquids bought after one checkpoint may not pass automatically through security during an onward connection. Some jurisdictions recognize sealed security tamper-evident bags with receipts under specific conditions, but the exact rules depend on route, airport and transfer. Do not open sealed bags before a connecting checkpoint if the applicable rule requires them to remain sealed. Bottles that are legal at the purchase airport can be confiscated later if the transit procedure does not provide an exemption.

    Before buying, tell the shop the full itinerary, including any connection where checked baggage is not collected. Ask for the appropriate sealed bag and receipt when necessary and understand that retail staff cannot guarantee another country’s decision. Travelers with a direct flight face fewer transfer complications, but normal customs and import restrictions still apply at the destination.

    Choosing a faster and calmer checkpoint routine

    The real time-saver is organization, not rushing. Put passports and boarding passes in a secure accessible pocket, remove the required items once rather than repeatedly unpacking, and listen for local directions. If the airport offers a family lane or accessibility assistance, find its location before arrival. Lines may become longest around banks of departures; build time into the itinerary rather than assuming a social-media estimate of security waiting time.

    Traveling companions can agree on simple roles: one manages the documents, another folds the stroller, and older children check their own empty pockets. Recount trays before leaving the area. Travelers who need more time should not feel obliged to hurry unsafely; move to the side to repack and ask questions when instructions are unclear. Never joke about weapons, threats or other prohibited items at security.

    A realistic packing layout for the journey

    Use three zones in the carry-on: an easily reached security pouch for liquids and devices, a medical or family pouch for declared essentials, and a main compartment for clothes and other items. Keep fragile electronics padded, not loosely stacked in a tray. This layout works whether your departure airport asks for removal or permits the items to stay packed. Avoid overstuffing the bag so officers can inspect it without damage.

    Illustration of a traveler packing a first-aid pouch and travel essentials

    If the group travels with children or older relatives, allow time for hydration and bathroom breaks before or after screening. Everyone should know where their identification is stored. The airport may offer repacking tables or seating near the checkpoint. Once finished, check that the number of devices, passports and bags matches the number you carried in; small accessories and travel documents are much easier to recover immediately than after boarding.

    Common screening problems and what to do

    When a bag is selected for additional checks, wait for instructions and avoid touching it while an officer is inspecting it. If a product is not permitted, ask whether it can be checked, returned to a non-traveling companion or surrendered; available options depend on airport layout and time before departure. Do not argue that the item passed elsewhere. Security agents work under the current checkpoint rules, not an agreement you had with another airport.

    If an essential medication or disability aid becomes the subject of disagreement, ask for a supervisor or the authority’s established assistance process in a calm and documented manner. Arrive early enough that an unusual inspection does not become a missed-flight emergency. Take a photograph of packing arrangement before departure if it helps you reconstruct your bag after inspection, but never photograph screening staff or secure areas where photography is prohibited.

    Frequently asked questions

    Can I take a half-full large shampoo bottle in hand luggage?

    At checkpoints applying the 100-milliliter container rule, a large container generally remains too large even when partly empty. Use a small travel container or checked baggage and check the exact departure-airport instructions.

    Must I always remove my laptop from the bag?

    No. Procedures depend on the checkpoint technology and local instructions. Pack it so you can remove it quickly if asked, and follow the officer’s direction on the day.

    Are baby formula and breast milk treated as ordinary toiletries?

    Often they have a special screening process, but permitted quantities, cooling products and declaration procedures are not globally identical. Consult the official authority for each departure or transfer airport.

    Can a power bank travel in checked baggage?

    Generally spare lithium batteries and power banks must be transported in the cabin, subject to operator restrictions. Verify the actual device capacity and current airline requirements.

    Does clearing airport security mean my food is legal to import?

    No. Security screening addresses aviation safety; customs, agricultural and public-health import rules are separate and may prohibit food that passed the departure checkpoint.

    Quick comparison

    Decision What to check
    Standard liquids Check departure checkpoint container rules
    Medical or baby supplies Ask about declaration and screening process
    Spare lithium batteries Follow cabin baggage restrictions
    Strollers and aids Allow time for alternative inspection

    Official resources and further reading

    Rules and availability may change. Check these sources and the relevant local operator before booking.

  • China in 10 Days by High-Speed Rail: Beijing, Xi’an and Shanghai Without Adding Domestic Flights

    China in 10 Days by High-Speed Rail: Beijing, Xi’an and Shanghai Without Adding Domestic Flights

    China’s scale can make a ten-day trip feel impossible before it starts. The solution is not to cover the country. It is to choose three cities that are very different and connect well by high-speed rail.

    Beijing, Xi’an and Shanghai form a strong first route: imperial history and hutongs, the Qin-era Terracotta Army and city walls, then China’s most internationally recognisable modern skyline and neighbourhood life.

    Beijing’s municipal government confirms that Beijing West serves high-speed routes to Xi’an, while Beijing’s rail network also connects toward Shanghai. The current system is extensive enough that domestic flights are unnecessary for this specific route.

    Quick trip summary

    • 4 nights Beijing, 2 Xi’an, 3 Shanghai, final departure day.
    • Use high-speed rail for both long intercity moves.
    • Book important trains once your passport/travel dates are final.
    • Choose one Great Wall section, not multiple.
    • Do not add Chengdu or Guilin to a ten-day first trip.

    Why this route works

    Beijing needs the longest stay because Forbidden City, Temple of Heaven, hutongs and the Great Wall are not geographically one compact cluster.

    Xi’an works efficiently in two nights when the Terracotta Army and old-city core are the priorities.

    Shanghai then changes the tone completely and is an excellent final city because neighbourhood walking, river views and modern museums can be adjusted easily around weather.

    A realistic itinerary at a glance

    DaysBaseMain focus
    1–4BeijingImperial sites, neighbourhoods and Great Wall
    5–6Xi’anTerracotta Army and old city
    7–9ShanghaiBund, neighbourhoods and flexible city time
    10DepartureAirport connection

    Day-by-day plan

    Day 1: Beijing arrival

    Stay near a useful subway line and keep the first walk local. Large blocks and security procedures mean distances often feel longer than the map suggests.

    Day 2: Imperial Beijing

    Build the day around the Forbidden City area and one adjacent historic space. Timed-entry rules can change, so verify official booking requirements before travel.

    Ban Gioc Detian Waterfalls On China Vietnam Border

    Day 3: Temple of Heaven and neighbourhood life

    Use the morning for a major monument and the afternoon for hutongs, parks or another area rather than another giant museum.

    Day 4: Great Wall

    Choose one section based on mobility, transfer time and crowd tolerance. A private driver or quality small-group tour can be worth the cost for families.

    Day 5: High-speed train to Xi’an

    Travel from the correct Beijing station, arrive Xi’an and use the evening for the city wall or Muslim Quarter depending on energy.

    Day 6: Terracotta Army

    Give the site most of the day, including transport. Return for a slower evening rather than adding another distant excursion.

    Day 7: Train to Shanghai

    Use a daytime high-speed service, then walk the Bund after check-in if energy allows.

    Day 8: Shanghai neighbourhood day

    Combine one historic/concession-area walk with a modern district or museum. Avoid crossing the entire city repeatedly.

    Day 9: Flexible Shanghai

    Use this for Pudong views, another museum, a water-town excursion only if it is a real priority, or simply more neighbourhood time.

    Day 10: Departure

    Know whether you are using Pudong or Hongqiao and leave enough time for the correct airport connection.

    Where to stay and how many hotel changes to make

    Beijing hotels near subway interchange stations can save significant time.

    In Xi’an, staying inside or just outside the wall makes the short city stay more efficient.

    Shanghai location should be chosen by metro access and your evening interests, not only by skyline view.

    Location matters more than a small difference in room price because a badly placed hotel can turn every meal and attraction into another transfer. Check the walking route from the station or drop-off point, not only the straight-line distance shown on the booking map.

    In historic centres, charm can come with stairs, small lifts, street noise and difficult taxi access. Recent guest reviews often reveal these details better than the room description, especially for families, older travellers and anyone carrying large luggage.

    The Giant Wild Goose Pagoda and its temple precinct in Xi’an

    Transport: what is worth planning in advance

    Chinese high-speed rail is excellent, but large stations require time for security, navigation and boarding.

    Always verify the exact station name; Beijing and Shanghai have multiple major terminals.

    Use metro for most city travel and taxis/ride-hailing selectively when a transfer is awkward.

    Think door to door rather than station to station. Checkout, the trip to the terminal, waiting time, luggage and the final ride to the next hotel can turn a short headline journey into half a travel day.

    Book fixed tickets early only when the savings justify losing flexibility. On days that depend on weather, a late-running tour or a long international arrival, flexibility can be worth more than the cheapest fare.

    Food and daily rhythm

    Treat Beijing, Xi’an and Shanghai as three separate food destinations rather than searching for one generic ‘Chinese food’ list.

    Order conservatively at first and add dishes; portion size and spice expectations vary.

    Use food to shape the pace of the day. A long regional lunch or market stop can be an experience in its own right and often gives the group the rest needed before another museum, fortress or evening walk.

    Do not force every meal to be famous or traditional. Mixing local specialties with simple breakfasts and familiar food is especially sensible on hot days, after long drives or when travelling with children.

    Families, children and older travellers

    High-speed rail is often easier than airports for families because city-centre access is better and the journey itself is comfortable.

    Older travellers should use elevators in stations and avoid itineraries that require repeated subway changes at rush hour.

    The Great Wall section should be chosen by mobility, not fame.

    For multigenerational travel, plan around the slowest comfortable pace rather than the maximum that the most energetic person can achieve. This produces better shared days and usually fewer last-minute taxi rides.

    Crescent Lake Oasis And Singing Sand Dunes Dunhuang Gansu China

    Give children and teenagers variety: a fortress after a museum, a beach after archaeology, a boat after a city walk. Changing the format is often more useful than adding another headline attraction.

    Budget: where the money really goes

    Rail, central hotels and major guided experiences are the main planning costs.

    A private Great Wall transfer can be better value for a group than losing hours to complicated public connections.

    Compare total trip cost, not only room rates and headline transport fares. Parking, luggage, transfers, mandatory fees and the time lost reaching a remote hotel can erase apparent savings.

    The best upgrades usually remove friction: a central hotel, a private transfer on the hardest leg, an experienced guide where context matters, or a direct connection that saves a full afternoon.

    Best time to go

    Spring and autumn generally suit the north-to-east route, but national holiday periods can change crowd levels dramatically.

    Summer heat/humidity and winter cold require different daily pacing.

    Shoulder season often gives the best balance between weather, room availability and crowd levels, but seasonal transport and attraction hours may be reduced. Always check the exact month rather than relying on a generic ‘best time’ label.

    Heat, rain, wind and short daylight change what a realistic sightseeing day looks like. Move outdoor priorities to the best part of the day and protect indoor alternatives instead of following the same schedule in every season.

    Comfort, accessibility and realistic pacing

    Four nights in Beijing allow jet lag and huge-scale sightseeing to coexist.

    Never schedule the Great Wall immediately before a long rail move; both deserve their own day.

    Travel fatigue compounds. A difficult transfer on Day 3 can make Days 4 and 5 worse as well, which is why this itinerary avoids one-night stops unless they solve a genuine geographical problem.

    A free half-day is not wasted time. It is insurance for weather, a delayed transfer, laundry, a child who needs a quiet afternoon or an attraction you discover only after arriving.

    Great Wall Of China In Autumn

    Small decisions that improve the trip

    Use high-speed rail instead of flights

    It keeps the route coherent and reduces airport repetition.

    Keep Xi’an to two focused nights

    The city can use longer, but this balance protects Beijing and Shanghai.

    Choose one Great Wall section

    More sections do not create a better first visit.

    What I would leave out on this length of trip

    Leave Chengdu, Guilin, Zhangjiajie and Hong Kong for a longer trip.

    Skip a water-town day trip from Shanghai if it means cutting the city to one full day.

    Mistakes that make this trip harder than it needs to be

    • Booking the wrong station.
    • Assuming famous attractions can always be entered without advance reservation.
    • Adding a fourth city to ten days.
    • Underestimating station walking/security time.
    • Choosing a Great Wall section only from photos.
    • Treating Shanghai solely as the Bund and Pudong skyline.

    How I would adapt the itinerary

    With seven days, use Beijing and Shanghai only or Beijing plus Xi’an.

    With fourteen days, add one additional region with at least three nights rather than several quick stops.

    Before booking

    • Verify current entry/visa rules for your nationality.
    • Book required attraction slots.
    • Confirm exact railway stations.
    • Save addresses in Chinese characters.
    • Check airport name before departure.

    Practical questions

    Can I do this without domestic flights?

    Yes. High-speed rail is one of the main reasons this three-city route works.

    How early should I arrive at stations?

    Allow more time than you would for a small European station because of security, terminal scale and identification checks.

    Is Xi’an worth only two nights?

    Two nights cover the main first-trip priorities; three is better if you want more museums and neighbourhood time.

    Final thoughts

    Ten days cannot show China, but they can show three very different versions of it.

    High-speed rail makes Beijing, Xi’an and Shanghai a coherent first journey without turning every third day into an airport day.

  • Free Walking Tours vs. Paid City Tours: How to Choose, Budget and Explore Responsibly

    Free Walking Tours vs. Paid City Tours: How to Choose, Budget and Explore Responsibly

    A walking tour can be the best introduction to a new city, but the words “free”, “guided” and “private” describe very different experiences. Some tours charge a fixed ticket price; others operate on a tip-based or pay-what-you-wish model; private guides tailor an itinerary to one party; and self-guided routes provide independence without a live guide. The best choice depends on your budget, interests, mobility, group size and comfort with crowds. This guide explains how to compare the real costs and services, understand tipping expectations, spot confusing booking terms and select experiences that respect both local communities and travellers.

    Understand what a free walking tour actually offers

    A tour promoted as free often has no fixed upfront guide fee but invites contributions at the end. The guide may depend on these voluntary payments for income, sometimes while paying the booking platform or operator for each participant. That does not make the model inherently good or bad, but it is important to understand before joining. Read the organiser’s explanation of the payment model; distinguish a genuinely free publicly funded activity from a tip-based commercial tour. If a platform charges a booking deposit or reservation fee, check whether it is refundable or deducted from any final payment.

    Ask the guide or organiser about the route, duration, language, maximum group size and whether entry to museums or monuments is included. Many introductory walks focus on public streets and squares, with attraction admissions sold separately. A “free” walk can still be an excellent experience, especially if the guide tells engaging stories and helps newcomers understand the city. However, a long tour ending with strong pressure to contribute beyond your budget may not suit everyone. Choosing a transparent fixed-price tour can sometimes feel more comfortable.

    Compare the complete cost, not merely the advertised price

    For two people, a tip-based tour might be affordable; for a family of six, several expected contributions could exceed the cost of a small-group ticket. A fixed-price tour can offer more predictable budgeting, but compare inclusions. Does the price cover a professional guide only, local transport, an audio headset or entrance fees? Are child tickets discounted? Is there a cancellation deadline? Do not assume a more expensive tour means a better guide or a shorter itinerary. The quality depends on preparation, interpretation, group management and how the route matches your interests.

    Build a simple comparison in your trip notes: number of participants, expected guide contribution or ticket price, meeting-point transport, admissions, required food or rest stops, and total time. Consider the opportunity cost of queuing or retracing a route already covered independently. A private tour may make sense for a large family because its per-person cost falls as more relatives share the guide fee. Conversely, one traveller may prefer a regular small-group walk that offers some social contact without the full cost of a personal guide.

    Choose by interest and interpretation style

    General city highlights tours introduce major squares, neighbourhood histories and useful orientation. Specialist tours may focus on architecture, food, migration, street art, literature or the experiences of local communities. Decide whether you want a broad introduction or an in-depth theme. A guide who explains a building’s social history and relationship to the city offers more than a list of dates; a specialist who cannot adjust the detail to the audience may be a poor fit for a family with younger children.

    Search for evidence of responsible, informed guiding: clear operator information, realistic route descriptions, local knowledge and a willingness to answer thoughtful questions. Ratings can be helpful, but a handful of glowing comments should not outweigh an unclear meeting point or misleading prices. UNESCO’s sustainable tourism guidance encourages engaging local communities and businesses rather than reducing a destination to a backdrop. Ask whether the guide works locally and whether the tour respects residential areas and heritage restrictions. That question matters especially for highly visited city centres.

    Group size can change the entire experience

    In a small group you are more likely to hear clearly, ask questions and follow a manageable pace. A large group may spread across narrow pavements, create bottlenecks or make it difficult for people with hearing impairments to follow the commentary. Operators should have a sensible method for keeping participants together without blocking residents. Ask about a headset if hearing the guide is essential. For a child who needs frequent pauses, the advertised duration may be less useful than the number of standing segments and the availability of nearby toilets.

    A private tour provides control over pacing, which may be valuable for wheelchair users, older travellers or families with several generations. But “private” does not automatically mean accessible: historic streets, steep staircases and restricted buildings remain physical barriers. Request a route with specific alternatives, not a generic assurance that the guide can accommodate everyone. Sometimes a well-designed short public tour is more enjoyable than a lengthy private booking whose price creates pressure to continue after participants are tired.

    Check routes, surfaces and realistic walking pace

    Tour listings may describe distance in kilometres without mentioning gradients, steps or long stretches of standing still. Two kilometres through cobbled streets and uphill alleys can be more challenging than a flat walk of four kilometres. Check the meeting point, finish point, transport connections, restroom opportunities and whether the walk returns to its start. Ask whether breaks are planned and whether there is an easy option to leave early. Those details matter for children, pregnant travellers and anyone managing energy or mobility needs.

    Do not treat all advertised accessible tours as interchangeable. If someone uses a power wheelchair, a narrow medieval lane or temporary roadworks can prevent a route from functioning as described. Guests with hearing loss may need visual notes or assistive listening; travellers with low vision may appreciate more detailed verbal description. Explain the specific need before paying. A good guide can often suggest a realistic alternative, but should not promise access to a protected site where lifts or ramps do not exist.

    New York City Pedestrian Walking Tour

    Tipping etiquette without awkward surprises

    On a genuinely tip-based tour, plan a contribution you can afford and consider fair for the work provided. There is no globally valid amount. Expectations depend on local costs, duration, tour quality and whether you are paying for several family members. Check whether the operator explains how guides are compensated and whether a credit-card contribution is possible. If the experience disappointed you, you can raise specific concerns rather than publicly challenging the guide in front of a large group. Avoid accepting guilt-based statements that misrepresent an optional model as a compulsory hidden price.

    Fixed-price tours may also involve optional tips in some destinations, but do not assume an additional payment is required if the total fee includes the guide’s service. Consult local custom and the operator’s written terms. Respect the guide’s time: turn up punctually, cancel a booking you cannot attend and let staff know if you leave early. A “free” reservation still occupies a place that another traveller might have wanted, and empty spaces can materially affect the experience and earnings of a small local operator.

    Safety, booking reliability and meeting points

    Reserve through an identifiable operator and check the exact meeting point rather than following an unsolicited street approach. Legitimate tours generally provide a guide name or identification method, expected group size and an emergency contact or booking reference. Be cautious if asked to move the transaction outside a trusted payment channel, provide unnecessary identity documents or send money to a personal account without a clear reason. A free-tour listing does not remove the need to read privacy and cancellation terms.

    Carry a small amount of local money or a suitable payment method only as needed, and keep wallets and phones secure in crowded areas. Dress for the weather and bring water, especially when the route has few shaded stops. Never block roads or climb restricted monuments to follow a guide. In crowded historic areas, an operator should balance storytelling with public access and residents’ daily routines. If the group is asked to enter a place of worship or sensitive memorial, follow that site’s own visiting rules even when the guide is enthusiastic about a photograph.

    Self-guided walks and audio tours as alternatives

    A self-guided route can be excellent when you want to linger in a museum, move slowly with a stroller or change direction without explaining yourself. Many cities offer free official walking maps or interpretive signage; other companies sell audio tours that play at each stop. These options usually offer more control but less opportunity to ask a knowledgeable person contextual questions. They also shift route planning and problem solving to the traveller. If the app requires continuous location access or data, download the content before departure where possible.

    A blended approach often works best. Take one guided orientation walk early in a visit, then return independently to the neighbourhoods that captured your interest. This avoids paying for repeated general highlights tours while still benefiting from local interpretation. For families, a shorter guide-led experience followed by a playground or café can be more successful than a three-hour lecture without breaks. You may discover that one excellent conversation with a guide adds more value than several extra attractions purchased simply because they are listed in a pass.

    Respect neighbourhoods and heritage places

    Local residents have a right to pass through their streets without encountering a tour group that occupies the entire pavement. A responsible organiser limits amplified sound in residential areas and keeps entrances, shopfronts and accessible ramps clear. Be cautious about tours built entirely around photographing private homes or the personal lives of residents. Historical tragedies, religious sites and working markets require particular sensitivity. A good guide explains context and consent, not just where to stand for a dramatic image.

    Support local knowledge thoughtfully by asking questions and considering smaller operators when they demonstrate professionalism and appropriate licensing where required. Qualifications and licensing rules vary by country and by venue. A general city walk might not require the same authorisation as guiding inside a regulated museum or archaeological site. Check the appropriate rules when necessary and avoid assuming that every online platform has verified every claim. A fair, engaging tour creates value for the visitor while reducing unnecessary pressure on the place being visited.

    Frequently asked questions

    Is a free walking tour really free?

    Some tours are genuinely free public programmes, but many operate on a pay-what-you-wish basis and expect voluntary contributions. Check the actual model, platform booking fees and what is included. If you want a guaranteed total price, a clearly priced small-group tour may suit you better.

    How much should I tip the guide?

    There is no single worldwide amount. Consider local norms, the time spent, guide quality, the size of your party and your budget. Review how the organiser describes compensation; do not assume an advertised contribution is a legal requirement. Be respectful and transparent about your choice.

    Are private tours better for wheelchair users?

    They can allow a customised pace and route, but accessibility must still be checked at the individual street and attraction level. Ask about gradients, stairs, bathrooms and alternative viewpoints. A private label alone is not an accessibility guarantee.

    Are entrance tickets included in walking tours?

    Not necessarily. Many walks remain outdoors and discuss buildings without entering. Read the exact inclusions and exclusions, including transport or headset charges. Never infer museum entry solely from the name of a landmark in the itinerary.

    Can I join a free tour without booking?

    Some operators allow walk-ins, others require reservations to control group size. The safest approach is to check the organiser’s current policy, time and meeting point. If you reserve and cannot attend, cancel promptly so the place is available to somebody else.

    Choose the tour that makes a city easier to understand

    The best tour is not automatically the cheapest, longest or most highly rated. It is the one that fits your curiosity, walking comfort, budget and respect for local life. Compare complete costs, ask practical access questions and choose guides who explain places rather than treating neighbourhoods as photo stops. A thoughtful walking tour can turn an unfamiliar city into a place you want to explore further on your own.

    Quick planning table

    What to checkRecommended action
    Tip-based walkCheck contribution expectations and any booking fees
    Fixed-price group tourConfirm inclusions, size and refund deadline
    Private guideAsk for a route tailored to pace and interests
    Self-guided routeCompare flexibility with access to live local interpretation

    Official resources and further reading

    Regulations, access and operating conditions may change. Check the relevant official source and provider for the exact destination and dates.

  • Morocco Atlantic Coast in 9 Days: Casablanca, Rabat and Essaouira Without Returning to Marrakech

    Morocco Atlantic Coast in 9 Days: Casablanca, Rabat and Essaouira Without Returning to Marrakech

    Morocco is often planned around Marrakech, Fez and the desert, which leaves the Atlantic side treated as arrival infrastructure. That misses a different version of the country: modern Casablanca, elegant Rabat and wind-shaped Essaouira.

    This nine-day route stays on the Atlantic axis and does not return to Marrakech simply because it is famous. Casablanca and Rabat use rail; Essaouira becomes the slower final section reached by road.

    The official Moroccan tourism office describes Casablanca as the country’s major modern metropolis and Rabat as a modern capital with deep historical roots and an Atlantic coastline. Essaouira is promoted separately as a medina-and-beach destination, which is exactly the contrast this route uses.

    Quick trip summary

    • 2 nights Casablanca, 3 Rabat, 3 Essaouira, Day 9 departure/transfer.
    • Use train between Casablanca and Rabat.
    • Use road transport for Rabat/Essaouira, often via Casablanca or another practical connection.
    • Do not add Marrakech unless you extend the trip.
    • Expect wind to shape Essaouira beach days.

    Why this route works

    Casablanca works well for architecture, the Hassan II Mosque area and contemporary urban Morocco when given two nights instead of an airport layover.

    Rabat is calmer and more walkable than Casablanca and deserves three nights for Oudayas, Chellah, museums and coastline.

    Essaouira is the natural slow finish: medina, harbour, seafood, beach and Atlantic light rather than another inland city.

    A realistic itinerary at a glance

    Days Base Main focus
    1–2 Casablanca Modern city, architecture and Atlantic waterfront
    3–5 Rabat Capital, Oudayas, Chellah and coast
    6–8 Essaouira Medina, harbour, beach and slow days
    9 Departure Road/airport connection

    Day-by-day plan

    Day 1: Casablanca arrival

    Keep the day to the central city, Corniche or an easy meal according to arrival time. Casablanca is large, so avoid an airport-to-sightseeing marathon.

    Day 2: Casablanca properly

    Visit the Hassan II Mosque according to current visitor arrangements, then add Art Deco streets, the old medina or Corniche. Do not treat the city solely as one mosque plus the station.

    Day 3: Train to Rabat

    Take the straightforward rail move, check in and use the afternoon for the Kasbah of the Oudayas and riverfront.

    Day 4: Rabat history

    Visit Chellah, Hassan Tower/Mohammed V area and one museum or garden without crossing the city repeatedly.

    Day 5: Rabat coast and neighbourhood day

    Use the quieter pace for gardens, the coast, cafés or contemporary culture. This is the buffer that keeps the capital from becoming a checklist.

    Day 6: Road transfer to Essaouira

    Use the most practical coach/private transfer for your dates. Treat the road as the main activity and keep the first evening for the medina and harbour.

    Day 7: Essaouira medina and harbour

    Walk the ramparts, market lanes and fishing harbour slowly; strong Atlantic wind can make the beach better for watching/watersports than lying still.

    Day 8: Slow coastal day

    Choose a beach walk, surf lesson, nearby countryside or simply another medina day. Essaouira earns its value through repetition and atmosphere.

    Day 9: Departure

    If flying from Casablanca or Marrakech, position conservatively rather than depending on a long road transfer before check-in.

    Where to stay and how many hotel changes to make

    In Casablanca, choose rail/central access rather than a remote beach hotel if sightseeing is the purpose.

    Rabat’s central areas near the medina or modern city make most days simple.

    Inside Essaouira medina, luggage access can be limited; ask your riad how the final walk from taxi drop-off works.

    On a multi-base itinerary, location often matters more than a small room-rate difference. A hotel that removes two daily transfers can save more energy than an upgraded room far from the places you actually want to visit.

    Illustrated Atlantic Morocco itinerary through Casablanca, Rabat and Essaouira

    Historic buildings can be atmospheric but may have stairs, small lifts, difficult vehicle access or late-night street noise. Read recent reviews for these practical details rather than relying only on star rating or photographs.

    Transport: what is worth planning in advance

    Casablanca–Rabat is well suited to rail, which is easier than driving between the major cities.

    Essaouira lacks the same direct rail convenience, so compare reputable coach and private-transfer options.

    Do not rent a car for Casablanca/Rabat city sightseeing unless you also need countryside flexibility.

    Judge every transfer door to door. The advertised rail, bus, flight or ferry time is only one part of the move; checkout, terminal access, waiting, luggage and the final connection to the next hotel all consume usable day.

    Book restricted tickets early only when the plan is genuinely fixed. Weather-sensitive days and remote transfers benefit from flexibility, even when the flexible fare costs a little more.

    Food and daily rhythm

    Casablanca gives modern variety, Rabat is excellent for calmer city dining and Essaouira naturally shifts toward seafood.

    Inside medinas, choose restaurants by recent quality and hygiene reviews rather than the most aggressive invitation.

    Meals should slow the itinerary rather than fill gaps between attractions. One regional lunch can add more to the memory of a trip than another rushed museum squeezed into late afternoon.

    Mix local specialties with simple meals. Trying to make every breakfast, lunch and dinner an iconic food experience is tiring, expensive and particularly awkward on transfer days.

    Families, children and older travellers

    The mix of waterfronts, medina exploration and open spaces works well with children.

    Older travellers should check riad stairs and medina walking surfaces.

    Private road transfer to Essaouira can be worthwhile when luggage or mobility makes coach stations difficult.

    For multigenerational travel, the realistic pace is the pace at which the least mobile member of the group still enjoys the day. That usually creates a better trip for everyone.

    Children often respond better to variety than to quantity: a castle after a museum, a beach after an archaeological site or a short boat ride after a city walk.

    Budget: where the money really goes

    Rail between the major northern cities is efficient; the road transfer to Essaouira is where private transport can increase cost.

    Riad charm is valuable only when the room is comfortable, quiet enough and accessible for your group.

    Compare total trip cost rather than headline price. A cheaper hotel can become more expensive after taxis, parking, breakfast and the time lost reaching it.

    The best splurges usually remove friction: a better-located room, a direct transfer, a guide where context matters or an extra night that prevents an exhausting one-day move.

    Best time to go

    Essaouira is famous for Atlantic wind, which can be refreshing in summer and cool at other times.

    Spring and autumn balance city sightseeing with comfortable coast weather, but conditions vary day to day.

    Shoulder season often gives the best balance of weather and crowds, but transport and attraction schedules can be reduced. Check the actual month rather than relying on a generic ‘best time’ sentence.

    Heat, rain, wind and daylight should change the order of the day. Move exposed outdoor sights to the most comfortable hours and keep indoor alternatives available.

    Comfort, accessibility and realistic pacing

    The route deliberately becomes slower as it moves south-west.

    Use the extra Rabat night to absorb arrival fatigue or poor weather instead of adding another famous city.

    Travel fatigue compounds. A difficult transfer on Day 3 can reduce the quality of Days 4 and 5, which is why this itinerary avoids unnecessary one-night stops.

    A free half-day is not wasted. It is a practical buffer for weather, laundry, a delayed departure, a child who needs rest or a place you discover only after arriving.

    Small decisions that improve the trip

    Do not force Marrakech into the route

    It changes the trip from Atlantic Morocco into a highlights circuit.

    Give Casablanca two nights

    The city deserves more than airport logistics.

    Finish in Essaouira

    The coastal rhythm is an ideal contrast after two large cities.

    What I would leave out on this length of trip

    Leave Marrakech, Fez and the desert for other itineraries already covered on the site.

    Skip same-day Essaouira from another distant city if you can sleep there instead.

    Mistakes that make this trip harder than it needs to be

    • Treating Casablanca as only an airport.
    • Staying one night in Rabat.
    • Assuming Essaouira is guaranteed sunbathing weather.
    • Booking inaccessible riads for travellers with mobility issues.
    • Renting a car unnecessarily in the big cities.
    • Driving long-distance to an airport on the final morning.

    How I would adapt the itinerary

    With six days, use Casablanca/Rabat plus two Essaouira nights.

    With twelve days, add El Jadida or another Atlantic stop with at least two nights rather than returning inland.

    Before booking

    • Check current mosque visiting arrangements.
    • Compare rail and coach schedules.
    • Ask riads about luggage access.
    • Pack a wind layer.
    • Protect the departure transfer.

    Practical questions

    Is Casablanca worth visiting?

    Yes if modern architecture, urban Morocco and the Hassan II Mosque interest you. It should not be judged by Marrakech expectations.

    Rabat or Casablanca for more nights?

    Rabat is calmer and usually easier to enjoy slowly; Casablanca is larger and more urban.

    Is Essaouira only a beach town?

    No. Its medina, harbour, food and atmosphere are at least as important as the beach.

    A final planning principle

    This route works because it stops treating famous inland cities as mandatory.

    A themed regional trip can show more of Morocco’s character than a rushed national checklist.

    Final thoughts

    Casablanca, Rabat and Essaouira form a coherent Atlantic journey with modernity, history and coast.

    Nine days are enough precisely because the route refuses to detour inland for another headline city.

  • Travel Money Abroad: Cards, Cash, ATMs and Currency Conversion Without Hidden Fees

    Travel Money Abroad: Cards, Cash, ATMs and Currency Conversion Without Hidden Fees

    Money problems rarely happen at a convenient moment. A card may be declined after landing, an ATM may charge more than expected, or a restaurant may offer to convert your bill into your home currency at an unfavorable rate. Those problems can affect anyone, from a student making their first trip abroad to grandparents traveling with family. Good preparation means understanding the costs and keeping a workable backup rather than carrying large amounts of cash everywhere.

    At a glance

    A practical payment plan for international holidays, from card acceptance and cash withdrawals to backups and exchange-rate surprises.

    What to check before booking
    Decision What matters
    Costs Issuer fees, ATM surcharges and exchange rates
    Payments Local-currency choice and merchant terms
    Backup Independent cards and emergency funds

    This guide is independent of any bank or card provider. Fees and protections vary by card issuer, country, network and merchant. Before departure, read your provider’s current foreign-transaction and withdrawal conditions. For travelers within or visiting Europe, Your Europe explains currency conversion charges; the underlying principle applies broadly even though legal disclosure requirements differ outside the EU.

    Identify where cash is truly necessary

    Card acceptance is widespread in many destinations, yet small markets, rural transport, tips and locally operated businesses may still prefer cash. Research the habits of the particular area rather than assuming an entire country is cashless. In some places electronic payments are the norm even for small purchases; elsewhere an ATM withdrawal shortly after arrival may be sensible.

    Estimate one or two days of ordinary spending in cash, with a reserve appropriate to the destination. Avoid carrying the full trip budget in banknotes. Ask the property whether it accepts card payments and whether local taxes are payable in cash. Our realistic travel budget helps separate daily spending from hotel deposits, transport charges and emergency funds.

    Learn the three kinds of charges you may face

    An international payment can involve a foreign-transaction fee from your issuer, a currency conversion markup and a merchant or ATM operator surcharge. These are separate costs. A card advertised as “no foreign transaction fee” may still convert currencies using a particular network or provider rate, and an independent ATM can add its own fee.

    Compare published fee schedules before travel. Read whether your debit card charges a fixed amount per withdrawal, a percentage or both. Fees can make repeated small withdrawals disproportionately expensive. Avoid using a credit card for a cash advance unless you understand potential interest and charges; cash advances commonly work differently from normal purchases.

    Understand the choice between local and home currency

    At some ATMs and card terminals, the screen asks whether to charge in your home currency or the currency of the country you are visiting. This is often called dynamic currency conversion. If you accept conversion by the ATM or merchant, its rate and markup may differ from what your issuer would otherwise use. Paying in local currency is often the better-value option, but check the details rather than assuming one rate is universally cheapest.

    Do not confuse declining merchant conversion with declining the purchase itself. The wording can be confusing, and screens may highlight a large home-currency figure. Read carefully, particularly when a terminal is presented quickly. Keep a receipt showing the selected currency. In parts of Europe, specific markup disclosures are required, but that does not mean the converted offer is necessarily attractive.

    Choose ATMs with attention to security and cost

    Prefer machines at established banks or in well-lit, supervised locations rather than unfamiliar stand-alone machines with unclear fees. Examine the machine for tampering and shield the keypad when entering a PIN. If a card is retained, contact the issuer through its official number immediately instead of accepting unsolicited help from a bystander.

    Review any displayed operator fee before confirming withdrawal. A seemingly cheap exchange rate can be offset by a substantial flat fee. Withdrawal limits and daily bank limits may restrict the amount you can access. It is useful to find a second ATM network or bank near your accommodation rather than depending on one machine that may be empty or offline.

    Decide how much cash to exchange before departure

    A small amount of destination currency can help with an airport taxi, a bus ticket or a snack, but exchanging a large sum at the last minute may involve unfavorable rates. Compare exchange offices by the net amount received after commission, not by a promotional rate displayed outside. Some places advertise “zero commission” but embed the cost in the exchange spread.

    Ask whether your home bank can supply the currency and what rate it uses. If you plan to exchange on arrival, check opening hours and avoid being forced into a poor deal because you have no way to reach accommodation. Never exchange money with an unlicensed stranger on the street. Keep the transaction receipt where local rules or later exchange requirements make it useful.

    Carry more than one independent payment method

    A single card can be blocked, lost or held as a deposit by a hotel. Carry at least one alternative method, ideally from a different account or provider where feasible, and keep it separately. Check that you know the PIN and can access the provider’s security service without relying solely on your usual mobile number. Some banks require app approval or SMS authentication, which may be difficult overseas.

    Traveling in a group? Agree how emergency funds would be accessed if one adult’s phone or wallet disappeared. Families should not depend entirely on a child carrying the group’s only bank card, while older travelers may prefer simple written instructions for card cancellation. Our Internet-abroad guide covers connectivity arrangements that help you reach financial services securely.

    Budget for deposits and temporary holds

    Hotels and rental companies may place a preauthorization hold that reduces your available balance without being a final charge. The amount and release time can depend on the property, bank and card type. A traveler with a tight budget may discover their remaining funds are inaccessible while a deposit is pending. Ask about the hold amount, accepted cards and estimated release process before check-in.

    Some services require a credit card in the lead traveler’s name rather than a debit or prepaid card. If you plan to rent a vehicle, review these rules carefully; our driving-abroad checklist explains why the correct payment card matters at pickup. Do not budget as if every authorization will clear immediately after returning the car or leaving the hotel.

    Stay alert to payment scams and false urgency

    Fraudsters may pose as a hotel, airline or toll agency, claiming that a small overdue amount must be settled through a link. The message may contain real booking information if an account was compromised. Do not click unexpected payment links; contact the provider using the original booking app or independently verified contact details.

    Illustration of a traveler paying by card at an outdoor café

    Avoid giving complete card details over the phone to someone who calls unexpectedly. Set reasonable transaction alerts and review statements while traveling, but use secure connections when accessing financial accounts. Our travel scam guide describes fake listings, suspicious payment methods and what to do after a fraudulent transaction. Familiarity with common scams is useful without assuming every unfamiliar request is malicious.

    Account for gratuities and local payment customs

    Tipping expectations differ widely. In some places service is included; in others gratuities are customary for particular services. Research local practices from current, credible sources rather than applying a home-country percentage everywhere. Tour operators and hotels sometimes state whether gratuities are included, and accepting their information can help avoid embarrassment or double-paying.

    Small businesses may offer a discount for cash, but make sure the transaction is lawful and you receive whatever receipt is required. If prices are quoted in another currency, clarify which exchange rate applies before agreeing. Respectfully declining an unexpected extra charge is reasonable, but avoid escalating minor disputes when personal safety or the group’s wellbeing could be affected.

    Create a calm payment routine for the holiday

    Before departure, check acceptance, fees, withdrawal limits, authentication methods and the numbers to report lost cards. Set a spending target in local currency and decide how you will monitor exchange rates without checking every purchase obsessively. On arrival, make a small test purchase or withdrawal, keep receipts for major charges and verify that your backup card works if needed.

    At the end of the day, record large expenses and important deposits, not every cup of coffee. Reconcile your account after returning home, including delayed hotel charges and outstanding authorizations. A clear payment plan supports the real purpose of travel: discovering places and enjoying time with other people, not spending the holiday troubleshooting financial surprises.

    Frequently asked questions

    Should I always choose the local currency at an ATM?

    Paying or withdrawing in the local currency often avoids an ATM or merchant’s dynamic conversion markup, but compare the disclosed rate and your issuer’s charges before deciding. The cheapest option depends on actual terms.

    Is it better to use cash or card abroad?

    A mix often works well. Research local acceptance, compare your card’s fees and keep enough appropriate cash for places that do not accept electronic payments or for a short emergency.

    Why is money unavailable after a hotel deposit?

    A preauthorization can temporarily reduce your available balance. Release timing depends on the business and bank. Ask about holds before arrival and leave room in your budget for them.

    What should I do if my card is lost or stolen?

    Use your bank’s official emergency channel immediately to freeze or cancel it, review transactions and ask about replacement or emergency cash options. Rely on a separate backup payment method in the meantime.

  • Vancouver Island in 10 Days: Victoria, Pacific Rim and the East Coast Without Driving End to End

    Vancouver Island in 10 Days: Victoria, Pacific Rim and the East Coast Without Driving End to End

    Vancouver Island is large enough to look manageable on a map and still surprise first-time visitors with its driving times. Mountains, ferry terminals, winding roads and irresistible coastal stops make a ten-day trip much better when it focuses on the southern and central island rather than trying to reach every community from Victoria to Cape Scott.

    The route below combines Victoria, the Pacific Rim and the east coast with three main bases. It leaves northern Vancouver Island for another trip, because adding it would turn relaxed coastal days into long transit stages.

    Wildlife, rainforests and ocean experiences are central to the island, but none should be treated as guaranteed. Weather and animal movement change daily, so a strong plan includes worthwhile beaches, towns and short walks even when a boat trip or wildlife sighting does not happen as expected.

    Quick trip summary

    • Allow 10 days for southern and central Vancouver Island.
    • Use Victoria, Tofino/Ucluelet and one east-coast base.
    • Do not add the far north unless you have more time.
    • Reserve summer ferries, Pacific Rim accommodation and key wildlife tours early.
    • Treat wildlife sightings as possibilities, not promises.

    Who this trip is best for

    This trip suits road trippers who enjoy ocean scenery, temperate rainforest, small cities, wildlife and a mixture of easy and moderate outdoor activity. Families and older travellers can enjoy most of the route without difficult hiking.

    It also suits travellers who want a Canada trip with varied landscapes but limited hotel changes. Anyone focused on remote wilderness expeditions or northern communities should plan a separate, longer island itinerary.

    How many days do you really need?

    Ten days is a strong first-trip length. Seven days can work with Victoria and Pacific Rim only, while two weeks allows Campbell River, Strathcona or the north without making every other day a transfer.

    A shorter trip works only if you shorten the geography as well as the calendar. Removing sleep and meal buffers while keeping every region usually creates a trip that looks efficient on paper and feels exhausting in practice. Extra nights are most valuable when they reduce a difficult transfer, create a weather buffer or let you experience a place at a different time of day.

    Where to stay and how to choose your bases

    Three bases keep the route simple. Add a fourth only if it clearly reduces driving for an activity you care about, not merely because another town appears on the map.

    Base Why it works
    Victoria Best for arrival, harbour atmosphere, gardens, museums and southern-island day trips.
    Tofino or Ucluelet Best for Pacific Rim beaches, rainforest walks, surf culture and marine excursions.
    Nanaimo, Parksville or Comox Valley Useful east-coast base for beaches, food, forests and onward ferry or driving connections.

    Choose each base by what you want to do in the first and last two hours of the day. Check parking or station access, stairs, restaurant hours and how far you will carry luggage. A location that saves forty minutes twice a day is often worth more than a prettier room far from the experiences you came for.

    A realistic day-by-day itinerary

    Day 1: Arrive in Victoria

    Collect the car only when you need it, settle in and explore the harbour and walkable central area.

    If you arrive by ferry or flight, avoid an immediate multi-hour drive to the west coast.

    Day 2: Victoria and the south island

    Choose museums, gardens, a coastal walk or a wildlife tour if conditions suit.

    Keep marine activities on a day when you can move other sightseeing around the weather.

    Day 3: Victoria to Pacific Rim

    Drive toward Tofino or Ucluelet, allowing far more time than the map suggests for stops, road works and scenic detours.

    Buy groceries before the final part of the drive if your accommodation is self-catering.

    Day 4: Pacific Rim beaches and rainforest

    Use short rainforest walks and beach time to understand the landscape before committing to a longer activity.

    Check tide, surf and storm conditions; the ocean is beautiful but not automatically safe for swimming.

    Day 5: Wildlife, paddling or a flexible ocean day

    Take a responsible marine excursion, paddle with a guide or choose a second beach-and-trail day.

    If a boat is cancelled, keep the day useful rather than trying to drive back across the island.

    Day 6: A slower Pacific Rim day

    Spend another day around the west coast, adding a short hike, cultural experience or relaxed town time.

    Three nights here are more useful than one rushed “Tofino day” between long drives.

    Day 7: Cross to the east coast

    Drive toward Nanaimo, Parksville or Comox Valley, stopping at forests or lakes en route when conditions allow.

    Treat the crossing as a scenic travel day and avoid adding a late-evening wildlife excursion.

    Day 8: East-coast communities and beaches

    Explore the chosen base with an easy beach, food stop, market or forest walk.

    The east coast is a good place to reduce the pace after more weather-dependent west-coast days.

    Day 9: Optional Campbell River, Strathcona edge or local day

    Choose one larger excursion north or inland, or keep the day local if the group is tired.

    Do not add a distant destination simply because this is the last full day; choose the experience with the best conditions.

    Day 10: Ferry or flight onward

    Return the car and connect to the mainland or your next destination.

    Reserve a generous ferry or airport buffer, particularly in busy summer periods.

    Transport: what works best

    A rental car gives the best flexibility once you leave Victoria, but the route includes ferries, road works and mountain driving that can lengthen journey times. Fuel before remote stretches and do not rely on a last-minute charging plan if using an electric vehicle.

    Ferry reservations can be important during busy periods, especially when travelling with a vehicle. Arrive with enough check-in margin and avoid building an international flight around the minimum theoretical connection.

    Calculate transfers door to door, not only by the time shown on a timetable. Add checkout, parking, waiting, luggage, boarding and the local connection at the other end. Download offline maps and save accommodation addresses before long rural drives or journeys with several connections.

    Best time to visit

    Late spring through early autumn offers the broadest mix of activities and longer daylight. Summer is busiest and requires earlier accommodation planning, while spring and autumn can be excellent for a quieter trip with more variable weather.

    The west coast is known for rain and dramatic storms outside summer. That can be part of the appeal, but dress for it and choose accommodation that is comfortable enough to enjoy when outdoor plans shorten.

    Weather averages help you choose a season, but they cannot decide tomorrow’s plan. Keep at least one weather-sensitive day flexible and reorder outdoor activities when wind, rain, heat, visibility or sea conditions make another day more sensible.

    How to pace each day

    The island’s scale is the biggest planning trap. Victoria to Pacific Rim and west coast to the east coast are real travel stages, not empty gaps that can absorb several major attractions.

    A useful rule is to plan one anchor experience before lunch and one lighter activity after it. That keeps the day interesting without making every meal, transfer and viewpoint compete for time. If weather or transport shifts, drop the lowest-priority stop instead of borrowing time from sleep or pushing dinner late into the evening.

    Protect one quiet evening every two or three days. Laundry, a supermarket stop, an early dinner or simply sitting near the hotel may look unproductive in an itinerary, but those pauses often determine whether the second half of the trip remains enjoyable.

    Travelling with children

    Families can build days around beaches, aquariums or museums, short rainforest walks and simple wildlife experiences. Ocean safety deserves extra attention because cold water, surf and logs can make a beach dangerous even when it looks calm.

    With children, reduce the number of transitions rather than simply shortening every activity. A beach, playground, easy viewpoint, boat ride or food stop can become the reward around which the adult sightseeing is built. Carry water and snacks, know where the next toilet is, and avoid scheduling the longest transfer at the time of day when everyone is already tired.

    Travelling with older adults or limited mobility

    Many rainforest and coastal viewpoints have short access routes, but boardwalks can be wet and uneven. Choose ground-floor or lift-access rooms and ask tour operators about boarding conditions before marine excursions.

    For older travellers or anyone with limited mobility, check the details behind words such as “easy” and “accessible”: surface, gradient, steps, distance from parking, boat boarding, shade and toilet availability. A scenic drive plus two short walks can produce a better day than one famous hike that consumes all available energy.

    Food and meal planning

    Victoria offers the widest restaurant choice, while Pacific Rim and east-coast communities are strong for seafood, bakeries, cafés and locally produced food. Reserve popular summer dinners if eating at a specific restaurant matters to you.

    One planned meal per day is usually enough. Keep another flexible so you can eat close to where you actually finish, repeat somewhere you liked or adapt to opening hours. In rural areas and small islands, kitchens may close earlier than in major cities, so keep a simple backup for late arrivals.

    Budget: where the money really goes

    Accommodation in Pacific Rim is often the largest expense, followed by the rental car, ferries and wildlife tours. Staying three nights in one west-coast base is usually better value than splitting nearby towns into multiple one-night stays.

    Compare total-day cost rather than isolated prices. A better-located room may remove taxis, a direct transfer may save a hotel night, and a guided excursion can be good value when it replaces complicated independent logistics. The easiest savings usually come from fewer hotel changes, simpler meals on transfer days and avoiding duplicate transport.

    Safety and practical preparation

    Respect cold-water conditions, wildlife distance rules and trail closures. Carry bear-aware habits in natural areas, follow local guidance and never approach marine or land animals for a photograph.

    Carry essential medication, water, sun and rain protection and a charged phone, but do not assume mobile coverage will be continuous in mountain, coastal or rural areas. Tell someone your plan before remote walks, respect local closures and turn around when conditions are worse than expected. For health, entry or security questions that can change quickly, use current official guidance rather than an old blog post.

    Mistakes that make this trip harder than it needs to be

    • Trying to drive the island from end to end in ten days.
    • Underestimating the Victoria–Pacific Rim travel day.
    • Booking key summer accommodation too late.
    • Treating wildlife sightings as guaranteed.
    • Ignoring ferry reservation and check-in requirements.
    • Assuming every beach is safe for swimming.

    Vancouver Island feels far larger when you stop at beaches, forests and cafés, which is exactly why a shorter geographic route creates a better holiday.

    If you have less time

    With seven days, use Victoria and Tofino/Ucluelet, with one overnight or transit stop only if needed. Skip the east-coast extension.

    The best shortened itinerary normally removes one region or island completely. Keeping the same number of bases and simply cutting nights creates more packing and less experience, which is the opposite of what a short trip needs.

    If you have more time

    With fourteen days, add Comox Valley, Campbell River, Strathcona or the north, but keep multiple nights in each region rather than creating a chain of one-night stops.

    Use additional days to deepen the route rather than extend the driving radius automatically. A second hike, market morning, village stay or weather buffer often reveals more than another distant pin on the map.

    What to book early and what can stay flexible

    Reserve summer Pacific Rim accommodation, vehicle ferries and any must-do wildlife tour. Keep beaches and forest walks flexible around weather.

    Book the pieces that can genuinely sell out or derail the route first: key accommodation, limited-capacity transport and any activity that matters enough to define the trip. Leave ordinary sightseeing movable. Recheck operating days, road or trail conditions and local transport shortly before departure, because seasonal destinations often change faster than old itineraries suggest.

    Useful official resource

    For current access, transport, seasonal opening information and visitor rules, check Tourism Vancouver Island before travel.

    Final planning checklist

    • Choose a south-and-central route rather than the whole island.
    • Reserve vehicle ferries in busy periods.
    • Book Pacific Rim lodging early.
    • Carry rain layers and respect ocean conditions.
    • Leave wildlife days flexible.
    • Keep the final ferry or flight connection generous.

    Final thoughts

    Vancouver Island is most satisfying when the distances are treated honestly. The island is not a single attraction but a sequence of coastal environments that need time to feel different from one another.

    Ten days is enough to combine a city, the wild Pacific coast and the gentler east side without spending the trip proving how far you can drive.