Author: admin

  • Canberra in 4 Days: National Museums, Lake Burley Griffin and Neighbourhoods Without Treating It as a Sydney Detour

    Canberra in 4 Days: National Museums, Lake Burley Griffin and Neighbourhoods Without Treating It as a Sydney Detour

    Canberra deserves enough time to feel like a destination rather than a box between better-known stops. 4 days give a first-time visitor room for essential sights, neighbourhood life, meals and a flexible block without turning every morning into a race.

    If Canberra is part of a wider journey, compare the pace with Sydney in 5 Days: Harbour, Beaches and Neighbourhoods Without Overloading the Trip. This city guide adds local depth rather than repeating the broader route.

    Quick trip summary

    • Ideal stay: 4 days for a first visit.
    • Best planning rule: group days geographically and protect one flexible half-day.
    • Best for: first-time visitors, couples, solo travellers, families and slower-paced travellers.
    • Main risk: adding too many excursions and losing the city itself.

    Why 4 days works

    A useful city break is not a contest to collect the maximum number of attractions. Group places that naturally belong together, protect only the reservations that genuinely matter and leave enough slack for meals, weather, queues and simple wandering. This matters for every traveller, but especially for families, older visitors and anyone who prefers to finish the trip with energy left.

    Canberra has enough contrast to justify a real stay, but it remains manageable when each day has a geographic focus. Alternate heavier sightseeing with easier periods so the trip works for different ages, interests and energy levels.

    Where to stay

    Area Why choose it
    City Centre / Civic Practical for restaurants, buses and a first visit without a car.
    NewActon Good for design, dining and access to cultural areas around the lake.
    Kingston / Manuka Popular for cafés, restaurants and a more neighbourhood-oriented stay.
    Barton Useful for Parliament and national institutions, quieter after office hours.

    Choose location before hotel style. Map the first morning, likely dinner area and departure route. A beautiful room that creates two extra transfers every day can cost more in time and energy than a slightly dearer room in the right district. Families should check room size and lift access; light sleepers should read recent comments about street noise.

    A realistic 4-day itinerary

    Day 1: Parliament and the national story

    Start with Parliament House and one nearby institution. Do not attempt every national museum on the first day; Canberra’s distances and large collections reward selection.

    Day 2: Lake Burley Griffin and cultural institutions

    Use the lake as the geographic anchor, combining one major museum or gallery with waterfront walking or cycling depending on weather.

    Day 3: Australian War Memorial and local neighbourhoods

    Give the memorial appropriate time, then change the tone of the day with Braddon, NewActon or another neighbourhood rather than adding another heavy national institution immediately.

    Day 4: nature, markets or flexible museum time

    Use the final day for Mount Ainslie, the arboretum, markets or one museum missed earlier. Keep enough buffer for the return journey if continuing to Sydney or another city.

    Arrival strategy

    Canberra Airport is close to the city by Australian standards, while intercity buses and driving connect Canberra with Sydney. Rail exists but is slower for many itineraries. Choose the arrival method based on total journey time, not only the ticket price.

    Arrival day should carry less risk than the rest of the trip. Save the accommodation address offline, know the first transport option before landing or leaving the station, and avoid a non-refundable attraction immediately after a long journey.

    Getting around efficiently

    Canberra is planned at a larger scale than many visitors expect. Buses, light rail, taxis, rides and cycling all help, but not every national institution is naturally grouped. Plan by precinct and use the lake as an orientation tool.

    Compare routes door to door, not station to station. Waiting time, stairs, transfers and the final walk can make the nominally fastest option worse for a family, a senior traveller or anyone carrying luggage.

    Best time to visit

    Spring and autumn are especially comfortable for outdoor spaces, while summer can be hot and winter mornings cold. Major political, sporting and floral events can raise accommodation demand.

    Seasonal planning should also consider daylight, local holidays, school breaks and whether your most important experience depends on clear skies, calm water or outdoor access.

    What to book before arrival

    Book first the things that can genuinely damage the itinerary if unavailable: a capacity-limited landmark, a specific long-distance connection, a guided experience with few departures or a weather-dependent excursion. Keep ordinary neighbourhood walks, markets and flexible museums movable whenever possible. Avoid reserving every hour; a useful booking creates certainty around something scarce, while an unnecessary booking removes flexibility.

    Food strategy

    Canberra has strong café, wine-region and modern restaurant scenes that are often overlooked. Use Civic, Braddon, Kingston and local markets to break up the museum-heavy days.

    Meals should also function as rest. A very good restaurant ten minutes from where you already are can be a better travel decision than a famous address requiring forty minutes of extra transport.

    What is actually worth prioritising

    Parliament, one or two national institutions, the lake and a neighbourhood-focused evening create a balanced first visit. Canberra is more rewarding when civic architecture and everyday local life are given equal space.

    Should you add a day trip?

    Nearby wine districts and nature areas can work, but a four-day first visit does not require them. If Canberra is added between Melbourne and Sydney or as a separate capital stop, keep the city days focused and avoid turning the stay into another road trip.

    A day trip earns its place when it adds a landscape, historical layer or experience that the city cannot provide. Count total door-to-door time, not only the advertised train, ferry or driving time.

    Travelling with children

    With children, reduce transitions before reducing highlights. One substantial visit in the morning, an easy lunch and a park, waterfront, market or interactive stop in the afternoon usually works better than three formal attractions. Keep snacks, water and a simple exit route available. For babies and toddlers, check surfaces, stairs and changing facilities instead of assuming that “walkable” means stroller-friendly.

    Travelling as a senior or at a slower pace

    For senior travellers or anyone who prefers a slower pace, remove low-value walking rather than removing the experiences themselves. Use public transport, taxis, lifts or short transfers where they save energy, then spend that energy on the historic streets, viewpoints, gardens and museums that justify the trip. Check hotel lifts, shower access and exact attraction entrances before booking.

    Budget planning

    Build the budget in layers: accommodation, airport or station transfer, local transport, fixed attractions, food and a reserve for weather or fatigue. A cheaper hotel is not automatically a cheaper trip if it creates repeated taxi rides or long commutes. If a tourist pass exists, calculate it against the exact attractions and journeys you will use.

    Weather backup plan

    Before each day, identify one outdoor anchor and one indoor alternative. Move museums, covered markets and cafés into the worst weather window and protect the experience that most needs good visibility or dry conditions. Temperature alone is not enough: wind, humidity, rain intensity and daylight can completely change the practical value of a plan.

    Accessibility and mobility

    Accessibility varies sharply between modern transport and historic streets. If step-free access matters, verify the exact station exit, attraction entrance and hotel approach rather than relying on a general city label. Cobblestones, steep lanes, heat, ice and older buildings without lifts can be more limiting than the nominal walking distance.

    Connectivity, payments and practical details

    Download an offline map, save the accommodation address and keep screenshots or offline copies of critical tickets. A local eSIM or data plan can make live transport easier, but the day should not fail because a phone battery dies. Carry a backup payment method and a small amount of local currency where useful.

    What to pack

    Comfortable walking shoes, weather-appropriate layers, sun or rain protection and a small day bag matter more than extra outfits. Add personal medication, a refillable bottle where practical and a compact power bank if navigation and tickets are digital. Pack for the destination’s real conditions, not only the headline temperature.

    Common mistakes to avoid

    • Assuming Canberra is compact because it is a capital city.
    • Booking several major museums on the same day.
    • Treating the city as a rushed detour from Sydney.
    • Ignoring cold winter mornings or hot summer afternoons.
    • Staying in a quiet government precinct when evening dining is a priority.

    Responsible travel and local etiquette

    Residential streets, markets, places of worship and working neighbourhoods are part of daily life, not open-air sets. Keep entrances clear, follow photography rules, dress appropriately where required and support local businesses when it fits naturally. In natural areas, respect marked routes, closures and current safety guidance.

    If you have less or more time

    With one day less, remove the most distant excursion or the day with the most transport instead of compressing every highlight. With one or two extra days, add neighbourhood depth, a slower museum block or one nearby excursion that offers something genuinely different. Extra time should make the trip calmer, not simply add more pins to the map.

    Safety and decision-making on the day

    Use ordinary situational awareness, keep valuables controlled in crowded transport and use clearly identified taxis or trusted ride services where relevant. Conditions vary by neighbourhood and time of day, so current local advice is more useful than blanket labels. On excursion and departure days, set a turnaround time early enough that a delay does not threaten an expensive connection.

    Useful official resource

    Opening hours, fees, access rules, transport schedules and seasonal operations can change. Recheck the official source shortly before departure.

    Final planning checklist

    • Confirm passport, visa, transit and health requirements for your nationality.
    • Reserve the attraction or transport that controls the rest of the itinerary.
    • Save the accommodation address and first-day route offline.
    • Recheck weather, closures and transport notices before each critical day.
    • Keep at least one half-day flexible enough to absorb a delay.
    • Leave a generous buffer before flights and other expensive connections.

    A strong trip to Canberra should feel as though you understood how the place fits together, not merely that you collected its famous names. Protect the reservations that matter, group the rest by geography and remove anything that creates more transit than experience.

  • Shoulder-Season Travel: Find Quieter Weeks Without Booking the Wrong Weather

    Shoulder-Season Travel: Find Quieter Weeks Without Booking the Wrong Weather

    A quieter week in a beautiful destination can be more memorable than a rushed visit in the most popular month. Shoulder-season travel sits between a destination’s peak demand and its quieter periods, although those boundaries change by region, school calendar and activity. The reward may be more comfortable streets, a wider choice of accommodation and time to enjoy local life. The trade-off is that weather, transport frequency and seasonal opening hours may be less predictable. This guide helps you decide whether the quieter window is actually right for your holiday.

    What shoulder season really means

    Shoulder season is not a universal date range. In much of Mediterranean Europe, parts of spring and autumn can be gentler than the busiest summer weeks; on tropical islands, rainy-season patterns and holiday demand may produce very different windows. In alpine resorts, the weeks between ski and hiking seasons can mean closed lifts and quiet hotels rather than bargain adventures. A destination can have separate peaks for beaches, wildlife, festivals and business travel.

    Start with the activity you most want to enjoy. A family hoping for warm swimming water is asking a different question from someone interested in museums or photography. Then identify the local climate, key business opening dates and school breaks in both the origin and destination. A month described online as ‘low season’ can still be crowded during a major festival or long weekend. Travel calendars are useful starting points, not firm promises about price or weather.

    Why a lower price is not the whole calculation

    Hotel rates sometimes fall when demand falls, but savings can disappear if direct flights stop, local buses run less frequently or a rental car becomes necessary. A low advertised room rate may be paired with paid heating, limited facilities or a long transfer from a reduced-season airport. Compare the total door-to-door trip rather than one eye-catching nightly price.

    Build three realistic budgets for your preferred dates: transport, accommodation and daily experiences. Include time cost as well as money. A three-night break requiring two complicated transfers may not be good value for an older traveler or a family with small children. Compare nearby weeks instead of assuming that the first day outside summer automatically becomes cheap. Consider free cancellation if the destination is vulnerable to seasonal transport changes, but read the actual conditions.

    Evaluate weather through the activities you want

    Average temperature is only a partial guide. A coastal destination can feel cooler because of persistent wind; mountains can receive snow at elevation while towns enjoy sunshine; tropical places may see brief intense storms rather than constant rain. For walking holidays, the number of usable daylight hours, trail conditions and transport back to the hotel can matter more than the daily maximum temperature. For beach holidays, sea temperature and lifeguard availability might decide the itinerary.

    Use national meteorological services or reputable climate records for historical context, then check an up-to-date forecast as departure approaches. Do not interpret a historic climate chart as a prediction for a particular week. Make two versions of the itinerary: an outdoor choice for good weather and an indoor or short-distance alternative. Traveling off peak is easier when your happiness is not tied to one perfect sunset.

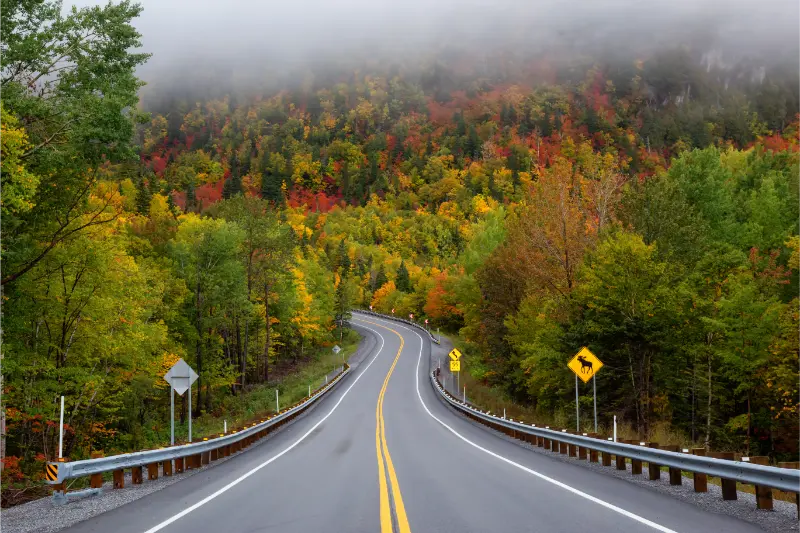
    Autumn Forest Road Through Mountains

    Ask which attractions are genuinely open

    Outside high season, a museum might close one extra day, a boat trip may operate only on weekends and a coastal restaurant may take a winter break. Some seasonal attractions post their dates only shortly before reopening. Verify the official website of every non-negotiable activity, especially ferries, mountain lifts, guided excursions and natural sites with restricted access. Third-party booking portals may show approximate availability before operators release their schedules.

    Avoid planning a holiday around a single tour with one departure each week unless there is a backup. Create a short list of three experiences that are excellent in any weather or season, then add seasonal extras. If you are visiting a small island or remote valley, confirm that a supermarket, pharmacy and transport service remain available. A quieter place can be delightful, but quiet does not always mean convenient.

    When shoulder season is especially rewarding

    Cities rich in museums, markets and neighborhood walks often work well when crowds are lighter. Spring and autumn can offer pleasant sightseeing in some parts of Europe, while heritage towns may feel more lived-in once cruise-ship or day-trip peaks ease. Nature and wildlife trips can also be superb in specific transitional periods, but timing must come from local ecology and conservation guidance rather than generic ‘best months’ lists.

    For couples or solo travelers with flexible leave, the best opportunity may be to choose a weekday arrival and avoid the first or final school-holiday weekend. For food lovers, harvests, seasonal products and community festivals can add meaning beyond famous sights. Respect that local celebrations are for residents first. Buy from local businesses, learn basic etiquette and avoid treating quieter streets as an invitation to ignore community boundaries.

    When high season may still be the better choice

    A family whose main goal is supervised swimming may value a staffed beach and reliable water conditions more than lower prices. A skier needs dependable lifts and snow, not merely a mountain hotel with an attractive offer. Remote national parks may have access roads, visitor centers or shuttles operating only in their main season. Travelers with limited mobility may rely on services that are less available during quiet months.

    Sometimes paying more is reasonable because the specific holiday experience genuinely depends on peak-season infrastructure. The useful question is not ‘How can I avoid crowds at any cost?’ but ‘Which services must be available for this trip to work?’ List those requirements, check them directly and compare the cost difference against the inconvenience of an off-peak alternative.

    Choose accommodation by comfort rather than a photograph

    During transitional weather, heating, air conditioning, rainproof access and a practical neighborhood matter more than a dramatic pool photograph. A remote villa can be peaceful, but with restaurants closed and buses infrequent it may leave non-drivers dependent on taxis. Read recent reviews from the same season, not just July reviews for an October visit. Ask specifically whether breakfast, reception, elevators and accessibility features are available on your dates.

    For older adults, families and wheelchair users, favor a reliable base near transport and essential services. For a quiet couple’s escape, a beautiful rural property can be ideal if roads and dining options are open. Consider whether the property offers free cancellation, flexible check-in and support during bad weather. An accommodation that works beautifully on a bright summer day may be very different in wet November.

    Build transport slack into the calendar

    Reduced flight schedules can turn a small disruption into an overnight delay. Some ferries suspend sailings in rough seas, and regional buses may run on school-day timetables. Check the last journey of the day before booking an onward accommodation. Do not build a chain of separate nonprotected tickets with only minutes between transfers, especially on islands or in mountain areas.

    New York City Autumn Trees And Streets

    A practical approach is to sleep near the arrival hub on the first night if transport is limited. Plan the most weather-dependent excursion for the middle of the stay, leaving a spare day to swap activities. When you rent a car, investigate road closures, snow regulations and parking before leaving. This flexibility is part of the value of shoulder-season travel, not evidence that your plan is incomplete.

    How families and older travelers can benefit

    With younger children, quieter playgrounds, shorter queues and a less frantic pace can be an advantage. However, swimming lessons, kids’ clubs and family shows may operate only during school-holiday peaks. Confirm childcare provision instead of assuming a resort remains fully staffed all year. With school-age children, fixed term dates limit flexibility, but shorter school breaks may still offer excellent city or nature opportunities.

    Older travelers may appreciate easier museum access and milder walking conditions, provided accessible transport and local healthcare are still available. Build rest breaks into the itinerary and avoid accommodation requiring a long uphill walk from reduced bus services. Travelers with specific health or sensory needs should prioritize predictable facilities above potential savings.

    A sensible seasonal packing strategy

    Transitional seasons reward layers rather than carrying clothes for every imagined disaster. Use a comfortable base layer, a warm layer and an outer layer suited to forecast wind or rain. Comfortable shoes with suitable grip matter more than an extra dressy outfit on wet cobbled streets. For family travel, add a small set of dry socks and spare children’s clothing to hand luggage when transit delays are possible.

    Pack for planned activities: sturdy shoes for gentle hikes, appropriate sun protection even in cooler weather and any special equipment required by operators. Before packing a bulky coat, check whether you will spend most time inside cities or at altitude. Review luggage allowances if changing from high-season nonstop flights to a cheaper route with separate carriers. There is little value in saving on airfare if unexpected baggage charges erase the difference.

    Example decision matrix

    Holiday priority Shoulder season advantages What to verify
    Art and city walks Quieter attractions and flexible dining Museum hours, local events
    Beach relaxation Less-crowded sand and accommodation Water temperature, beach services
    Family resort Possible lower room prices Kids’ clubs, pools, restaurants
    Mountain hiking Attractive colors and quieter paths Trail access, daylight, weather
    Island hopping Calm towns and different local rhythms Ferries, wind, open lodging

    Make your booking plan resilient

    First, choose two date windows rather than one fixed week. Compare flight connections, room cancellations and must-see activity calendars. Second, contact accommodation when a facility such as heating, accessible parking or an elevator is essential. Third, identify one alternative excursion for every weather-sensitive day. Fourth, monitor significant seasonal closures in the two weeks before departure. Finally, avoid booking every meal and tour unless there is a genuine capacity reason.

    A good shoulder-season itinerary often contains fewer attractions on paper but more time to experience them. There is room to return to a market, enjoy a café or ask a local guide what is happening that week. That flexibility is one of the strongest reasons to travel outside the most predictable months.

    Frequently asked questions

    Is shoulder season always cheaper?

    No. Events, business travel, school holidays, reduced flight capacity and local demand can raise prices. Compare total trip costs for several weeks.

    Is autumn better than spring?

    It depends on destination and priorities. Sea temperature, daylight, rainfall, wildlife patterns and annual closures can make one transitional season preferable to the other.

    Should I buy travel insurance for an off-season trip?

    Review cancellation, interruption and weather-related terms for any trip, particularly when transport is infrequent. Policies do not automatically cover every poor-weather day.

    Further reading

    Start with how to build a realistic travel budget, then compare hotel, apartment, hostel or resort options. For disrupted journeys, see flight delays and cancellations and travel insurance explained.

  • Responsible Wildlife Tourism: How to Choose Ethical Animal Encounters

    Responsible Wildlife Tourism: How to Choose Ethical Animal Encounters

    Watching an animal in its natural habitat can be one of the most memorable travel experiences. It can also become harmful when visitors crowd wildlife, purchase close-contact encounters or reward operators that keep animals in poor conditions. The difficult part is that marketing words such as ‘sanctuary’, ‘rescue’ and ‘eco-tour’ do not guarantee good welfare. Responsible wildlife travel begins before booking, with careful questions about animal behavior, the guide’s methods and how tourism benefits conservation and local communities.

    Start by deciding what kind of encounter you want

    A walk through a protected wetland with a knowledgeable guide is very different from touching a captive wild animal for photographs. Responsible choices usually emphasize observation at a distance, natural behaviors and a quiet visitor role. That might mean birdwatching from a hide, whale watching with regulated approach distances, visiting a national park or taking a guided night walk where local rules permit. The best experience does not always include the closest photograph.

    Think about your mobility, budget and the ages in your group. A small child may enjoy a short dawn wildlife walk more than six hours in a vehicle. A traveler with limited mobility may need a step-free viewing platform or adapted safari vehicle. Ask operators for honest descriptions of terrain, toilet access and activity length. An ethical excursion should also be safe and feasible for the humans who attend.

    Why labels such as ‘sanctuary’ are not enough

    Some venues use conservation language while encouraging riding, bathing, feeding or selfies with wild animals. A credible organization should explain the animals’ origin, daily management, welfare standards and whether they can avoid interacting with people. In facilities caring for rescued animals that cannot be released, good welfare may mean space, appropriate veterinary care, species-specific social conditions and distance from visitors—not performances on demand.

    The World Animal Protection elephant-friendly guide warns that close-contact activities can disguise poor welfare and advises travelers to prioritize observation rather than touching. The principle extends beyond elephants: a captive dolphin show or posed photograph with a sedated-looking predator deserves scrutiny, regardless of a polished website. Ask where the booking revenue goes and whether an independent conservation authority oversees the facility.

    Questions to ask before paying a tour operator

    Begin with one specific question: ‘What will the animals be free to do if they do not approach us?’ A responsible answer should not promise contact or a guaranteed close-up. Ask for the guide-to-visitor ratio, minimum distances, whether feeding is prohibited and how operators respond when animals change direction. For boats, ask about engine speed and procedures to avoid surrounding or chasing marine mammals.

    Read recent independent reviews carefully, looking for descriptions of overcrowding, repeated pursuit, noise or coercive handling. A few exceptional photographs may reflect pressure on wildlife rather than quality. Confirm that the operator holds required local permits and follows the rules of the protected area. Prefer companies that explain how visitors can minimize disturbance before setting out.

    Keep your distance even when an animal approaches

    Animals can move unpredictably, particularly around young, food, nesting sites and territories. Keep to officially published viewing distances and follow rangers’ instructions; the appropriate distance depends on the species and location. Never use food to lure an animal closer, imitate distress calls for photographs or step between a parent and its young. Do not touch wildlife, including animals that appear calm or accustomed to tourists.

    If an animal approaches, follow the site-specific guidance rather than improvising. Some areas require visitors to remain still; others recommend moving away or returning to a vehicle. A generic internet rule cannot replace instruction from the responsible park authority. For families, explain ahead of time that wild animals are not pets and that seeing them briefly from far away is still a successful outing.

    Choose viewing times for welfare, not just photos

    Dawn and dusk can be productive wildlife-viewing periods in some ecosystems, but the right time depends on season, species and conservation restrictions. Night activities may be inappropriate in sensitive habitats, particularly when bright lights disturb animals. Verify whether seasonal closures protect nesting birds, breeding beaches or migration corridors. Accept that reputable operators sometimes cancel outings when conditions would make them unsafe or damaging.

    Create an itinerary with optional nature time instead of building the whole holiday around a single guaranteed sighting. Weather, food availability and animal movements are beyond a guide’s control. Being prepared not to see a specific species is part of ethical wildlife tourism. A guide who explains habitat and tracks carefully can offer a worthwhile experience even when the hoped-for animal remains hidden.

    Whale watching and other marine encounters

    On a whale- or dolphin-watching boat, watch how the captain behaves before you focus on your camera. Chasing an animal, forcing repeated approaches or blocking its movement can create stress. Local regulations may set approach distances, speed limits, visitor caps and restrictions around calves. Review the relevant marine wildlife authority’s rules for your destination, as one global number would be misleading.

    For snorkeling or diving, do not stand on coral, touch turtles or use wildlife as a prop. Secure loose equipment so it cannot drag across a reef. Choose operators who provide a safety and conservation briefing and who do not promise that you can swim directly alongside protected species where such interaction is restricted. Sea conditions also determine whether an activity is suitable for children or less confident swimmers.

    Tenerife Pilot Whales At The Ocean Surface

    Birdwatching without disturbing nests and habitats

    Birdwatching is accessible at many budgets, from urban wetlands to guided mountain walks. A small pair of binoculars and a local field guide often create more enjoyment than the largest camera lens. Use marked trails and designated hides where available. Avoid playback of bird calls where it may disturb nesting or territorial birds, and never move branches or approach a nest merely to improve a photograph.

    Many wetlands have boardwalks, accessible paths and short loops suited to mixed-age groups. Ask about mosquito activity, heat exposure and the availability of benches. Respect quiet zones and other photographers’ space; a noisy group can disturb birds and spoil the visit for everyone. The point is learning to recognize behavior and habitat, not collecting the longest checklist at the expense of the animals.

    How to judge conservation claims

    A tour company may advertise that it ‘supports conservation’ without explaining what this means. Look for measurable activities: payments to a park authority, habitat restoration, a research partnership with a named institution or wages for trained local guides. Claims should be specific and independently verifiable where possible. A photo with an animal is not evidence of a conservation outcome.

    Be cautious about volunteer experiences that invite untrained tourists to handle wild animals, provide veterinary care or rear orphaned juveniles. Such activities may be inappropriate or harmful and can create demand for contact. Legitimate scientific or rehabilitation work requires expertise, protocols and supervision. Supporting conservation through entrance fees, donations to credible organizations and responsible observation is often more useful than trying to participate in animal care during a short vacation.

    Make the experience accessible and family-friendly

    A responsible excursion must respect both wildlife and people. Ask whether the vehicle has a high step, whether a boardwalk is suitable for a wheelchair and how long the group will remain without toilets. Older travelers may prefer a shorter sunrise excursion and an afternoon rest rather than several days of rough-road drives. Parents should clarify minimum ages, life-jacket sizes and safety barriers on boats or platforms.

    Explain rules to children as a positive promise: ‘We watch from here so the animal can choose what to do.’ Give them a role such as recording bird colors or identifying footprints. Avoid using food to entice animals for entertainment. For sensory-sensitive visitors, ask about engine noise, crowd size and the length of quiet stops. Access and animal welfare do not have to compete when planning is thoughtful.

    Photograph memories without changing behavior

    A long lens, binoculars or cropping later can help you enjoy distant animals without moving closer. Silence camera sounds where allowed and minimize flash, especially around nocturnal animals. Do not use drones unless expressly permitted by local law and park policy; they can frighten wildlife and disturb other visitors. Respect guides who tell you a particular photo is not possible or that an area is temporarily closed.

    Be careful how you caption and share wildlife images. A geotag can attract crowds to fragile nesting or breeding sites. If a photograph shows an animal being held or handled, it may inadvertently promote a harmful attraction even if your post criticizes it. Share the story of the habitat, the guide’s knowledge or the conservation project rather than only the ‘perfect’ close-up.

    Budget and community impact

    Ethical nature excursions can cost more because well-trained guides, small groups, licensed access and conservation fees have real costs. Price alone does not prove good practices, but an impossibly cheap tour that guarantees close animal interaction is worth questioning. Compare what is included: transport, park permits, safety equipment, insurance arrangements and fair guide pay. Avoid bargaining over protected-area fees or asking to skip required permits.

    Support nearby communities by eating locally, staying longer when practical and using trained guides with authentic connections to the place. Yet do not assume that a business is responsible simply because it is locally owned; ask the same welfare questions. The best tourism models benefit residents while protecting the ecosystems that make the destination special.

    Wildlife-tour checklist

    Green flags Red flags
    Natural observation at a distance Guaranteed touching or riding
    Published rules and required permits No clear access permissions
    Qualified guide who accepts no sightings Claims that wildlife always performs
    Conservation activity explained concretely Vague ‘eco’ branding only
    Safety and accessibility questions welcomed Pressure to book immediately

    What to do when something feels wrong

    If an operator behaves differently from the promised standard, ask calmly to stop participating in unsafe or harmful activities. Follow local emergency and park procedures rather than confronting staff in a way that creates risk. Keep factual notes, relevant photos taken lawfully and the business’s booking details. Report serious concerns to the appropriate local wildlife authority or trusted conservation organization. Reviews can be useful when they describe what happened without exaggeration.

    The goal is not to shame every imperfect venue from afar, but to direct demand toward better practices. Choose fewer, better-researched experiences instead of filling every morning with animal attractions. Your memory of wildlife will be more powerful when you know that your presence did not require an animal to perform for you.

    Frequently asked questions

    Are all animal sanctuaries ethical?

    No. The word ‘sanctuary’ is not sufficient proof of welfare. Research how the facility obtains, houses and manages animals, and whether visitors are encouraged to touch them.

    Is feeding wild animals harmless?

    Often it is not. Feeding can change behavior, create dependence and lead to dangerous encounters. Follow the site’s specific rules and avoid feeding unless it is part of authorized professional animal care.

    What if we see no animals?

    A responsible guide cannot control wildlife. Enjoy the habitat, plants, tracks and broader ecosystem, and treat a sighting as a bonus rather than a guaranteed product.

    Further reading

    For a slower style of exploration, see how to plan slow travel and cultural etiquette and photography. For current animal welfare guidance, consult World Animal Protection and the destination’s national park authority.

  • City Bike Sharing Abroad: How to Use Public Rental Bicycles Without Unwanted Fees

    City Bike Sharing Abroad: How to Use Public Rental Bicycles Without Unwanted Fees

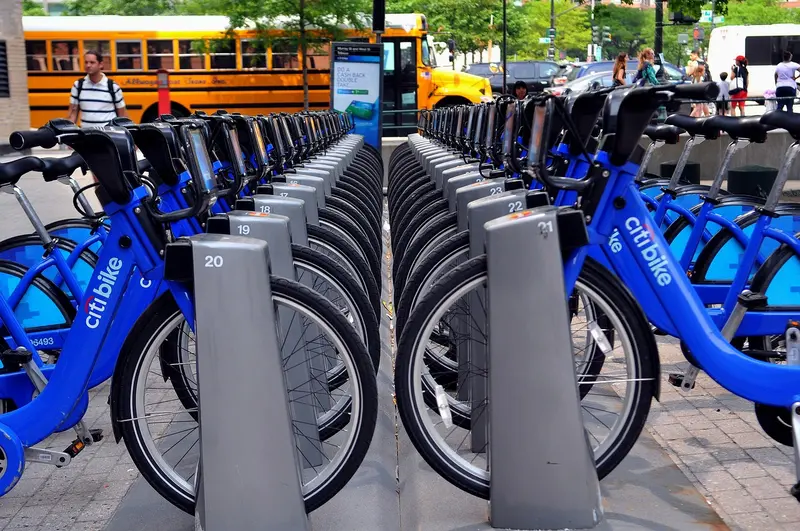
    Public bicycle-sharing systems can make a city feel smaller. A short ride between two neighborhoods may be more enjoyable than waiting for a bus, especially where protected cycle lanes link public squares, parks and waterfronts. Yet bike sharing is not the same as hiring a bicycle for a full day from a shop. Most schemes are designed for short, repeat journeys, with app registration, unlocking procedures, service areas and extra fees if the bicycle is not properly returned. Travelers should understand the local road rules and total charging model before their first ride, then choose routes that match their confidence rather than treating cycling as a universal shortcut.

    At a glance

    • Start with rules and services for the exact destination and operator.
    • Make travel choices appropriate to your group’s ages, accessibility needs and preferences.
    • Keep written confirmations, allow realistic time and have a practical backup.

    Identify the type of bike-sharing system

    A docked system uses fixed stations where riders collect and return bicycles. A dockless system allows parking in designated areas shown in an app, subject to geofencing and local restrictions. Some schemes mix conventional bicycles and pedal-assist e-bikes with different charges. A bicycle available on the map may be reserved, defective or unsuitable for a rider’s height. Review the operator’s official map and user instructions, not just a third-party travel blog that may describe an older version of the service.

    Many systems require a phone, mobile data, a payment card and a functioning app. Some also offer passes through ticket machines, kiosks or transport-card integration. Visitors without a local phone number may face identity or payment verification barriers. Register and test the application before reaching a busy street corner with luggage. If the app refuses your card, do not assume a stranger offering to unlock a bicycle for cash is a legitimate representative of the program.

    Work out the real fare before riding

    Pricing may combine an unlock fee with minutes ridden, a daily pass with time-limited journeys, or a membership allowing a specified number of short trips. The word “day pass” does not necessarily mean one bicycle can remain checked out for an entire day without further fees. In some systems, keeping it for two hours instead of returning within the included period creates a large additional charge. E-bikes may have separate minute rates even under an ordinary bike pass.

    Imagine a city scheme offering a day pass with unlimited individual rides of up to thirty minutes. A ride lasting forty-five minutes could trigger a fee, even if you intend to take no other bike that day. If you want an extended countryside ride, a conventional bicycle rental shop with a day rate may be better. Use the official pricing page to compare realistic trip lengths and remember possible deposits, damaged-bike charges and penalties for parking outside permitted zones.

    Learn the road rules and cycling culture first

    Traffic-side conventions, bicycle lane rules, helmet requirements and restrictions on sidewalks vary by destination. In a city unfamiliar to you, take time to observe intersections before joining traffic. Protected lanes can end abruptly, turn across tram tracks or merge with turning vehicles. Plan a calm first route through a park or a well-marked corridor instead of choosing the app’s shortest path through a complex junction. Never assume that a green route on a map guarantees separation from cars.

    Use hand signals where appropriate, obey traffic lights and pedestrian priority, and keep predictable distances from parked vehicles. When crossing tram rails, take special care with the angle and surface. Do not wear headphones that block awareness of surrounding traffic. Follow the law on lights at night and choose slower, simpler routes in rain. If the road conditions feel unsafe, park the bicycle correctly and continue by public transport rather than forcing the trip to justify the rental fee.

    Inspect the bicycle before unlocking it

    Check tires, brakes, frame, saddle, handlebar, chain or drive system, lights and any visible damage. Adjust the seat to a safe height. A wobbly handlebar, broken light or rubbing brake is a reason to choose another bike. In app-based systems, report damaged bicycles using the provider’s official process so you are not inadvertently charged for damage caused by a previous rider. Photograph obvious issues before starting if permitted, especially when the system has no staffed location.

    An e-bike can accelerate more quickly than expected, and some models are much heavier than ordinary cycles. Start in a safe space and test the assistance setting. Check battery level against the planned route but allow a margin; estimated range depends on terrain and riding style. Never use a bicycle that seems to have a faulty motor or controls. Return it through the normal procedure and report the issue rather than attempting a repair on the street.

    Understand docking and parking rules

    The ride is not finished just because you stop moving. A docked bicycle usually must lock fully into an available station bay; look for the confirmation light, sound or app message. If a station is full, find the next official station rather than leaving the bike against a railing. For dockless schemes, the legal parking zone might exclude footpaths, doors, tactile paving and historic squares. A geofence may prevent ending the ride outside a permitted area, continuing minute charges until you relocate the bicycle.

    Before walking away, wait for the app to show the ride is closed. Save a screenshot with end time and location, especially if the dock indicator appears inconsistent. If the service does not end, use official support immediately and document your attempts. A properly parked bicycle can still create access barriers if it blocks a wheelchair route or a stroller crossing. Responsible parking is an essential part of respectful travel, not an optional courtesy.

    Choose routes with scenery rather than speed

    Bike sharing works especially well for short riverside stretches, waterfront parks, campuses and connected neighborhoods. Build a route with a safe return station near the next attraction. Consider your group’s riding ability, road surfaces and hills. What looks like a ten-minute ride on a map may be tiring in extreme heat or strong wind. Include a break and enough time to return the bike within the relevant charging period. Planning two relaxed short rides is often better than using one long trip to cover the entire city.

    A first-day route might start at an outer transit stop, follow a protected cycle lane toward a public park, finish near a museum and continue on foot. That avoids carrying a bicycle all day and gives the group flexibility. Do not ride through pedestrian-only zones or crowded market streets merely because the app shows the shortest distance. Where cycling infrastructure is limited, consider a guided introductory ride with a qualified operator or skip bike sharing entirely.

    Bike sharing with teenagers and families

    Minimum rider ages, height requirements and account-sharing rules differ, and many public bike-share services are not designed for young children. Standard rental bicycles may have adult frames and no approved child seats. Never improvise by carrying a child in a basket or on handlebars. If your family needs child seats, a cargo bike or a trailer, find a specialized rental service that supplies properly approved equipment and a suitable route. A city known for cycling is not automatically suitable for a six-year-old on every street.

    For teens who meet the local age and size requirements, practice starts, stops and road positioning in a safe place. Avoid complex multi-lane junctions on a first ride. Agree on a meeting place if separated and make sure each rider knows how to end the rental. A group with grandparents or less confident riders may prefer one scenic path and public transit for the rest of the day. Freedom should not come at the cost of putting someone on a bicycle they cannot control comfortably.

    Accessibility and alternatives to ordinary bicycles

    Standard bike-share fleets may not meet the needs of riders using adaptive bicycles, tricycles or handcycles. Some cities and specialist operators have inclusive cycling programs, but equipment availability requires advance confirmation. Ask about stable adapted cycles, reservation conditions, trained assistance, surface quality and storage. Do not treat e-bike assistance as a substitute for an adapted bicycle when balance or mobility is a concern. An accessible waterfront path might offer an equally enjoyable route by wheelchair, scooter or on foot.

    For visitors with visual or hearing impairments, app accessibility and road safety are both relevant. A screen-reader-friendly app is helpful but does not establish that a route is safe or comprehensible. In unfamiliar cities, a tandem ride with an experienced guide may be preferable for some travelers. Check whether local rental insurance and liability conditions allow an accompanied or assisted rider. The goal is a comfortable experience rather than an obligation to follow a popular cycling trend.

    Theft, accidents and insurance

    Read who is responsible if a bike is stolen before it has been properly docked, or if it is damaged during a ride. Some schemes make riders liable for substantial replacement costs. Do not leave a running rental unattended outside a cafe, even for a moment. If the system provides a lock, use it according to the terms; locking a bike incorrectly may leave the trip active and vulnerable to theft. Ensure payment details and your account are protected with appropriate device security.

    If an accident occurs, prioritize medical assistance and local emergency procedures. Report the incident through the operator’s official channel and document the bicycle number, place and time. Personal travel insurance may exclude certain cycling activities or have conditions about helmets and road use; check before riding. Third-party liability coverage is a separate concern from medical treatment. A small fare does not necessarily mean the service includes comprehensive insurance for visitors.

    Avoid problems with roaming and weak phone coverage

    Download the app on reliable internet and verify sign-in before departure. A weak signal can prevent unlocking or confirming the end of a journey in some systems. Keep a charged phone and an offline screenshot of customer support information. Some bike-sharing schemes require location permission or Bluetooth; learn the requirements before standing at a dock. Never use an untrusted public Wi-Fi portal to enter card details if a safer connection is available.

    If a bike will not unlock, end the attempt within the app instead of repeatedly paying for failed starts. If the ride will not close, call support and keep the bicycle in the correct location until you receive instructions. A city transport visitor center may help you understand the scheme’s boundaries and payment system. Budget time to solve technical issues: a few extra minutes at the first station can prevent an expensive day of unexplained charges.

    Frequently asked questions

    Is a bike-share day pass the same as a full-day bicycle rental?

    Often no. Many passes permit multiple short trips rather than one continuous all-day booking. Check the time limits and overage fees.

    Can I leave the bicycle anywhere?

    No. Docked and dockless systems both have defined return and parking rules. Improper return can cause large charges.

    Can children ride shared bicycles?

    Only when local minimum ages, height and account rules permit. Most standard fleets are adult-oriented and do not provide child restraints.

    What happens if I cannot end my ride in the app?

    Park correctly, document the issue and contact the operator immediately. Do not assume charges stop when you physically leave the bicycle.

    Are helmets and insurance always provided?

    No. Rules and provisions vary; check both the operator’s terms and local cycling laws before your first ride.

    Quick planning checklist

    Check Practical next step
    Short ride Check inclusive minutes and unlocking fee
    Docking Wait for digital or dock confirmation
    Children Check age, height and approved child equipment
    Insurance Understand damage and theft liability

    Official resources and further reading

    Requirements and operating conditions can change. Consult official sources and the relevant provider for your specific trip.

  • Andalusia in 10 Days: Seville, Córdoba and Granada Without Changing Hotels Every Night

    Andalusia in 10 Days: Seville, Córdoba and Granada Without Changing Hotels Every Night

    Andalusia can look deceptively compact on a map. Seville, Córdoba, Granada, Málaga, Ronda, Cádiz and the white villages all seem close enough to combine, and that is how many ten-day itineraries become a sequence of check-outs rather than a holiday.

    A better first trip uses three bases at most. Seville deserves several nights, Córdoba can work as either a one-night stop or a day trip, and Granada needs enough time for the Alhambra plus the city beyond it. This route chooses depth over collecting provinces.

    If you enjoy this pace, it connects naturally with our Portugal itinerary or Croatia guide on a different trip: the same principle applies across southern Europe—fewer bases usually produce better days.

    Quick trip summary

    • Use Seville and Granada as the two main bases; make Córdoba a day trip or one-night stop.
    • Book the Alhambra as soon as your dates are firm because entry is capacity controlled.
    • Use high-speed and intercity trains for the core route; a car is unnecessary inside the major cities.
    • In hot months, move major outdoor sightseeing to mornings and late afternoons.
    • Do not add Ronda, Málaga, Cádiz and several white villages unless you have more than ten days.

    Why three famous cities are enough for ten days

    Seville, Córdoba and Granada are not interchangeable. Seville is a large, lived-in city with monumental architecture and neighbourhood evenings; Córdoba is compact and works beautifully as a concentrated historic stop; Granada combines the Alhambra with hill districts, tapas culture and views toward the Sierra Nevada.

    The rail network makes this route efficient. You can arrive in one city, walk or use local transport for several days, then move by train without dealing with parking or central driving restrictions.

    The official Andalusia tourism website is useful for checking regional events and current attraction information, but your itinerary should still leave free time for plazas, neighbourhoods and meals.

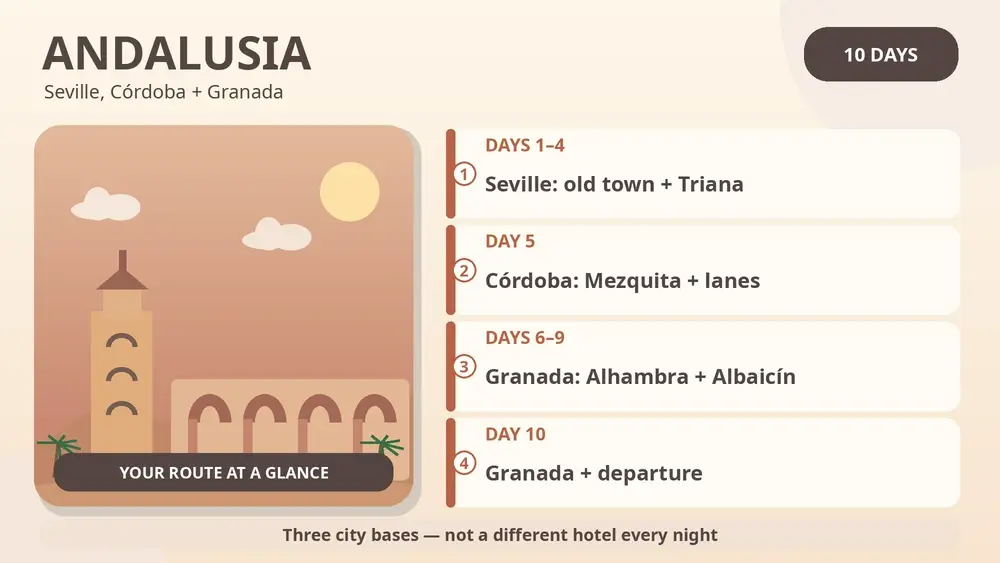
    A realistic itinerary at a glance

    Days Base Main focus
    1–4 Seville Historic core, Triana, parks and one slower neighbourhood day
    5 Córdoba Mezquita-Catedral and old city
    6–9 Granada Alhambra, Albaicín, Sacromonte and city life
    10 Granada / departure Buffer and onward journey

    Day-by-day plan

    Day 1: Arrive in Seville

    Stay central enough to walk to the historic core but not necessarily on the busiest street. Use the first evening for a river walk, Alameda, Santa Cruz or Triana depending on where you sleep.

    Seville is a city where atmosphere starts to make sense after sunset. Do not waste arrival day chasing a long monument list.

    Day 2: Cathedral, Alcázar and the old centre

    Give the major monuments a full day with a proper lunch break. Timed-entry tickets can reduce uncertainty, but stacking the cathedral, Alcázar, archives and several museums in one continuous block is tiring.

    Return to the same streets later in the evening when the light and temperature change; seeing an area twice at different times often gives more value than adding another distant sight.

    Day 3: Triana and the river

    Cross to Triana, explore its market and ceramic traditions, then use the river corridor as a lower-intensity day. The official tourism site highlights Triana as a distinct cultural neighbourhood, and it is worth experiencing as more than a photo stop.

    Illustrated Andalusia itinerary for Seville, Córdoba and Granada

    This is a good flamenco evening, but choose a performance style that suits you rather than assuming the most heavily advertised show is the only option.

    Day 4: Seville beyond the headline sights

    Use Plaza de España and María Luisa Park in the morning, then choose one museum, neighbourhood or food-focused afternoon. In summer, structure the day around heat rather than willpower.

    If you want a day trip, Cádiz is possible, but on a first ten-day route I would keep this fourth day in Seville unless the coast is a major priority.

    Day 5: Córdoba

    Travel early by train. If staying overnight, leave bags and explore the Mezquita-Catedral area, Jewish Quarter, Roman bridge and quieter lanes after day-trippers leave.

    If you prefer only two hotel bases, visit Córdoba as a day trip from Seville and take a direct train to Granada the next day. The one-night version is more atmospheric; the day-trip version is simpler.

    Day 6: Move to Granada

    Arrive without trying to visit the Alhambra immediately after check-in. Walk the lower centre, have a relaxed meal and orient yourself around the hills.

    Granada involves more slopes than Seville or Córdoba. A hotel that looks close in map distance may still require a steep climb, which matters with luggage or limited mobility.

    Day 7: Alhambra day

    Treat the Alhambra as the main event, not a two-hour stop. Confirm the exact entry conditions for your ticket and allow time for the Nasrid Palaces, Generalife and the walk between areas.

    Keep the evening flexible. A viewpoint at sunset is appealing, but you may prefer a simple dinner after several hours on your feet.

    Day 8: Albaicín and Sacromonte

    Explore the hill districts slowly, using buses or taxis for part of the climb if that makes the day more enjoyable. The value is in lanes, viewpoints and changes of perspective rather than a single attraction.

    This is another good evening for flamenco if you skipped it in Seville, but the experiences are different enough that enthusiasts may enjoy both.

    Day 9: Granada at a local pace

    Use the final full day for the cathedral area, markets, tapas neighbourhoods or a short excursion if you have energy. Keeping one uncommitted day is useful if weather or ticket availability affected earlier plans.

    Travellers who want mountains can investigate Sierra Nevada options, but do not force a long excursion simply to fill the day.

    Day 10: Departure buffer

    Have breakfast, revisit a favourite street and leave enough time for the station or airport. If flying from Málaga, account for the transfer rather than treating “Granada to Málaga” as a local airport ride.

    Where to stay and how many hotel changes to make

    In Seville, Santa Cruz is atmospheric but can be busy; Arenal is convenient for the river and centre; Alameda offers a more local evening feel. Choose according to your preferred night-time environment, not just daytime attractions.

    In Córdoba, one night near the old city is enough if you want the evening atmosphere. If you dislike hotel changes, skip the overnight and visit by train.

    In Granada, consider slope as well as location. Albaicín is beautiful but less convenient with heavy luggage; the lower centre can make transport and evening meals easier.

    Transport: what is worth booking in advance

    Train is the default for this route. It avoids city-centre parking and turns transfer days into simple point-to-point moves. Book earlier for fixed dates if you want better fares and preferred departure times.

    Within cities, walk strategically and use buses or taxis when hills or summer heat make them worthwhile. Saving energy for the Alhambra or a long evening is not “cheating” the itinerary.

    A rental car becomes more useful only if you add pueblos blancos or rural areas. For the three-city core, it is mostly an extra responsibility.

    Food and daily rhythm

    Andalusia rewards a later daily rhythm. Tapas, markets, terraces and long lunches can be part of the itinerary rather than breaks from it. In hot weather, a slower midday and active evening often matches local conditions better than a northern-European sightseeing schedule.

    Do not chase a list of famous dishes in every city. Try local specialities, but leave room to return to places you enjoy. The best meal of a trip is not always the one with the longest reservation queue.

    Families, children and older travellers

    Families should balance monumental interiors with parks, plazas and shorter walking loops. Seville’s María Luisa Park and riverfront are useful reset spaces after formal sightseeing.

    Older travellers may want hotels with lifts, especially in historic buildings, and should check walking gradients in Granada. A taxi to a hill viewpoint followed by a downhill walk can transform the day.

    In July and August, heat management becomes a family and mobility issue, not merely a comfort preference. Early starts, shade, water and indoor breaks matter.

    Budget: where the money really goes

    Rail fares, Alhambra tickets and well-located hotels are the main items worth planning early. Restaurant spending can range widely, but sharing dishes and eating at local bars makes it easy to control without turning meals into austerity exercises.

    City-centre parking can erase the apparent savings of a cheap rental car. If you are not visiting rural Andalusia, compare the full transport cost rather than the advertised daily rental rate.

    Spend on location and timed tickets before upgrading every hotel category. Less commuting is often the more valuable luxury.

    Best time to go

    Spring and autumn are popular for good reason, but festival dates can also mean high prices and crowds. Winter can be excellent for city sightseeing, although evenings are cooler and daylight shorter.

    Summer is possible, but the itinerary must change. The middle of the day should be lighter, and outdoor sites should be moved to morning or evening.

    Check event calendars because Semana Santa, Feria periods and local festivals can dramatically change availability and atmosphere.

    Mistakes that make this trip harder than it needs to be

    • Trying to fit Seville, Córdoba, Granada, Málaga, Ronda and Cádiz into ten days.
    • Renting a car for city-to-city travel when you do not need it.
    • Waiting until the last moment to look for Alhambra tickets.
    • Ignoring summer heat when planning afternoon walking.
    • Choosing an Albaicín hotel without checking access and gradients.
    • Treating Córdoba only as a two-hour stop between trains.

    How I would adapt the itinerary

    With seven days, use Seville and Granada as the two bases and make Córdoba a day trip from Seville. With fourteen days, add Cádiz or a short rural/white-village segment rather than simply extending every city.

    Beach-focused travellers can finish in Málaga or the Costa del Sol, but that creates a different trip. If your priority is architecture, history and food, the three-city route already has enough depth.

    Before booking the trip

    • Reserve the Alhambra once your Granada dates are fixed.
    • Compare rail times before choosing hotel nights.
    • Check whether your accommodation has a lift and easy luggage access.
    • Plan heat-sensitive sightseeing around the season.
    • Review current regional events on the official Andalusia tourism site.

    Andalusia is not improved by seeing more towns per day. It becomes memorable when you have time to notice how Seville changes after dark, how Córdoba empties in the evening and how Granada’s hills look different from one viewpoint to the next.

  • Utah and Arizona in 10 Days: Zion, Bryce and Grand Canyon With Realistic National Park Driving

    Utah and Arizona in 10 Days: Zion, Bryce and Grand Canyon With Realistic National Park Driving

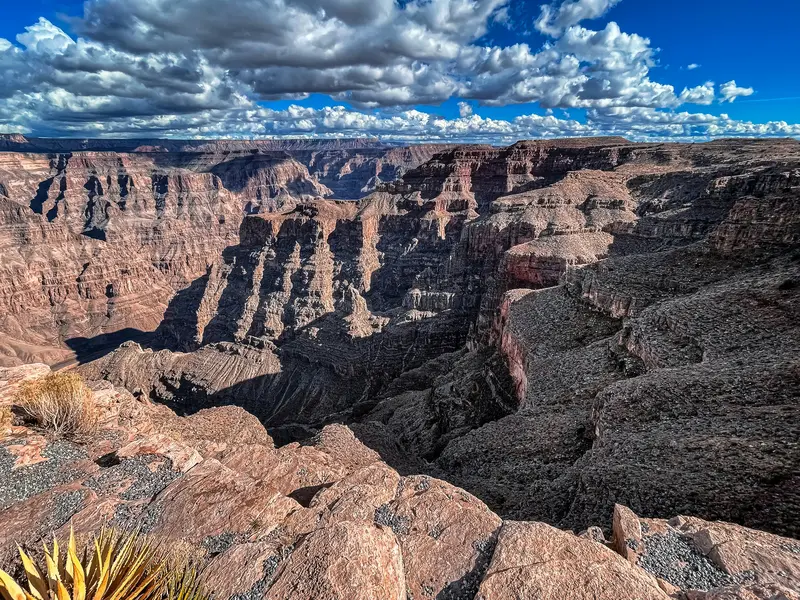
    The American Southwest encourages overplanning because Zion, Bryce Canyon, Grand Canyon, Arches, Canyonlands, Monument Valley and Page all look close when viewed at state scale. Ten days are better spent on three major parks than on a windshield tour of seven.

    This route uses Las Vegas as the practical gateway, then Zion, Bryce Canyon and the Grand Canyon South Rim. Page is optional as a transfer stop, not another mandatory two-night base, and Moab is deliberately left for a second road trip.

    For 2026, the National Park Service states that Zion Canyon shuttle service resumes March 7 and operates seasonally; no shuttle ticket or reservation is required, but park admission still applies. Bryce Canyon also publishes a 2026 seasonal shuttle schedule, so current NPS information should shape each park day rather than an old road-trip blog.

    Quick trip summary

    • 1 Las Vegas arrival night, 3 Zion-area nights, 2 Bryce nights, 3 Grand Canyon South Rim/Tusayan nights, Day 10 departure.
    • In 2026 Zion Canyon shuttle service is seasonal; check the exact NPS schedule for your dates.
    • Bryce Canyon shuttle operates seasonally in 2026 and can reduce parking stress.
    • Use the Grand Canyon South Rim for this route; do not build the itinerary around North Rim access without checking current NPS status.
    • Do not add Moab/Arches unless the trip becomes at least 13–14 days.

    Why this route works

    Three Zion nights let you use the shuttle system without making the first hike a race after driving from Las Vegas.

    Bryce needs less time than Zion but benefits from one sunrise/sunset plus one daylight trail/viewpoint day.

    The Grand Canyon deserves several nights because scale, heat, weather and shuttle logistics make a one-hour rim stop a poor finale.

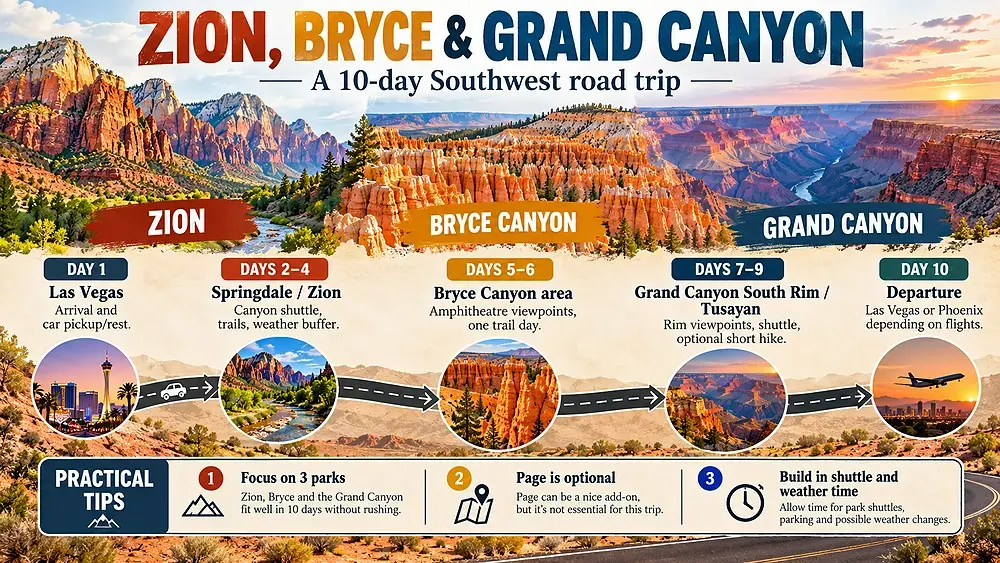
    A realistic itinerary at a glance

    Days Base Main focus
    1 Las Vegas Arrival and car pickup/rest
    2–4 Springdale / Zion Canyon shuttle, trails and weather buffer
    5–6 Bryce Canyon area Amphitheatre viewpoints and one trail day
    7–9 Grand Canyon South Rim / Tusayan Rim, shuttle viewpoints and optional short hike
    10 Departure Las Vegas/Phoenix depending on flights

    Day-by-day plan

    Day 1: Las Vegas arrival

    Collect the car only if rested and keep the night simple. Do not begin a desert highway drive after a long-haul arrival just to save one hotel night.

    Day 2: Drive to Zion

    Travel to Springdale/Zion area and use a short visitor-centre or Pa’rus-style orientation walk. Learn the shuttle system before the main day.

    Day 3: Zion Canyon

    Use the 2026 shuttle when it is operating. The NPS says buses generally arrive every 5–10 minutes in the canyon during scheduled service, and a one-way ride to Temple of Sinawava takes about 45 minutes. Choose one major trail plus one short stop, not every shuttle station.

    Day 4: Zion flexible day

    Use a second trail, Kolob/other accessible area, e-bike-style valley option where legal, or a slow day. This is the weather/crowd buffer and protects the route if Day 3 was too hot or busy.

    Illustrated road trip through Zion, Bryce Canyon and the Grand Canyon South Rim

    Day 5: Zion to Bryce

    Drive to Bryce Canyon and stop selectively. Arrive with daylight for the amphitheatre rim or sunset, but do not start a long trail after the transfer.

    Day 6: Bryce Canyon

    Use the 2026 shuttle during its operating season to reduce parking pressure. Combine several viewpoints with one trail matched to altitude, heat/cold and fitness; Bryce sits much higher than Zion and can feel dramatically cooler.

    Day 7: Bryce to Grand Canyon South Rim

    Drive south, using Page only if it fits naturally. Avoid stacking Antelope Canyon, Horseshoe Bend and the entire drive unless you have timed entries and enough daylight.

    Day 8: Grand Canyon South Rim

    Use rim shuttles/viewpoints and walk a manageable section of the Rim Trail. The canyon’s scale does not require a strenuous below-rim hike to be meaningful.

    Day 9: Second Grand Canyon day

    Use sunrise, another rim sector, museum/geology interpretation or a short below-rim section only if weather, heat and fitness are appropriate. Turn around before exhaustion; uphill return is harder than the descent suggests.

    Day 10: Departure

    Drive to Las Vegas or Phoenix according to the chosen airport with a conservative buffer. Do not schedule a long canyon hike before the departure drive.

    Where to stay and how many hotel changes to make

    Springdale is the most convenient Zion base when shuttle season and walkability matter.

    At Bryce, staying near the park entrance reduces dawn/sunset driving.

    At the Grand Canyon, in-park lodging or Tusayan costs more but protects sunrise/sunset time and removes a long daily commute.

    On a multi-base trip, hotel location matters more than a small difference in nightly price. A room that removes repeated transfers usually adds more value than a prettier property in the wrong place.

    Read recent reviews for practical details that booking photos rarely show: stairs, lift size, road noise, parking access, breakfast hours and the final walk from transport.

    Transport: what is worth planning in advance

    A rental car is essential between parks, but inside Zion Canyon and some Bryce/Grand Canyon areas the shuttle systems can be more useful than driving.

    NPS rules, road closures, shuttle dates and trail conditions can change; recheck each park shortly before arrival.

    Fuel and food should be planned before long rural stretches, especially outside peak season.

    Measure every move door to door rather than by the published journey time. Checkout, terminal access, waiting, luggage and the final connection can turn a short transfer into half a day.

    Use inflexible tickets only when the saving is meaningful and the day is truly fixed. Weather-sensitive island, mountain and outdoor plans benefit from flexibility.

    Food and daily rhythm

    Park gateway towns can be expensive and busy; groceries/simple breakfasts help on early trail days.

    Hydration and electrolytes matter more than elaborate dining on hot hiking days.

    Use meals to control the rhythm of the day. A long regional lunch can be an experience and a recovery period, especially after hiking, museums, boat trips or early starts.

    Do not make every meal another attraction. Mix local specialties with simple food so that the destination, not the restaurant schedule, remains the centre of the trip.

    Families, children and older travellers

    Shuttles, rim trails and viewpoints make the route workable without demanding hikes.

    Older travellers should choose trail surfaces/altitude carefully; Bryce elevation and canyon heat can be significant.

    Never treat Angels Landing or a deep Grand Canyon hike as a family default; permits, conditions and individual ability matter.

    For multigenerational travel, the useful pace is the one at which the least mobile member still enjoys the day. That usually produces a better experience for everyone.

    Children often respond better to a change of format than to another famous sight: a beach after a museum, a ferry after a city walk, or wildlife after a road day.

    Budget: where the money really goes

    Park lodging and rental cars are the main fixed costs; food and guided activities vary widely.

    Paying more to stay near the parks often saves hours of driving and improves sunrise/sunset access.

    Compare total trip cost rather than headline prices. Parking, transfers, luggage, tours and time lost reaching a remote hotel can erase an apparent saving.

    The best splurges usually remove friction: a central room, a safe private transfer, a direct train or ferry, a guide where context matters or one extra night that prevents an exhausting move.

    Best time to go

    Spring and autumn can balance temperature and crowd levels, but high-elevation Bryce can still see cold/snow while the Grand Canyon interior is hot.

    Summer heat requires early starts and conservative hiking; winter brings snow/ice and reduced services in some areas.

    Shoulder season often balances weather, demand and room prices well, but ferries, mountain services and rural restaurants may operate less frequently.

    Heat, rain, wind, snow and daylight should change the order of a day. Use comfortable hours for exposed outdoor sights and keep lower-effort alternatives available.

    Comfort, accessibility and realistic pacing

    The route uses two full Zion days and two Grand Canyon days so no single hike has to carry the trip.

    Do not combine long drives with strenuous descents into canyons.

    Travel fatigue compounds. One difficult transfer can reduce the quality of the following two days, which is why this route avoids one-night bases unless geography genuinely requires them.

    A free half-day is not wasted time. It is insurance for weather, laundry, a delayed transfer, a tired child or a place you discover only after arrival.

    Small decisions that improve the trip

    Use only three major parks

    Zion, Bryce and Grand Canyon already provide distinct geology and hiking.

    Plan around 2026 shuttles

    Current NPS operations matter more than old blog maps.

    Stay close to parks

    Dawn and evening are worth more than a cheaper room an hour away.

    Leave Moab out

    Arches/Canyonlands deserve their own multi-day block.

    What I would leave out on this length of trip

    Leave Arches, Canyonlands and Capitol Reef for another Utah route.

    Skip the North Rim unless current NPS access is fully confirmed for your dates; the South Rim is the stable structure for this itinerary.

    Mistakes that make this trip harder than it needs to be

    • Trying to see five or six national parks in ten days.
    • Ignoring Zion shuttle operations.
    • Underestimating Bryce elevation and cold.
    • Descending too far into the Grand Canyon in summer heat.
    • Booking distant motels that add hours of daily driving.
    • Driving to a flight after a major hike.

    How I would adapt the itinerary

    With seven days, use Zion plus Grand Canyon or Zion plus Bryce.

    With fourteen days, add Page and Moab/Arches only with two or three proper nights.

    Before booking

    • Check each NPS park alert page.
    • Verify 2026 shuttle dates.
    • Reserve park lodging early.
    • Carry water/sun protection and cold layers for Bryce.
    • Protect the final airport drive.

    Practical questions

    Do I need reservations for Zion shuttle in 2026?

    NPS states no shuttle ticket or reservation is required, but park admission applies and service is seasonal.

    How many parks are realistic in ten days?

    Three major parks provide a much stronger trip than six brief stops.

    Should I hike below the Grand Canyon rim?

    Only to a distance you can safely climb back in the conditions; the Rim Trail and viewpoints are complete experiences too.

    Final thoughts

    The Southwest is a place where fewer parks can produce a much bigger experience.

    Zion, Bryce and the Grand Canyon fill ten days with distinct landscapes while leaving enough energy to hike safely and actually watch the light change.

  • Washington, DC in 5 Days: Smithsonian Museums, Monuments and Neighborhoods Without Museum Fatigue

    Washington, DC in 5 Days: Smithsonian Museums, Monuments and Neighborhoods Without Museum Fatigue

    Washington, DC is deceptively easy to overplan because many of its most famous museums and monuments are free. Free admission does not make a museum short, and the National Mall is much larger on foot than it appears on a map.

    This five-day itinerary uses one hotel and groups experiences by geography. It mixes museums, monuments and neighbourhoods so every day does not become six hours indoors followed by an exhausted walk past memorials.

    The Smithsonian confirms that admission to Smithsonian museums is generally free, but several locations still require free passes or tickets. In 2026 this includes the National Museum of African American History and Culture, the National Air and Space Museum in DC and the National Zoo. Always check the exact museum before the visit.

    Quick trip summary

    • One hotel for all 5 days.
    • Stay near Metro rather than trying to sleep beside every monument.
    • Plan one major Smithsonian museum per half-day or day.
    • Reserve free timed passes where required.
    • Use evenings for memorials and neighborhoods when temperatures are lower.

    Why this route works

    The Mall works best when divided into east, central and west clusters rather than walked end-to-end repeatedly.

    Smithsonian museums vary enormously in size; choosing fewer institutions lets you actually see collections instead of racing entrances.

    Neighbourhood time in places such as Georgetown, Dupont Circle, Shaw or Capitol Hill prevents the trip from feeling like a school excursion.

    A realistic itinerary at a glance

    DaysBaseMain focus
    1National Mall eastCapitol area, museums and orientation
    2Central MallSmithsonian museum and memorial evening
    3West Mall / monumentsLincoln, Vietnam, Korean, MLK/FDR area
    4Neighborhood DCGeorgetown, Dupont, Shaw or another district
    5FlexibleSecond major museum or final monuments

    Day-by-day plan

    Day 1: Orientation and eastern Mall

    Use the Capitol grounds, Library of Congress exterior/interior if planned, and one nearby museum. Do not walk to Lincoln Memorial and back on the same afternoon just because you can.

    Day 2: Major Smithsonian day

    Choose Air and Space, Natural History, American History or another priority museum. If visiting Air and Space, reserve the currently required free timed-entry pass.

    Day 3: Memorials and history

    Use the western memorials in one coherent walking loop, with breaks. Late afternoon and evening can be especially effective for atmosphere and heat.

    Washington DC White House North Side

    Day 4: Neighborhood day

    Move beyond the Mall: Georgetown waterfront, Dupont Circle, Shaw/U Street, Eastern Market/Capitol Hill or another area that matches your interests.

    Day 5: Flexible museum or cultural day

    Use the African American History and Culture Museum with the appropriate pass, National Gallery, another Smithsonian or the museum you skipped earlier. Keep the end close to the airport/rail route if departing.

    Where to stay and how many hotel changes to make

    Downtown, Penn Quarter, Capitol Hill and Dupont all work well when Metro access is strong. A slightly less central hotel beside a direct Metro line can outperform a more expensive room that still requires long walks.

    Avoid choosing a hotel only because it is ‘near the Mall’; the Mall itself spans a large area.

    Where you sleep should remove friction rather than create it. A well-connected room can save more time and energy than a cheaper property that requires repeated taxis, awkward luggage transfers or long walks at the start and end of every day.

    Read recent guest reviews for details that booking photos rarely reveal: steps, lift size, road noise, parking, breakfast hours and the true walking distance from a station, ferry terminal or attraction.

    Transport: what is worth planning in advance

    Metro, buses and walking remove the need for a rental car. Rideshare can be useful late or when museum fatigue sets in.

    Airport choice matters: Reagan National has the simplest Metro access, while Dulles is farther but connected by rail.

    Measure every move door to door rather than by the headline timetable. Checkout, waiting, luggage, station access and the final connection can turn a short journey into half a day.

    Use inflexible tickets only when the saving is meaningful and the day is genuinely fixed. Outdoor, island, marine and mountain plans are much easier when at least one component can move.

    Food and daily rhythm

    The Mall itself is not where you should plan every meal. Use Penn Quarter, Wharf, Georgetown, Shaw, Capitol Hill and other neighbourhoods for better variety.

    A museum café can be strategically useful when leaving and re-entering would waste an hour.

    Use meals to control the rhythm of the day. A long regional lunch can be both an experience and a recovery period after museums, hiking, heat or an early start.

    Washington DC White House From South Lawn

    Do not make every meal another attraction. Mix destination restaurants with bakeries, markets, cafés and simple local places so food improves the trip instead of controlling it.

    Families, children and older travellers

    Free museums are excellent for families, but children usually benefit from one major museum at a time rather than several enormous collections.

    Older travellers should use Metro and buses to reduce long Mall walks; memorials can be grouped into shorter loops.

    For multigenerational travel, the useful pace is the one at which the least mobile member still enjoys the day. That usually creates a better shared trip for everyone.

    When accessibility matters, ask specific questions about steps, trail surfaces, boat boarding, lifts and vehicle access instead of relying on a generic accessibility label.

    Budget: where the money really goes

    Many major sights are free, so accommodation and food dominate the budget.

    Do not buy an attraction pass automatically unless its paid attractions truly match your priorities.

    Compare total trip cost rather than headline prices. Parking, transfers, luggage, tours and time lost reaching remote accommodation can erase an apparent saving.

    The best splurges usually remove friction: a central room, a direct transfer, a quality guide or one extra night that prevents an exhausting move.

    Best time to go

    Spring and autumn are excellent but popular; summer can be hot and humid, making early museum starts and evening monuments valuable.

    Winter can be cold but is often easier for museum-heavy trips outside holiday periods.

    Shoulder season often balances weather, demand and prices well, but ferries, rural attractions and mountain services may run less frequently.

    Heat, rain, wind, snow and daylight should change the order of a day. Keep lower-effort alternatives for conditions that do not suit the original plan.

    Comfort, accessibility and realistic pacing

    The itinerary intentionally alternates indoor and outdoor days.

    One flexible final day absorbs pass availability, weather and museum fatigue.

    Travel fatigue compounds. One difficult transfer can reduce the quality of the following two days, which is why this itinerary avoids one-night bases unless geography genuinely requires them.

    A free half-day is not wasted time. It is insurance for weather, transport disruption, a tired child or a place you discover only after arriving.

    Small decisions that improve the trip

    Reserve only what truly requires it

    Passes should not control every hour.

    Use one museum at a time

    The Smithsonian is too large for completion.

    Leave the Mall

    Neighborhood DC adds food and everyday atmosphere.

    Washington DC Pennsylvania Avenue Downtown

    Walk monuments later

    Evenings can be cooler and more memorable.

    What I would leave out on this length of trip

    Leave Mount Vernon, Baltimore and several Virginia day trips for another visit.

    Skip trying to see every Smithsonian museum in five days.

    Mistakes that make this trip harder than it needs to be

    • Assuming free museums do not need tickets.
    • Walking the Mall end-to-end several times.
    • Scheduling three large museums in one day.
    • Eating every meal inside tourist zones.
    • Ignoring summer heat.
    • Leaving a distant neighbourhood under a tight airport transfer.

    How I would adapt the itinerary

    With three days, choose two museum blocks, one monument loop and one neighbourhood.

    With seven days, add Arlington, Mount Vernon or more neighbourhood time without changing hotels.

    Before booking

    • Check Smithsonian pass requirements.
    • Choose a Metro-friendly hotel.
    • Pack comfortable shoes.
    • Group memorials geographically.
    • Keep one day flexible.

    Practical questions

    Are Smithsonian museums free?

    Generally yes, but several locations require free passes or tickets, so check the current Smithsonian visitor page.

    Do I need a car?

    No.

    How many museums per day?

    One major museum plus a smaller cultural stop is a comfortable maximum for most visitors.

    Final thoughts

    Washington is a better trip when free admission is treated as permission to slow down rather than permission to overfill the day.

    Five days allow the Smithsonian, monuments and neighbourhoods to feel like one city rather than a list of institutions.

    How to keep the itinerary resilient

    Keep Day 5 open for any museum pass you could not secure earlier.

    Use indoor museums as the fallback when heat, rain or cold makes a long memorial walk unpleasant.

    Who this route suits best

    This itinerary works best for travellers who prefer depth over collecting places. It keeps hotel changes low, protects flexible time and assumes that a good meal, an unexpectedly interesting neighbourhood or a slower morning can be as valuable as another attraction. That approach works especially well for first-time visitors, couples, families and multigenerational groups.

    More energetic travellers can add a longer hike, another museum or a second excursion on flexible days. Travellers who prefer an easier pace can remove those extras and still keep the core journey intact. Before booking, identify the two or three experiences that would genuinely disappoint you to miss; those are the ones to reserve first.

  • Hiroshima in 4 Days: Peace Memorials, Miyajima and Food Without Rushing the City

    Hiroshima in 4 Days: Peace Memorials, Miyajima and Food Without Rushing the City

    Hiroshima Hiroshima deserves more than a fast stop between Kyoto and Fukuoka. The city carries one of the most important modern histories in Japan, but it is also a lived-in regional capital with rivers, neighbourhoods, gardens, baseball culture and one of the country’s most satisfying local food scenes. Four days gives you enough time to visit the memorial sites with the attention they deserve, spend a full day on Miyajima and still see Hiroshima as a city rather than only a historical lesson.

    If this destination is part of a wider trip, compare the pacing with Japan Beyond Tokyo in 10 Days: Kyoto, Nara, Hiroshima and Osaka Without Constant Packing. The city guide adds local depth; the wider itinerary is better for deciding how this stop fits into the rest of the journey.

    Quick trip summary

    Ideal stay4 days for a first trip
    Best approachGroup each day by geography and keep one flexible block
    Transport strategyUse the fastest reliable mode for long moves, then explore locally on foot
    Who it suitsFirst-time visitors, couples, solo travellers, families and slower-paced travellers
    Most common mistakeAdding distant attractions because they look close on a map

    How to plan the trip before booking

    Before booking, separate the trip into three kinds of decisions: fixed reservations, neighbourhood choices and flexible time. Fixed items are the experiences that genuinely sell out or control the rest of the day. Neighbourhood choices determine where you sleep and how much time you spend in transit. Flexible time protects the itinerary when weather, traffic, queues or tiredness change the original plan.

    A useful four- or five-day city itinerary should not feel full on paper. It should still work after a late breakfast, a museum that takes longer than expected or one cancelled transfer. Aim for one major anchor, one secondary experience and a free block most days.

    Where to stay: choose location before hotel style

    BaseWhy choose it
    Hiroshima StationBest for rail connections, airport buses and early departures to Miyajima or other parts of western Japan.
    Hondori / KamiyachoExcellent for first-time visitors who want restaurants, trams and easy access to the Peace Memorial Park.
    Peace Park areaQuiet and convenient for memorial sites, especially if you prefer to begin early before larger groups arrive.
    Nagarekawa / HatchoboriUseful for evening dining and nightlife while remaining within easy tram reach of the main sights.

    A beautiful room is not automatically a useful base. Map the first activity of the morning, the likely dinner area and the departure route. If the hotel creates two unnecessary transfers every day, the hidden cost is time and energy as well as money.

    Itsukushima Shrine Over Water Miyajima Hiroshima Japan

    A realistic 4-day itinerary

    Day 1: Peace Memorial Park and central Hiroshima

    Begin early at the Peace Memorial Park and give the museum, Atomic Bomb Dome and surrounding memorials enough time. This is not a place to squeeze between lunch reservations. Afterward, walk along the rivers and move gradually toward Hondori or Shukkeien rather than immediately adding another major excursion. Keep the evening simple and choose a local okonomiyaki restaurant near your hotel.

    Day 2: Miyajima as a full day, not a rushed half-day

    Travel to Miyajima in the morning and let tide, weather and your energy decide the order of Itsukushima Shrine, the village streets and Mount Misen. If hiking or using the ropeway, leave a margin for queues and changing conditions. Stay into the later afternoon when many day groups leave. Returning to Hiroshima after sunset is usually more rewarding than racing back for a second city attraction.

    Day 3: Hiroshima Castle, Shukkeien and neighbourhood time

    Use the third day for the city itself. Combine Hiroshima Castle or its surrounding park with Shukkeien Garden, then explore a shopping street, café district or riverside area at a slower pace. This is also a good day for an indoor museum if rain affects outdoor plans. Keep the evening free for local food rather than another transport-heavy excursion.

    Day 4: One focused regional option or a deeper city day

    Choose either a carefully selected regional trip, such as a Setouchi destination that fits train and ferry schedules, or stay in Hiroshima for markets, museums and neighbourhoods you skipped. If your next train is in the afternoon, keep the final morning within the city and leave luggage at the hotel or station rather than dragging it through sightseeing stops.

    Getting from the airport or station and handling arrival day

    Most international visitors arrive by Shinkansen at Hiroshima Station or via Hiroshima Airport. The airport is outside the urban core, so use the official limousine bus or another current transport option that matches your hotel location. If arriving by rail, a hotel near a tram or bus corridor can make the rest of the stay easy. Do not assume every major sight is next to the station; central Hiroshima is several tram stops away.

    Arrival day should carry less risk than the rest of the trip. Keep the first reservation easy to cancel, learn the route back to the hotel before staying out late and avoid building the day around a connection you cannot control.

    Hiroshima Peace Park Memorial Canal

    Getting around without wasting the day

    Hiroshima’s tram network is one of the most useful visitor systems in Japan because it connects the station, downtown, Peace Memorial area and routes toward Miyajima. Walking works well once you are inside one district. For Miyajima, compare the JR and tram-plus-ferry combinations based on your pass and starting point. A rental car is unnecessary for a first city stay unless you are continuing into rural Chugoku.

    When comparing two routes, include walking to the station, waiting, transfers and the final approach. The route with fewer changes is often better for families, luggage, older travellers and anyone visiting in difficult weather.

    Best time to visit and how the season changes the itinerary

    Spring and autumn are comfortable for walking and Miyajima, while summer is hot and humid and winter is cooler but often manageable. Cherry blossom and autumn foliage periods can be busy, especially on Miyajima. Rain can change the value of Mount Misen views, so keep the island day movable when your schedule allows.

    Season also changes hotel prices, daylight, event calendars and how tiring outdoor sightseeing feels. If your dates are fixed, adapt the daily rhythm rather than forcing an itinerary designed for another month.

    What to book first

    Book first what is difficult to replace: timed monuments, limited-capacity tours, high-demand museums, special performances or transport that determines the rest of the route. Leave ordinary neighbourhood walks, most meals and flexible museums open unless a specific reservation matters to you.

    Recheck opening days, reservation procedures, local transport notices and access rules shortly before departure. These operational details change faster than the overall logic of a good itinerary, so the official source should win over an old screenshot or saved social post.

    Food strategy: eat well without crossing the city for every meal

    Hiroshima-style okonomiyaki is an obvious priority, but do not make every meal the same experience. Try oysters when in season and appropriate to your preferences, local noodles, izakaya dishes and bakeries or cafés around central neighbourhoods. Okonomimura is famous, but excellent shops exist across the city; convenience and atmosphere can matter more than chasing one address.

    For a multi-age group, a reliable breakfast and an easy lunch often matter more than one additional attraction. Use meals as genuine rest and part of the travel experience rather than another task to complete quickly.

    Travelling with children

    Families can balance the emotionally demanding memorial area with riverside walks, gardens and the ferry ride to Miyajima. Explain the museum visit in an age-appropriate way and avoid adding another intense museum immediately afterward. On Miyajima, keep children away from unsecured food around deer and allow extra time for toilets, snacks and ferry queues.

    Hiroshima Peace Memorial Park Aerial

    With children, reduce transitions before reducing the highlights. Alternate one structured indoor visit with something that allows movement, and always know where the easy route back to the hotel is before starting a long afternoon.

    Travelling at a slower pace or as a senior

    The central city is relatively easy when you use trams for longer sections. At Miyajima, the village and shrine areas are more accessible than the full Mount Misen experience; choose the ropeway or a lower-elevation day if steep paths are not suitable. A hotel near a tram stop can remove many unnecessary steps.

    Slower travel often improves a city itinerary because it forces better geographic choices. Use transport to remove unrewarding distance, then spend walking energy on the streets, museums, viewpoints and markets that actually define the destination.

    Budget planning

    The biggest budget differences usually come from hotel location, airport transfers, repeated taxis, major admissions and restaurant style. A room that costs slightly more can be better value when it removes two long rides every day. Compare the total daily cost, not only the nightly rate.

    Keep a modest daily reserve for an easier taxi, extra water, a weather-driven change, an unexpected admission or a meal when the original plan fails. A good budget creates resilience rather than allocating every euro, dollar or local-currency unit before the trip begins.

    Weather backup plan

    Keep at least one indoor or low-commitment block movable. The best weather backup is usually in the same part of the city, so a storm, heat wave or poor visibility does not force an entirely new transport plan. Outdoor viewpoints and long walks should be able to move by half a day when possible.

    Connectivity, payments and small practical details

    Save the hotel address, essential tickets, insurance information and the next important transfer offline. Carry a small power bank and keep a backup payment method separate from the main wallet. Do not assume every small business uses the same payment methods as major hotels; a modest amount of local cash can still be useful.

    What to pack

    Comfortable shoes, a small day bag, sun protection and weather layers matter more than extra outfits. Add any medication you may need during the day and a refillable bottle where practical. Pack for the conditions you will actually walk through, including air-conditioning, rain and evening temperature changes.

    Hiroshima Peace Memorial Cenotaph

    Common mistakes to avoid

    • Visiting the Peace Memorial Museum on a stopwatch because another attraction is booked immediately after it.
    • Treating Miyajima as a two-hour photo stop instead of allowing for ferry time, tides and crowds.
    • Staying near Hiroshima Station but assuming the entire city centre is directly walkable from the hotel.
    • Planning Mount Misen on a poor-visibility day when the island itinerary could be swapped.
    • Eating every meal in one tourist complex instead of exploring Hiroshima’s broader food scene.

    Responsible travel and local etiquette

    Treat residential streets, markets, places of worship, memorial sites and working neighbourhoods as real parts of the city rather than scenery. Follow local instructions, keep entrances and pavements passable, ask before photographing people in sensitive settings and spend with local businesses when it fits naturally.

    In natural settings, stay within marked routes and respect closures even when another visitor appears to ignore them. Access rules often protect both visitors and the place itself.

    If you have less or more time

    With two days, dedicate one to central Hiroshima and one to Miyajima. Three days adds gardens, castle grounds and neighbourhood time. With five or six days, add a Setouchi or Chugoku excursion while preserving at least two full days in Hiroshima itself.

    Safety and decision-making on the day

    Use ordinary urban awareness: keep valuables controlled in crowded places, use clearly identified transport, avoid displaying a phone unnecessarily near traffic and follow current local advice about specific streets or transport hubs. Safety conditions can differ by neighbourhood and time of day, so hotel staff and official notices are more useful than blanket claims that an entire city is either “safe” or “unsafe”.

    Set a practical turnaround time for excursions and departure days. Missing a secondary attraction is cheaper than missing a flight, travelling exhausted late at night or forcing a route after conditions have changed.

    Useful official and planning resources

    Opening hours, fees, transport schedules and access rules change more often than the basic geography. Recheck the official source shortly before departure.

    Final planning checklist

    • Confirm passport, visa, transit and health requirements for your nationality.
    • Reserve the attraction, tour or transport that controls the rest of the itinerary.
    • Save your accommodation address and first-day route offline.
    • Recheck weather, closures and transport notices before each critical day.
    • Keep at least one half-day that can absorb a delay or become simple rest.
    • Leave a generous buffer before flights and other costly connections.

    A strong trip to Hiroshima should feel as though you understood how the place fits together, not merely that you collected its famous names. Protect the fixed reservations that matter, group the rest by geography and remove anything that creates more transit than experience.

  • Flight Delays, Cancellations and Missed Connections: What to Do at the Airport

    Flight Delays, Cancellations and Missed Connections: What to Do at the Airport

    The worst part of a disrupted flight is often not the delay itself but the uncertainty. Should you join the customer-service line, search for another flight, book a hotel, or ask for a refund? The best decision depends on where the flight operates, whether your journey is on one ticket, why the disruption happened and whether reaching the destination still makes sense. Passenger rights are not identical worldwide, and an airline’s goodwill offer is not always the same as its legal obligation. This guide provides a practical sequence for protecting your travel plans, documenting reasonable expenses and understanding when a refund, rebooking or further claim may be available. It also explains why a calm response early in a disruption can save considerable time later.

    SituationImmediate priority
    Flight delayedConfirm status, protect connections, save proof
    Flight cancelledCompare refund and rebooking choices
    Overnight waitAsk about assistance and retain receipts
    Missed connectionDetermine whether flights are on one ticket

    Find out what has actually changed

    Before doing anything costly, establish whether the flight is delayed, formally cancelled, rerouted to another airport or brought forward to an earlier departure time. Read messages in the airline’s app and email, then check airport displays and the carrier’s official site. Announcements and third-party flight trackers can lag behind an operational decision. Save screenshots showing the scheduled time, updated time, flight number and reservation reference. A departure delay does not necessarily equal the arrival delay, particularly on long flights that can regain time en route. If a connection is involved, consider the scheduled arrival at your final ticketed destination rather than the intermediate airport alone. Ask the airline what cause it is recording, but do not assume a gate agent will know the final legal classification immediately.

    Protect your seat while you explore options

    When a flight is cancelled, the airline may automatically offer a replacement that departs much later or goes through a different hub. Before accepting, examine the total journey: extra transfers, overnight stops, visa needs and whether your original checked bag will follow. Check alternatives in the airline’s app while waiting to speak with an agent, because useful seats may disappear quickly. Do not cancel your existing booking in frustration without understanding whether that changes your rights. Similarly, purchasing an independent replacement flight can create a reimbursement dispute unless the original airline had a legal obligation to arrange it and you followed an appropriate process. Ask for a written explanation when rebooking cannot be provided, and save proof of the options offered. For many travelers, a slightly later nonstop service is safer than several tight connections.

    One ticket and separate tickets are very different

    If multiple flights form one protected reservation, the carrier generally has obligations involving your ticketed final destination under the applicable contract and law. Separate tickets create much more risk: the second airline may treat a missed departure as a no-show even if the first flight was badly delayed. The same distinction can apply when a booking website presents independent tickets together as a “self-transfer.” Read the booking confirmation for separate reservation references and warnings about collecting baggage or checking in again. If your flights are separate, contact the next airline as early as possible to ask about change rules. If they are on one ticket, ask the operating airline to reroute the complete journey and confirm how bags will be transferred. Keep records of all messages and the names of agents who offered alternatives.

    Know where EU passenger rules apply

    European rules can protect passengers on flights departing from airports in the European Union, irrespective of airline nationality, and certain flights arriving in the EU when operated by an EU carrier. The official Your Europe guidance also explains coverage involving Iceland, Norway and Switzerland. The protection can include care during qualifying waits, options after cancellation and, in some cases, compensation for arrival delays or cancellation. However, eligibility depends on the route and circumstances. Extraordinary events may affect compensation even when the carrier still owes certain forms of care or assistance. Do not apply EU thresholds indiscriminately to a domestic flight elsewhere. At the airport, request written information about your rights, keep receipts and use the airline’s official claim channel once the journey is stable. Check the rules currently in force when filing, since air-passenger law is periodically revised.

    Understand the U.S. refund distinction

    In the United States, federal rules include refund protections for cancelled flights and certain significant changes when a passenger does not accept the alternative offered. This does not create a blanket cash-compensation entitlement for every delay. Carrier commitments about meals, hotels or rebooking can vary with the cause of the problem and the airline’s policies. The Department of Transportation provides current consumer guidance and dashboards explaining relevant obligations and commitments. A refund generally means choosing not to use the disrupted travel service; a traveler who accepts a replacement flight should not assume they can also obtain a full refund for that same transportation. If you booked through an intermediary, identify who is legally responsible for processing the refund under the applicable rules. Keep original payment records and ask for any refund explanation in writing.

    Meals, hotels and overnight waits

    When an eligible passenger must wait for re-routing, EU rules can require care such as refreshments and, for necessary overnight waits, accommodation and transport between airport and hotel. The precise conditions depend on the delay and route. Elsewhere, an airline may offer vouchers voluntarily or under its own service commitments. Ask first whether the carrier has a partner hotel, food voucher or transport arrangement. If no assistance is supplied and you must pay yourself, choose reasonable options rather than a luxury room and keep itemized receipts. Do not assume every expense will be reimbursed: alcohol, premium upgrades or a distant hotel may be disputed. For families, explain the number and ages of children; for a person with a disability, request an accessible room and suitable transfer rather than accepting an unusable voucher. Retain evidence that assistance was unavailable or inadequate.

    A missed connection: choose the next useful step

    First check the booking: one ticket, or two? Then contact the airline responsible for the next leg and ask for an itinerary to the final destination. If the change pushes arrival into the next day, ask about accommodation and meals under applicable rules. Consider whether a different airport in the same city genuinely works for you; a long taxi trip can erase the benefit of arriving earlier. If the carrier offers rebooking through a country requiring a transit visa you do not hold, explain this before accepting. Travelers with checked bags should confirm whether they must collect them and where to report if the luggage does not arrive. Do not leave a secure transit zone or cross immigration merely to speak at a desk unless you understand the entry requirements and can return for departure.

    Families, older adults and accessibility needs

    A standard alternative itinerary can be particularly difficult for someone using mobility assistance, traveling with young children or needing scheduled medication. Tell the airline early about essential requirements, including equipment, accessible transfers and whether a caregiver must stay on the same flight. Confirm special-assistance requests again when a new flight number is issued, as they may not transfer automatically. If medication or a baby-feeding item is in checked luggage, explain the urgency to baggage staff. A long delay can make a physically ambitious onward itinerary unrealistic; reschedule museum tickets and prebooked transfers when you know the new arrival time. Older passengers may prefer a daytime hotel rest to an exhausting overnight connection, and this should inform decisions where choice exists. Ask what the carrier can provide before agreeing to arrangements that you cannot safely use.

    Travel insurance and airline rights can work together

    An airline may owe rebooking or a refund, while an insurance policy may cover qualifying additional costs that the carrier does not pay. But insurers normally require that you first pursue money or services available from transport providers, and they will not intentionally reimburse the same loss twice. Check the policy’s definition of a covered delay, minimum duration and documentation requirements. A weather disruption or strike might be treated differently across policies, and an event that became known before you purchased insurance may be excluded. Keep all airline notifications, proof of final arrival time, receipts and evidence of nonrefundable bookings affected by the delay. Contact the insurer’s assistance line before making major new purchases where prior approval is required. The role of insurance is to fill eligible gaps, not replace the airline’s responsibilities.

    A practical airport action sequence

    In the first fifteen minutes, verify the flight status, save screenshots and assess any connection at risk. Next, inspect official rebooking options while joining the customer-service queue or calling the airline. Ask clearly whether the carrier can rebook you to the final destination and what meals, hotel or ground transport it will arrange. Once a new itinerary is confirmed, update accommodation providers and any prebooked transport. Save receipts throughout, including taxi journeys made necessary by a changed airport if eligible. If the first solution is not workable because of visas, accessibility or traveling companions, say so before accepting it. When the journey ends, assemble the timeline and submit formal refund or compensation requests through the responsible airline’s channel. Escalate to a regulator or dispute body if necessary under the relevant rules.

    A passenger aircraft taxiing on the airport apron

    Avoid costly reactions under pressure

    Do not rely exclusively on a social-media account claiming to be airline support; fake accounts often appear beneath customer complaints. Never send passport images, card details or booking verification codes to an unverified profile. Avoid booking an expensive replacement before confirming whether the original airline will cover it. Do not throw away boarding passes or receipts just because the disruption seems settled. Keep a little battery power for boarding updates and save important messages offline. If your original booking is still active, make sure the airline has not cancelled onward segments because of a missed flight. Finally, do not assume an airline agent at the gate can interpret international legal rights definitively; use written rules and official claims procedures after immediate needs are resolved.

    Build more resilient itineraries from the start

    Some disruptions cannot be avoided, but their consequences can be reduced. Prefer reasonable connection times, especially where passport control, terminal changes or luggage collection are involved. If an important event or cruise departure is fixed, consider arriving a day early rather than depending on a same-day long-haul connection. Book critical services with cancellation flexibility where possible. Keep medication and a change of clothes in cabin baggage. Check whether your chosen airfare is on a single reservation and record the operating carrier, not just the marketing airline. A travel plan with one buffer day and a realistic transfer time may cost slightly more, yet save you from losing the experience that motivated the journey.

    Frequently asked questions

    Am I entitled to compensation whenever a flight is late?

    No. Compensation depends on the governing law, route, delay and cause. Assistance and the right to reimbursement can be separate from monetary compensation.

    Should I accept a travel voucher?

    Understand whether a refund is legally available and whether accepting the voucher changes your rights. Compare expiration rules and restrictions before choosing.

    What if I miss a separately booked onward flight?

    The onward airline may not be obligated to rebook you free of charge. Contact it immediately and check applicable ticket terms and travel insurance.

    Official resources

  • Vietnam in 12 Days: Hanoi, Ninh Binh, Hoi An and Ho Chi Minh City With Fewer Transfers

    Vietnam in 12 Days: Hanoi, Ninh Binh, Hoi An and Ho Chi Minh City With Fewer Transfers

    Vietnam’s long, narrow geography makes it tempting to build an itinerary that hops from Hanoi to Ha Long Bay, Ninh Binh, Hue, Hoi An, Nha Trang, Da Lat, Ho Chi Minh City and the Mekong Delta in less than two weeks. The result may look impressive on a map but usually includes too many packing mornings and transport days. Twelve days are better used to connect four strong bases and let each region feel distinct.

    This plan uses Hanoi, Ninh Binh, Hoi An/Da Nang and Ho Chi Minh City. It deliberately avoids trying to “finish” the entire country. Domestic flights or an overnight train can bridge the long central distance, while local day trips provide variety without constantly changing hotels.

    Quick trip summary

    • Use four bases and let day trips provide variety.
    • Treat north–central and central–south transport as major travel blocks, not normal sightseeing days.
    • Choose either an overnight train or a domestic flight according to comfort, time and luggage—not because one is universally “more authentic.”
    • Build weather flexibility into Hoi An and Ninh Binh, where outdoor experiences matter.
    • Keep street-food exploration adventurous but practical: hydration, food allergies and heat can influence the day as much as sightseeing.

    Who this itinerary is for — and when to change it

    This route is designed for a first visit with a moderate pace. It assumes you want the destination’s defining experiences without turning every day into an early start, late arrival and luggage transfer. Couples, solo travellers, families and mixed-age groups can all use the same geographic structure, but the number of activities inside each day should change with mobility, heat, jet lag and personal interests.

    The easiest way to personalize it is to identify your two non-negotiable experiences before booking hotels. Protect those first, then let the rest of the itinerary support them. If a weather-dependent activity matters more than a museum or city walk, give it the flexible day rather than hoping the forecast behaves exactly as expected.

    Where to stay: choose the base before the hotel

    Accommodation is a transport decision as much as a comfort decision. Check how you will reach the first activity in the morning, how you will return after dinner, whether the property has stairs or parking, and what happens with luggage on transfer days. A cheaper room that creates two difficult journeys every day can cost more in taxis, time and energy than a slightly more expensive base in the right place.

    Base Why it works — and the trade-off
    Hanoi: Old Quarter edge / Hoan Kiem Central and atmospheric with easy access to sights and food, but noise and traffic can be intense. A hotel on the edge of the busiest lanes offers a useful compromise.
    Ninh Binh / Tam Coc Tam Coc is convenient for countryside excursions and evening restaurants; Ninh Binh city has stronger transport links but less holiday atmosphere.
    Hoi An old-town edge / An Bang Old-town edge is best for walking and evenings; An Bang suits travellers who want beach time and are happy to taxi into Hoi An.
    Ho Chi Minh City: District 1 / District 3 District 1 is simplest for a first visit; District 3 can feel more residential while remaining close to central attractions.

    The four decisions that shape this trip most

    Decision Best default When to change it
    Ninh Binh 2 nights A day trip works, but an overnight stay gives quieter mornings and less bus time.
    Central base Hoi An or Da Nang Choose Hoi An for atmosphere; Da Nang for beach, airport convenience and a larger-city rhythm.
    Long north–central transfer Flight for time, train for experience Select according to schedule and sleep comfort, not ideology.
    Mekong Delta Optional day trip Add only if it outranks a slower Ho Chi Minh City day for you.

    Make these decisions before filling the calendar with attractions. They determine how many hotel changes, early starts and long journeys the trip contains. Once the structure is right, individual sightseeing choices become much easier to adjust.

    A realistic day-by-day route

    Days 1–3: Hanoi with one neighbourhood at a time

    Use arrival day around Hoan Kiem and the edge of the Old Quarter. Crossing busy streets takes confidence and attention, so let the city teach you its rhythm before scheduling a long tour.

    On the first full day, combine the historic core with one museum or major cultural site. On the second, choose a different side of the city—West Lake, a food-focused walk or another museum—rather than repeating the same crowded streets.

    Hanoi deserves evenings. Leave time for coffee, food and simple wandering instead of treating every night as spare capacity for another attraction.

    Pace check: if this stage runs late, remove the lowest-priority activity rather than stealing time from meals, sleep or the next transfer. A resilient itinerary should become simpler when something changes, not more frantic.

    Days 4–5: Ninh Binh countryside

    Travel to Ninh Binh/Tam Coc and use the arrival day for a bicycle ride, short temple visit or local landscape.

    On the full day, choose one major boat route and one land-based viewpoint or temple complex. Do not stack several nearly identical boat experiences simply because they appear in different tour packages.

    Weather changes the value of viewpoints dramatically. Keep the order flexible if heavy rain or mist makes a climb less worthwhile.

    Days 6–8: move to central Vietnam and slow down in Hoi An

    Use the transfer day for transport to Da Nang and onward to Hoi An. A domestic flight saves time; an overnight train changes where the “lost” hours fall.

    Spend one full day in Hoi An’s historic area, ideally with early or later hours around the busiest period. Use the second for beach time, countryside, a cooking experience or nearby My Son if history is a priority.

    Do not book every lantern-lit evening activity. Hoi An is most enjoyable when you can simply walk back after dinner and stop where the atmosphere feels right.

    Days 9–11: Ho Chi Minh City with one optional excursion

    Fly or travel south and keep the first afternoon local to District 1 or 3. The city’s scale and traffic make geographic grouping important.

    Use the first full day for central historical sights, markets, cafés and one museum. On the next day, choose either a Mekong Delta excursion, Cu Chi Tunnels or deeper city neighbourhood time; doing two major excursions back-to-back can make the city itself disappear from the trip.

    Leave one dinner flexible for a neighbourhood or food style you discovered during the day.

    Day 12: departure without adding another province

    Keep the final morning near your hotel, particularly if you have an international flight from Tan Son Nhat. Traffic can vary considerably.

    Use luggage storage for a final café, museum or market rather than taking a long day trip.

    Check terminal and airline information before leaving the hotel, especially if you have separate domestic and international tickets.

    Transport reality: plan door to door

    Vietnam’s major cities are well connected by flights, trains and buses, but travel times between regions are long. A route that looks linear can still be exhausting if every second night involves a departure. Use Vietnam’s official tourism information for destination context and confirm schedules directly with the transport provider. In cities, ride-hailing and taxis can reduce friction, but walking distances are deceptive because traffic crossings and heat slow progress. In Ninh Binh and Hoi An, bicycles are useful only where traffic confidence and weather make them appropriate.

    Door-to-door time is the number that matters. Add hotel checkout, reaching the station/airport/pier, waiting, boarding, collecting luggage, local transport at the other end and the possibility that everyone needs food immediately after arrival. This is why a “two-hour flight” or “three-hour drive” can consume most of a day. Our guide to building realistic 7-, 10- and 14-day itineraries explains how to treat transfer days honestly.

    Food strategy: make meals part of the route

    Food is one of the strongest reasons to travel through Vietnam, and each base offers different specialties. Build meals into the geography of the day rather than crossing cities to chase viral recommendations. Busy local restaurants and stalls with visible turnover are often a practical starting point. Carry oral rehydration supplies, drink safe water and take allergies seriously—fish sauce, peanuts, shellfish and hidden ingredients can appear in dishes where visitors do not expect them.

    One planned meal per day is usually enough. Keep the other meal flexible so it can respond to where you actually are, not where an old itinerary expected you to be. With children, older travellers or very hot weather, eating before everyone becomes tired is often more important than reaching the “best” restaurant on a list.

    When to go and how the season changes the plan

    Vietnam does not have one national weather season. Northern, central and southern regions can experience very different conditions at the same time, and central Vietnam has periods of heavier rain and storm risk. Plan for the specific month and region rather than searching for a single “best time for Vietnam.” If weather is central to your priorities, it may be better to focus on one half of the country instead of forcing this entire route.

    Instead of searching for one universal best month, decide which compromise you prefer: better weather, fewer visitors, lower prices, long daylight, swimming conditions or seasonal wildlife. No month maximizes everything. Recheck short-term weather and official access information shortly before the relevant day, especially for roads, trails, boats and outdoor attractions.

    Budget: where spending actually improves the trip

    Vietnam can be affordable, but domestic flights, boutique Hoi An hotels and private tours can lift the budget quickly. Spend where it saves a half-day or provides a meaningful experience, not because every transfer needs to be private. Overnight trains can combine transport and accommodation, but only if you are likely to sleep reasonably well. Use our carry-on packing system if you want to reduce the friction of repeated airports and short hotel transfers.

    The most useful upgrades are often logistical rather than luxurious: a hotel that removes a daily transfer, a direct ride after a long flight, a flexible ticket, an additional night in a weather-dependent region or a guide where interpretation genuinely adds value. Cut low-value extras before cutting the pieces that keep the route reliable.

    Common mistakes to avoid

    • Trying to include Ha Long Bay, Hue, Da Lat and the Mekong Delta in addition to all four bases.
    • Counting an overnight train as guaranteed restful sleep before a demanding sightseeing day.
    • Booking Hoi An outdoor activities without any rain alternative.
    • Crossing a major city solely for one famous restaurant when equally good local options are nearby.
    • Assuming the weather will be similar in Hanoi, central Vietnam and Ho Chi Minh City on the same trip.

    Most difficult trips are not ruined by one large mistake. They become tiring through a sequence of small optimistic assumptions: a transfer that “should” be quick, a hotel that is “only” a kilometre away, a famous walk that is assumed to suit everyone and a dinner reservation across town after an already long day. Leave margin before you need it.

    Families, older travellers and mixed-age groups

    Families can enjoy this route, but transport days should be simplified and hotel pools or quiet breaks can be valuable in the heat. Older travellers benefit from central hotels, private transfers for awkward station/airport links and a realistic approach to stairs at viewpoints or historic sites. Mixed-age groups should treat food tours, bicycle rides and long excursions as optional modules rather than forcing everyone into the same activity.

    For mixed-age groups, agree which experiences everyone will share and which can be optional. Splitting for two hours is often healthier than forcing the entire group through one person’s priority. Build seating, toilets, shade, step-free access and realistic meal times into the plan with the same seriousness as headline attractions. Our guide to travelling with parents and older adults covers this approach in more detail.

    If you have more or less time

    With fourteen to sixteen days, add Hue or a two-night bay/cruise experience in the north. With nine days, keep Hanoi + Ninh Binh + Hoi An and skip Ho Chi Minh City, or choose the opposite half of the country. Vietnam rewards depth; a shorter regional trip is often stronger than a compressed north-to-south checklist.

    When shortening the trip, remove an entire base before cutting every destination to one night. When lengthening it, add depth before distance. An extra morning in a place you already understand often produces a better memory than another three-hour transfer to a new pin on the map.

    Useful official resources

    Opening hours, park rules, transport timetables, road conditions and visitor procedures can change. Use official sources for the details that affect your exact travel dates and recheck them shortly before departure.

    Final planning checklist

    • Confirm passport, visa, entry and transit requirements for your nationality and route.
    • Book the genuinely scarce transport or accommodation segment before secondary attractions.
    • Check the exact luggage journey between bases, including stairs, ferries, station exits and rental-car rules.
    • Save offline copies of essential reservations, insurance details and each accommodation address.
    • Recheck weather, road, park, trail or transport notices shortly before each critical day.
    • Keep at least one flexible half-day that can absorb rain, fatigue, a delay or a cancellation.
    • Choose clothing and footwear for the actual surfaces and climate, not only for photographs.
    • Leave a generous buffer before international flights and other connections that are expensive to miss.

    The purpose of a good itinerary is not to prove that you covered the maximum distance. It is to make the important experiences easier to enjoy and to leave enough energy for the unexpected parts that become the best memories. Use this route as a framework, then remove anything that does not fit your interests, mobility or travel rhythm.